User:Chazmatron
Yo yo yo!!! I first started playing Pikmin when Pikmin 3 came out on the Wii U. I then had Pikmin 2 (Wii version) given to me for my birthday and then the following year I had the original (Wii version). At some point, I bought Hey! Pikmin and I started playing Pikmin Bloom a few years back, although I've stopped recently;;
March 28, 2025
- 18:1018:10, March 28, 2025 diff hist +435 Blonde Impostor →Gallery: added 3 images. Split the galleyr current
(FISH)
| edit | This user has 3,187 total edits on this wiki. |
| Chazmatron | |
|---|---|
| Games | |
| don’t have a GameCube 😫 | |
| 100% | |
| 100% | |
| still no GameCube 😔 | |
| 100% | |
| 100% | |
| 100% 😎 | |
| 100% | |
| 100% | |
| ~90% not got all the amiibos | |
| 39 | |
| 100% x2 | |
Subpages
- A more (in)accurate biology section involving certain creatures. So far, it only has Bulborbs and Fiery Blowhogs and Burrowing Snagrets (Incomplete)
- A Pikmin 4 run where I only use Red Pikmin, no Yellow, Blue, White, Purple, Rock, Winged or Ice Pikmin involved. (Incomplete)
User:Chazmatron/Location Tests
- Page to hold my, mainly enemy, location WIPS
- Page testing multiple bridge articles, similar to the gates.
- Big tests that won't fit on this page.
User:Chazmatron/Yellow Wollyhop and User:Chazmatron/Gildemander
- Enemy article test, based on both PopitTart's and Twins1105's versions. Mine are of a Yellow Wollyhop and a Gildemander, PopitTart's is of a Fiery Blowhog, and Twins1105's is of a Bulborb
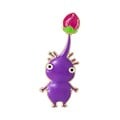
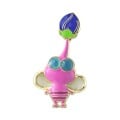
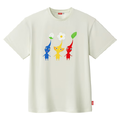
Pikmin Merchandise

Red.

Yellow.

Blue.
Purple.

White.
Winged.

Glow.
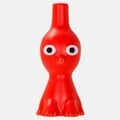
Red.

Yellow.

Blue.
Encounter.

Pocket.


.jpg)
.jpg)
.jpg)


Enemy Names
| Name | Welsh | Notes |
|---|---|---|
| Armored Cannon Beetle | Chwilen Ganon Arfwisg | Arfwisg meaning armour and "chwilen" meaning beetle. Ganon comes from canon, soft mutating because of chwilen. |
| Beady Long Legs | Coesau Hir Grain | Grain meaning bead and coseau hir meaning long legs. |
| Breadbug | Either Byg Bara, or Barabyg | Bara meaning bread and byg meaning bug. |
| Burrowing Snarget | Snagret Cloddio | Cloddio meaning to dig or burrow. Snagret stays the same |
| Dwarf Bulbear | Could either be Bwlbear Corrach or Bwlarth Gorrach | Corrach meaning dwarf and bwlbear ~meaning bulbear. Bwlarth comes from bwl (bul) and arth from bear. Gorrach soft mutates due to arth being a feminine noun. |
| Dwarf Bulborb | Bwlborb Corrach | Corrach meaning dwarf and bwlborb ~meaning bulborb. |
| Emperor Bulblax | Bwlblax Ymerawdwr | Ymerawdwr meaning emperor and bwlblax ~meaning bulb lax. |
| Female Sheargrub | A direct translation could be Lindysyn Cneifio Benywaidd, however it may be better to say Cneifysyn Fenywaidd | Fenywaidd comes from benywaidd meaning female, with the f coming from the soft mutation, and cneifysyn coming from cneifio (shear) and lindysyn (grub). |
| Fiery Blowhog | Mochwyth Tanllyd | Tanllyd meaning fiery and mochwyth coming from mochyn (pig) and chwythu (to blow). |
| Goolix | Gwlix | Gwlix ~meaning goolix. |
| Honeywisp | Mêlysbryd | Mêl meaning honey and ysbryd meaning ghost or spirit. |
| Iridescent Flint Beetle | Chwilen Fflint Golau | Golau meaning bright and shiny, flint meaning flint, and chweilen meaning flint. |
| Male Sheargrub | A direct translation could be Lindysyn Cneifio Gwrrywaidd, however it may be better to say Cneifysyn Gwrrywaidd | Gwrrywaidd meaning male and cneifysyn coming from cneifio (shear) and lindysyn (grub). |
| Mamuta | Mamuta | Same as English. |
| Pearly Clamclamp | Cragenclampio Perlog | Perlog meaning pearl-like and cragenclampio coming from cragen (scallop) and clamp (to clamp). |
| Puffstool | Pwffstôl | Pwff meaning puff and stôl meaning stool. |
| Puffy Blowhog | Mochwyth Chwyddedig | Chwyddedig meaning puffy and mochwyth coming from mochyn (pig) and chwythu (to blow). |
| Shearwig | Cneifwig | Cneif coming from cneifio (shear) and wig staying the same. |
| Smoky Progg | Prog Myglyd | Myglyd meaning smoky and Prog just loses a g. |
| Spotty Bulbear | Could either be Bwlbear Pothellog or Bwlarth Bothellog | Pothellog meaning dwarf and bwlbear ~meaning bulbear. Bwlarth comes from bwl (bul) and arth from bear. Bothellog soft mutates due to arth being a feminine noun. |
| Spotty Bulborb | Bwlborb Pothellog | Pothellog meaning spotty and bwlborb ~meaning bulborb. |
| Swooping Snitchbug | Plymiobyg Cipio | Cipio meaning to snatch or steal and plymiobwg coming from plymio (swoop or dive) and byg (bug). |
| Water Dumple | Either Dympl Der or Pencath Der | Der meaning water and dympl ~meaning dumple. Pencath means catfish. |
| Wolpole | Penbwl, Wylpolyn? or Wolpole | Penbwl translates to tadpole. Wylpolyn roughly means Wolpole. Or keep the same. |
| Wollyhop | Wollyhop | Same as English. |
| Yellow Wollyhop | Wollyhop Melyn | Melyn means yellow. Wollyhop is the same as English. |
Tables
| Colspan and Rowspan 2 (sortable) |
Sortable and Rowspan 2 |
Unsortable and Colspan 2 |
Same as Style Header | ||||
|---|---|---|---|---|---|---|---|
| Header under Header |
Long Header | Header with No Cells | |||||
| h H s E i A d D e E h R |
Adjacent Header 1 |
Mawdad | FISH | Red Bulborb | Orange Bulborb | Hairy Bulborb | |
| Adjacent Header 2 |
Bouncing | A Purple Pikmin | LOOONG ROW | ||||
| Adjacent Header 3 |
Oatchi's Teeth | ||||||
| Adjacent Header 4 |
| ||||||
| Olimar's Sock |
|||||||
| Sizzling Floor | Sunseed Berry | ||||||
| A Quantum Jumping Jellybean | |||||||
| A Talking Rock | Mr. Lui's talk “I was alone, so I picked it up. When I gave it rice, Nadetsed.” | ||||||
| I FISH a fish today. | Shoot today. | ||||||
Tests
Uses
Required Uses - X are absolutely necessary to complete these task. There are no workarounds
Primary Uses – X are the intended or most efficient choice for the task. There are possible workarounds
Helpful Uses – X aren't required for these tasks, but can make them a bit easier. There are simple workarounds
Situational Uses – For odd uses. X may or may not be useful.
- Oatchi
- Blue Pikmin
- Required uses
- Area Treasures and Flarlics
- Sun-Speckled Terrace
 Temporal Mechanism: This treasure is attached to a wooden fence. The only way to knock it off the fence is to have Oatchi Rush into it.
- Sun-Speckled Terrace
- Primary uses
- Caves
- Sun-Speckled Terrace
- Aquiferous Summit: Access to this cave, and all of its collectibles, requires Oatchi due to his ability to Jump up the platforms leading to the cave. However, if the player has Rush Boots equipped, they can run up the ledges by running up in the leftmost corner.
- Aquiferous Summit sublevel 2: Access to the next sublevel requires Oatchi to Jump up a raised platform. But by using the Mine boosting glitch, it is possible for the player to climb the platform without Oatchi.
- Hectic Hollows: Access to this cave, and all of its collectibles, requires Oatchi due to his ability to Jump up the platforms leading to the cave. However, by using the previously mentioned glitch, the player can climb the small platforms without Oatchi.
- Industrial Maze: Access to this cave, and all of its collectibles, requires Oatchi due to his ability to Jump up the platforms leading to the cave. The same method as the Hectic Hollows can be applied to reaching this cave.
- Dandori Challenge cave: Access to this Dandori cave requires Oatchi to Jump up to the island surrounded by water. But by using Mine Boosting and freezing the moat surrounding the island, the island can be reached without Oatchi.
- Aquiferous Summit: Access to this cave, and all of its collectibles, requires Oatchi due to his ability to Jump up the platforms leading to the cave. However, if the player has Rush Boots equipped, they can run up the ledges by running up in the leftmost corner.
- Sun-Speckled Terrace
- Area Treasures and Flarlics
- Sun-Speckled Terrace
 Fire-Breathing Feast: Access to this treasure requires beating the Aquiferous Summit. The cave can be completed using the Mine boosting glitch as seen above.
 Orb of Destruction: The treasure is on the same raised platform the Hectic Hollows is on. By using the same Mine boosting glitch, the platform can be reached. Whilst the treasure is on a high ledge that can be Rushed into by Oatchi to knock it off, Yellow Pikmin or Winged Pikmin can be used instead.
 Snack Bean: Same as the Fire-Breathing Feast.
 Sunseed Berry: Access to the treasure requires climbing up some raised platforms. These are the same platforms as the ones used to reach the Industrial Maze. Mine booting allows for them to be climbed, and for the treasure to be collected.
 Talisman of Life (Moon): Same as the Fire-Breathing Feast.
- Sun-Speckled Terrace
- Cave Treasures, Flarlics and Castaways
- Aquiferous Summit
 Castaway (sublevel 2): The castaway is on a raised section. This section can be climbed using Mine Boosting. Additionally, a clay bridge will need to be built.
 Gold Nugget × 15 (sublevel 2): Same as the castaway, though the clay bridge isn't needed to collect these.
 Memory Fragment (Top Left) (sublevel 2): Same as the Gold Nuggets
 Skin of the Phoenix (sublevel 2): Whilst Oatchi will be unable to pull down the hanging treasure, the nearby iron fence will need to be lowered for it to be collected. The white switch for this fence is at the top of some raised platforms. Mine Boosting to reach the switch or throwing a Pikpik Carrot with the Pebble Pitcher to lower it can be done instead.
- Hectic Hollows
- Castaway (sublevel 2): On a high ledge that Oatchi can rush into. Mine Boosting can be used to climb onto the slightly raised arena housing the Tusked Blowhog, and Winged Pikmin can be used to carry the castaway down.
- Aquiferous Summit
- Helpful uses
- Caves
- Blossoming Arcadia
- Kingdom of Beasts: Access to this cave requires crossing a pathway created by smashing some potted mushrooms. A Rush from Oatchi can smash these, though explosive items can be used instead.
- Sightless Passage: The entrance to this cave is surrounded by 8 breakable pots that Oatchi can Rush into. Bomb Rocks, Mines or Trackonators can be used instead.
- Blossoming Arcadia
- Area Treasures and Flarlics
- Sun-Speckled Terrace
 Aspiration-Ritual Ball: This treasure is on a high ledge that can be Rushed into by Oatchi to knock it off. Yellow Pikmin or Winged Pikmin can reached the top of this high ledge as well.
 Child of the Earth: The treasure is fully buried, meaning Oatchi is the only one capable of finding it. However, since the treasure doesn't change locations, if the location is known beforehand, Oatchi isn't needed.
 Lesser Mock Bottom: This treasure is inside of a breakable pot that Oatchi can Rush into. Bomb Rocks, Mines or Trackonators can be used instead.
 Perforated Raft × 2: These 2 treasures are inside of the same breakable pot that Oatchi can Rush into. Bomb Rocks, Mines or Trackonators can be used instead.
- Blossoming Arcadia
 Daughter Doll Head: This treasure is atop a raised platform that can be Rushed into by Oatchi to knock it off. Yellow Pikmin, Winged Pikmin, or any Pikmin types using gyro controls can be thrown on top of this ledge instead.
 Mooching Vase: The treasure is fully buried, meaning Oatchi is the only one capable of finding it. However, since the treasure doesn't change locations, if the location is known beforehand, Oatchi isn't needed. It's buried on a raised ledge that can be Rushed into, but Yellow Pikmin or Winged Pikmin can reach the top.
- Sun-Speckled Terrace
- Cave Treasures, Flarlics and Castaways
- Last-Frost Cavern
- Castaway: In a section behind some breakable pots that Oatchi can Rush into. Bomb Rocks, Mines or Trackonators can be instead. Additionally, Yellow Pikmin can be thrown behind the paper bag and they can push it down, so the breakable pots do not need to be broken.
 Flarlic: Same as the castaway, however, the Flarlic is behind some additional breakable pots. They can also be destroyed with explosive items.
 Refreshing Goo: Same as the castaway.
- Industrial Maze
- Castaway (sublevel 2): The castaway is on a floating platform in a section blocked off by some breakable pots. Whilst Oatchi can't reach the castaway, he can Rush into the pots to break them. Alternatively, explosive items can be used instead.
 Detective's Truth Seeker (sublevel 2): The treasure requires some raised platforms to be climbed. Mine Boosting can be done to climb them.
 Memory Fragment (Top Right) (sublevel 1): Behind some breakable pots. Explosive items can be used instead of a Rush from Oatchi.
 Personal-Injury Plank (sublevel 1): The treasure is on top of a raised ledge that Oatchi can Rush into to knock it off. Alternatively, Yellow Pikmin can be thrown up to carry the treasure down.
 Stately Rubber Cutie (sublevel 2): Inside of a breakable pot at the top of some raised platforms. Mine Boosting allows for the steps to be climbed, and an explosive item can break the pots.
 Unlimited Locomotive (sublevel 2): Same as the Detective's Truth Seeker.
- Hectic Hollows
 Aspiration-Ritual Pole (sublevel 1): Oatchi would normally be used to jump up the multiple platforms so Pikmin can be thrown onto the hanging treasure, but Winged Pikmin can be used to pull it down without jumping up said platforms.
 Mama Doll Head (sublevel 1): On a raised ledge in the middle of some water. Oatchi can Rush into the ledge to knock it off. Alternatively, Yellow Pikmin can be thrown on the ledge to carry it down and Blue Pikmin can carry it across the water, or Ice Pikmin can freeze the lake.
- Last-Frost Cavern
- Blossoming Arcadia
- Drafty Gallery
 Memory Fragment (Top...Probably?): The treasure is on a raised ledge that Oatchi can Rush into, though 2 Yellow Pikmin can be thrown to carry down the treasure instead.
- Drafty Gallery
- Situational uses
- Area Treasures and Flarlics
- Blossoming Arcadia
 Wayward Moon: This treasure weighs 50 units, and whilst Oatchi isn't required to collect his treasure, if his Super Buff skill is at level 3, he can carry back the treasure by himself.
- Blossoming Arcadia
- Required uses
There are glitches and exploits that make it so that Blue Pikmin are not required to collect any ship parts or defeat any enemies. There are two main ones: the object nudging glitch allows one to push ship parts out of the water, while the drowning reset glitch allows non-Blue Pikmin to travel large bodies of water without drowning. Other minor exploits and glitches include ending the day to make a ship part appear on the closest carrying waypoint on the following day, which can place ship parts in unintended places, and the ability to place a lying Olimar between a ship part and a gate to make him pop up on top of the gate, going out of bounds.
- Primary uses
- Ship parts
 Analog Computer: This ship part is submerged in water, although it can be taken out using the object nudging glitch.
 Anti-Dioxin Filter: The part is in a large pool of water, but with the object nudging glitch, it is possible to take it out without Blue Pikmin. Wollyhop corpses can be used to help push the part, and a Breadbug dragging a Male Sheargrub corpse can be used to push the part mostly onto dry land.[1]
 Chronos Reactor: This part is located a long way across a pool of water. As part of the puzzle, the Blue Pikmin carrying this part must first become Yellow Pikmin. By using the Spotty Bulbear near the maze, Olimar can be pushed to the ledges out of bounds, and from there, lure a Swooping Snitchbug near where the Chronos Reactor is. Its corpse or pellets can be used to bring Olimar to the ship part's ledge, where it can then be pushed all the way out of the water section of the area and onto regular dry land.[2]
 Geiger Counter: In order to reach the Burrowing Snagret that holds the ship part, a cardboard box must be pushed out of the way, and Blue Pikmin need to be guided from a puddle to the backside of the box. However, it is possible to use other Pikmin to throw the box, either with long throws or by throwing them to the top of the box and guiding them to the back.
 Gluon Drive: This part is opposite a wide river, and a bridge must be built from the other side. However, Pikmin can be tossed from the Zirconium Rotor's location.
 Interstellar Radio: The Puffy Blowhog containing this ship part is floating above water and the path to carry the ship part back to the ship goes through the large lake of water. By going out of bounds on the south using the Massage Machine, attacking the Blowhog from dry land, and then by nudging the ship part out of the water, it can be collected.[3]
 Libra: Blue Pikmin are needed to activate the geyser that gives Olimar access to the first high ledge. However, it is possible to have other Pikmin types open the geyser; if they are guided towards it, they might land one or two hits before starting their drowning sequence. They can just be called back, and the process can be repeated until the geyser is enabled.[4] Alternatively, one can use a pellet from a Shearwig to clip to the railing wall, and from there, walk up to the ship part and push it down.[5]
 Massage Machine: This part is across a large lake, with the bridge that must be built located on the opposite shore. However, by throwing Red Pikmin or Yellow Pikmin to the water and whistling them to the other shore, it is possible to have them build the bridge.[3]
 #1 Ionium Jet: This ship part is submerged in water. It can be pushed out with the object nudging glitch, but it is too resistant to the pushes to do so effectively. By luring a Male Sheargrub and using its corpse or a pellet, Olimar can push the pellet, which in turn pushes the ship part. By bringing it close to the bodies of water in the higher levels and ending the day, it is possible for the Ionium Jet to appear in the next body of water by the next day. Eventually, the ship part can be brought to land.[6]
- #2 Ionium Jet: This part is on top of a tall ledge that opens into water. By bringing Pikmin to the ship part's shore using the drowning reset glitch, it's possible to bring enough Pikmin to take the part out of the ledge. From there, it can be pushed to near the Pilot's Seat section, which will make it appear right next to the Pilot's Seat the next day. Since it takes too long to push normally, a Water Dumple corpse must be pushed instead, which in turn pushes the Ionium Jet.[7]
 Positron Generator: The ship part is inside of a Pearly Clamclamp on a beach, and defeating the enemy will drop the ship part in the water. But, by using the smaller islands on the beach, it is possible to attack the Pearly Clamclamp using Red Pikmin or Yellow Pikmin and the ship part can then be pushed out of the water with the object nudging glitch.[8]
 Radiation Canopy: The path that Olimar needs to cross to reach this part is blocked by a gate inside a body of water. However, with precise throws, it's possible to throw bomb-rock Yellow Pikmin on top of the gate to destroy it without needing Blue Pikmin.
 Repair-type Bolt: This part is on top of a ledge. When it falls off, it will almost immediately land in the water. It can be nudged to dry land, however.[3]
- Sagittarius: Two stick bridges must be built to reach the part, but one of them can only be reached by tossing Pikmin while in a large pond. Luckily, there is a small protrusion on the island that allows non-Blue Pikmin to shore on, and from there, they can be thrown at the bridge. To reach the bit of land, the Pikmin can just swim towards it from the mainland.
 Secret Safe: The island with the bridges is in the middle of the lake, meaning Blue Pikmin must traverse it to reach it. That said, it is not too hard to guide Red or Yellow Pikmin to the island, by whistling them to it while they're drowning.
 Zirconium Rotor: This part is behind a gate that is difficult to destroy without Blue Pikmin, but it can be done without them.
- Enemies
 Goolix: Only Blue Pikmin can touch its body, but it's still possible to defeat the creature without them by throwing Pikmin when it stretches.
- Helpful uses
- Enemies
 Water Dumple: This underwater grub-dog is often found in bodies of water. Whilst some can be lured onto land, Olimar is more than capable of defeating them.
 Wolpole: Although this aquatic enemy can jump onto land and become vulnerable, the chances of this happening are quite slim.
- Situational uses
- Enemies
 Puffy Blowhog: One instance of this enemy in Story Mode is located above water; the one containing the Interstellar Radio.
 Wollyhop: Some Wollyhops in The Forest Navel are located inside of water bodies. There are two of them near the Anti-Dioxin Filter.
 Yellow Wollyhop: Just like its albino counterpart, some Yellow Wollyhops are located in bodies of water. Whilst they could be lured onto land, using Blue Pikmin may be easier.
- ^ YouTube video of the Anti-Dioxin Filter being collected with Red Pikmin only, published on July 6th, 2018, retrieved on July 10th, 2018
- ^ YouTube video showing how to obtain the Chronos Reactor with Red Pikmin only
- ^ Jump up to: a b c YouTube video showing how to collect the Interstellar Radio, Repair-type Bolt, and Massage Machine using only Red Pikmin
- ^ YouTube video showing how the Libra can be obtained using only Red Pikmin
- ^ YouTube video showing how to get Captain Olimar up to the Libra
- ^ YouTube video showing how to obtain the #1 Ionium Jet using only Red Pikmin
- ^ YouTube video showing how to collect the #2 Ionium Jet using Red Pikmin only
- ^ YouTube video showing the Positron Generator being recovered using only Red Pikmin
Stealing enemies
Enemies that steal. Stealing enemies. Object-stealing enemies?
- Definately include:
- Breadbug, Anode Dweevil, Fiery Dweevil, Giant Breadbug, Hydro Dweevil, Munge Dweevil, Bloomcap Bloyster, Iceblown Dweevil, Venom Dweevil, Waddlequaff
- Maybe?
- Swooping Snitchbug, Bumbling Snitchbug, Greater Spotted Jellyfloat, Lesser Spotted Jellyfloat, Ravenous Whiskerpillar, Volatile Dweevil, Arachnode, Medusal Slurker, Myserious Life-Form/Plasm Wraith, Scornet, Skutterchuck, Swarming Sheargrub, Moss
Pikmin 4 Enemy Attack
| Enemy Name | showMax Pikmin Death |
|---|---|
| Dwarf Bulborb - Eat | With a single bite: 1 |
| Albino Dwarf Bulborb - Eat | With a single bite: 1 |
| Bulborb - Eat | With a single bite: 5 |
| Jumbo Bulborb - Eat | With a single bite: Unknown With all three bites: 10 |
| Dwarf Orange Bulborb - Eat | With a single bite: 1 |
| Orange Bulborb - Eat | With a single bite: 5 |
| Dwarf Bulbear - Eat | With a single bite: 1 |
| Spotty Bulbear - Eat | With a single bite: 5 |
| Dwarf Frosty Bulborb - Eat | With a single bite: 1 |
| Frosty Bulborb - Eat | With a single bite: 5 |
| Fiery Bulblax - Eat + Fire | With a single bite: 5 With its fire: 100 (except Reds or Glows) |
| Whiptongue Bulborb - Eat | With a single tongue attack: 5 |
| Bulborb Larva - Eat | With a single bite: 1 |
| Empress Bulblax - Crush | With a single roll: 100 (except Rocks) |
| Emperor Bulblax - Eat + Crush + Confuse | With a single tongue attack: 9 With a single jump: Likely 100 (except Rocks) With a single roar: 100 |
| Sovereign Bulblax - Eat + Crush + Consume | With a single bite: 15 With a single jump: Likely 100 (except Rocks) With a single roar: 100 |
| Fiery Blowhog - Fire | With a single fire attack: 100 (except Reds or Glows) |
| Watery Blowhog - Water | With a single water attack: 100 (except Blues or Glows) |
| Snowy Blowhog - Ice | With a single ice attack: 100 (Ice and Glows are immune to being frozen; no Pikmin will be killed) |
| Titan Blowhog - Fire | With a single fire attack: 100 (except Reds or Glows) |
| Blizzarding Blowhog - Ice | With a single ice attack: 100 (Ice and Glows are immune to being frozen; no Pikmin will be killed) |
| Tusked Blowhog - Eat | With a single charged-bite: 3 |
| Armored Cannon Larva - Crush | With a single rock: 10 (except Rocks; other Pikmin are knocked away but not killed) |
| Horned Cannon Beetle - Crush | With a single rock: 20 (except Rocks; other Pikmin are knocked away but not killed) |
| Arctic Cannon Larva - Crush (Harmless) | With a single snowy-rock: 0 (100 Pikmin are caught in the snowy-rock, but are not killed) |
| Arctic Cannon Beetle - Eat + Crush (Harmless) | With a single snowy-rock: 0 (100 Pikmin are caught in the snowy-rock, but are not killed) With a single suck attack: Half of the Pikmin caught in the attack, 50 therefore being the max. For an odd-numbered amount, the extra Pikmin will be eaten; if the amount was 19 Pikmin then 10 Pikmin would be eaten. |
| Female Sheargrub - N/A | Harmless enemy: 0 |
| Male Sheargrub - Eat | With a single bite: 1 |
| Mama Sheargrub - Crush | With a jump attack: Likely 100 (except Rocks) |
| Shearwig - Eat | With a single bite: 1 |
| Shearflea - Eat | With a single bite: 1 |
| Joustmite - Eat | With a single pierced bite: 3 (except Rocks) |
| Flighty Joustmite - Eat | With a single pierce attack: 3 (except Rocks) |
| Swooping Snitchbug - N/A (Grabs Pikmin) | Harmless enemy: 0 (two Pikmin can be picked up in one swoop) |
| Skitterleaf - N/A | Harmless enemy: 0 |
| Desiccated Skitter Leaf - Eat | With a single leafy-attack: 2 |
| Fiery Dweevil - Fire | With a single fire attack: 100 (except Reds and Glows) |
| Anode Dweevil - Electric | With a single electric attack: 100 (except Yellows and Glows) |
| Hydro Dweevil - Water | With a single water attack: 100 (except Blues and Glows) |
| Iceblown Dweevil - Ice | With a single ice attack: 100 (except Ice and Glows; no Pikmin will be killed) |
| Venom Dweevil - Poison | With a single poison attack: 100 (except Whites and Glows; ones with the bomb rocks can kill 100 Pikmin as well) |
| Arachnode - Eat | With a single bite (in web): 3 |
| Baldy Long Legs - Crush | With a single stomp attack: Likely 100 |
| Man-at-Legs - Explode | With a single shot (sequence): Unknown, possibly 100 |
| Groovy Long Legs - Crush + Confuse | With a single stomp attack: Likely 100 With a single panic attack: 100 |
| Anode Beetle - Electric | With a single electric attack: 100 (except Yellows and Glows) |
| Iridescent Flint Beetle - N/A | Harmless enemy: 0 |
| Doodlebug - Poison | With a single poison attack: 100 (except Whites and Glows) |
| Iridescent Glint Beetle - N/A | Harmless enemy: 0 |
| Mitite - N/A | Harmless enemy: 0 (100 Pikmin panic once they are revealed) |
| Skutterchuck - Crush (+ Explode) | With a single crush attack (from the crystal: Likely 100 With a bomb rock: 100 |
| Skeeterskate - Water | With a single water attack: Possibly 100 (If all Pikmin were bunched together. I had a maximum of 10 hit at once, most tests had around 1-3) |
| Muckerskate - Mud | With a single mud attack: Same as Skeeterskate |
| White Spectralids - N/A | Harmless enemy: 0 |
| Yellow Spectralids - N/A | Harmless enemy: 0 |
| Red Spectralids - N/A | Harmless enemy: 0 |
| Snowfake Fluttertail - Eat + Ice | With a single tongue attack: 5 With a single ice attack: 100 (except Ice and Glows; no Pikmin will be killed) |
| Creeping Chrysanthemum - Eat | With a single tongue attack: Unknown (usually around 5, but some results have given larger amounts) |
| Startle Spore - Eat + Poison | With a single tongue attack: Same as Creeping Chrysanthemum With a single poison attack (from its tongue): 100 (except Whites and Glows) |
| Breadbug - N/A | Harmless enemy: 0 (Pikmin just stop carrying back the item) |
| Giant Breadbug - N/A | Harmless enemy: 0 (Pikmin just stop carrying back the item) |
| Gildemandwee - Eat | With a single tongue sweep: 3 With a single tongue sweep (for the gold): Likely 8 |
| Gildemander - Eat | With a single tongue sweep: Unknown (usually around 6, but some results have given larger amounts) With a single tongue sweep (for the gold): 100 |
| Miniature Snootwhacker - N/A | Harmless enemy: 0 (100 Pikmin can get caught up in its trunk sweep) |
| Mammoth Snootwhacker - Crush | With a single trunk slam attack: 100 (except Rocks; 100 Pikmin can get caught up in its trunk sweep) |
| Sunsquish - Eat | With a single ensnare attack: 5 (other Pikmin will get pushed away) |
| Foolix - Eat | With a single charged attack: 100 (Pikmin will get caught in its jelly-like body during the attack) |
| Downy Snagret - Eat | With a single peck: 1 |
| Burrowing Snagret - Eat | With a single peck: 1 With a full peck sequence (5 at most): Possibly 5 (results give either 3 or 4, but P3 allowed for 5) |
| Waddlequaff - Eat | With a single suck attack: 6 |
| Scorchcake - Crush + Fire | With a single crush attack: Likely 100 (except Rocks) With a single crush attack (fire): 100 (except Reds and Glows, Rocks will die to the fire and crush attack) |
| Shockcake - Crush + Electric | With a single crush attack: Likely 100 (except Rocks) With a single crush attack (electric): 100 (except Yellows and Glows, Rocks will die to the electric and crush attack) |
| Freezecake - Crush + Ice | With a single crush attack: Likely 100 With a single crush attack (ice): 100 (except Ice and Glows, Rocks will die to the ice and crush attack; Pikmin aren't killed by the surrounding ice, but will be when crushed) |
| Puffstool - Confuse | With a single confusion spray: 100 (Pikmin aren't killed, just panicked) |
| Toxstool - Poison | With a single poison attack: 100 (except Whites and Glows) |
| Moldy Dwarf Bulborb - Eat + Poison | With a single bite: 1 With a single poison attack: 100 (except Whites and Glows) |
| Moldy Slooch - Eat + Poison | With a single tongue sweep: 3 With a single poison attack (from its trail): 100 (except Whites and Glows) |
| Pyroclasmic Slooch - Eat + Fire | With a single tongue sweep: 3 With a single fire attack (from its trail): 100 (except Reds and Glows) |
| Bearded Amprat - Eat + Electric | With a single charged-bite: 2 (One per hand) With a single charge attack (electric): 100 (except Yellows and Glows) |
| Mamuta | With a single hand-slam: 100 (Pikmin aren't killed, just turned into flowered sprouts) |
| Porquillion | With a single spike attack: Likely 100 (Pikmin aren't bunched together enough, but a majority are killed) |
| Honeywisp - N/A | Harmless enemy: 0 |
| Puffy Blowhog - Blow Wind | With a single blow: 100 (all Pikmin get knocked back, except Purples) |
| Icy Blowhog - Blow Icy Wind | With a single icy blow: 100 (all Pikmin get knocked back and frozen, except Purple only get frozen) |
| Withering Blowhog - Blow Wind | With a single blow: 100 (all Pikmin get deflowered, but not knocked back) |
| Lesser Spotted Jellyfloat - Eat (Harmless) | With a single suck: 10 (can store up to 30 Pikmin, except Purples; Pikmin aren't killed) |
| Greater Spotted Jellyfloat | With a single suck: 20 (can store up to 60 Pikmin, except Purples) |
| Wolpole - N/A | Harmless enemy: 0 |
| Yellow Wollyhop - Crush | With a single jump attack: Likely 100 (Pikmin aren't bunched together enough, but a majority are killed; Rock Pikmin are immune) |
| Wollyhop - Crush | With a single jump attack: Likely 100 (Pikmin aren't bunched together enough, but a majority are killed; Rock Pikmin are immune) |
| Chillyhop - Crush + Ice | With a single jump attack: Likely 100 (Pikmin aren't bunched together enough, but a majority are killed. Rock Pikmin are killed when frozen. Ice Pikmin are immune to the ice, but not being crushed) |
| Masterhop - Crush | With a single jump attack: Likely 100 (Pikmin aren't bunched together enough, but a majority are killed; Rock Pikmin are immune) |
| Water Dumple - Eat | With a single bite: 2 |
| Puckering Blinnow - Eat | With a single bite: 1 |
| Pricklepuff - Eat | With a single pierce: 5 (Rock Pikmin are immune) |
| Waddlepus - Bubble | With a single bubble: 1 (Purples and Ice are immune) With its whole bubble attack: Unknown (seems to release a random amount of bubbles) |
| Aristocrab Offspring - Eat and Bubble | With a single claw sweep: 2 (can hold two Pikmin in its claw, and can grab Pikmin from the bubbles) With its whole bubble attack: 5 |
| Peckish Aristocrab - Eat and Bubble | With a single claw sweep: 3 (can hold three Pikmin in its claw) With its whole bubble attack: Unknown (multiple bubbles created, and around at least 30) |
| Grubchucker - Eat | With a single claw: 1 (has two claws, so it grabs two Pikmin during one attack phase) During its whole attack phase: 6 (once its done its grabbing three times, it stops and swats away other Pikmin) |
| Hermit Crawmad - Eat | With a single charge attack: 1 (has two pincers, so it grabs two Pikmin in each one) |
| Bug-Eyed Crawmad - Eat | With a single charge attack: 10 (has two pincers, so it grabs five Pikmin in each one) |
| Crusted Rumpup - Eat | With a single charge attack: 5 |
| Pearly Clamclamp - Eat | With a single bite: 100 |
| Toady Bloyster - Eat + Poison | With a single tongue attack: Unknown (each result it ate a different amount of Pikmin, but a lot of them) With a single posion attack: 100 (except Glow Pikmin) |
| Bloomcap Bloyster - Eat | With a single tongue attack: 5 (one at a time, until five are eaten, then it stops moving) |
| Bogswallow - Eat | With a single suck: Unknown (each result it ate a different amount of Pikmin, but a lot of them; Purple Pikmin are immune) |
| Waterwraith - Crush | With a single roll: 100 (except Rocks) |
| Smoky Progg - Gloom | With a single gloom attack: 100 |
| Ancient Sirehound | With a single charged-bite: 10 (rest are knocked away) With a single jump attack: 100 With all of its elemental hazard: 100 (except their respective Pikmin type) |
Pellet Posy Test
- Pikmin
- The Impact Site - 24 total (3 on day 1)
 1-pellet Pellet Posy (Cycling) × 24 (3 during day 1 will be Red)
- The Forest of Hope - 25 total (20 after day 4)
- 1-pellet Pellet Posy (Red) × 7 (0 after day 4)
- 1-pellet Pellet Posy (Yellow) × 10 (20 after day 4)
- 1-pellet Pellet Posy (Cycling) × 8 (0 after day 4)
- The Forest Navel - 17 total (12, 10 days after the Blue Onion has been discovered)
- 1-pellet Pellet Posy (Blue) × 6 (1, 10 days after the Blue Onion has been discovered)
- 1-pellet Pellet Posy (Cycling) × 11
| Name | Number | Color | Spawning |
|---|---|---|---|
| 1-pellet | 4 | Red | Only spawns on day 1 |
| 5-pellet | 2 | Red | Only spawns on day 1 |
| 1-pellet | 1 | Yellow | Spawns after day 1; respawns after 1 day |
| 1-pellet | 1 | Blue | Spawns after day 1; respawns after 1 day |
| 10-pellet | 1 | Red | Spawns after day 1; respawns after 1 day |
| 10-pellet | 1 | Yellow | Spawns after day 1; respawns after 1 day |
| 10-pellet | 1 | Blue | Spawns after day 1; respawns after 1 day |
| 20-pellet | 1 | Red | Spawns after day 1; respawns after 1 day |
| 20-pellet | 1 | Yellow | Spawns after day 1; respawns after 1 day |
| 20-pellet | 1 | Blue | Spawns after day 1; respawns after 1 day |
| Pellet Posy | 3 | Red | Spawns after day 1; respawns after 1 day |
| Pellet Posy | 21 | Cycling | Spawns after day 1; respawns after 1 day |
| Name | Number | Color | Spawning |
|---|---|---|---|
| 1-pellet | 1 | Red | Does not respawn |
| 1-pellet | 4 | Yellow | Does not respawn |
| 5-pellet | 1 | Red | Does not respawn |
| 10-pellet | 1 | Red | Does not respawn |
| 20-pellet | 1 | Yellow | Spawns until day 4; respawns after 1 day |
| Pellet Posy | 7 | Red | Spawns until day 4; respawns after 1 day |
| Pellet Posy | 10 | Yellow | Spawns until day 4; respawns after 1 day |
| Pellet Posy | 10 | Cycling | Respawns after 1 day |
| Pellet Posy | 10 | Cycling | Spawns after day 4; respawns after 1 day |
- Pikmin 3
- Tropical Wilds - 20 total (5 on day 1)
 1-pellet Pellet Posy (Cycling) × 14 (4 during the day 1 tutorial will be Red)
- 5-pellet Pellet Posy (Cycling) × 4 (1 during the day 1 tutorial will be Red)
- 10-pellet Pellet Posy (Red) × 1
- 10-pellet Pellet Posy (Cycling) × 1
- Garden of Hope - 21 total (25 in Pikmin 3 Deluxe)
- 1-pellet Pellet Posy (Blue) × 2 (with both beyond the cinder block)
- 1-pellet Pellet Posy (Cycling) × 12 (15 in Pikmin 3 Deluxe; with seven beyond the cinder block and on the Quaggled Mireclops' corpse)
- 5-pellet Pellet Posy (Red) × 1
- 5-pellet Pellet Posy (Blue) × 1 (beyond the cinder block)
- 5-pellet Pellet Posy (Cycling) × 5 (6 in Pikmin 3 Deluxe; with two beyond the cinder block and on the Quaggled Mireclops' corpse)
- Distant Tundra - 14 total
- 1-pellet Pellet Posy (Cycling) × 10 (5 during the Yellow Pikmin tutorial will be Yellow)
- 5-pellet Pellet Posy (Cycling) × 4 (1 during the Yellow Pikmin tutorial will be Yellow)
- Twilight River - 17 total
- 1-pellet Pellet Posy (Red) × 1 (after the electrode is complete)
- 1-pellet Pellet Posy (Yellow) × 1 (after the electrode is complete)
- 1-pellet Pellet Posy (Winged) × 3
- 1-pellet Pellet Posy (Cycling) × 4
- 5-pellet Pellet Posy (Rock) × 1 (after the electrode is complete)
- 5-pellet Pellet Posy (Winged) × 4
- 5-pellet Pellet Posy (Cycling) × 2
- 10-pellet Pellet Posy (Winged) × 1
See also: X strategy
These collectables are inside of by enemies, or guarded by hard enemies/bosses.
- Pikmin
| Collectable name | Enemy name | See also: |
|---|---|---|
| Positron Generator | Pearly Clamclamp | None |
| Geiger Counter | Burrowing Snagret | Burrowing Snagret strategy |
| Radiation Canopy | Armored Cannon Beetle (guarded) | None |
| Omega Stabilizer | Puffstool | Puffstool strategy |
| Guard Satellite | Beady Long Legs | Beady Long Legs strategy |
| Interstellar Radio | Puffy Blowhog | None |
| Bowsprit | Armored Cannon Beetle | Armored Cannon Beetle strategy |
| Space Float | Breadbug | None |
| Secret Safe | Emperor Bulblax | Emperor Bulblax strategy |
- Pikmin 2
| Collectable name | Enemy name | See also: |
|---|---|---|
| Seed of Greed | Orange Bulborb | None |
| Insect Condo | Fiery Bulblax | Fiery Bulblax strategy |
| Armored Nut | Creeping Chrysanthemum | None |
| Meat Satchel | Burrowing Snagret | None |
| Triple Sugar Threat | Burrowing Snagret | None |
| Impenetrable Cookie | Puffy Blowhog | None |
| Bug Bait | Fiery Bulblax | None |
| Imperative Cookie | None | Breadbug#Strategy |
| Comfort Cookie | Bulbmin | None |
| King of Sweets | Hermit Crawmad | None |
| Pale Passion | Iridescent Glint Beetle | None |
| Mysterious Remains | Emperor Bulblax (US), Dwarf Orange Bulborb (Europe) | None |
| Crystal King | Iridescent Glint Beetle | None |
| Future Orb | Greater Spotted Jellyfloat | None |
| Unknown Merit | Wollyhop | None |
| Lustrous Element | Pileated Snagret | None |
| Manual Honer | Gatling Groink | None |
| Heavy-duty Magnetizer | Armored Cannon Beetle Larva | None |
| Emperor Whistle | Antenna Beetle | None |
| Dimensional Slicer | Fiery Bulblax | None |
| Mirrored Stage | Greater Spotted Jellyfloat | None |
| Danger Chime | Spotty Bulbear | None |
| Temporal Mechanism | Fiery Bulblax | None |
| Indomitable CPU | Gatling Groink | None |
| Superstrong Stabilizer | Armored Cannon Beetle Larva | None |
| Eternal Emerald Eye | Orange Bulborb | None |
| Princess Pearl | Wollyhop | None |
| Crystal Clover | Orange Bulborb | None |
| Essence of Despair | Fiery Bulblax | None |
| Essence of Desire | Puffy Blowhog | None |
| Pink Menace | Burrowing Snagret (guarded) | None |
| Joyless Jewel | Ranging Bloyster | None |
| Frosty Bauble | Fiery Bulblax | None |
| Gemstar Wife | Fiery Bulblax | None |
| Crystallized Telekinesis | Orange Bulborb | None |
| Crystallized Clairvoyance | Dwarf Orange Bulborb | None |
| Silencer | Segmented Crawbster | None |
| Aquatic Mine | Toady Bloyster | None |
| Ultimate Spinner | Dwarf Orange Bulborb | None |
| Stupendous Lens | Dwarf Orange Bulborb | None |
| Talisman of Life | Lesser Spotted Jellyfloat | None |
| Dream Architect | Red Bulborb | None |
| Glee Spinner | Spotty Bulbear | None |
| Remembered Old Buddy | Ranging Long Legs | None |
| Fond Gyro Block | Beady Long Legs | None |
| Memorable Gyro Block | Man-at-Legs | None |
| Lost Gyro Block | Iridescent Glint Beetle | None |
| Favorite Gyro Block | Empress Bulblax | None |
| Treasures Gyro Block | Emperor Bulblax | None |
| Container of Knowledge | Emperor Bulblax | None |
| Patience Tester (Europe) | Fiery Bulblax | None |
| Endless Repository (Europe and Japan) | Orange Bulborb | None |
| Stringent Container (US) | Orange Bulborb | None |
| Drone Supplies (Europe) | Spotty Bulbear | None |
| Milky Team (Japan) | Yellow Wollyhop | Creative Inspiration#Collecting the treasure |
| Good Old Memories (Japan) | Spotty Bulbear | Happiness Emblem#Collecting the treasure |
| Understood Person Symbol (Japan) | Emperor Bulblax | Mysterious Remains#Collecting the treasure |
| Flying Saucer (Japan) | Fiery Bulblax | Dimensional Slicer#Collecting the treasure |
| Inviting...Thing (Japan) | Orange Bulborb | Hypnotic Platter#Collecting the treasure |
| Anywhere Floater (Japan) | Withering Blowhog | Activity Arouser#Collecting the treasure |
| Alien Billboard (Europe) | Orange Bulborb | None |
| Activity Arouser (US) | Withering Blowhog | None |
| Hypnotic Platter (US) | Orange Bulborb | None |
| Massive Lid (Wii US) | Spotty Bulbear | None |
| Happiness Emblem (GameCube US) | Spotty Bulbear | None |
| Pondering Emblem (Europe) | Withering Blowhog | None |
| Activity Arouser (Europe) | Yellow Wollyhop | None |
| Creative Inspiration (US) | Yellow Wollyhop | None |
| Prototype Detector | Empress Bulblax | None |
| Five-man Knapsack | Burrowing Snagret | None |
| Brute Knuckles | Mamuta | None |
| Repugnant Appendage | Empress Bulblax | None |
| Stellar Orb | Man-at-Legs | None |
| Forged Courage | Emperor Bulblax | None |
| Dream Material | Giant Breadbug | None |
| Justice Alloy | Pileated Snagret | None |
| Amplified Amplifier | Ranging Bloyster | Ranging Bloyster strategy |
| Professional Noisemaker | Waterwraith | None |
| The Key | Beady Long Legs | None |
| Shock Therapist | Titan Dweevil | None |
| Flare Cannon | Titan Dweevil | None |
| Comedy Bomb | Titan Dweevil | None |
| Monster Pump | Titan Dweevil | None |
| King of Bugs | Titan Dweevil | None |
- Pikmin 3
| Collectable name | Enemy name | See also: |
|---|---|---|
| Crimson Banquet | Sandbelching Meerslug | Sandbelching Meerslug strategy |
| Disguised Delicacy | Shaggy Long Legs | Shaggy Long Legs strategy |
| Fire-Breathing Feast | Armored Mawdad | Armored Mawdad strategy |
| Heroine's Tear | Behemoth Phosbat | Vehemoth Phosbat strategy |
| Insect Condo | Burrowing Snagret | Burrowing Snagret strategy |
| Juicy Gaggle (Tropical Wilds) | Medusal Slurker | None |
| Scaly Custard (Garden of Hope) | Peckish Aristocrab | None |
| Searing Acidshock (Tropical Wilds) | Calcified Crushblat | None |
| Searing Acidshock (Garden of Hope) | Bug-Eyed Crawmad | None |
| Seed Hive | Scornet Maestro | Scornet Maestro strategy |
| Stellar Extrusion (Garden of Hope) | Bug-Eyed Crawmad | Bug-Eyed Crawmad strategy |
| Stellar Extrusion (Distant Tundra) | Shaggy Long Legs | Shaggy Long Legs strategy |
| Sunseed Berry (Distant Tundra) | Pyroclasmic Slooch | None |
| Velvety Dreamdrop (Tropical Wilds) | Armored Cannon Larva | None |
| Wayward Moon | Quaggled Mireclops | Quaggled Mireclops strategy |
| Zest Bomb | Peckish Aristocrab | Peckish Aristocrab strategy. |
- Pikmin 4
| Collectable name | Enemy name | See also: |
|---|---|---|
| Universal Rubber Cutie (Giant's Hearth) | Arachnode (web) | None |
| Planetary Rubber Cutie × 2 (Seafloor Resort) | Fiery Dweevil (carried) | None |
| Stately Rubber Cutie (Giant's Hearth) | Arachnode (web) | None |
| Stately Rubber Cutie × 3 (Cradle of the Beast) | Empress Bulblax | Empress Bulblax strategy |
| Sweet Stumble-Not (Kingdom of Beasts) | Whiptongue Bulborb | None |
| Sweet Stumble-Not (Subterranean Swarm) | Sovereign Bulblax | Sovereign Bulblax strategy |
| Vanishing Cookie | Fiery Bulblax | None |
| S.S. Berry (Plunder Palace) | Giant Breadbug | Giant Breadbug strategy |
| S.S. Berry (Cavern for a King) | Titan Blowhog | Titan Blowhog strategy |
| S.S. Peppermint (Cavern for a King | Blizzarding Blowhog | Blizzarding Blowhog strategy |
| Princess Pearl | Pearly Clamclamp | None |
| Sticky Jewel | Toxstool | Toxstool strategy |
| Hoop of Healing (Subterranean Swarm) | Arachnode (web) | None |
| Hoop of Fortune (Subterranean Swarm) | Arachnode (web) | None |
| Sphere of Fuzzy Feelings | Burrowing Snagret (guarded) | None |
| Orbital Communication Sphere × 3 (Cavern for a King) | Arctic Cannon Beetle | Arctic Cannon Beetle strategy |
| Greed-Inducement Device | Masterhop | Masterhop strategy |
| Disk of Joyous Wisdom × 3 (Kingdom of Beasts) | Empress Bulblax | Empress Bulblax strategy |
| Disk of Angry Wisdom × 3 (Plunder Palace) | Giant Breadbug | Giant Breadbug strategy |
| Disk of Sorrowful Wisdom (Cavern for a King) | Bloomcap Bloyster | Bloomcap Bloyster strategy |
| Disk of Amusing Wisdom (Giant's Hearth) | Iridescent Glint Beetle | None |
| Disk of Amusing Wisdom (Cavern for a King) | Bloomcap Bloyster | Bloomcap Bloyster strategy |
| Disk of Surprising Wisdom (Ultimate Testing Range) | Fiery Dweevil (carried) | None |
| Trap Lid × 10 (Cavern for a King) | Baldy Long Legs | Baldy Long Legs strategy |
| Gift of Friendship | Ancient Sirehound | Ancient Sirehound strategy |
| Memory Fragment (Center Right) | Gildemander (guarded) | Gildemander#Strategy |
| Condensed Sunshine | Jumbo Bulborb | Jumbo Bulborb strategy |
| Sphere of Family | Puffy Blowhog (numbered gate) | Puffy Blowhog#Strategy |
| Searing Acidshock (Primordial Thicket) | Baldy Long Legs | Baldy Long Legs strategy |
| Wayward Moon (Cavern for a King) | Smoky Progg | Smoky Progg strategy |
| Dawn Pustules (The Mud Pit) | Blizzarding Blowhog | None |
| Zest Bomb (Frozen Inferno) | Freezecake | None |
| Delectable Bouquet (Cradle of the Beast) | Fiery Bulblax | None |
| Portable Sunset (The Mud Pit) | Bogswallow | None |
| Tremendous Sniffer (Primordial Thicket) | Puffstool | Puffstool strategy |
| Tremendous Sniffer (Cavern for a King) | Emperor Bulblax | Emperor Bulblax strategy |
| Crunchy Deluge (The Mud Pit) | Mamuta | None |
| Face Wrinkler (Serene Shores) | Peckish Aristocrab | None |
| Insect Condo (Engulfed Castle) | Startle Spore | None |
| Dapper Blob (Cavern for a King) | Crusted Rumpup | Crusted Rumpup strategy |
| Seed Hive (Giant's Hearth) | Bug-Eyed Crawmad | Bug-Eyed Crawmad strategy |
| Stellar Extrusion (Frozen Inferno) | Icy Blowhog | None |
| Fire-Breathing Feast (Cavern for a King) | Empress Bulblax | Empress Bulblax strategy |
| King of Meats | Porquillion | Porquillion strategy |
| Fish-Bed Snack (Serene Shores) | Crusted Rumpup | Crusted Rumpup strategy |
| Fish-Bed Snack (Giant's Hearth) | Bug-Eyed Crawmad | Bug-Eyed Crawmad strategy |
| Mechanical Harp (Lullabies) | Jumbo Bulborb + Bulborb + Dwarf Bulborbs | None |
| Shake-a-Smile | Mamuta | None |
| Amplified Amplifier | Groovy Long Legs | Groovy Long Legs strategy |
| Life Station | Bug-Eyed Crawmad + Hermit Crawmads (guarded) | Bug-Eyed Crawmad strategy |
| Back-at-the-Beginning Track | Horned Cannon Beetle (guarded) | None |
| Thrill-Ride Track | Gildemander | Gildemander strategy |
| Brush of Wisdom | Burrowing Snagret | Burrowing Snagret strategy |
| Sure-Footed Combobot | Iceblown Dweevil (carried) | None |
| Uniquely You Goo | Jumbo Bulborb | None |
| Neon Goo | Bloomcap Bloyster | Bloomcap Bloyster strategy |
| Ancient Statue Head | Emperor Bulblax (numbered gate) | Emperor Bulblax strategy |
| Contemplation Statue | Arctic Cannon Beetle (numbered gate) | Arctic Cannon Beetle strategy |
| Expression Hider | Foolix (numbered gate) | Foolix strategy |
| Relentless Spear (Below-Grade Discotheque) | Tusked Blowhog | None |
| Shattering Lance | Snowfake Fluttertail | Snowfake Fluttertail strategy |
| Glinty Circular Disc | Waterwraith | Waterwraith strategy |
| Connection Detector | Waterwraith | Waterwraith strategy |
| Creativity Conduit | Horned Cannon Beetle | Horned Cannon Beetle strategy |
| Winged Freedom Sculpture | Man-at-Legs (numbered gate) | Man-at-Legs strategy |
| Don't-See-It Specs | Sovereign Bulblax | Sovereign Bulblax strategy |
| Crush Nugget × 2 (Engulfed Castle) | Bulborb | None |
| Mysterious Carriage (Cavern for a King) | Gildemander | Gildemander strategy |
| Foolish Fruit (Cavern for a King) | Horned Cannon Beetle | Horned Cannon Beetle strategy |
| Blast Shield | Mammoth Snootwhacker (guarded) | Mammoth Snootwhacker strategy |
| Ring-of-Return Shield | Pearly Clamclamp | None |
| Heroic Sword (Cavern for a King) | Man-at-Legs | Man-at-Legs strategy |
| Bright Sword (Cavern for a King) | Man-at-Legs | Man-at-Legs strategy |
| Divine Balloon (Hero's Hideaway) | Horned Cannon Beetle | Horned Cannon Beetle strategy |
| Love Emblem | Mammoth Snootwhacker (guarded) | Mammoth Snootwhacker strategy |
| Chance Totem (Kingdom of Beasts) | Spotty Bulbear | None |
| Talisman of Life (Moon) | Porquillion | Porquillion strategy |
| Talisman of Life (Phoenix) | Burrowing Snagret | None |
Enemy Strategy Ideas
- Bulborb
- With Pikmin:
- Rushing/Charging with a large squad of Pikmin. ~50 Reds in P1, but a squad of around 20-30 will work in P3 + P3.
- P2: Don't rush, instead throw onto its back and whistle before they are shaken off. Use Purples for the stun.
- P3: Stunning the Bulborb's eyes. Use Rocks for impact damage.
- P4: Use Ices to freeze.
- Alternate methods:
- Oatchi
- Dwarf Bulborb
- With Pikmin:
- Throw onto back, 1-shot. Swarm/Charge with a small squad of around 5-10.
- P1: Crushing glitch.
- P2: Use Purples to hone onto their backs
- Alternate methods:
- Oatchi, levelled up rush or bite. Leaders to punch, especially the first 2 games.
Sublevel Tables
| Treasure | Quantity | Notes | |
|---|---|---|---|
| × 1 | × A | A NOTES | |
| × B | B NOTES | ||
| × 35 | × 1 pile | ||
| × 1 | |||
| × 1 | |||
| Treasure | Quantity | Notes | ||
|---|---|---|---|---|
| × 1 | × A | × B | Inside of the Mamuta | |
| × 35 | × 1 pile | |||
| × 1 | ||||
| × 1 | ||||
| Enemy | Quantity | Notes |
|---|---|---|
| × 2 | × 1 is fighting 5 Winged Pikmin | |
| × 1 | ||
| × 1 | Drops × 1 Crunchy Deluge. | |
| × 3 | ||
| × 10 | × 1 group. They are underneath a patch of sticky mold. | |
| × 1 | Drops × 1 Ultra-Spicy Nectar. | |
| × 3 | 50% chance to drop × 1 raw material each. | |
| × 2 | Drops × 1 Nectar each. |
| Obstacle | Quantity | Notes |
|---|---|---|
| × 1 | ||
| × 4 | The lone Kingcap and × 3 spotcaps drop × 1 Nectar. The largest of the three Kingcaps drops × 5 raw materials. | |
| × 1 | Requires 100 Ice Pikmin to freeze. | |
| × 22 | 18 spotcaps inside of sticky mold patches, 4 spotcaps are not. The group of × 3 spotcaps and the lone Kingcap drop × 1 Nectar. | |
| × 2 | One patch has 5 spotcaps, one patch has 13 spotcaps. The patch of 5 spotcaps drops × 5 raw materials and × 10 Mitites. | |
| Tool | Quantity | Notes |
|---|---|---|
| × 1 | Requires × 13 raw materials. | |
| × 3 | One geyser is clogged. | |
| × 1 |
| Wild Pikmin | Quantity | Notes |
|---|---|---|
| × 5 | Replaced with nectar egg if the player has more than 50 Winged Pikmin. | |
| Finish off the rest |
| Others | Quantity | Notes |
|---|---|---|
| × UNKNOWN | Wild Pikmin conditions |
- Crackling Cauldron sublevel 1
| Treasure | Quantity | Notes |
|---|---|---|
| × 1 | ||
| × 1 | Hanging from a cobweb. | |
| × 1 | Partially buried. |
| Enemy | Quantity | Notes |
|---|---|---|
| × 3 | Each drops 1 raw material. | |
| × 4 | One will be above ground flying, two will be below ground. |
| Obstacle | Quantity | Notes |
|---|---|---|
| × 1 | Has 1667 HP and drops 2 raw materials. | |
| × 1 | Has a weight of 10. |
| Wild Pikmin | Quantity | Notes | |
|---|---|---|---|
| × 10 | × 5 (idle) | Replaced with a Yellow Candypop Bud if the player has more than 50 Yellow Pikmin or more than 95 Pikmin. | |
| × 5 (sprouts) | Replaced with a Yellow Candypop Bud if the player has more than 50 Yellow Pikmin or more than 95 Pikmin. | ||
| × 1 | This is what replaces the 5 idle Yellow Pikmin. | ||
| Others | Quantity | Notes | |
|---|---|---|---|
| × 3 | × 2 | ||
| × 1 | Replaces the 5 Yellow Pikmin sprouts. | ||
| × 1 | Pile of 15 raw materials. | ||
| × 5 | 3 from the Fiery Blowhogs and 2 from the electric gate. | ||
- Crackling Cauldron sublevel 2
| Treasure | Quantity | Notes |
|---|---|---|
| × 1 | On a high ledge. | |
| × 1 | Partially buried inside sizzling floor. | |
| × 1 | On a high ledge. |
| Enemy | Quantity | Notes |
|---|---|---|
| × 1 | The first hit drops 3 raw materials, the second hit drops 6 raw materials, and the third hit drops 10 raw materials. 19 raw materials in total. | |
| × 1 | Drops 1 raw material. It guards an alternate base location. | |
| × 3 | One will be above ground flying, two will be below ground. |
| Obstacle | Quantity | Notes |
|---|---|---|
| × 1 | Has 5333 HP and drops 4 raw materials. | |
| × 1 | Has 5333 HP and drops 4 raw materials. | |
| × 5 | 2 floors have 1 piece of charcoal, 2 floors have 2 pieces of charcoal, and 1 floor has 3 pieces of charcoal. |
| Wild Pikmin | Quantity | Notes |
|---|---|---|
| × 10 | Two groups of 5 Yellow Pikmin sprouts. One group is replaced with a nectar egg if the player has more than 50 Yellow Pikmin or more than 95 Pikmin (need to check). The other group is replaced with a Yellow Candypop Bud if the player has more than 50 Yellow Pikmin or more than 95 Pikmin (need to check). | |
| × 1 | Disappears if the player has more than 5 Red Pikmin. | |
| × 1 | This is what replaces a group of 5 Yellow Pikmin sprouts. |
| Others | Quantity | Notes |
|---|---|---|
| × 1 | On a high ledge. | |
| × 3 | 1 egg is what replaces the 5 Yellow Pikmin sprouts. | |
| × 2 | Pile of 15 and 20 raw materials. | |
| × 28 | 19 from the Iridescent Flint Beetle, 4 from the dirt wall, and 4 from the electric gate. |
- Wild Pikmin tests
| Wild Pikmin | Quantity | Can become | If you have more/less than... | Can be a Candypop Bud | |
|---|---|---|---|---|---|
| × 10 | × 5 (idle) | Yellow Candypop Bud | More than 50 Yellow Pikmin | Yes, if there is more than 90 Pikmin in the sublevel of any color. | |
| × 5 (sprouts) | Nectar egg | More than 50 Yellow Pikmin | No, if there is more than 90 Pikmin in the sublevel, with at most 50 Yellow Pikmin. | ||
| × 1 | Yellow Pikmin (idle) | Less than 51 Yellow Pikmin | N/A | ||
| Wild Pikmin | Quantity | Can become | If you have more/less than... | Can be a Candypop Bud | |
|---|---|---|---|---|---|
| × 10 | × 5 (sprouts) | Yellow Candypop Bud | More than 50 Yellow Pikmin | Yes, if there is more than 90 Pikmin in the sublevel of any color. | |
| × 5 (sprouts) | Nectar egg | More than 50 Yellow Pikmin | No, if there is more than 90 Pikmin in the sublevel, with at most 50 Yellow Pikmin. | ||
| × 1 | Nothing | More than 5 Red Pikmin | N/A | ||
| × 1 | Yellow Pikmin (idle) | Less than 51 Yellow Pikmin | N/A | ||
Disambiguation Tests
Controller can refer to any of the following treasures or other object in the Pikmin series:
- Pikmin 2
 Glee Spinner: a control stick from the Nintendo GameCube.
 Stone of Glory: a d-pad from the Nintendo Entertainment System (NES).
- Pikmin 4
 Connection Detector: a Neon Blue Nintendo Switch Joycon (left).
 Creativity Conduit: a Super NES Mouse.
 Life Controller: an NES Classic Edition controller.
 Telekinesis Detector: a Neon Red Nintendo Switch Joycon (right).
 Winged Freedom Sculpture: a WaveBird Wireless Controller.
You may also be looking for controllers used to play the Pikmin games:
- GameCube controller: used to play Pikmin and Pikmin 2.
- Wii Remote and Nunchuck: used to play New Play Control! Pikmin, New Play Control! Pikmin 2 and Pikmin 3.
- Wii U GamePad: used to play Pikmin 3.
- Wii U Pro Controller: used to play Pikmin 3.
- Joy-Con: used to play Pikmin 3 Deluxe and Pikmin 4.
- Nintendo Switch Pro Controller: used to play Pikmin 3 Deluxe and Pikmin 4.
- Nintendo 3DS (and equivalents): used to play Hey! Pikmin.
Side Mode Tables
Side Mode General Tables
| Name and Objective |
Pikmin | Onions | Requirements | Time limit |
|---|---|---|---|---|
 Flower Garden Collect Fruits and Nuggets! |
9:00 |
| Name and Objective |
Pikmin | Onions | Requirements | Time limit | ||||
|---|---|---|---|---|---|---|---|---|
| Red | Rock | Yellow | Winged | Blue | ||||
| Flower Garden Collect Fruits and Nuggets! |
9:00 | |||||||
 Inside Forest Collect Fruits and Nuggets! |
10:00 | |||||||
 River Collect Fruits! |
10:00 | |||||||
 Tundra Collect Fruits and Nuggets! |
12:00 | |||||||
| Name | Sublevels | Pikmin | Sprays | ||||
|---|---|---|---|---|---|---|---|
| Red | Yellow | Blue | Purple | White | |||
 Explorer's Cave |
2 | (leaf) |
|||||
 Novice Training |
2 | (leaf) |
|||||
 Lost Toy Box |
2 | (flower) |
|||||
 Creator's Garden |
1 | (flower) |
|||||
 Green Hole |
2 | (leaf) |
(leaf) |
(leaf) |
|||
 Hot House |
2 | (leaf) |
(leaf) |
(leaf) |
|||
 Brawny Abyss |
2 | (flower) |
|||||
 Red Chasm |
1 | (flower) |
|||||
 Trampled Garden |
1 | (flower) |
(flower) |
(flower) |
|||
 Twilight Garden |
1 | ||||||
 Cryptic Cavern |
5 | (flower) |
(flower) |
||||
 Concrete Maze |
3 | (flower) |
|||||
 Collector's Room |
7 | (flower) |
|||||
 Dweevil Nest |
1 | (flower) |
(flower) |
(flower) |
(flower) |
||
 Cavernous Abyss |
1 | (leaf) |
(leaf) |
||||
 Snack Pit |
1 | (leaf) |
(leaf) |
(leaf) |
(leaf) |
(leaf) |
|
 Three Color Training |
1 | (leaf) |
(leaf) |
(leaf) |
|||
 Hazard Training |
2 | (flower) |
(flower) |
||||
 Cave of Snarls |
2 | (flower) |
(flower) |
(flower) |
|||
 The Giant's Bath |
2 | (flower) |
|||||
 Rumbling Grotto |
2 | (flower) |
(flower) |
||||
 Subterranean Lair |
1 | (flower) |
(flower) |
(flower) |
|||
 Hidden Garden[note 1] |
1 | ||||||
 Abduction Den |
1 | (flower) |
(flower) |
||||
 Secret Testing Range |
2 | (flower) |
(flower) |
(flower) |
(flower) |
(flower) |
|
 Breeding Ground |
3 | (flower) |
|||||
 Cave of Pain |
1 | (flower) |
|||||
 Bully Den |
1 | (flower) |
|||||
 Sniper Room |
1 | (flower) |
(flower) |
||||
 Emperor's Realm |
5 | (flower) |
(flower) |
(flower) |
|||
- ^ 2 flower Bulbmin are given at the start of this sublevel. When selecting this stage in the Challenge Mode menu, no Pikmin appear to jump into the stage.
| Image | Name | Starting Pikmin | Maximum Score | Time limit |
|---|---|---|---|---|

|
The Impact Site | 278 | 10:48 | |

|
The Forest of Hope | 569 | 18:54 | |

|
The Forest Navel | 482 | 16:12 | |

|
The Distant Spring | 752 [note 1] | 18:54 | |

|
The Final Trial | 299 | 13:30 |
- ^ Despite being the maximum score, it is extremely difficult to achieve due to the large amount of enemies and the randomly-colored pellets. The maximum score has never been achieved by humans on the GameCube or the Wii, though few have completed it on the Nintendo Switch due to the crushing glitch occuring less frequently. The maximum score has only been achieved using a TAS.
| Name | Pikmin | Onions | Requirements | Time limit | |||||||||
|---|---|---|---|---|---|---|---|---|---|---|---|---|---|
| Red | Rock | Yellow | Winged | Blue | Purple | White | |||||||
Tropical Forest |
1000 |
1400 |
1800 |
2100 |
7:00 | ||||||||
Silver Lake |
1500 |
2000 |
2500 |
2920 |
8:00 | ||||||||
Thirsty Desert |
1500 |
2000 |
2700 |
3340 |
10:00 | ||||||||
Twilight Hollow |
1500 |
2000 |
2500 |
3240 |
10:00 | ||||||||
Shaded Garden |
1500 |
2000 |
2500 |
3180 |
8:00 | ||||||||
Tropical Forest Remix |
800 |
1100 |
1500 |
1810 |
8:00 | ||||||||
Silver Lake Remix |
750 |
1500 |
2250 |
3000 |
9:00 | ||||||||
Thirsty Desert Remix |
2500 |
3500 |
4500 |
5125 |
8:00 | ||||||||
Twilight Hollow Remix |
1800 |
2300 |
2800 |
3300 |
9:00 | ||||||||
Shaded Garden Remix |
800 |
1300 |
1800 |
2400 |
8:00 | ||||||||
Fortress of Festivity |
2000 |
3000 |
4500 |
5900 |
12:00 | ||||||||
The Rustyard |
1100 |
1400 |
1700 |
1950 |
7:00 | ||||||||
Beastly Caverns |
2000 |
2500 |
3000 |
3500 |
12:00 | ||||||||
Forgotten Cove |
900 |
1800 |
2700 |
3480 |
11:00 | ||||||||
Clockwork Chasm |
700 |
1000 |
1500 |
2185 |
13:00 | ||||||||
| Name | Pikmin | Onions | Requirements | Time limit | ||||||
|---|---|---|---|---|---|---|---|---|---|---|
| Red | Rock | Yellow | Winged | Blue | Purple | White | ||||
Tropical Forest |
7:00 | |||||||||
Silver Lake |
8:00 | |||||||||
Thirsty Desert |
8:00 | |||||||||
Twilight Hollow |
9:00 | |||||||||
Shaded Garden |
9:00 | |||||||||
Tropical Wilds Remix |
13:00 | |||||||||
Garden of Hope Remix |
7:00 | |||||||||
Distant Tundra Remix |
9:00 | |||||||||
Twilight River Remix |
10:00 | |||||||||
Formidable Oak Remix |
5:55 | |||||||||
Fortress of Festivity |
7:30 | |||||||||
The Rustyard |
6:00 | |||||||||
Beastly Caverns |
6:00 | |||||||||
Forgotten Cove |
9:00 | |||||||||
Clockwork Chasm |
7:00 | |||||||||
| Stage | Name | Image | Pikmin | Requirements | Time limit | |||
|---|---|---|---|---|---|---|---|---|
| 11 | Fortress of Festivity | 2000 |
3000 |
4500 |
5900 |
12:00 | ||
| 1 | Tropical Forest | 250 |
400 |
550 |
650 |
7:00 | ||
| Stage | Name | Pikmin | Time limit |
|---|---|---|---|
| 11 | Fortress of Festivity |
12:00 | |
| 1 | Tropical Forest |
7:00 |
Mission Mode Layout
Option 1
Extremely wide table. (You can see the whole table further up this page, I'm not having a duplicate. This table is slightly edited however)
| Stage | Name | Pikmin | Onions | Requirements | Time limit | |||||||||
|---|---|---|---|---|---|---|---|---|---|---|---|---|---|---|
| Red | Rock | Yellow | Winged | Blue | Purple | White | ||||||||
| 1 | Tropical Forest |
1000 |
1400 |
1800 |
2100 |
7:00 | ||||||||
Option 2
No Pikmin or Onion columns and no Pikmin quantity.
| Stage | Name | Image | Pikmin | Requirements | Time limit | |||
|---|---|---|---|---|---|---|---|---|
| 11 | Fortress of Festivity | 2000 |
3000 |
4500 |
5900 |
12:00 | ||
Option 3
Basically the same as Option 1, although it could be done as columns
| Stage | Name | |
|---|---|---|
| Collect Treasures | Battle Enemies! | |
| 11 | Fortress of Festivity |
Fortress of Festivity |