Drafty Gallery
| Drafty Gallery | |
|---|---|

| |
| Ice Pikmin fighting a Joustmite. | |
| Location | Blossoming Arcadia |
| Sublevels | 4 |
| Rescues | 1 |
| Treasures | 10 |
| Onions | 0 |
| Suggested Pikmin | |
| Wild Pikmin | |
|
The following article or section contains guides. |
The Drafty Gallery (ふっとばされ回廊?, lit.: "Blow Away Gallery") is a cave in the Blossoming Arcadia in Pikmin 4. Its entrance is not surrounded by any major obstacles, and the only hazards present in the cave are fire hazards and pits. The final sublevel contains a Puffy Blowhog, a member of the blowhog family capable of knocking Pikmin back with a large gust of wind. Due to this metallic cave having pits, it is recommended that the player takes extra care to make sure no enemies shake or knock Pikmin off into them – especially the Puffy Blowhog. This cave has ![]() × 1,010 worth of treasure, making it the most sparklium-rich cave in this area.
× 1,010 worth of treasure, making it the most sparklium-rich cave in this area.
How to reach[edit]

There is one main way to access this cave. Starting at the Fragrant Ravine base (the default base), head west and follow the curved path. You'll pass a dirt-mound and end up at the top of a hill with the area's Dandori Battle cave entrance. Nearby, you'll also find a clay bridge requiring 29 raw material. Build and cross the bridge, and the Drafty Gallery cave entrance will be slightly north.
Notes[edit]
Olimar's Voyage Log[edit]

Sublevel 1[edit]

- Treasures:
- Enemies:
 Downy Snagret × 3
- Obstacles:
 Dirt wall × 1
- Tools:
- None
- Wild Pikmin:
- None
- Others:
- None
Defeat the Downy Snagrets and then collect the treasures. Destroying the dirt wall allows for your Pikmin carrying the Spouse Alert to take a faster route, though is not required. The Memory Fragment (Top...Probably?) is on a raised ledge, so you should either Rush into it with Oatchi to knock it down, or you should use Yellow Pikmin due to their increased throw height.
Sublevel 2[edit]

- Treasures:
 Back-at-the-Beginning Track × 1
 Gold Nugget × 10
 Sphere of Support × 1
 Tandem Trainer × 1
- Enemies:
 Fiery Blowhog × 2
- Obstacles:
- Dirt wall × 2
 Fire geyser × 2
- Tools:
 Geyser × 3
- Wild Pikmin:
 Candypop Bud × 1 (Ice)
- Others:
 Egg × 2
Fire hazards exist on this sublevel. Defeat the Fiery Blowhogs and destroy the fire generators to ensure that non-Red Pikmin carrying treasures and nuggets can safely reach the S.S. Beagle. Be careful when fighting the Fiery Blowhog towards the north, as it is located near a pit and can buck your Pikmin off into it. One of the geysers is a shortcut that leads back to the base, while the other two are necessary to reach the Back-at-the-Beginning Track.
Sublevel 3[edit]

- Treasures:
- Enemies:
- Fiery Blowhog × 1
 Joustmite × 2 (1 guarding a base)
- Obstacles:
 Bag × 1 (requiring 10 Pikmin)
 Clipboard × 1 (requiring 20 Pikmin)
- Fire geyser × 2
- Tools:
 Clay bridge × 1 (requires 29 raw material)
- Geyser × 2
- Wild Pikmin:
 Ice Pikmin × 5 (fighting Joustmite)
- Ice Pikmin × 5 (sprouts)
- Others:
- Egg × 3 (1 falls from the sky)
 Raw material pile × 3 (piles of 5, 10 and 15)
To access the hole to the next sublevel, a clay bridge must be built with 29 pieces of raw material. 30 pieces are found in the sublevel, meaning it will always be possible to build it. One pile of 5 raw materials can be found slightly south of the S.S. Beagle. Most of the raw material and all of the treasures are found on the northern section of this sublevel, and to access it, a geyser must be unclogged until it starts shooting air. Another base exists on this section, which can be used after defeating the Joustmite next to it. To collect the treasures and the remaining raw material piles, you will need to call the S.S. Beagle over to this new base.
Sublevel 4[edit]

- Treasures:
 Sphere of Family × 1
- Enemies:
 Puffy Blowhog × 1
- Obstacles:
 Numbered gate × 1 (opens when 1 Puffy Blowhog is defeated)
- Tools:
- None
- Wild Pikmin:
- Ice Pikmin × 5
- Others:
- See also: Puffy Blowhog strategy.
The boss of this cave is a Puffy Blowhog. Take care when fighting it as it is capable of blowing or bucking your Pikmin into the void. Defeating it makes it drop a castaway and lower a numbered gate, letting the player collect the Sphere of Family and exit the cave. There are 5 wild Ice Pikmin on a high platform towards the east. They can be whistled from the far side of the platform from the boss arena.
Gallery[edit]
|
This article or section is in need of more images. |
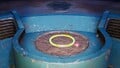
The Hoop of Fortune in the location it is discovered.

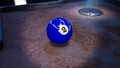
The Sphere of Support in the location it is discovered.
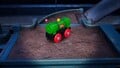
The Middle-Management Tank Car in the location it is discovered.
The Sphere of Family in the location it is discovered.
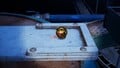
The Spouse Alert in the location it is discovered.


Names in other languages[edit]
| Language | Name | Meaning |
|---|---|---|
| ふっとばされ回廊? Fut-tobasare Kairō |
Blow Away Gallery | |
(traditional) |
吹飛走廊 Chuīfēi Zǒuláng |
Blow Away Gallery |
(simplified) |
吹飞走廊 Chuīfēi Zǒuláng |
Blow Away Gallery |
| Blaaskaakgalerij | Blowhard gallery | |
| Galerie des bourrasques | Gusts gallery | |
| Zugige Gänge | Drafty Hallways | |
| Galleria ventosa | Windy gallery | |
| 낭떠러지 회랑 Nangtteoleoji Hirang |
Precipice Gallery | |
| Galeria ventilante | Ventilating gallery | |
| Galería ventosa | Windy gallery |
Trivia[edit]
- This cave's sublevels reference several cave units from metal-themed caves in Pikmin 2. Most prominently, the circular room in sublevel 1 is a reference to sublevel 2 of the White Flower Garden.
- The location of this cave is where Moss is found in Olimar's Shipwreck Tale.
See also[edit]
| Caves in Pikmin 4 | |
|---|---|
| Rescue Command Post | Burrow of Beginnings |
| Sun-Speckled Terrace | Last-Frost Cavern • Crackling Cauldron • Aquiferous Summit • Industrial Maze • Hectic Hollows |
| Blossoming Arcadia | Drafty Gallery • Secluded Courtyard • Sightless Passage • Kingdom of Beasts |
| Serene Shores | Seafloor Resort • Subzero Sauna • Below-Grade Discotheque • Engulfed Castle |
| Hero's Hideaway | Doppelgänger's Den • Frozen Inferno • Plunder Palace |
| Giant's Hearth | Ultimate Testing Range • Dream Home • Cradle of the Beast |
| Primordial Thicket | The Mud Pit • Subterranean Swarm • Cavern for a King |
| Dandori Challenges | Dandori Day Care • Hotshock Canyon • Rockaway Cellars • Test Tubs • Ice-Cross Course • Hefty Haulway • Aerial Incinerator • Strategic Freezeway • Planning Pools • Toggle Training • Cliff-Hanger's Hold • Oasis of Order • Trial of the Sage Leaf |
| Dandori Battles | Trial Run • Battle in a Box • Dandori Castle • Leafy Showdown • Hot Sandy Duel • Final Battle |