|
The following article or section contains guides.
The strategies shown are just suggestions.
|
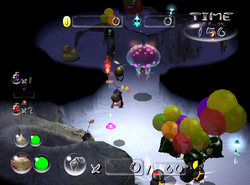
Abduction Den is the twenty-fourth level in Pikmin 2's Challenge Mode. Most of the enemies are capable of grabbing Pikmin or leaders, hence the name. Take caution to ensure they're not abducted into hazards, and be especially mindful of the Bumbling Snitchbugs; if your leader is grabbed at an inconvenient time, your army will be easy prey for the Careening Dirigibugs or the Greater Spotted Jellyfloat.
Sublevel 1[edit]
- Theme: Snow
- Music: Emergence Cave 2
- Time: 180 (360 seconds)
- Starting Pikmin:
- Treasures:
- Enemies:
- Obstacles:
- Vegetation:
- Others:
The Key is inside the Greater Spotted Jellyfloat. Grabbing it should be your first priority, so lure it away from the other enemies with one of your leaders before using your other leader to weigh it down with Pikmin. If your only concern is a pink flower, just beeline for the exit after collecting it, but be careful if the Swooping Snitchbug grabs a Pikmin – if it successfully buries it before you leave, you'll need to backtrack to pluck the sprout, since leaving it behind will count as a death.
An alternative, more humorous method to dealing with the Greater Spotted Jellyfloat is to allow it to consume one of your leaders, then switch to the other and spray it with ultra-bitter spray. Switch back to the leader inside the petrified Jellyfloat and mash buttons to escape – if successful, they will shatter it from the inside for a one-hit kill.
If you care for a high score, you'll need to defeat the other enemies. All of them drop treasure, and you'll probably need to defeat all of them anyway to safely transit the treasures. Save your sprays for quickly dealing with the Careening Dirigibugs – the sublevel's main threat.
Generate sample map →
| showTechnical sublevel information
|
| Internal cave name
|
ch_NARI_09suikomi
|
| "Main" object maximum (?)
|
14
|
| "Treasure" object maximum (?)
|
3
|
| "Gate" object maximum (?)
|
0
|
| Dead end unit probability (?)
|
0
|
| Number of rooms (?)
|
3
|
| Corridor-to-room ratio (?)
|
0
|
| Escape geyser (?)
|
Yes
|
| Clogged hole (?)
|
No
|
| Cave units file (?)
|
3_MAT_hit34_sak2_uzu1_snow.txt
|
| Lighting file (?)
|
tutorial_1_light.ini
|
| Background (?)
|
None
|
| Cave units (?)
|
|
|
|
|
|
|
| Dead end |
Three-way crossing |
Four-way crossing |
Turning corridor |
Corridor |
Long corridor
|
|
|
|
|
| Room with large trunk |
Room with 4 exits |
Room with spiraling trunk
|
- For details on how objects are spawned, and how some may fail to spawn, see here.
Names in other languages[edit]
| Language
|
Name
|
Meaning
|
 Japanese Japanese |
さらいの洞窟? |
Kidnapper's Cave
|
 French (NoA) French (NoA) |
Antre du rapt |
Abduction den
|
 French (NoE) French (NoE) |
Antre du Rapt |
Abduction Den
|
 German German |
Höhle der Entführung |
Kidnapping Cave
|
 Italian Italian |
Covo di sequestro |
Abduction Lair
|
 Spanish (NoA) Spanish (NoA) |
Antro de la Abducción |
Abduction Den
|
See also[edit]

 Red Pikmin × 30 (flower)
 Yellow Pikmin × 30 (flower)
 Combustion Berry × 1
 Mirth Sphere × 3 (inside Bumbling Snitchbugs)
 Omniscient Sphere × 6 (4 inside Careening Dirigibugs, 2 inside Fiery Dweevils)
 Paradoxical Enigma × 1 (partially buried)
 Rubber Ugly × 1
 The Key × 1 (inside Greater Spotted Jellyfloat)
 Unknown Merit × 1 (inside Swooping Snitchbug)
 Bumbling Snitchbug × 3
 Careening Dirigibug × 4
 Fiery Dweevil × 2
 Greater Spotted Jellyfloat × 1
 Swooping Snitchbug × 1
 Fire geyser × 3
 Common Glowcap × 7


