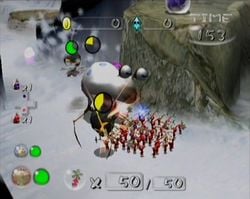
Cave of Pain
| Cave of Pain | |||
|---|---|---|---|

| |||
| Sublevels | 1 | Ultra-bitter sprays | 1 |
| Red Pikmin | 50 | Ultra-spicy sprays | 1 |
| Yellow Pikmin | 0 | ||
| Blue Pikmin | 0 | ||
| White Pikmin | 0 | ||
| Purple Pikmin | 0 | ||
| Bulbmin | 0 | ||
|
The following article or section contains guides. |
The Cave of Pain is the twenty-seventh level in Pikmin 2's Challenge Mode. This challenge is filled to the brim with dangerous enemies that will often drop directly on top of your squad – you'll need to remain extremely alert at all times to react to them, especially if you're aiming for a pink flower.
Sublevel 1[edit]
- Theme: Snow
- Music: Emergence Cave 1
- Time: 160 (320 seconds)
- Starting Pikmin:
 Red Pikmin × 50 (flower)
- Treasures:
 Arboreal Frippery × 2 (inside Anode Dweevils)
 Combustion Berry × 1 (inside Hairy Bulborb)
 Crystallized Clairvoyance × 1
 Crystallized Telepathy × 1
 Gyroid Bust × 1
 Omniscient Sphere × 1 (inside Dwarf Red Bulborb)
 Seed of Greed × 1 (inside Fiery Bulblax)
 The Key × 1
- Enemies:
 Anode Dweevil × 2
 Dwarf Red Bulborb × 1
 Fiery Bulblax × 1
 Hairy Bulborb × 1
 Volatile Dweevil × 6
- Obstacles:
- Vegetation:
- None
- Others:
- None
This challenge is very difficult. If you're aiming for a pink flower, it may take several tries; if you get a particularly bad layout, quitting and reentering the challenge to get a new one is entirely valid.
You'll likely want to send a lone leader out to trigger as many of the traps as possible. A Fiery Bulblax may drop from the sky – this is the sublevel's biggest threat, so you may wish to use the Volatile Dweevils to weaken or kill it. Otherwise, use your sprays on it; a petrified Fiery Bulblax is no match for 50 Red Pikmin.
The Key is out in the open, seemingly unguarded, but your ordeal won't end there, as Anode Dweevils and a few more Volatile Dweevils will drop from the sky as the Pikmin attempt to carry it back. Punching the Anode Dweevils to death to avoid any Pikmin causalities is recommended. If you still have your ultra-spicy spray, spraying the Pikmin that are carrying The Key back will potentially let them outpace some of them, but be cautious, nonetheless.
You're probably better off ignoring the treasures altogether, but if you want a high score, you'll need to run around and kill every enemy that drops from the ceiling, as all of them besides the Volatile Dweevils will drop treasure.
| showTechnical sublevel information |
|---|
| showDetailed object list |
|---|
- For details on how objects are spawned, and how some may fail to spawn, see here.
Names in other languages[edit]
| Language | Name | Meaning |
|---|---|---|
| 天罰の穴? | Divine Punishment Den | |
| Grotte du martyre | Martyrdom cave | |
| Grotte du Martyre | Martyrdom Cave | |
| Höhle des Schmerzes | Cave of Pain | |
| Covo del dolore | Den of pain | |
| Cueva del Dolor | Cave of Pain |
| showPikmin 2 Challenge Mode locations |
|---|


