User:Chazmatron: Difference between revisions
Jump to navigation
Jump to search
Chazmatron (talk | contribs) (→Oatchi uses: Trying a layout for Blue Pikmin P1) |
Chazmatron (talk | contribs) (→Uses: BA Oatchi uses) |
||
| Line 213: | Line 213: | ||
***{{icon|Gold Nugget|v=P4|y}} × 15 (sublevel 2): Same as the castaway, though the clay bridge isn't needed to collect these. | ***{{icon|Gold Nugget|v=P4|y}} × 15 (sublevel 2): Same as the castaway, though the clay bridge isn't needed to collect these. | ||
***{{icon|Memory Fragment (Top Left)|v=P4|y}} (sublevel 2): Same as the Gold Nuggets | ***{{icon|Memory Fragment (Top Left)|v=P4|y}} (sublevel 2): Same as the Gold Nuggets | ||
***{{icon|Skin of the Phoenix|v=P4}} (sublevel 2): Whilst Oatchi will be unable to pull down the hanging treasure, the nearby [[iron fence]] will need to be lowered for it to be collected. The white [[switch]] for this fence is at the top of some raised platforms. Mine Boosting to reach the switch or throwing a [[Pikpik Carrot]] with the [[Pebble Pitcher]] to lower it can be done instead. | ***{{icon|Skin of the Phoenix|v=P4|y}} (sublevel 2): Whilst Oatchi will be unable to pull down the hanging treasure, the nearby [[iron fence]] will need to be lowered for it to be collected. The white [[switch]] for this fence is at the top of some raised platforms. Mine Boosting to reach the switch or throwing a [[Pikpik Carrot]] with the [[Pebble Pitcher]] to lower it can be done instead. | ||
**[[Hectic Hollows]] | **[[Hectic Hollows]] | ||
***{{icon|Castaway|v=P4|y}} (sublevel 2): On a high ledge that Oatchi can rush into. Mine Boosting can be used to climb onto the slightly raised arena housing the [[Tusked Blowhog]], and [[Winged Pikmin]] can be used to carry the castaway down. | ***{{icon|Castaway|v=P4|y}} (sublevel 2): On a high ledge that Oatchi can rush into. Mine Boosting can be used to climb onto the slightly raised arena housing the [[Tusked Blowhog]], and [[Winged Pikmin]] can be used to carry the castaway down. | ||
;Helpful uses | ;Helpful uses | ||
*[[Cave]]s | |||
**[[Blossoming Arcadia]] | |||
***[[Kingdom of Beasts]]: Access to this cave requires crossing a pathway created by smashing some [[potted mushroom]]s. A Rush from Oatchi can smash these, though explosive items can be used instead. | |||
***[[Sightless Passage]]: The entrance to this cave is surrounded by 8 [[breakable pot]]s that Oatchi can [[Rush]] into. [[Bomb Rock]]s, [[Mine]]s or [[Trackonator]]s can be used instead. | |||
*Area [[Treasure]]s and [[Flarlic]]s | *Area [[Treasure]]s and [[Flarlic]]s | ||
**[[Sun-Speckled Terrace]] | **[[Sun-Speckled Terrace]] | ||
| Line 224: | Line 229: | ||
***{{icon|Lesser Mock Bottom|v=P4|y}}: This treasure is inside of a [[breakable pot]] that Oatchi can Rush into. Bomb Rocks, Mines or Trackonators can be used instead. | ***{{icon|Lesser Mock Bottom|v=P4|y}}: This treasure is inside of a [[breakable pot]] that Oatchi can Rush into. Bomb Rocks, Mines or Trackonators can be used instead. | ||
***{{Icon|Perforated Raft|v=P4|y}} × 2: These 2 treasures are inside of the same breakable pot that Oatchi can Rush into. Bomb Rocks, Mines or Trackonators can be used instead. | ***{{Icon|Perforated Raft|v=P4|y}} × 2: These 2 treasures are inside of the same breakable pot that Oatchi can Rush into. Bomb Rocks, Mines or Trackonators can be used instead. | ||
**[[Blossoming Arcadia]] | |||
***{{icon|Daughter Doll Head|v=P4|y}}: This treasure is atop a raised platform that can be Rushed into by Oatchi to knock it off. Yellow Pikmin, Winged Pikmin, or any Pikmin types using gyro controls can be thrown on top of this ledge instead. | |||
***{{icon|Mooching Vase|v=P4|y}}: The treasure is fully buried, meaning Oatchi is the only one capable of finding it. However, since the treasure doesn't change locations, if the location is known beforehand, Oatchi isn't needed. It's buried on a raised ledge that can be Rushed into, but Yellow Pikmin or Winged Pikmin can reach the top. | |||
*Cave Treasures, Flarlics and [[Castaway]]s | *Cave Treasures, Flarlics and [[Castaway]]s | ||
| Line 240: | Line 248: | ||
***{{icon|Aspiration-Ritual Pole|v=P4|y}} (sublevel 1): Oatchi would normally be used to jump up the multiple platforms so Pikmin can be thrown onto the hanging treasure, but Winged Pikmin can be used to pull it down without jumping up said platforms. | ***{{icon|Aspiration-Ritual Pole|v=P4|y}} (sublevel 1): Oatchi would normally be used to jump up the multiple platforms so Pikmin can be thrown onto the hanging treasure, but Winged Pikmin can be used to pull it down without jumping up said platforms. | ||
***{{icon|Mama Doll Head|v=P4|y}} (sublevel 1): On a raised ledge in the middle of some water. Oatchi can Rush into the ledge to knock it off. Alternatively, Yellow Pikmin can be thrown on the ledge to carry it down and Blue Pikmin can carry it across the water, or Ice Pikmin can freeze the lake. | ***{{icon|Mama Doll Head|v=P4|y}} (sublevel 1): On a raised ledge in the middle of some water. Oatchi can Rush into the ledge to knock it off. Alternatively, Yellow Pikmin can be thrown on the ledge to carry it down and Blue Pikmin can carry it across the water, or Ice Pikmin can freeze the lake. | ||
*[[Blossoming Arcadia]] | |||
**[[Drafty Gallery]] | |||
***{{icon|Memory Fragment (Top...Probably?)|v=P4|y}}: The treasure is on a raised ledge that Oatchi can Rush into, though 2 Yellow Pikmin can be thrown to carry down the treasure instead. | |||
;Situational uses | ;Situational uses | ||
*Area [[Treasure]]s and [[Flarlic]]s | |||
**[[Blossoming Arcadia]] | |||
***{{icon|Wayward Moon|v=P4|y}}: This treasure weighs 50 units, and whilst Oatchi isn't required to collect his treasure, if his [[Oatchi#Super Buff|Super Buff]] skill is at level 3, he can carry back the treasure by himself. | |||
|Blue Pikmin| | |Blue Pikmin| | ||
Latest revision as of 15:54, March 22, 2025
Yo yo yo!!! I first started playing Pikmin when Pikmin 3 came out on the Wii U. I then had Pikmin 2 (Wii version) given to me for my birthday and then the following year I had the original (Wii version). At some point, I bought Hey! Pikmin and I started playing Pikmin Bloom a few years back, although I've stopped recently;;
March 28, 2025
- 18:1018:10, March 28, 2025 diff hist +435 Blonde Impostor →Gallery: added 3 images. Split the galleyr current
(FISH)
| edit | This user has 3,187 total edits on this wiki. |
| Chazmatron | |
|---|---|
| Games | |
| don’t have a GameCube 😫 | |
| 100% | |
| 100% | |
| still no GameCube 😔 | |
| 100% | |
| 100% | |
| 100% 😎 | |
| 100% | |
| 100% | |
| ~90% not got all the amiibos | |
| 39 | |
| 100% x2 | |
Subpages
- A more (in)accurate biology section involving certain creatures. So far, it only has Bulborbs and Fiery Blowhogs and Burrowing Snagrets (Incomplete)
- A Pikmin 4 run where I only use Red Pikmin, no Yellow, Blue, White, Purple, Rock, Winged or Ice Pikmin involved. (Incomplete)
User:Chazmatron/Location Tests
- Page to hold my, mainly enemy, location WIPS
- Page testing multiple bridge articles, similar to the gates.
- Big tests that won't fit on this page.
User:Chazmatron/Yellow Wollyhop and User:Chazmatron/Gildemander
- Enemy article test, based on both PopitTart's and Twins1105's versions. Mine are of a Yellow Wollyhop and a Gildemander, PopitTart's is of a Fiery Blowhog, and Twins1105's is of a Bulborb
Pikmin Merchandise

Red.
Yellow.
Blue.
Purple.
White.
Winged.
Glow.
Red.
Yellow.

Blue.
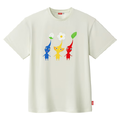
Encounter.
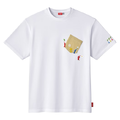
Pocket.


.jpg)
.jpg)
.jpg)


Enemy Names
Tables
Tests
Uses
Stealing enemies
Enemies that steal. Stealing enemies. Object-stealing enemies?
- Definately include:
- Breadbug, Anode Dweevil, Fiery Dweevil, Giant Breadbug, Hydro Dweevil, Munge Dweevil, Bloomcap Bloyster, Iceblown Dweevil, Venom Dweevil, Waddlequaff
- Maybe?
- Swooping Snitchbug, Bumbling Snitchbug, Greater Spotted Jellyfloat, Lesser Spotted Jellyfloat, Ravenous Whiskerpillar, Volatile Dweevil, Arachnode, Medusal Slurker, Myserious Life-Form/Plasm Wraith, Scornet, Skutterchuck, Swarming Sheargrub, Moss
Pikmin 4 Enemy Attack
| Enemy Name | showMax Pikmin Death |
|---|
Pellet Posy Test
See also: X strategy
Enemy Strategy Ideas
- Bulborb
- With Pikmin:
- Rushing/Charging with a large squad of Pikmin. ~50 Reds in P1, but a squad of around 20-30 will work in P3 + P3.
- P2: Don't rush, instead throw onto its back and whistle before they are shaken off. Use Purples for the stun.
- P3: Stunning the Bulborb's eyes. Use Rocks for impact damage.
- P4: Use Ices to freeze.
- Alternate methods:
- Oatchi
- Dwarf Bulborb
- With Pikmin:
- Throw onto back, 1-shot. Swarm/Charge with a small squad of around 5-10.
- P1: Crushing glitch.
- P2: Use Purples to hone onto their backs
- Alternate methods:
- Oatchi, levelled up rush or bite. Leaders to punch, especially the first 2 games.
Sublevel Tables
Disambiguation Tests
Controller can refer to any of the following treasures or other object in the Pikmin series:
- Pikmin 2
 Glee Spinner: a control stick from the Nintendo GameCube.
 Stone of Glory: a d-pad from the Nintendo Entertainment System (NES).
- Pikmin 4
 Connection Detector: a Neon Blue Nintendo Switch Joycon (left).
 Creativity Conduit: a Super NES Mouse.
 Life Controller: an NES Classic Edition controller.
 Telekinesis Detector: a Neon Red Nintendo Switch Joycon (right).
 Winged Freedom Sculpture: a WaveBird Wireless Controller.
You may also be looking for controllers used to play the Pikmin games:
- GameCube controller: used to play Pikmin and Pikmin 2.
- Wii Remote and Nunchuck: used to play New Play Control! Pikmin, New Play Control! Pikmin 2 and Pikmin 3.
- Wii U GamePad: used to play Pikmin 3.
- Wii U Pro Controller: used to play Pikmin 3.
- Joy-Con: used to play Pikmin 3 Deluxe and Pikmin 4.
- Nintendo Switch Pro Controller: used to play Pikmin 3 Deluxe and Pikmin 4.
- Nintendo 3DS (and equivalents): used to play Hey! Pikmin.


