The following article or section contains guides The strategies shown are just suggestions.
The Breeding Ground is the twenty-sixth level in Challenge Mode in Pikmin 2
Sublevel 1
Theme : GardenMusic : Yard Time : 100 (200 seconds)Starting Pikmin :
Treasures :
Enemies :
Obstacles :
Plants and fungi :
Others :
Technical sublevel information
Internal cave name
ch_NARI_06start3hard
"Main" object maximum (?)
20
"Treasure" object maximum (?)
1
"Gate " object maximum (?)
0
Dead end unit probability (?)
100
Number of rooms (?)
1
Corridor-to-room ratio (?)
{{{ctrratio}}}
Escape geyser (?)
No
Clogged hole (?) No
Cave units file (?)
1_units_big2_kusachi.txt
Lighting file (?)
kusachi_light_lv0.ini
Background (?)
hiroba (
Cave units (?)
Dead end with item
Three-way crossing
Four-way crossing
Turning corridor
Corridor
Long corridor
Room with 5 exits
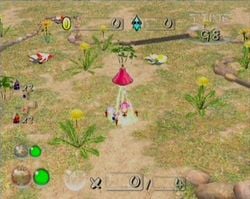
Snatch your 4 Red Pikmin and throw them in the Candypop Buds (Red Pikmin preferred, as they are stronger). Watch out for Creeping Chrysanthemums . The Key should be lying around somewhere.
Sublevel 2
Theme : ConcreteMusic : Concrete 2 Time : +150 (+300 seconds)Treasures :
Enemies :
Obstacles :
Plants and fungi :
Others :
Technical sublevel information
Internal cave name
ch_NARI_06start3hard
"Main" object maximum (?)
4
"Treasure" object maximum (?)
2
"Gate " object maximum (?)
10
Dead end unit probability (?)
100
Number of rooms (?)
3
Corridor-to-room ratio (?)
{{{ctrratio}}}
Escape geyser (?)
No
Clogged hole (?) No
Cave units file (?)
1_NARI_4x4b_conc.txt
Lighting file (?)
normal_light_cha.ini
Background (?)
None
Cave units (?)
Dead end with item
Three-way crossing
Four-way crossing
Turning corridor
Corridor
Long corridor
Room with 4 exits
Lots of Buds here. Make a mix of Blue, Red & Yellow Pikmin and use an ultra-spicy spray if you want. If you want to collect everything, time will get tight. The Key should be behind one of the many gates, as will the hole.
Sublevel 3
Theme : TilesMusic : Tile 1 Time : +180 (+360 seconds)Treasures :
Enemies :
Obstacles :
Plants and fungi :
Others :
Technical sublevel information
Internal cave name
ch_NARI_06start3hard
"Main" object maximum (?)
24
"Treasure" object maximum (?)
5
"Gate " object maximum (?)
3
Dead end unit probability (?)
50
Number of rooms (?)
4
Corridor-to-room ratio (?)
{{{ctrratio}}}
Escape geyser (?)
No (despite having one, in reality)
Clogged hole (?) No
Cave units file (?)
3_units_d_f_ujikou_tile.txt
Lighting file (?)
normal_light_cha.ini
Background (?)
None
Cave units (?)
Dead end
Dead end with item
Dead end with item
Three-way crossing
Four-way crossing
Turning corridor
Corridor
Long corridor
Room with 4 exits Room with 4 exits and a raised edge Room with a pathway with grill
We meet the Shower Room style and you will need all Pikmin types. A Fiery Blowhog should have The Key. There will be lots of Danger Chimes here. Take The Key and exit.
Names in other languages
Language
Name
Meaning
Japanese倍々ゲームの穴?
Spanish (NoA )Críadero
Breeding Ground
Navigation 
