| Red Chasm | |||
|---|---|---|---|

| |||
| Sublevels | 1 | Ultra-bitter sprays | 3 |
| Red Pikmin | 40 | Ultra-spicy sprays | 4 |
| Yellow Pikmin | 0 | ||
| Blue Pikmin | 0 | ||
| White Pikmin | 0 | ||
| Purple Pikmin | 0 | ||
| Bulbmin | 0 | ||
|
The following article or section contains guides. |
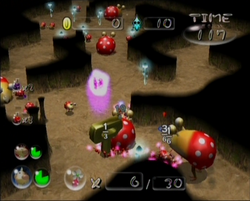
Red Chasm is the eighth level in Pikmin 2's Challenge Mode. Its name is in reference to the huge population of Dwarf Bulborbs, Red Bulborbs, and Red Pikmin on its only sublevel, as well as the red treasures dropped by the enemies.
Sublevel 1
- Theme: Soil
- Music: Electricity
- Time: 130 (260 seconds)
- Starting Pikmin:
- Red Pikmin × 40 (flower)
- Treasures:
- Omniscient Sphere × 15 (inside Dwarf Red Bulborbs)
- Petrified Heart × 4 (inside Red Bulborbs)
- The Key × 1 (inside Red Bulborb)
- Enemies:
- [icon] Dwarf Red Bulborb × 15
- Red Bulborb × 5
- Obstacles:
- None
- Vegetation:
- Common Glowcap × 12
- Others:
- None
Try finding the Bulborb that has The Key. Leaving the course and returning to change the layout will be helpful here. Take out all Bulborbs in the path back to the Research Pod, making it easier by simply luring the Dwarf Red Bulborbs away. It may also be a good idea to carry the bodies of enemies back to the pod, so that they don't get in your way during future fights. Although there is no need to do so for a Pink Flower, you can collect other treasures if you have time by defeating the Bulborbs.
Using ultra-spicy or ultra-bitter spray can help a lot in defeating the Red Bulborbs, particularly if you can hit two at once with ultra-bitter spray. Also, always make sure you can hit them from behind. The Dwarf Red Bulborbs shouldn't give you much trouble, but try to keep track of your Pikmin while they are around, especially if your aim is a pink flower.
| Technical sublevel information | |||||
|---|---|---|---|---|---|
| Internal cave name | ch_MAT_limited_time | ||||
| "Main" object maximum (?) | 20 | ||||
| "Treasure" object maximum (?) | 0 | ||||
| "Gate" object maximum (?) | 0 | ||||
| Dead end unit probability (?) | 0 | ||||
| Number of rooms (?) | 4 | ||||
| Corridor-to-room ratio (?) | 0.1 | ||||
| Escape geyser (?) | No (despite having one, in reality) | ||||
| Clogged hole (?) | No | ||||
| Cave units file (?) | 4_NARI_all_hitode.txt | ||||
| Lighting file (?) | normal_light_cha.ini | ||||
| Background (?) | None | ||||
| Cave units (?) | |||||
| Dead end | Dead end with item | Three-way crossing | Four-way crossing | Turning corridor | Corridor |
| Long corridor | Room with 5 exits | Room with 5 exits | Room with 4 exits | Room with 4 exits | |
| Detailed object list | ||||
|---|---|---|---|---|
| The game spawns these "main" objects: | ||||
| ID | Object | Amount | Fall method | Spawn location |
| 1 | Red Bulborb | 1 | None | "Hard" enemy spots |
| - | The Key | Carried inside entry with ID 1 | ||
| 2 | Red Bulborb | 2 | None | "Hard" enemy spots |
| - | Petrified Heart | Carried inside entry with ID 2 | ||
| 3 | [icon] Dwarf Red Bulborb | 4 | None | "Easy" enemy spots |
| - | Omniscient Sphere | Carried inside entry with ID 3 | ||
| 4 | [icon] Dwarf Red Bulborb | 4 | None | "Easy" enemy spots |
| - | Omniscient Sphere | Carried inside entry with ID 4 | ||
| 5 | [icon] Dwarf Red Bulborb | 4 | None | "Easy" enemy spots |
| - | Omniscient Sphere | Carried inside entry with ID 5 | ||
| 6 | Red Bulborb | 2 | None | Cave unit seams |
| - | Petrified Heart | Carried inside entry with ID 6 | ||
| Alongside it spawns 3 "main" objects (and their treasures). Chances: | ||||
| ID | Object | Chance | Fall method | Spawn location |
| 3 | [icon] Dwarf Red Bulborb | 100% | None | "Easy" enemy spots |
| - | Omniscient Sphere | Carried inside entry with ID 3 | ||
| Then it spawns these "decoration" objects: | ||||
| ID | Object | Amount | Fall method | Spawn location |
| 7 | Common Glowcap | 12 | None | Plant spots |
- For details on how objects are spawned, and how some may fail to spawn, see here.
Names in other languages
| Language | Name | Meaning |
|---|---|---|
| Japanese | 赤の洞窟? | Red Cave |
| French (NoA) | Abîme rouge | Red abyss |
| French (NoE) | Abîme Rouge | Red Abyss |
| Spanish (NoA) | Sima Roja | Red Chasm |
