|
The following article or section contains guides.
The strategies shown are just suggestions.
|
Cryptic Cavern is the eleventh level in Pikmin 2's Challenge Mode. There are 5 sublevels, each with one enemy in the same basic layout.
Sublevel 1
- Theme: Soil
- Music: Toy
- Time: 50 (100 seconds)
- Starting Pikmin:
- Treasures:
- Enemies:
- Obstacles:
- Vegetation:
- Others:
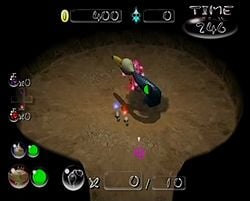
The Doodlebug is hidden in the middle of the second room; it may be poisonous, but is very easy to beat. As soon as it takes a hit from the top, it'll disappear. Grab The Key and hurry to the next level. If it re-hides before you get The Key, search around the middle of the level, particularly closer to the research pod; you should find it again.
Generate sample map →
| Technical sublevel information
|
| Internal cave name
|
ch_MAT_t_hunter_enemy
|
| "Main" object maximum (?)
|
1
|
| "Treasure" object maximum (?)
|
1
|
| "Gate" object maximum (?)
|
0
|
| Dead end unit probability (?)
|
0
|
| Number of rooms (?)
|
2
|
| Corridor-to-room ratio (?)
|
0
|
| Escape geyser (?)
|
No
|
| Clogged hole (?)
|
No
|
| Cave units file (?)
|
1_MAT_north_boss_tsuchi.txt
|
| Lighting file (?)
|
normal_light_cha.ini
|
| Background (?)
|
None
|
| Cave units (?)
|
|
|
|
|
|
|
| Dead end with item |
Three-way crossing |
Four-way crossing |
Turning corridor |
Corridor |
Long corridor
|
|
|
| Circular room with 1 exit
|
| Detailed object list
|
| The game spawns these "main" objects:
|
| ID |
Object |
Amount |
Fall method |
Spawn location
|
| 1
|
 Doodlebug Doodlebug
|
1
|
None
|
"Hard" enemy spots
|
| -
|
 The Key The Key
|
Carried inside entry with ID 1
|
| Then it spawns these "treasure" objects:
|
| ID |
Object |
Amount |
Fall method |
Spawn location
|
| 2
|
 Regal Diamond Regal Diamond
|
1
|
None
|
Treasure spots
|
- For details on how objects are spawned, and how some may fail to spawn, see here.
Sublevel 2
- Theme: Soil
- Music: Soil 1
- Time: +75 (+150 seconds)
- Treasures:
- Enemies:
- Obstacles:
- Vegetation:
- Others:
A Watery Blowhog. Kill it quickly, grab The Key, and off to the hole.
Generate sample map →
| Technical sublevel information
|
| Internal cave name
|
ch_MAT_t_hunter_enemy
|
| "Main" object maximum (?)
|
1
|
| "Treasure" object maximum (?)
|
1
|
| "Gate" object maximum (?)
|
0
|
| Dead end unit probability (?)
|
0
|
| Number of rooms (?)
|
2
|
| Corridor-to-room ratio (?)
|
0
|
| Escape geyser (?)
|
No
|
| Clogged hole (?)
|
No
|
| Cave units file (?)
|
1_MAT_north_tsuchi.txt
|
| Lighting file (?)
|
normal_light_lv0.ini
|
| Background (?)
|
None
|
| Cave units (?)
|
|
|
|
|
|
|
| Dead end |
Dead end with item |
Three-way crossing |
Four-way crossing |
Turning corridor |
Corridor
|
|
|
|
| Long corridor |
Circular room with 1 exit
|
| Detailed object list
|
| The game spawns these "main" objects:
|
| ID |
Object |
Amount |
Fall method |
Spawn location
|
| 1
|
 Watery Blowhog Watery Blowhog
|
1
|
None
|
"Hard" enemy spots
|
| -
|
 The Key The Key
|
Carried inside entry with ID 1
|
| Then it spawns these "treasure" objects:
|
| ID |
Object |
Amount |
Fall method |
Spawn location
|
| 2
|
 Pink Menace Pink Menace
|
1
|
None
|
Treasure spots
|
- For details on how objects are spawned, and how some may fail to spawn, see here.
Sublevel 3
- Theme: Soil
- Music: Concrete 2
- Time: +65 (+130 seconds)
- Treasures:
- Enemies:
- Obstacles:
- Vegetation:
- Others:
An Anode Dweevil. This can be defeated relatively easily with leaders, is hard to hit with Pikmin, and kills them instantly if it attacks, so attacking with leaders is often the safer option.
Generate sample map →
| Technical sublevel information
|
| Internal cave name
|
ch_MAT_t_hunter_enemy
|
| "Main" object maximum (?)
|
1
|
| "Treasure" object maximum (?)
|
1
|
| "Gate" object maximum (?)
|
0
|
| Dead end unit probability (?)
|
0
|
| Number of rooms (?)
|
2
|
| Corridor-to-room ratio (?)
|
0
|
| Escape geyser (?)
|
No
|
| Clogged hole (?)
|
No
|
| Cave units file (?)
|
1_MAT_north_tsuchi.txt
|
| Lighting file (?)
|
normal_light_lv1.ini
|
| Background (?)
|
None
|
| Cave units (?)
|
|
|
|
|
|
|
| Dead end |
Dead end with item |
Three-way crossing |
Four-way crossing |
Turning corridor |
Corridor
|
|
|
|
| Long corridor |
Circular room with 1 exit
|
| Detailed object list
|
| The game spawns these "main" objects:
|
| ID |
Object |
Amount |
Fall method |
Spawn location
|
| 1
|
 Anode Dweevil Anode Dweevil
|
1
|
None
|
"Hard" enemy spots
|
| -
|
 The Key The Key
|
Carried inside entry with ID 1
|
| Then it spawns these "treasure" objects:
|
| ID |
Object |
Amount |
Fall method |
Spawn location
|
| 2
|
 Memorial Shell Memorial Shell
|
1
|
None
|
Treasure spots
|
- For details on how objects are spawned, and how some may fail to spawn, see here.
Sublevel 4

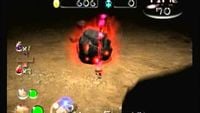
The Fiery Bulblax on the fourth sublevel.
- Theme: Soil
- Music: Soil 2
- Time: +40 (+80 seconds)
- Treasures:
- Enemies:
- Obstacles:
- Vegetation:
- Others:
- See also: Fiery Bulblax strategy.
A Fiery Bulblax. Take the 5 Red Pikmin and use both kind of sprays, or else you are almost guaranteed to lose Pikmin. You will make it just before the Bulblax turns normal. After its defeat, advance to the last sublevel. There are no buried treasures to look for.
Generate sample map →
| Technical sublevel information
|
| Internal cave name
|
ch_MAT_t_hunter_enemy
|
| "Main" object maximum (?)
|
1
|
| "Treasure" object maximum (?)
|
0
|
| "Gate" object maximum (?)
|
0
|
| Dead end unit probability (?)
|
0
|
| Number of rooms (?)
|
2
|
| Corridor-to-room ratio (?)
|
0
|
| Escape geyser (?)
|
No
|
| Clogged hole (?)
|
No
|
| Cave units file (?)
|
1_MAT_north_tsuchi.txt
|
| Lighting file (?)
|
normal_light_lv2.ini
|
| Background (?)
|
None
|
| Cave units (?)
|
|
|
|
|
|
|
| Dead end |
Dead end with item |
Three-way crossing |
Four-way crossing |
Turning corridor |
Corridor
|
|
|
|
| Long corridor |
Circular room with 1 exit
|
| Detailed object list
|
| The game spawns these "main" objects:
|
| ID |
Object |
Amount |
Fall method |
Spawn location
|
| 1
|
 Fiery Bulblax Fiery Bulblax
|
1
|
None
|
"Hard" enemy spots
|
| -
|
 The Key The Key
|
Carried inside entry with ID 1
|
- For details on how objects are spawned, and how some may fail to spawn, see here.
Sublevel 5
- Theme: Soil
- Music: Concrete 3
- Time: +70 (+140 seconds)
- Treasures:
 The Key × 1 (inside Burrowing Snagret)
- Enemies:
- Obstacles:
- Vegetation:
- Others:
- See also: Burrowing Snagret strategy.
A Burrowing Snagret resides here in the last sublevel. Use all the sprays you have left. Always aim for the head, its weak point. When it buries itself in the ground, wait for it to get stuck on emerging, so you have time to aim at the head. When its head is being attacked by a number of Pikmin, the creature will stop attacking to retreat.
Generate sample map →
| Technical sublevel information
|
| Internal cave name
|
ch_MAT_t_hunter_enemy
|
| "Main" object maximum (?)
|
1
|
| "Treasure" object maximum (?)
|
0
|
| "Gate" object maximum (?)
|
0
|
| Dead end unit probability (?)
|
0
|
| Number of rooms (?)
|
2
|
| Corridor-to-room ratio (?)
|
0
|
| Escape geyser (?)
|
Yes
|
| Clogged hole (?)
|
No
|
| Cave units file (?)
|
1_MAT_north_boss_tsuchi.txt
|
| Lighting file (?)
|
normal_light_lv0.ini
|
| Background (?)
|
None
|
| Cave units (?)
|
|
|
|
|
|
|
| Dead end with item |
Three-way crossing |
Four-way crossing |
Turning corridor |
Corridor |
Long corridor
|
|
|
| Circular room with 1 exit
|
| Detailed object list
|
| The game spawns these "main" objects:
|
| ID |
Object |
Amount |
Fall method |
Spawn location
|
| 1
|
 Burrowing Snagret Burrowing Snagret
|
1
|
None
|
"Hard" enemy spots
|
| -
|
 The Key The Key
|
Carried inside entry with ID 1
|
- For details on how objects are spawned, and how some may fail to spawn, see here.
Names in other languages
| Language
|
Name
|
Meaning
|
 Japanese Japanese |
かくしもちの洞窟? |
Treasure Keeper's Cave
|
 French (NoA) French (NoA) |
Terres des mystères |
Mystery lands
|
 French (NoE) French (NoE) |
Terres des Mystères |
Mystery Lands
|
 German German |
Höhle der Geheimnisse |
Cave of Secrets
|
 Italian Italian |
Grotta misteriosa |
Mysterious Cave
|
 Spanish (NoA) Spanish (NoA) |
Caverna Críptica |
Cryptic Cavern
|

 Red Pikmin × 5 (flower)
 White Pikmin × 5 (flower)
 Regal Diamond × 1 (fully buried)
 The Key × 1 (inside Doodlebug)
 Doodlebug × 1
 Pink Menace × 1 (fully buried)
 The Key × 1 (inside Watery Blowhog)
 Watery Blowhog × 1
 Memorial Shell × 1 (fully buried)
 The Key × 1 (inside Anode Dweevil)
 Anode Dweevil × 1
 The Key × 1 (inside Fiery Bulblax)
 Fiery Bulblax × 1
 The Key × 1 (inside Burrowing Snagret)


