Nectar egg
- "Egg" redirects here. For other uses, see Egg (disambiguation).
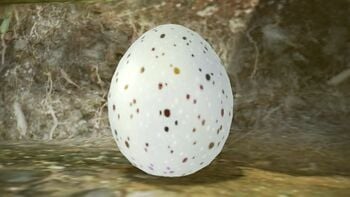
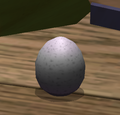
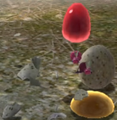
A nectar egg (known as an egg prior to Pikmin 3) is a white, semi-round object found in alcoves of caves, and on specific places aboveground. It is unknown if they come from any kind of creature or plant and it may be possible that they are merely egg-shaped containers. They can be attacked, and when broken, they release nectar, although they can also release other things. The eggs held by Honeywisps in Pikmin 2 function identically to grounded eggs. In Pikmin 4, large versions of nectar eggs can be found. These 'large nectar eggs' release multiple drops of nectar when broken.
To destroy an egg, it must be attacked with Pikmin, punched at a few times with a leader, or destroyed by an enemy projectile, like a Gatling Groink's fireworks.
For Pikmin 2, it is advisable to throw a Purple Pikmin onto an egg, as this will immediately break it and contained Mitites will be instantly defeated. It is also recommended to destroy an egg with a leader, as a Pikmin thrown at the egg may drink the nectar after being called back, wasting it.
Stats
| Game | Weight | Max. carriers |
Seeds | Value | Health | Regen. |
|---|---|---|---|---|---|---|
| N/A | N/A | N/A | N/A | 50 | No | |
| N/A | N/A | N/A | N/A | 45 | No | |
| N/A | N/A | N/A | N/A | No |
Contents
In Pikmin 2, the contents of an egg are picked at random from a list, and they're only chosen on the exact moment the egg breaks, not when the egg is created (i.e. they're not chosen when the area or cave loads). Not every outcome has the same probability of happening.[1] In story mode, if the game decided on a drop of spray nectar, but the player has not yet unlocked that spray, the outcome will instead be changed to a single drop of nectar.[2] The chances (assuming both sprays are unlocked or it's outside of story mode) are detailed in the following table:
| Content | Probability |
|---|---|
| A single drop of nectar | 50% |
| Two drops of nectar | 35% |
| A drop of ultra-bitter spray | 5% |
| A drop of ultra-spicy spray | 5% |
| A group of ten Mitites | 5% |
In Pikmin 3, certain eggs are programmed to always drop certain objects. For example, some of the eggs in the hollowed-out tree in the Tropical Wilds where the Juicy Gaggle is found are pre-programmed to always drop bomb rocks – the only known ones to do so. Other than that, some eggs in Mission Mode always drop ultra-spicy spray. Most eggs in Story mode can drop either nectar or ultra-spicy spray. If ultra-spicy spray has not been discovered, they will only drop nectar, as ultra-bitter spray and Mitites are not present in this game.
In Pikmin 4, eggs can drop nectar, ultra-spicy spray, or raw material. Occasionally, the Sunsquish and the Downy Snagret can be found inside eggs.
Notes
Pikmin 3 Prima Guide
Locations
There are no nectar eggs in the first game, but they can be found in many places in Pikmin 2 and Pikmin 3. Their location in areas is always constant, and they always respawn whenever the area is entered. Underground, there are several sublevels with eggs, some having more than one. Eggs that fall off the ceiling of caves will instantly break when they reach the ground.
The following is a list of the eggs' locations:
Pikmin 2
|
The following article or section is in need of assistance from someone who plays Pikmin 2. |
- Valley of Repose
- A group of three, near the landing site.
- Perplexing Pool
- A group of two, between the Beady Long Legs and the original location of the Yellow Onion.
- A group of three, near the entrance to the Glutton's Kitchen.
- Wistful Wild
- A group of three, on the intersection between the two main parts closest to the landing site.
- A group of four, near the Anti-hiccup Fungus.
- A group of three, near the entrance to the Hole of Heroes.
Pikmin 3
|
The following article or section is in need of assistance from someone who plays Pikmin 3. |
|
The following article or section is in need of assistance from someone who plays Pikmin 3 Deluxe. |
- Tropical Wilds
- A group of seven in the tree stump where the Medusal Slurker holding the Juicy Gaggle is found.
- A group of three in the secondary circular arena the Shaggy Long Legs is fought on.
- A group of three at the end of the meandering path with the Pyroclasmic Slooches.
- Distant Tundra
- A group of eight in the Shaggy Long Legs arena, with one of them hidden under a Flukeweed.
- Twilight River
- One egg is hidden under a Flukeweed near the discovery location of the Winged Onion.
- Formidable Oak
- Most eggs are found on top of the walls inside the oak.
- Tropical Forest (Battle Enemies!)
- One egg is outside the Yellow Onion area at the end of the path.
- Silver Lake (Battle Enemies!)
- One egg is found next to a Red Bulborb at the east end of the drained lake.
- A group of 2 in the southeast between a Red Bulborb and the Yellow Onion.
- A group of 2 north of the blue fragments.
- Thirsty Desert (Battle Enemies!)
- One egg is found in the southeast of the map next to a crystal wall.
- One egg is found in the north of the map next to a crystal wall.
- A group of two next to some Dwarf Red Bulborbs in the northeast.
- A group of two next to some Dwarf Red Bulborbs in the south.
- A group of two in the center of the map next to a geyser.
- Twilight Hollow (Battle Enemies!)
- One egg is found in the center of the lake on a small island.
- One egg is found in the middle of the northern high platform.
- A group of two north of the lake.
- A group of two in the eastern area with the Spotty Bulbear.
- Tropical Wilds Remix
- One egg is found on a small island in the central lake.
- A group of two at the top of the meandering path with the Pyroclasmic Slooch.
- Distant Tundra Remix
- A group of four in the southeast where the Dodge Whistle is found in Story Mode.
- Twilight River Remix
- One egg is found in a Flukeweed in the southernmost point in the map.
- A group of two under Flukeweeds in the southwest part behind an Arachnode.
- Formidable Oak Remix
- A group of two at the north end of the map next to the Rock Candypop Buds.
- A group of two in the center of the map next to Alph's starting location.
- A group of two in the western corridor near a crystal wall.
- A group of two in the western part of the area with 3 Red Bulborbs.
- A group of two at the branch in the southeastern corridor.
- Fortress of Festivity (Battle Enemies!)
- One egg is found southwest of the pizza box on ground level.
- Beastly Caverns (Battle Enemies!)
- A group of two in the eastern tunnel near the Onion.
- A group of two in the western tunnel behind the Phosbat.
- A group of two in the southern tunnel on a ledge.
- Forgotten Cove (Battle Enemies!)
- A group of three southwest of the central Onion.
- Clockwork Chasm (Battle Enemies!)
- One egg is found in the northwest corner of the map.
Pikmin 4
|
The following article or section is in need of assistance from someone who plays Pikmin 4. |
- Primordial Thicket
- The Mud Pit
- Sublevel 2: a single large egg on a small patch of land on the western side of the sublevel.
- Sublevel 3: a group of two next to the landing location.
- Subterranean Swarm
- Sublevel 1: a single large egg next to the landing location.
- Sublevel 2: a single large egg behind a dirt wall in the eastern portion of the sublevel.
- Sublevel 3: a single large egg in a small outcropping.
- Sublevel 5: a large egg next to the landing location. A large egg in an outcropping north of the arena. Two eggs hidden in foliage near the path to the exit.
- Cavern for a King
- Sublevel 2: a group of two in the foliage closest to the landing location.
- Sublevel 3: a group of two in a broken pot passed three Burrowing Snagrets.
- Sublevel 4: a group of two behind two Dwarf Orange Bulborbs, just before the Arctic Cannon Beetle.
- Sublevel 5: a single large egg in the northern portion of the arena.
- Sublevel 7: a group of two next to the landing location.
- Sublevel 9: a single large egg by the exit pipe.
- Sublevel 10: a single large egg on the west side of the arena.
- Sublevel 14: a single large egg before the enemy arena.
- Sublevel 18: a single large egg next to the landing location.
Technical information
| Pikmin 2 technical information (?) | |||
|---|---|---|---|
| Internal name | egg
| ||
| Global properties (List) | |||
| ID | Japanese comment | Property | Value |
| s000 | friction(not used) | Friction | 0.5 |
| s001 | wallReflection | Unknown (wall bounce speed multiplier?) | 0.5 |
| s002 | faceDirAdjust | Unknown | 0.25 |
| s003 | accel | Acceleration | 0.1 |
| s004 | bounceFactor | Unknown (bounce when it hits the ground?) | 0.3 |
| fp00 | ライフ | HP | 50 |
| fp01 | マップとの当り | Unknown (related to slopes) | 10 |
| fp02 | ダメージスケールXZ | Horizontal damage scale | 0.2 |
| fp03 | ダメージスケールY | Vertical damage scale | 0.25 |
| fp04 | ダメージフレーム | Damage scale duration | 0.35 |
| fp05 | 質量 | Unknown (weight?) | 0.5 |
| fp06 | 速度 | Move speed | 30 |
| fp08 | 回転速度率 | Rotation acceleration | 0.1 |
| fp09 | テリトリー | Territory radius | 300 |
| fp10 | ホーム範囲 | "Home" radius | 30 |
| fp11 | プライベート距離 | "Private" radius | 30 |
| fp12 | 視界距離 | Sight radius | 700 |
| fp13 | 視界角度 | FOV | 180 |
| fp14 | 探索距離 | Unknown (exploration radius?) | 0 |
| fp15 | 探索角度 | Unknown (exploration angle?) | 0 |
| fp16 | 振り払い率 | Successful shake rate | 1 |
| fp17 | 振り払い力 | Shake knockback | 150 |
| fp18 | 振り払いダメージ | Shake damage | 0 |
| fp19 | 振り払い範囲 | Shake range | 0 |
| fp20 | 攻撃可能範囲 | Unknown (shock attack max range?) | 30 |
| fp21 | 攻撃可能角度 | Unknown (shock attack max angle?) | 15 |
| fp22 | 攻撃ヒット範囲 | Unknown (attack hit range?) | 30 |
| fp23 | 攻撃ヒット角度 | Unknown (attack hit angle?) | 15 |
| fp24 | 攻撃力 | Attack damage | 10 |
| fp25 | 視界高 | Unknown (height visibility?) | 50 |
| fp26 | 探索高 | Unknown (exploration height?) | 0 |
| fp27 | ライフの高さ | HP wheel height | 40 |
| fp28 | 回転最大速度 | Rotation speed | 10 |
| fp29 | 警戒時間 | Unknown (warning time?) | 0 |
| fp30 | 警戒ライフ | Unknown | 0 |
| fp31 | ライフ回復率 | Regeneration rate | 0 |
| fp32 | LOD半径 | Off-camera radius | 30 |
| fp33 | マップとのあたりポリゴンの選定 | Collision processing radius | 20 |
| fp34 | ピクミンとのあたり | Pikmin damage radius | 7 |
| fp35 | 石化時間 | Petrification duration | 1 |
| fp36 | ヒップドロップダメージ | Purple Pikmin drop damage | 50 |
| fp37 | 地震気絶確立 | Purple Pikmin stun chance | 0 (0%) |
| fp38 | 地震気絶時間 | Purple Pikmin stun time | 10 |
| ip01 | 振り払い打撃A | Shake mode 1 – hit count | 1 |
| ip02 | 振り払い張付1 | Shake mode 1 – Pikmin requirement | 1 |
| ip03 | 振り払い打撃B | Shake mode 2 – hit count | 2 |
| ip04 | 振り払い張付2 | Shake mode 2 – Pikmin requirement | 2 |
| ip05 | 振り払い打撃C | Shake mode 3 – hit count | 5 |
| ip06 | 振り払い張付3 | Shake mode 3 – Pikmin requirement | 3 |
| ip07 | 振り払い打撃D | Shake mode 4 – hit count | 10 |
| Specific properties | |||
| ID | Japanese comment | Property | Value |
| fp01 | 蜜レート | Nectar chance | 0.5 (50%) |
| fp02 | 蜜x2レート | Double nectar chance | 0.35 (35%) |
| fp03 | タマゴムシx10レート | Mitite chance | 0.05 (5%) |
| fp04 | 赤ドーピングレート | Ultra-Spicy drop chance | 0.05 (5%) |
| fp05 | 黒ドーピングレート | Ultra-Bitter drop chance | 0.05 (5%) |
| Pikmin 3 technical information (?) | |
|---|---|
| Internal name | egg
|
| HP | 45 |
| Rock Pikmin throw hits to kill | 1 |
| White Pikmin ingestions to kill | 0 |
| Bomb rock explosions to kill | 1 |
| Bomb rock ingestions to kill | 0 |
| Number of direct hits on top to kill | 0 |
| Damage to leaders | 10 |
| Territory radius | 0 |
| Mission Mode value | 0 |
Gallery
A single egg in a cave, in Pikmin 2.
A group of eggs in the Wistful Wild.
An egg just after being broken, in the Perplexing Pool.
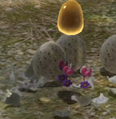
A dose of ultra-spicy spray in an egg in Pikmin 3.
The player next to a large nectar egg in Pikmin 4.
Name in other languages
| Language | Name | Meaning |
|---|---|---|
| Ei | Egg | |
| Nectarovio | From "néctar" (nectar) and a corruption of "ovo" (egg) |


