Gold Nugget: Difference between revisions
m (→See also) Tag: Mobile edit |
m (Rookie rename) Tags: Mobile edit Advanced mobile edit |
||
| (88 intermediate revisions by 21 users not shown) | |||
| Line 1: | Line 1: | ||
{{game icons|p3=y}} | |||
{{infobox p4 treasure | {{infobox p4 treasure | ||
|image = Gold Nugget.jpg| | |treasure_name = Gold Nugget | ||
|series = | |image = Gold Nugget.jpg | ||
|sparklium = 5 | |size = 300px | ||
|weight = 1 | |series = Collection Obsession Series | ||
|max_pikmin = 1 | |sparklium = 5 (individual part) | ||
|location = Aquiferous Summit | |weight = 1 (individual part) | ||
|max_pikmin = 1 (individual part) | |||
|location = [[Aquiferous Summit]], [[Drafty Gallery]], [[Secluded Courtyard]], [[Kingdom of Beasts]], [[Serene Shores]], [[Subzero Sauna]], [[Seafloor Resort]], [[Below-Grade Discotheque]], [[Hero's Hideaway]], [[Doppelgänger's Den]], [[Plunder Palace]], [[Dream Home]], [[Ultimate Testing Range]], [[Cradle of the Beast]], [[Primordial Thicket]], [[Subterranean Swarm]], [[The Mud Pit]] | |||
|dandori_c = [[Dandori Day Care]], [[Hotshock Canyon]], [[Rockaway Cellars]], [[Test Tubs]], [[Ice-Cross Course]], [[Hefty Haulway]], [[Aerial Incinerator]], [[Strategic Freezeway]], [[Planning Pools]], [[Toggle Training]], [[Cliff-Hanger's Hold]], [[Oasis of Order]], [[Trial of the Sage Leaf]] | |||
|dandori_b = [[Trial Run]], [[Battle in a Box]], [[Dandori Castle]], [[Leafy Showdown]], [[Hot Sandy Duel]], [[Final Battle]] | |||
|amount = 470 | |||
}} | }} | ||
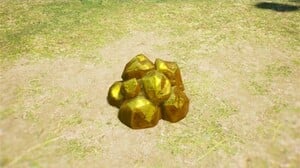
{{ | '''Gold Nuggets''', called '''Nuggets''' in ''Pikmin 3'' and ''Pikmin 4''{{'s}} cave results menu, are [[treasure]]s in {{p4}} and special collectible items in {{p3}}{{'s}} [[Mission Mode]] and [[Side Stories]]. They are found in piles, and each individual nugget in the pile can be [[Carry|carried]] by 1 Pikmin and delivered to the [[S.S. Beagle]] or [[SPERO]]. If not enough Pikmin are directed to the pile to carry all the nuggets, they will walk back and forth between the S.S. Beagle or SPERO and the pile until all have been taken. If a Pikmin carrying a nugget is whistled, the nugget will disappear and return to the pile. Once all nuggets have been taken from the pile, the pile will disappear. In ''Pikmin 3'', each nugget is worth {{pokos|3|y}}. In ''Pikmin 4'', each nugget is worth {{sparklium|p4|5}}, or 1 point in Dandori stages. They are comparable to real-world {{w|gold nugget}}s. On ''Pikmin 4''{{'s}} [[radar]], Gold Nuggets are displayed differently from other treasures, as instead of being represented by a star, they're represented by a small pile of three nuggets, similar to the icon for [[raw material]]s, which have similar carrying mechanics. | ||
==''Pikmin 3'' locations== | |||
===Mission Mode=== | |||
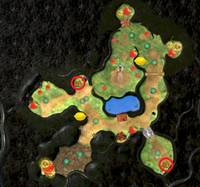
[[File:Tropical Forest Nuggets.png|thumb|left|200px|Nugget locations are highlighted.]] | |||
;[[Tropical Forest]] | |||
* 30 × 2 | |||
{{clear}} | |||
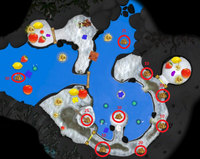
[[File:Silver lake nuggets.png|thumb|left|200px|Nugget locations are highlighted.]] | |||
;[[Silver Lake]] | |||
* 10 × 3 | |||
* 20 × 2 | |||
* 25 × 2 | |||
* 30 × 2 | |||
{{clear}} | |||
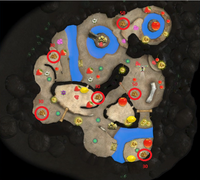
[[File:Thirsty Desert Nuggets.png|thumb|left|200px|Nugget locations are highlighted.]] | |||
;[[Thirsty Desert]] | |||
* 30 × 4 | |||
* 50 × 2 | |||
{{clear}} | |||
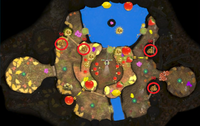
[[File:Twilight Hollow Nuggets.png|thumb|left|200px|Nugget locations are highlighted.]] | |||
;[[Twilight Hollow]] | |||
* 50 × 4 | |||
{{clear}} | |||
[[File:Shaded Garden Nuggets.png|thumb|left|200px|Nugget locations are highlighted.]] | |||
;[[Shaded Garden]] | |||
* 20 × 2 | |||
* 25 × 2 | |||
* 30 × 1 | |||
* 35 × 2 | |||
{{clear}} | |||
;[[Tropical Forest Remix]] | |||
* 50 × 2 | |||
* 100 × 1 | |||
;[[Silver Lake Remix]] | |||
* 10 × 2 (partially buried) | |||
* 20 × 1 | |||
* 25 × 1 (crystal) | |||
* 25 × 1 (buried) | |||
* 50 × 2 (crystal) | |||
;[[Thirsty Desert Remix]] | |||
* 8 × 1 | |||
* 12 × 1 | |||
* 15 × 1 | |||
* 20 × 1 | |||
* 30 × 1 | |||
* 50 × 1 | |||
;[[Twilight Hollow Remix]] | |||
* 20 × 9 | |||
* 40 × 2 | |||
;[[Shaded Garden Remix]] | |||
* 20 × 1 | |||
* 30 × 1 | |||
;[[Fortress of Festivity]] | |||
* 20 × 1 | |||
* 30 × 1 | |||
* 40 × 1 | |||
* 50 × 1 | |||
* 60 × 1 | |||
* 100 × 1 | |||
;[[Beastly Caverns]] | |||
* 20 × 2 | |||
* 40 × 3 | |||
;[[Forgotten Cove]] | |||
* 30 × 1 | |||
* 40 × 1 | |||
;[[Clockwork Chasm]] | |||
* 33 × 1 | |||
* 77 × 1 | |||
===Side Stories=== | |||
;[[Flower Garden]] | |||
* 20 × 1 | |||
* 30 × 1 | |||
;[[Inside Forest]] | |||
* 10 × 1 | |||
* 20 × 2 | |||
;[[Tundra]] | |||
* 10 × 4 | |||
;[[Channel Gone Dry]] | |||
* 30 × 1 | |||
* 50 × 1 | |||
== Collecting the treasure == | == Collecting the treasure == | ||
{{guide}} | {{guide}} | ||
{{ | |||
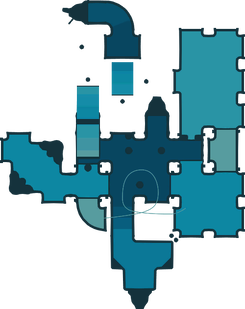
=== Aquiferous Summit === | |||
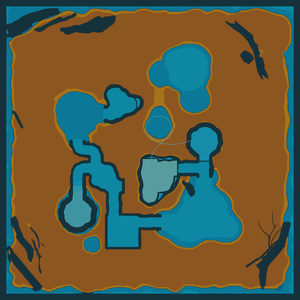
{{location map | width = 320 | height = 220 | image = Aquiferous Summit Sublevel 2 map.png | caption = Location of the Gold Nuggets on sublevel 2 of the [[Aquiferous Summit]]. | icons = | |||
{{map icon | Gold Nugget | v=P4 | 162 | 36}} | |||
}} | |||
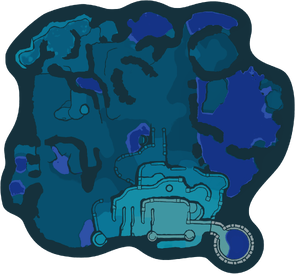
There are 10 Gold Nuggets lying on the ground on the northern section of sublevel 2 of the [[Aquiferous Summit]], next to the [[Memory Fragment (Top Left)]]. The path is blocked by two [[sizzling floor]]s, but the nearby [[paper bag]] can be pushed down to provide a path. | |||
{{clear}} | |||
=== Drafty Gallery === | |||
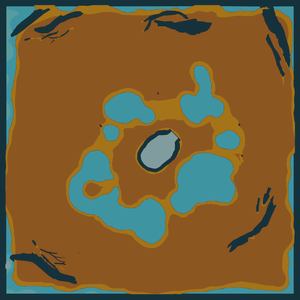
{{location map | width = 300 | height = 240 | image = Drafty Gallery Sublevel 2 map.png | caption = Location of the Gold Nuggets on sublevel 2 of the [[Drafty Gallery]]. | icons = | |||
{{map icon | Gold Nugget | v=P4 | 176 | 108}} | |||
}} | |||
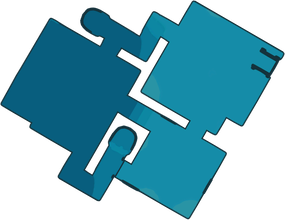
There are 10 Gold Nuggets near the center of sublevel 2 of the [[Drafty Gallery]]. To retrieve them, either use [[Red Pikmin]], or destroy one of the [[fire geyser]]s along the way back to the [[S.S. Beagle]]. | |||
{{clear}} | |||
=== Secluded Courtyard === | |||
{{location map | width = 300 | height = 290 | image = Secluded Courtyard Sublevel 3 map.png | caption = Location of the Gold Nuggets on sublevel 3 of the [[Secluded Courtyard]]. | icons = | |||
{{map icon | Gold Nugget | v=P4 | 248 | 62}} | |||
}} | |||
There are 15 Gold Nuggets in the northeastern corner of sublevel 3 of the [[Secluded Courtyard]]. To collect them, you must throw between 1 and 15 Pikmin at them. The nearby [[Sunsquish]] should be dealt with first, and unless you're using [[Blue Pikmin]], so should the [[water spout]] in the way. | |||
{{clear}} | |||
=== Kingdom of Beasts === | |||
{{location map | width = 275 | height = 280 | image = Kingdom of Beasts Sublevel 4 map.png | caption = Location of the Gold Nuggets on sublevel 4 of the [[Kingdom of Beasts]]. | icons = | |||
{{map icon | Gold Nugget | v=P4 | 12 | 174}} | |||
}} | |||
There are 20 Gold Nuggets lying on the ground on the far western side of sublevel 4 of the [[Kingdom of Beasts]]. To collect them, you must first throw 20 Pikmin onto the metal handle to lower the nearby drawbridge to allow the Pikmin to return to the base. The bridge is guarded by a [[Whiptongue Bulborb]], which should be defeated before anything else. There is also a [[fire geyser]] along the way which can be problematic for non-[[Red Pikmin]]. Then, throw between 1 and 20 Pikmin at the treasure. | |||
{{clear}} | |||
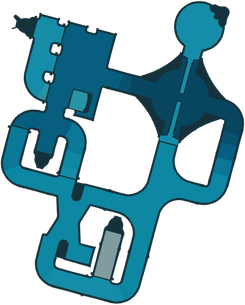
=== Serene Shores === | |||
{{location map | width = 295 | height = 285 | image = Serene Shores low tide map.png | caption = Location of the Gold Nuggets in the [[Serene Shores]]. | icons = | |||
{{map icon | Gold Nugget | v=P4 | 195 | 210}} | |||
{{map icon | Gold Nugget | v=P4 | 117 | 130}} | |||
{{map icon | Gold Nugget | v=P4 | 177 | 85}} | |||
}} | |||
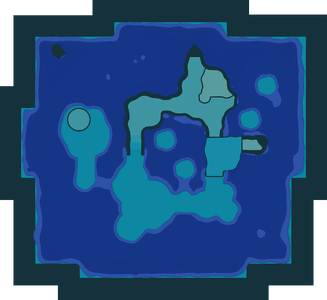
There are 20 Gold Nuggets lying on the sand near the center of the overworld, directly east of the Water's Edge [[base]]. They actually don't exist during high tide. They are guarded by a [[Bloomcap Bloyster]], which should be defeated before attempting to collect this treasure. To collect them, you must throw between 1 and 20 Pikmin during low tide. | |||
There are 20 Gold Nuggets sitting near the lake in the very center of the overworld. They are guarded by a [[Pricklepuff]], who should be defeated before attempting to collect the treasure. These also don't exist at high tide. To collect them, you must throw between 1 and 20 Pikmin during low tide. | |||
There are 20 Gold Nuggets sitting on a ledge beneath the peak of the sandcastle near the south edge of the overworld. There are several [[Armored Cannon Larva]]e that can prevent Pikmin from collecting the nuggets, which should be defeated before progressing. Then, throw between 1 and 20 Pikmin at it. It is recommended that you build the nearby climbing stick first. | |||
{{clear}} | |||
=== Subzero Sauna === | |||
{{location map | width = 285 | height = 230 | image = Subzero Sauna Sublevel 1 map.png | caption = Location of the Gold Nuggets on sublevel 1 of the [[Subzero Sauna]]. | icons = | |||
{{map icon | Gold Nugget | v=P4 | 203 | 165}} | |||
{{map icon | Gold Nugget | v=P4 | 122 | 142}} | |||
}} | |||
There are 5 Gold Nuggets inside of a [[hydro jelly]] right next to the [[S.S. Beagle]] in sublevel 1 of the [[Subzero Sauna]]. To collect them, you must first burst the hydro jelly, then throw 4 Pikmin at them. | |||
There are 10 Gold Nuggets located to the west of the [[S.S. Beagle]], also in sublevel 1. There is a [[poison geyser]] blocking the path, so you must either have an [[Oatchi]] who is immune to poison, or use the [[Candypop Bud]] in a hydro jelly on the west side of the sublevel to obtain [[White Pikmin]] and clear out the hazard. | |||
{{clear}} | |||
=== Seafloor Resort === | |||
{{location map | width = 330 | height = 300 | image = Seafloor Resort Sublevel 1 map.png | caption = Location of the Gold Nuggets on sublevel 1 of the [[Seafloor Resort]]. | icons = | |||
{{map icon | Gold Nugget | v=P4 | 128 | 228}} | |||
}} | |||
There are 15 Gold Nuggets lying in the sand at southwestern corner of sublevel 1 of the [[Seafloor Resort]]. They are guarded by two [[Lesser Spotted Jellyfloat]]s, which should be defeated before attempting to collect this treasure, although it is not strictly necessary. To collect them, you must throw between 1 and 15 Pikmin at them. | |||
{{clear}} | |||
{{location map | width = 300 | height = 300 | image = Seafloor Resort Sublevel 3 map.png | caption = Location of the Gold Nuggets on sublevel 3 of the [[Seafloor Resort]]. | icons = | |||
{{map icon | Gold Nugget | v=P4 | 60 | 123}} | |||
}} | |||
There are 15 Gold Nuggets on the northwestern corner of sublevel 3 of the [[Seafloor Resort]], next to the [[Brush of Foolishness]]. To collect them, you must throw between 1 and 15 Pikmin at the pile. | |||
{{clear}} | |||
=== Below-Grade Discotheque === | |||
{{location map | width = 245 | height = 310 | image = Below-Grade Discotheque Sublevel 3 map.png | caption = Location of the Gold Nuggets on sublevel 3 of the [[Below-Grade Discotheque]]. | icons = | |||
{{map icon | Gold Nugget | v=P4 | 98 | 13}} | |||
}} | |||
There are 10 Gold Nuggets lying on the ground in the northeastern corner of sublevel 3 of the [[Below-Grade Discotheque]]. To collect this treasure, you must excavate the tunnel in the northeast of the sublevel with your Pikmin and/or [[Oatchi]], then throw between 1 and 10 Pikmin at the pile. | |||
{{clear}} | |||
{{location map | width = 245 | height = 310 | image = Below-Grade Discotheque Sublevel 4 map.png | caption = Location of the Gold Nuggets on sublevel 4 of the [[Below-Grade Discotheque]]. | icons = | |||
{{map icon | Gold Nugget | v=P4 | 44 | 147}} | |||
}} | |||
There are 15 Gold Nuggets lying on the ground on the central western part of sublevel 4. To collect them, you must throw between 1 and 15 Pikmin at them. The [[bubble geyser]] should be destroyed first. | |||
{{clear}} | |||
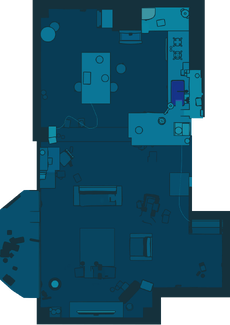
=== Hero's Hideaway === | |||
{{location map | width = 230 | height = 330 | image = Hero's Hideaway map.png | caption = Location of the Gold Nuggets in the [[Hero's Hideaway]]. | icons = | |||
{{map icon | Gold Nugget | v=P4 | 77 | 198}} | |||
}} | |||
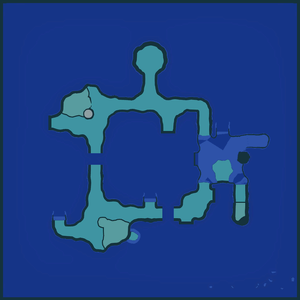
There are 5 Gold Nuggets lying on the eastern armrest of the long couch near the center of the overworld. To collect this treasure, you must use the fan on the nearby table to land on the couch, then throw between 1 and 5 Pikmin at it. | |||
{{clear}} | |||
=== Doppelgänger's Den === | |||
{{location map | width = 270 | height = 300 | image = Doppelgänger's Den Sublevel 2 map.png | caption = Location of the Gold Nuggets on sublevel 2 of the [[Doppelgänger's Den]]. | icons = | |||
{{map icon | Gold Nugget | v=P4 | 167 | 45}} | |||
}} | |||
There are 50 Gold Nuggets sitting on the ground near the pool at the northwest corner of the northeastern room in sublevel 2 of the [[Doppelgänger's Den]]. There are [[water spout]]s nearby which should be eliminated prior to collecting the treasure. To collect the treasure, throw between 1 and 50 Pikmin at it. | |||
{{clear}} | |||
{{location map | width = 310 | height = 310 | image = Doppelgänger's Den Sublevel 3 map.png | caption = Location of the Gold Nuggets on sublevel 3 of the [[Doppelgänger's Den]]. | icons = | |||
{{map icon | Gold Nugget | v=P4 | 296 | 270}} | |||
}} | |||
There are 30 Gold Nuggets sitting on the ground in the southeastern corner of sublevel 3 of the [[Doppelgänger's Den]]. It is guarded by a [[Flighty Joustmite]], which should be defeated before attempting to collect this treasure, although it is not strictly necessary. To collect this treasure, you must throw between 1 and 30 Pikmin at it. | |||
{{clear}} | |||
{{location map | width = 290 | height = 300 | image = Doppelgänger's Den Sublevel 4 map.png | caption = Location of the Gold Nuggets on sublevel 4 of the [[Doppelgänger's Den]]. | icons = | |||
{{map icon | Gold Nugget | v=P4 | 167 | 187}} | |||
}} | |||
There are 10 Gold Nuggets inside of a set of [[jar]]s in the southwest of the arena in sublevel 4 of the [[Doppelgänger's Den]]. To collect them, you must first break the jars with a [[rush]] from [[Oatchi]], then throw between 1 Pikmin at each. | |||
{{clear}} | |||
=== Plunder Palace === | |||
{{location map | width = 300 | height = 300 | image = Plunder Palace Sublevel 2 map.png | caption = Location of the Gold Nuggets on sublevel 2 of the [[Plunder Palace]]. | icons = | |||
{{map icon | Gold Nugget | v=P4 | 231 | 168}} | |||
}} | |||
There are 15 Gold Nuggets in the far eastern corner of sublevel 2 of the [[Plunder Palace]]. They are guarded by a [[Whiptongue Bulborb]], which should be defeated before attempting to collect the treasure. To collect them, you must throw between 1 and 15 Pikmin at the pile. | |||
{{clear}} | |||
{{location map | width = 300 | height = 300 | image = Plunder Palace Sublevel 4 map.png | caption = Location of the Gold Nuggets on sublevel 4 of the [[Plunder Palace]]. | icons = | |||
{{map icon | Gold Nugget | v=P4 | 205 | 105}} | |||
}} | |||
There are 20 Gold Nuggets in a pile atop a box in the northeastern part of sublevel 4 of the [[Plunder Palace]]. To collect them, you must climb up the climbing rope and throw between 1 and 20 Pikmin at it. | |||
{{clear}} | |||
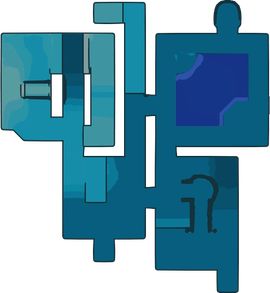
=== Dream Home === | |||
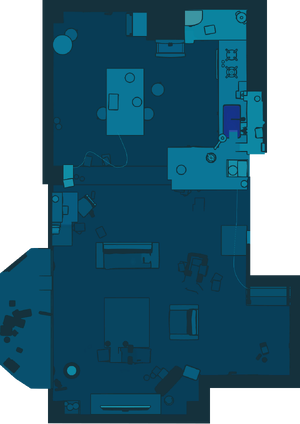
{{location map | width = 300 | height = 300 | image = Dream Home map.png | caption = Location of the Gold Nuggets in the [[Dream Home]]. | icons = | |||
{{map icon | Gold Nugget | v=P4 | 196 | 33}} | |||
{{map icon | Gold Nugget | v=P4 | 100 | 185}} | |||
}} | |||
There are 20 Gold Nuggets lying on the ground near the northeastern corner of sublevel 1 of the [[Dream Home]]. To collect them, you must first excavate the [[tunnel]] from the northwest, then throw between 1 and 20 Pikmin at the pile. | |||
There are also 20 Gold Nuggets lying on the ground behind a corner west of the center of sublevel 1. They are guarded by a [[Jumbo Bulborb]] and two [[Dwarf Bulborbs]], which should be defeated before attempting to collect this treasure. Then, throw between 1 and 20 Pikmin at the pile. | |||
{{clear}} | |||
=== Ultimate Testing Range === | |||
{{location map | width = 260 | height = 300 | image = Ultimate Testing Range Sublevel 4 map.png | caption = Location of the Gold Nuggets on sublevel 4 of the [[Ultimate Testing Range]]. | icons = | |||
{{map icon | Gold Nugget | v=P4 | 164 | 37}} | |||
}} | |||
There are 15 Gold Nuggets lying on the ground in the northeastern corner of sublevel 4 of the [[Ultimate Testing Range]], next to the [[Memory Fragment (Right Edge)]]. To collect them treasure, you must throw between 1 and 15 Pikmin at it. You will need to invert the directions of the conveyor belts or use [[Winged Pikmin]] to collect them. | |||
{{clear}} | |||
=== Cradle of the Beast === | |||
{{location map | width = 300 | height = 250 | image = Cradle of the Beast Sublevel 1 map.png | caption = Location of the Gold Nuggets on sublevel 1 of the [[Cradle of the Beast]]. | icons = | |||
{{map icon | Gold Nugget | v=P4 | 253 | 227}} | |||
}} | |||
There are 15 Gold Nuggets in the southeastern corner of sublevel 1 of the [[Cradle of the Beast]]. They are guarded by a [[Puffy Blowhog]] and a [[Scorchcake]], which should be defeated before attempting to collect the pile. To collect them, you must throw between 1 and 15 Pikmin at it. | |||
{{clear}} | |||
{{location map | width = 240 | height = 310 | image = Cradle of the Beast Sublevel 2 map.png | caption = Location of the Gold Nuggets on sublevel 2 of the [[Cradle of the Beast]]. | icons = | |||
{{map icon | Gold Nugget | v=P4 | 185 | 15}} | |||
}} | |||
There are 15 Gold Nuggets in the northeastern corner of sublevel 2 of the [[Cradle of the Beast]]. They are guarded by a [[Porquillion]], which should be defeated before attempting to collect the pile. To collect them, you must throw between 1 and 15 Pikmin at it. | |||
{{clear}} | |||
=== Primordial Thicket === | |||
{{location map | width = 300 | height = 320 | image = Primordial Thicket map.png | caption = Location of the Gold Nuggets in the [[Primordial Thicket]]. | icons = | |||
{{map icon | Gold Nugget | v=P4 | 230 | 137}} | |||
}} | |||
There are 10 Gold Nuggets engulfed inside of a [[sticky mold]] near the northeast of the overworld, just east of [[Final Battle]]. To collect them, you must first clear out the mushrooms to remove the mold, causing the nuggets to show up. Then, throw 10 Pikmin at them. | |||
{{clear}} | |||
=== Subterranean Swarm === | |||
{{location map | width = 315 | height = 200 | image = Subterranean Swarm Sublevel 4 map.png | caption = Location of the Gold Nuggets on sublevel 4 of the [[Subterranean Swarm]]. | icons = | |||
{{map icon | Gold Nugget | v=P4 | 93 | 109}} | |||
}} | |||
There are 15 Gold Nuggets lying in a fallen-over clay pot west of the center of sublevel 4 of the [[Subterranean Swarm]]. They are guarded by a [[Shearwig]], which should be defeated before attempting to collect it. To collect them, you must first clear the [[sticky mold]] in front of them. This will prompt a swarm of Mitites to emerge from the ground and induce fear in your Pikmin and [[Oatchi]], requiring you to round them all up again. Then, throw between 1 and 15 Pikmin at the pile. | |||
{{clear}} | |||
=== The Mud Pit === | |||
{{location map | width = 300 | height = 300 | image = The Mud Pit Sublevel 1 map.png | caption = Location of the Gold Nuggets on sublevel 1 of the [[The Mud Pit]]. | icons = | |||
{{map icon | Gold Nugget | v=P4 | 73 | 219}} | |||
}} | |||
There are 35 Gold Nuggets lying on a dead end in the southwestern corner of sublevel 1 of [[The Mud Pit]]. They are guarded by an [[Aristocrab Offspring]], which should be defeated before attempting to collect it. To collect this treasure, you must throw between 1 and 35 Pikmin at it. | |||
{{clear}} | |||
{{location map | width = 300 | height = 300 | image = The Mud Pit Sublevel 2 map.png | caption = Location of the Gold Nuggets on sublevel 2 of the [[The Mud Pit]]. | icons = | |||
{{map icon | Gold Nugget | v=P4 | 123 | 115}} | |||
}} | |||
There are 5 Gold Nuggets inside a [[jar]] at the northwest of sublevel 2 of [[The Mud Pit]]. To collect them, you must first break the jar with a [[rush]] from [[Oatchi]], then throw 5 Pikmin at them. If your rush skill is a high enough level, the [[Water Dumple]] inside will also die directly, otherwise you will need to defeat it first. | |||
{{clear}} | |||
== Notes == | == Notes == | ||
===Schnauz's notes=== | === Schnauz's notes === | ||
{{transcript| | {{transcript|{{Notes:Gold Nugget/schnauz}}|block=y}} | ||
=== Olimar's notes === | |||
{{transcript|{{Notes:Gold Nugget/olimar}}|block=y}} | |||
=== Louie's notes === | |||
{{transcript|{{Notes:Gold Nugget/louie}}|block=y}} | |||
===Mission Mode tip=== | |||
{{transcript|Nuggets are beautiful gems that sparkle softly! One of these gives you {{Pokos|3|y}}!|block=y}} | |||
== Gallery == | == Gallery == | ||
{{image}} | {{image|An image of each size of nugget pile.}} | ||
===''Pikmin 3''=== | |||
<gallery> | |||
Pikmin3 Nuggets.png|[[Winged Pikmin]] carrying nuggets in the Mission Mode stage [[Thirsty Desert]]. | |||
Pikmin3ScreenND17.jpg|An early E3 2012 screenshot of Red Pikmin carrying nuggets in [[Tropical Forest]]. | |||
Tropical Forest P3 E3 2012 vine.png|An early E3 2012 screenshot of [[Red Pikmin]] and [[Rock Pikmin]] carrying nuggets down a vine in Tropical Forest. | |||
</gallery> | |||
===''Pikmin 4''=== | |||
<gallery> | |||
Pikmin 4 Gold Nugget.jpg|A pile of gold nuggets as seen in {{p4}}. | |||
P4 Memory Fragment (Top Left) location.jpg|The nuggets in [[Aquiferous Summit]]. | |||
P4 Gold Nuggets Drafty Gallery location.jpg|The nuggets in [[Drafty Gallery]]. | |||
P4 Gold Nuggets Secluded Courtyard location.jpg|The nuggets in [[Secluded Courtyard]]. | |||
P4 Gold Nuggets Kingdom of Beasts location.jpg|The nuggets in the [[Kingdom of Beasts]]. | |||
P4 Gold Nuggets Serene Shores location 1.jpg|Some of the nuggets in [[Serene Shores]]. | |||
P4 Gold Nuggets Serene Shores location 2.jpg|More of the nuggets in Serene Shores. | |||
P4 Gold Nuggets Seafloor Resort 1 location.jpg|The nuggets in [[Seafloor Resort]], sublevel 1. | |||
P4 Brush of Foolishness location.jpg|The nuggets in Seafloor Resort, sublevel 3. | |||
P4 Gold Nuggets Below-Grade Discotheque 3 location.jpg|The nuggets in [[Below-Grade Discotheque]], sublevel 3. | |||
P4 Gold Nuggets Below-Grade Discotheque 4 location.jpg|The nuggets in Below-Grade Discotheque, sublevel 4. | |||
Individual gold nuggets in Subzero Sauna.jpg|Five individual gold nuggets in [[Subzero Sauna]], sublevel 1. | |||
P4 Gold Nuggets Hero's Hideaway location.jpg|The nuggets in [[Hero's Hideaway]]. | |||
P4 Gold Nuggets Plunder Palace 2 location.jpg|The nuggets in [[Plunder Palace]], sublevel 2. | |||
Pikmin 4 player character carrying a gold nugget.jpg|200px|The rookie Rescue Officer carrying a gold nugget. | |||
P4 Gold Nugget Closer Look.jpg|A closer look at a Gold Nugget in the [[Treasure Catalog]]. | |||
</gallery> | |||
===''Other''=== | |||
<gallery> | <gallery> | ||
P3 Carrying Nuggets Artwork.jpg|''Pikmin 3'' concept art of Pikmin carrying nuggets. | |||
GoldNuggets.jpg|Gold nuggets in real life. | |||
</gallery> | </gallery> | ||
== Names in other languages == | == Names in other languages == | ||
;Nugget (''Pikmin 3'') | |||
{{foreignname | {{foreignname | ||
|Jap | |Jap=キンカイ | ||
|JapR = | |JapR=Kinkai | ||
|JapM = | |JapM=Gold nugget | ||
|ChiTrad | |ChiTrad=金塊 | ||
|ChiTradR = | |ChiTradR= | ||
|ChiTradM = | |ChiTradM=Gold nugget | ||
| | |ChiSimp=金块 | ||
| | |ChiSimpR= | ||
|Fra | |ChiSimpM=Gold nugget | ||
|FraM = | |Fra=Pépite | ||
|Ger | |FraM=Nugget | ||
|GerM = | |Ger=Goldklumpen | ||
|Ita | |GerM=Goldclunk | ||
|ItaM = | |Ita=Pepite | ||
|Kor | |ItaM=Nugget | ||
|KorR = | |Kor=금괴 | ||
|KorM = | |KorR=Geumgwi | ||
|KorM=Gold nugget | |||
|Spa=Pepita de oro | |||
|Spa | |SpaM=Gold nugget | ||
|SpaM = | |||
}} | }} | ||
== See also == | ;Gold Nugget (''Pikmin 4'') | ||
*[[ | {{foreignname | ||
|Jap = キンカイ | |||
|JapR = Kinkai | |||
|JapM = Gold Nugget | |||
|ChiTrad = 金塊 | |||
|ChiTradR = Jīnkuài | |||
|ChiTradM = Gold Nugget | |||
|ChiSimp = 金块 | |||
|ChiSimpR = Jīnkuài | |||
|ChiSimpM = Gold Nugget | |||
|Dut = Goudklomp | |||
|DutM = Gold nugget | |||
|Fra = Pépite d'or | |||
|FraM = Gold nugget | |||
|Ger = Goldklumpen | |||
|GerM = Gold Nugget | |||
|Ita = Pepite | |||
|ItaM = Nugget | |||
|Kor = 금괴 | |||
|KorR = Geumgoe | |||
|KorM = Gold Nugget | |||
|Por = Pepita de ouro | |||
|PorM = Gold nugget | |||
|Spa = Pepita de oro | |||
|SpaM = Gold nugget | |||
}} | |||
==Trivia== | |||
*In the E3 2012 demo of ''Pikmin 3'', nuggets were worth {{pokos|5|y}}.{{cite youtube|PejuG2W2hV4|where Rock Pikmin carry nuggets worth {{pokos|5}} to the [[SPERO]]|m=7|s=52}} | |||
==See also== | |||
* [[Golden Vaulting Table]] | |||
* [[Golden Grenade]] | |||
* [[Golden Sunseed]] | |||
* [[Golden Sniffer]] | |||
* [[Raw material]] | |||
* [[Dawn Pustules]] | |||
* [[Dusk Pustules]] | |||
==References== | |||
{{refs}} | |||
{{Serene Shores}} | |||
{{Hero's Hideaway}} | |||
{{Primordial Thicket}} | |||
{{p4 treasures}} | {{p4 treasures}} | ||
[[Category:Mission Mode]] | |||
[[Category:Side Stories]] | |||
[[Category:Dandori Challenge]] | |||
[[Category:Trial of the Sage Leaf]] | |||
[[Category:Dandori Battle]] | |||
Latest revision as of 09:19, December 2, 2024
| Gold Nugget Pikmin 4 treasure | |
|---|---|
| |
| Series | Collection Obsession Series |
| Value | |
| Weight | 1 (individual part) |
| Maximum carriers | 1 (individual part) |
| Locations | Aquiferous Summit, Drafty Gallery, Secluded Courtyard, Kingdom of Beasts, Serene Shores, Subzero Sauna, Seafloor Resort, Below-Grade Discotheque, Hero's Hideaway, Doppelgänger's Den, Plunder Palace, Dream Home, Ultimate Testing Range, Cradle of the Beast, Primordial Thicket, Subterranean Swarm, The Mud Pit |
| Dandori Challenge stages | Dandori Day Care, Hotshock Canyon, Rockaway Cellars, Test Tubs, Ice-Cross Course, Hefty Haulway, Aerial Incinerator, Strategic Freezeway, Planning Pools, Toggle Training, Cliff-Hanger's Hold, Oasis of Order, Trial of the Sage Leaf |
| Dandori Battle stages | Trial Run, Battle in a Box, Dandori Castle, Leafy Showdown, Hot Sandy Duel, Final Battle |
| Total amount | 470 |
Gold Nuggets, called Nuggets in Pikmin 3 and Pikmin 4's cave results menu, are treasures in Pikmin 4 and special collectible items in Pikmin 3's Mission Mode and Side Stories. They are found in piles, and each individual nugget in the pile can be carried by 1 Pikmin and delivered to the S.S. Beagle or SPERO. If not enough Pikmin are directed to the pile to carry all the nuggets, they will walk back and forth between the S.S. Beagle or SPERO and the pile until all have been taken. If a Pikmin carrying a nugget is whistled, the nugget will disappear and return to the pile. Once all nuggets have been taken from the pile, the pile will disappear. In Pikmin 3, each nugget is worth ![]() × 3. In Pikmin 4, each nugget is worth
× 3. In Pikmin 4, each nugget is worth ![]() × 5, or 1 point in Dandori stages. They are comparable to real-world gold nuggets. On Pikmin 4's radar, Gold Nuggets are displayed differently from other treasures, as instead of being represented by a star, they're represented by a small pile of three nuggets, similar to the icon for raw materials, which have similar carrying mechanics.
× 5, or 1 point in Dandori stages. They are comparable to real-world gold nuggets. On Pikmin 4's radar, Gold Nuggets are displayed differently from other treasures, as instead of being represented by a star, they're represented by a small pile of three nuggets, similar to the icon for raw materials, which have similar carrying mechanics.
Pikmin 3 locations[edit]
Mission Mode[edit]
- 30 × 2
- 10 × 3
- 20 × 2
- 25 × 2
- 30 × 2
- 30 × 4
- 50 × 2
- 50 × 4
- 20 × 2
- 25 × 2
- 30 × 1
- 35 × 2
- 50 × 2
- 100 × 1
- 10 × 2 (partially buried)
- 20 × 1
- 25 × 1 (crystal)
- 25 × 1 (buried)
- 50 × 2 (crystal)
- 8 × 1
- 12 × 1
- 15 × 1
- 20 × 1
- 30 × 1
- 50 × 1
- 20 × 9
- 40 × 2
- 20 × 1
- 30 × 1
- 20 × 1
- 30 × 1
- 40 × 1
- 50 × 1
- 60 × 1
- 100 × 1
- 20 × 2
- 40 × 3
- 30 × 1
- 40 × 1
- 33 × 1
- 77 × 1
Side Stories[edit]
- 20 × 1
- 30 × 1
- 10 × 1
- 20 × 2
- 10 × 4
- 30 × 1
- 50 × 1
Collecting the treasure[edit]
|
The following article or section contains guides. |
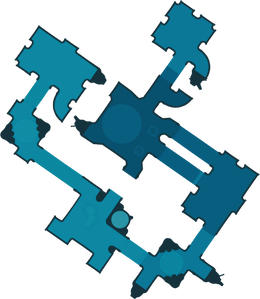
Aquiferous Summit[edit]
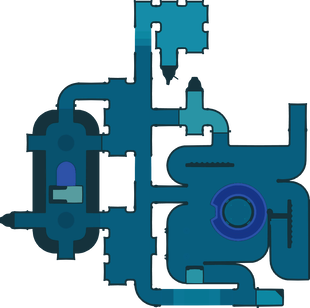
There are 10 Gold Nuggets lying on the ground on the northern section of sublevel 2 of the Aquiferous Summit, next to the Memory Fragment (Top Left). The path is blocked by two sizzling floors, but the nearby paper bag can be pushed down to provide a path.
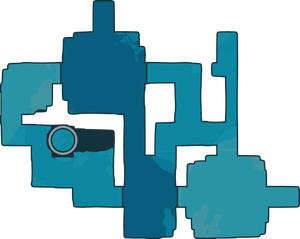
Drafty Gallery[edit]
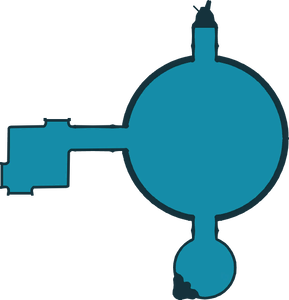
There are 10 Gold Nuggets near the center of sublevel 2 of the Drafty Gallery. To retrieve them, either use Red Pikmin, or destroy one of the fire geysers along the way back to the S.S. Beagle.
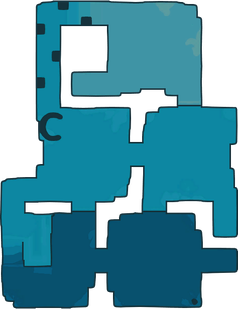
Secluded Courtyard[edit]
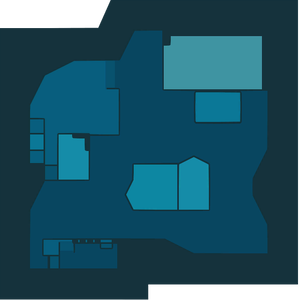
There are 15 Gold Nuggets in the northeastern corner of sublevel 3 of the Secluded Courtyard. To collect them, you must throw between 1 and 15 Pikmin at them. The nearby Sunsquish should be dealt with first, and unless you're using Blue Pikmin, so should the water spout in the way.
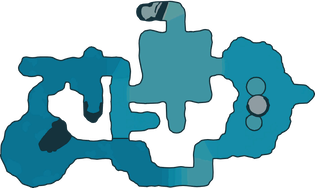
Kingdom of Beasts[edit]
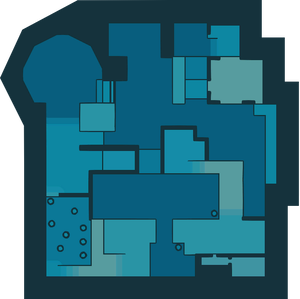
There are 20 Gold Nuggets lying on the ground on the far western side of sublevel 4 of the Kingdom of Beasts. To collect them, you must first throw 20 Pikmin onto the metal handle to lower the nearby drawbridge to allow the Pikmin to return to the base. The bridge is guarded by a Whiptongue Bulborb, which should be defeated before anything else. There is also a fire geyser along the way which can be problematic for non-Red Pikmin. Then, throw between 1 and 20 Pikmin at the treasure.
Serene Shores[edit]
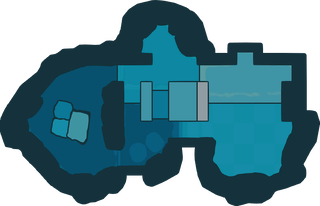
There are 20 Gold Nuggets lying on the sand near the center of the overworld, directly east of the Water's Edge base. They actually don't exist during high tide. They are guarded by a Bloomcap Bloyster, which should be defeated before attempting to collect this treasure. To collect them, you must throw between 1 and 20 Pikmin during low tide.
There are 20 Gold Nuggets sitting near the lake in the very center of the overworld. They are guarded by a Pricklepuff, who should be defeated before attempting to collect the treasure. These also don't exist at high tide. To collect them, you must throw between 1 and 20 Pikmin during low tide.
There are 20 Gold Nuggets sitting on a ledge beneath the peak of the sandcastle near the south edge of the overworld. There are several Armored Cannon Larvae that can prevent Pikmin from collecting the nuggets, which should be defeated before progressing. Then, throw between 1 and 20 Pikmin at it. It is recommended that you build the nearby climbing stick first.
Subzero Sauna[edit]
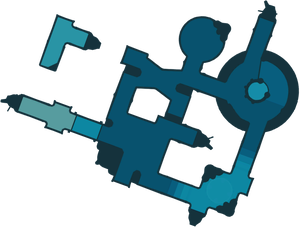
There are 5 Gold Nuggets inside of a hydro jelly right next to the S.S. Beagle in sublevel 1 of the Subzero Sauna. To collect them, you must first burst the hydro jelly, then throw 4 Pikmin at them.
There are 10 Gold Nuggets located to the west of the S.S. Beagle, also in sublevel 1. There is a poison geyser blocking the path, so you must either have an Oatchi who is immune to poison, or use the Candypop Bud in a hydro jelly on the west side of the sublevel to obtain White Pikmin and clear out the hazard.
Seafloor Resort[edit]
There are 15 Gold Nuggets lying in the sand at southwestern corner of sublevel 1 of the Seafloor Resort. They are guarded by two Lesser Spotted Jellyfloats, which should be defeated before attempting to collect this treasure, although it is not strictly necessary. To collect them, you must throw between 1 and 15 Pikmin at them.
There are 15 Gold Nuggets on the northwestern corner of sublevel 3 of the Seafloor Resort, next to the Brush of Foolishness. To collect them, you must throw between 1 and 15 Pikmin at the pile.
Below-Grade Discotheque[edit]
There are 10 Gold Nuggets lying on the ground in the northeastern corner of sublevel 3 of the Below-Grade Discotheque. To collect this treasure, you must excavate the tunnel in the northeast of the sublevel with your Pikmin and/or Oatchi, then throw between 1 and 10 Pikmin at the pile.
There are 15 Gold Nuggets lying on the ground on the central western part of sublevel 4. To collect them, you must throw between 1 and 15 Pikmin at them. The bubble geyser should be destroyed first.
Hero's Hideaway[edit]
There are 5 Gold Nuggets lying on the eastern armrest of the long couch near the center of the overworld. To collect this treasure, you must use the fan on the nearby table to land on the couch, then throw between 1 and 5 Pikmin at it.
Doppelgänger's Den[edit]
There are 50 Gold Nuggets sitting on the ground near the pool at the northwest corner of the northeastern room in sublevel 2 of the Doppelgänger's Den. There are water spouts nearby which should be eliminated prior to collecting the treasure. To collect the treasure, throw between 1 and 50 Pikmin at it.
There are 30 Gold Nuggets sitting on the ground in the southeastern corner of sublevel 3 of the Doppelgänger's Den. It is guarded by a Flighty Joustmite, which should be defeated before attempting to collect this treasure, although it is not strictly necessary. To collect this treasure, you must throw between 1 and 30 Pikmin at it.
There are 10 Gold Nuggets inside of a set of jars in the southwest of the arena in sublevel 4 of the Doppelgänger's Den. To collect them, you must first break the jars with a rush from Oatchi, then throw between 1 Pikmin at each.
Plunder Palace[edit]
There are 15 Gold Nuggets in the far eastern corner of sublevel 2 of the Plunder Palace. They are guarded by a Whiptongue Bulborb, which should be defeated before attempting to collect the treasure. To collect them, you must throw between 1 and 15 Pikmin at the pile.
There are 20 Gold Nuggets in a pile atop a box in the northeastern part of sublevel 4 of the Plunder Palace. To collect them, you must climb up the climbing rope and throw between 1 and 20 Pikmin at it.
Dream Home[edit]
There are 20 Gold Nuggets lying on the ground near the northeastern corner of sublevel 1 of the Dream Home. To collect them, you must first excavate the tunnel from the northwest, then throw between 1 and 20 Pikmin at the pile.
There are also 20 Gold Nuggets lying on the ground behind a corner west of the center of sublevel 1. They are guarded by a Jumbo Bulborb and two Dwarf Bulborbs, which should be defeated before attempting to collect this treasure. Then, throw between 1 and 20 Pikmin at the pile.
Ultimate Testing Range[edit]
There are 15 Gold Nuggets lying on the ground in the northeastern corner of sublevel 4 of the Ultimate Testing Range, next to the Memory Fragment (Right Edge). To collect them treasure, you must throw between 1 and 15 Pikmin at it. You will need to invert the directions of the conveyor belts or use Winged Pikmin to collect them.
Cradle of the Beast[edit]
There are 15 Gold Nuggets in the southeastern corner of sublevel 1 of the Cradle of the Beast. They are guarded by a Puffy Blowhog and a Scorchcake, which should be defeated before attempting to collect the pile. To collect them, you must throw between 1 and 15 Pikmin at it.
There are 15 Gold Nuggets in the northeastern corner of sublevel 2 of the Cradle of the Beast. They are guarded by a Porquillion, which should be defeated before attempting to collect the pile. To collect them, you must throw between 1 and 15 Pikmin at it.
Primordial Thicket[edit]
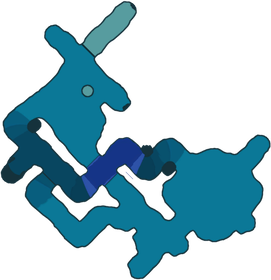
There are 10 Gold Nuggets engulfed inside of a sticky mold near the northeast of the overworld, just east of Final Battle. To collect them, you must first clear out the mushrooms to remove the mold, causing the nuggets to show up. Then, throw 10 Pikmin at them.
Subterranean Swarm[edit]
There are 15 Gold Nuggets lying in a fallen-over clay pot west of the center of sublevel 4 of the Subterranean Swarm. They are guarded by a Shearwig, which should be defeated before attempting to collect it. To collect them, you must first clear the sticky mold in front of them. This will prompt a swarm of Mitites to emerge from the ground and induce fear in your Pikmin and Oatchi, requiring you to round them all up again. Then, throw between 1 and 15 Pikmin at the pile.
The Mud Pit[edit]
There are 35 Gold Nuggets lying on a dead end in the southwestern corner of sublevel 1 of The Mud Pit. They are guarded by an Aristocrab Offspring, which should be defeated before attempting to collect it. To collect this treasure, you must throw between 1 and 35 Pikmin at it.
There are 5 Gold Nuggets inside a jar at the northwest of sublevel 2 of The Mud Pit. To collect them, you must first break the jar with a rush from Oatchi, then throw 5 Pikmin at them. If your rush skill is a high enough level, the Water Dumple inside will also die directly, otherwise you will need to defeat it first.
Notes[edit]
Schnauz's notes[edit]
Olimar's notes[edit]
Louie's notes[edit]
Mission Mode tip[edit]
Gallery[edit]
|
This article or section is in need of more images. Particularly: |
Pikmin 3[edit]
Winged Pikmin carrying nuggets in the Mission Mode stage Thirsty Desert.
An early E3 2012 screenshot of Red Pikmin carrying nuggets in Tropical Forest.
An early E3 2012 screenshot of Red Pikmin and Rock Pikmin carrying nuggets down a vine in Tropical Forest.
Pikmin 4[edit]
A pile of gold nuggets as seen in Pikmin 4.
The nuggets in Aquiferous Summit.
The nuggets in Drafty Gallery.
The nuggets in Secluded Courtyard.
The nuggets in the Kingdom of Beasts.
Some of the nuggets in Serene Shores.
The nuggets in Seafloor Resort, sublevel 1.
The nuggets in Below-Grade Discotheque, sublevel 3.
Five individual gold nuggets in Subzero Sauna, sublevel 1.
The nuggets in Hero's Hideaway.
The nuggets in Plunder Palace, sublevel 2.
A closer look at a Gold Nugget in the Treasure Catalog.
Other[edit]
Names in other languages[edit]
- Nugget (Pikmin 3)
| Language | Name | Meaning |
|---|---|---|
| キンカイ? Kinkai |
Gold nugget | |
(traditional) |
金塊 | Gold nugget |
(simplified) |
金块 | Gold nugget |
| Pépite | Nugget | |
| Goldklumpen | Goldclunk | |
| Pepite | Nugget | |
| 금괴 Geumgwi |
Gold nugget | |
| Pepita de oro | Gold nugget |
- Gold Nugget (Pikmin 4)
| Language | Name | Meaning |
|---|---|---|
| キンカイ? Kinkai |
Gold Nugget | |
(traditional) |
金塊 Jīnkuài |
Gold Nugget |
(simplified) |
金块 Jīnkuài |
Gold Nugget |
| Goudklomp | Gold nugget | |
| Pépite d'or | Gold nugget | |
| Goldklumpen | Gold Nugget | |
| Pepite | Nugget | |
| 금괴 Geumgoe |
Gold Nugget | |
| Pepita de ouro | Gold nugget | |
| Pepita de oro | Gold nugget |
Trivia[edit]
- In the E3 2012 demo of Pikmin 3, nuggets were worth
 × 5.[1]
See also[edit]
- Golden Vaulting Table
- Golden Grenade
- Golden Sunseed
- Golden Sniffer
- Raw material
- Dawn Pustules
- Dusk Pustules
References[edit]
- ^ YouTube video where Rock Pikmin carry nuggets worth
 × 5 to the SPERO (at 07:52)
| Hero's Hideaway | ||||||||||||||||||||||||||||||||
|---|---|---|---|---|---|---|---|---|---|---|---|---|---|---|---|---|---|---|---|---|---|---|---|---|---|---|---|---|---|---|---|---|
|
Click an object |
| |||||||||||||||||||||||||||||||
| Primordial Thicket | ||||||||||||||||||||||||
|---|---|---|---|---|---|---|---|---|---|---|---|---|---|---|---|---|---|---|---|---|---|---|---|---|
|
Click an object |
| |||||||||||||||||||||||
| Treasure Catalog | |
|---|---|
| Rubber Cutie Series | Universal Rubber Cutie • Planetary Rubber Cutie • Stately Rubber Cutie • Dapper Rubber Cutie |
| Sweet Tooth Series | Sweet Stumble-Not • Sweet Torrent • Deceptive Snack • Cookie of Nibbled Circles • Cookie of Prosperity • Vanishing Cookie • Love's Fortune Cookie • Hearty Container • Jiggle-Jiggle • S.S. Berry • S.S. Peppermint • S.S. Chocolate |
| Dazzle Series | Unbreakable Promise • Golden Vaulting Table • Olfactory Sculpture • Princess Pearl • Sticky Jewel • Hoop of Healing • Hoop of Passion • Hoop of Fortune |
| Recreation Recollection Series | Tandem Trainer • Sphere of Fuzzy Feelings • Orbital Communication Sphere • Orb of Destruction |
| Gimme Gimme Series | Greed-Inducement Device • Disk of Joyous Wisdom • Disk of Angry Wisdom • Disk of Sorrowful Wisdom • Disk of Amusing Wisdom • Disk of Surprising Wisdom |
| Modern Amenities Series | Secured Satchel • Floral Instigator • Fastening Item • Trap Lid • Perforated Raft • Gift of Friendship |
| Memory Fragment Series | Memory Fragment (Top Left) • Memory Fragment (Top-ish) • Memory Fragment (Top...Probably?) • Memory Fragment (Top Right) • Memory Fragment (Left Edge) • Memory Fragment (Center Left) • Memory Fragment (Center Right) • Memory Fragment (Right Edge) • Memory Fragment (Bottom Left) • Memory Fragment (Bottom-ish) • Memory Fragment (Bottom...Probably?) • Memory Fragment (Bottom Right) |
| Extravagant Breakfast Series | Condensed Sunshine • Flaky Temptation • Cushion Cake • Puzzle Snack |
| Sacred Sphere Series | Sphere of Desire • Sphere of Family • Sphere of Heart • Sphere of Beginnings • Sphere of Vitality • Sphere of Calm • Sphere of Good Fortune • Sphere of Trust • Sphere of Support • Sphere of Truth |
| Spring Crop Series | Sunseed Berry • Cupid's Grenade • Searing Acidshock • Velvety Dreamdrop • Astringent Clump • Wayward Moon |
| Summer Fruit Series | Lesser Mock Bottom • Mock Bottom • Dawn Pustules • Dusk Pustules • Crimson Banquet • Juicy Gaggle |
| Autumn Harvest Series | Zest Bomb • Delectable Bouquet • Portable Sunset • Tremendous Sniffer • Crunchy Deluge • Disguised Delicacy • Blonde Impostor |
| Winter Reserve Series | Merciless Extractor • Citrus Lump • Face Wrinkler • Pocked Airhead • Insect Condo |
| Tropical Pickings Series | Dapper Blob • Scaly Custard • Seed Hive • Stellar Extrusion • Heroine's Tear • Slapstick Crescent • Fire-Breathing Feast |
| Bedtime Series | Dusty Bed • Doggy Bed • Birdy Bed • Fishy Bed |
| Three Generations Series | Granddaughter Doll Head • Gifting Vase • Daughter Doll Head • Mooching Vase • Mama Doll Head • Empty Vase |
| Gourmet Series | King of Meats • Maestro of Flavor • Belted Delicacy • Fish-Bed Snack • The Four Grill Brothers |
| Soulful Musician Series | Harmonic Synthesizer • Spouse Alert • Path Creator • Time Marker • Wind Detector • Ambiguous Hostel • Mega Horn • Mechanical Harp (Memory Song) • Mechanical Harp (Lullabies) • Mechanical Harp (Windmills) • Emperor Whistle • Shake-a-Smile • Amplified Amplifier |
| Great Adventure Series | Double Dragon-Eyed Scope • Temporal Mechanism • Director of Destiny • Detective's Truth Seeker |
| Roundabout Express Series | Unlimited Locomotive • Middle-Management Tank Car • Leisure Car • Life Station • Straight-and-Narrow Track • Turn-of-Events Track • Back-at-the-Beginning Track • Thrill-Ride Track |
| Oral Arguments Series | Mouth of Lies • Monster Teeth • Brush of Wisdom • Brush of Foolishness • False Lollipop • Maternal Sculpture • Bathing Pool |
| Assembled Courage Series | Think-Tank Combobot • Nexus Combobot • Fist-Force Combobot • Peacemaker Combobot • Kick-Start Combobot • Sure-Footed Combobot |
| Soulful Artist Series | Uniquely You Goo • Decorative Goo • Illumination Goo • Noble Goo • True Goo • Ambiguous Goo • Captivation Goo • Refreshing Goo • Neon Goo |
| Ancient Secrets Series | Lamp of Inspiration • Beckoning Mannequin • Ancient Statue Head • Contemplation Station • Unfinished Statue • Persistence Machine • Giant's Fossil • Expression Hider • Buddy Display |
| Gifts from the Sages Series | Heat Sensor • Internal-Clock Measurer • Solar-Powered Computing Machine • Number Jumper |
| Paleontology Series | Octoplus • Mystery Squish Fish • Newtolite Shell • Slipper-Bug Fossil |
| Point of Honor Series | Relentless Spear • Noble Bident • Shattering Lance |
| Newly Nostalgic Series | Micromanagement Station • Glinty Circular Disc • Life Controller • Spinning Memories Plank • Masterpiece Plank • Telekinesis Detector • Connection Detector • Creativity Conduit • Stone of Advancement • Winged Freedom Sculpture |
| Ultra-Hyper-Technology Series | Dimension Converter • Soul Reverberator • Personal-Injury Plank • Don't-See-It Specs |
| Nature's Candy Series | Love Nugget • Crush Nugget • Anxious Sprout • Crew-Cut Gourd • Child of the Earth • Daughter of the Earth • Mysterious Carriage • Snack Bean • Foolish Fruit |
| Sword & Shield Series | Blast Shield • Ring-of-Return Shield • Satellite Shield • Heroic Shield • Shooting-Star Shield • Heart Sword • Spirit Sword • Ice Sword • Heroic Sword • Bright Sword |
| Toys of Giants Series | Unfloatable Boat • Faux Fishy • Space Spinner • Sweat-Soaked Blue Bird • Skin of the Phoenix • Priceless Bird • Aspiration-Ritual Ball • Aspiration-Ritual Pole • Divine Balloon |
| Collection Obsession Series | Deity's Portrait • Devil's Portrait • Courage Emblem • Power Emblem • Wisdom Emblem • Love Emblem • Money Emblem • Work Emblem • Gold Nugget |
| Hands of Fate Series | Long-Shot Totem • Go-with-the-Flow Totem • Chance Totem • Difficult-Choice Totem • Talisman of Life (Crane) • Talisman of Life (Cherry Blossom) • Talisman of Life (Moon) • Talisman of Life (Rain) • Talisman of Life (Phoenix) |
