Cradle of the Beast
| Cradle of the Beast | |
|---|---|
| |
| Location | Giant's Hearth |
| Sublevels | 3 |
| Rescues | 1 |
| Treasures | 12 |
| Onions | 0 |
| Suggested Pikmin | |
|
The following article or section contains guides. |
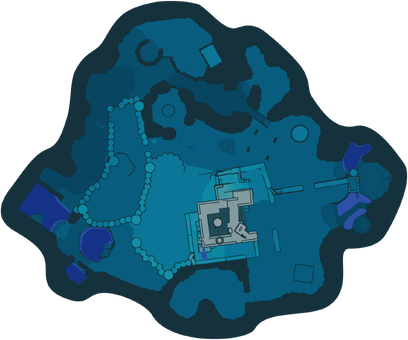
The Cradle of the Beast is a cave in the Giant's Hearth in Pikmin 4. It is named for its boss, the Empress Bulblax, which in this cave gives birth to Bulborb Larvae. The second heaviest treasure in the game is found here, so Purple Pikmin are useful for carrying as well for stomping on smaller enemies. This cave has ![]() × 1,305 worth of treasure.
× 1,305 worth of treasure.
How to reach[edit]
The entrance to the Cradle of the Beast resides in the southern part of the Giant's Hearth, guarded by a Bloomcap Bloyster and surrounded by dried plants. There are two paths the player can take to reach this cave, both of which require using fire starters to reach. One path is just south of the Abandoned Throne base and is the shortest of the two. The player will have to deal with a sprinkler system and a Masterhop before they burn away the hay bales leading directly to the cave. The second path is longer but easier. The only obstacles in this path are a pond with Wolpoles that must be drained to get a fire starter to the dried plants on the eastern edge and a pushable box near a Bug-Eyed Crawmad den. The cave can then be accessed by burning the last set of dried plants surrounding it.
Notes[edit]
Louie's Voyage Log[edit]
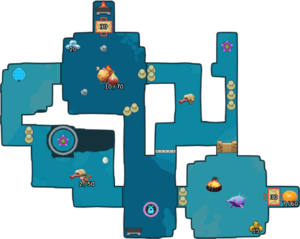
Sublevel 1[edit]
- Treasures:
 Citrus Lump × 1
 Delectable Bouquet × 1 (inside Fiery Bulblax)
 Memory Fragment (Bottom-ish) × 1
 Gold Nugget × 15
- Enemies:
 Fiery Bulblax × 1
 Puffy Blowhog × 1
 Scorchcake × 1
 Waddlequaff × 2
- Obstacles:
 Dirt wall × 1
 Water spout × 2
 Bag × 2 (both have a weight of 30)
 Dried plant × 12 (3 groups of 2, 2 groups of 3)
 Iron fence × 1
- Tools:
 Bonfire altar × 1
 Unlit bonfire altar × 1
- Wild Pikmin
 Red Pikmin × 10 (2 groups of 5, both groups sprouts)
- Others:
 Raw material pile (20 piece pile) × 1
 Candypop Bud (Purple) × 2
 Egg × 2
Most rooms are blocked off by haystacks, so you're gonna need to use a fire starter to open up the paths. The lit fire starter can be found on the room in front of where you start, with the sleeping Fiery Bulblax. The room might appear blocked oof by haystacks, but there is a small gap between them and the wall for you and the Pikmin to walk in there. Before defeating the Bulblax, send Oatchi to remove the watery geysers before waking the enemy. After that's done, flatten the paper bag to get the fire starter and start collecting all the treasure and defeating all the enemies in the level. Make sure to use the violet candypop buds to get Purple Pikmin. You'll need at least 12 Purple Pikmin but preferably should try to get 30. When you finish, the entrance to the next sublevel will be in an elevated room and blocked by more haystack. Throw a fire starter into the room and use Oatchi to jump up the ledge, then quickly send another Red Pikmin to pick up the thrown fire starter and bring it to the haystacks.
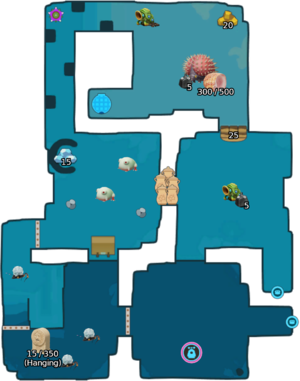
Sublevel 2[edit]
- Treasures:
 Mouth of Lies × 1
 King of Meats × 1 (inside Porquillion)
 Gold Nugget × 20
- Enemies:
 Armored Cannon Larva × 2
 Porquillion × 1
 Skutterchuck × 3
 Wollyhop × 2
- Obstacles:
 Water spout × 2
 Paper bag × 1
 Breakable pot × 5 (1 group of 5)
 Iron fence × 3
- Tools:
 Clay mound (25 raw materials required) × 1
 Pup tunnel × 1
- Wild Pikmin:
 Rock Pikmin × 5 (fighting an Armored Cannon Larva)
 Rock Pikmin × 5 (fighting a Porquillion)
- Others:
 Raw material pile (15 piece pile) × 1
 Candypop Bud (Purple) × 1
This sublevel is very dangerous for non-crush-resistant Pikmin, so Rock Pikmin are going to be the Pikmin you'll want to use. Dismiss all other Pikmin types and leave them at base where they will be safe. There are two paths you can start exploring, one through a pup tunnel where only Oatchi can go, and one through metal bars where only you with the Pikmin can go. The pup tunnel leads to a room with a Cannon Larva, some wild Rock Pikmin if you brough less than 100 Pikmin in the sublevel, a place to build a ramp, and some breakable pots that lead to a room with Wollywogs and more watery geysers. Through the metal bars is a room with Skutterchucks and a ramp that leads to the room with Wollywogs and watery geysers. Playing as Oatchi, enter the room and remove the watery geysers so the Pikmin can defeat the Wollywogs without them getting in the way, or you can try to remove them by rushing the Pikmin before they spew out water. After the hazards are cleared, have the Pikmin build the ramp to enter the last room in the sublevel. There is also a narrow secret corridor that takes you to the last room, but boulders are constantly rolling through it because of another Cannon Larva. You could go through that corridor by riding Oatchi and waiting for the boulders to pass by, but it's best to wait for the ramp to be finished building. In the room is a Porquillion that you can safely defeat with Rock Pikmin due to them being unable to die from its attack. The Porquillion will drop the second heaviest treasure in the game with a total weight of 300. If you are not able to collect the treasure, you might have to return at a later point with more Purple Pikmin, Oatchi after improving his Buff skill, or with more Pikmin after collecting more Flarlics. Once you're done, go to the hole and continue to the final sublevel
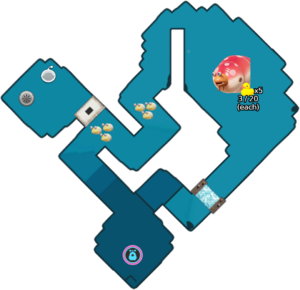
Sublevel 3[edit]
- Treasures:
 Stately Rubber Cutie × 5 (inside Empress Bulblax)
- Enemies:
 Empress Bulblax × 1
 Bulborb Larva × 9 (also spawns infinitely from the Empress Bulblax until it is defeated)
- Obstacles:
 Crystal wall × 1
 Dirt wall × 1
 Numbered gate × 1 (lowers after 1 Empress Bulblax is defeated)
- Others:
 Castaway × 1 (buried)
There's only one corridor that leads you to the boss of this cave, which will be inhabited by dozens of Bulborb Larvae. Be very careful not to let the larvae too close to the Pikmin since they are fast biters and will eat a Pikmin in only a second. If one manages to grab a Pikmin, you can still react fast and try to kill it before the Pikmin dies. Purple Pikmin are particularly good against them, thanks to their ground stomp killing all nearby larvae, although their slow descend make it harder to rescue Pikmin once they're grabbed. The boss is an Empress Bublax, which will be birthing nonstop larvae that follow and slowly chase you and the Pikmin. Go towards the face of the Empress, and before you start to attack it, clear your surroundings of larvae so they won't eat any Pikmin as you battle. After being attacked for a moment, the Empress will shake off any Pikmin that are on her to the side and then begin doing her roll attack. Whistle early and quickly so the Pikmin escape before being flatten, and try to whistle them before she has a chance to shake them off. Of course, Rock Pikmin won't die from getting rolled over, so you can choose to only send Rocks to attack her, though they are very slow at doing damage. When she rolls, she will squash most, if not all, larvae that are coming towards you, so if you are getting approached by many of them, attack the boss so she begins rolling to clear the ground of the larvae. Continue to attack and dodge the boss and you will eventually defeat it, but be mindful of any larvae that may have stayed alive. Collect the five treasures the boss drops and head to the numbered gate to uncover the castaway. After you collected everything, head to the exit to leave the cave.
Gallery[edit]
|
This article or section is in need of more images. |
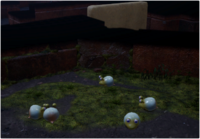
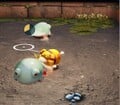
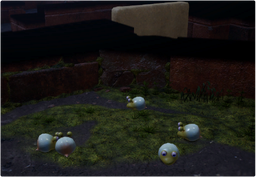
Oatchi being attacked by several Bulborb Larvae.
A Porquillion sends its spikes upon Oatchi, while also being attacked by wild Rock Pikmin.
Oatchi is near a Scorchcake and Puffy Blowhog, both of which are trying to hurt it.
Oatchi near a Violet Candypop Bud.
Oatchi fighting a Fiery Bulblax.
Oatchi fighting two Wollyhops.
Oatchi fighting the Empress Bulblax wiht some Purple Pikmin.
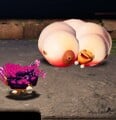
The body of an Empress Bulblax, with Oatchi and some Pikmin near it.
Trivia[edit]
- Louie specifically mentions this cave ("something-something the Beast") in his fourth Fit for a Feast quest, when requesting a single Fiery Bulblax.
Names in other languages[edit]
| Language | Name | Meaning |
|---|---|---|
| けだもののゆりかご? Kedamono no Yurikago |
Cradle of the Beast | |
(traditional) |
野獸的搖籃 Yěshòu de Yáolán |
Cradle of the Beast |
(simplified) |
野兽的摇篮 Yěshòu de Yáolán |
Cradle of the Beast |
| Wieg van het beest | Cradle of the beast | |
| Pouponnière royale | Royal nursery | |
| Kreaturenwiege | Creature Cradle | |
| Culla della bestia | Cradle of the beast | |
| 짐승의 요람 Jimseung-ui Yoram |
Cradle of the Beast | |
| Berço da fera | Cradle of the beast | |
| Cuna de la bestia | Cradle of the beast |
See also[edit]
| Caves in Pikmin 4 | |
|---|---|
| Rescue Command Post | Burrow of Beginnings |
| Sun-Speckled Terrace | Last-Frost Cavern • Crackling Cauldron • Aquiferous Summit • Industrial Maze • Hectic Hollows |
| Blossoming Arcadia | Drafty Gallery • Secluded Courtyard • Sightless Passage • Kingdom of Beasts |
| Serene Shores | Seafloor Resort • Subzero Sauna • Below-Grade Discotheque • Engulfed Castle |
| Hero's Hideaway | Doppelgänger's Den • Frozen Inferno • Plunder Palace |
| Giant's Hearth | Ultimate Testing Range • Dream Home • Cradle of the Beast |
| Primordial Thicket | The Mud Pit • Subterranean Swarm • Cavern for a King |
| Dandori Challenges | Dandori Day Care • Hotshock Canyon • Rockaway Cellars • Test Tubs • Ice-Cross Course • Hefty Haulway • Aerial Incinerator • Strategic Freezeway • Planning Pools • Toggle Training • Cliff-Hanger's Hold • Oasis of Order • Trial of the Sage Leaf |
| Dandori Battles | Trial Run • Battle in a Box • Dandori Castle • Leafy Showdown • Hot Sandy Duel • Final Battle |
