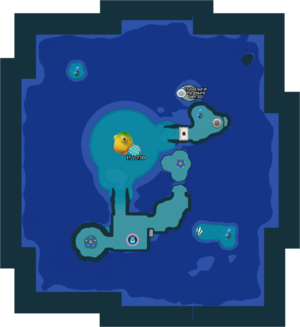
Seafloor Resort
| Seafloor Resort | |
|---|---|
| [[File:|]] | |
| Location | Serene Shores |
| Sublevels | 4 |
| Rescues | 2 |
| Treasures | 23 |
| Onions | 1 |
| Hazards | |
| Suggested Pikmin | blue Pikmin, ice Pikmin. |
|
The following article or section contains guides. |
|
The following article or section is in need of assistance from someone who plays Pikmin 4. |
The Seafloor Resort is a cave in Pikmin 4. It has a large amount of water, making Blue Pikmin necessary. Non-aquatic enemies, such as jellyfloats, aristocrabs, and Fiery Blowhogs appear as well, including an encounter with a large Masterhop. This cave has ![]() × 1,625 worth of treasure.
× 1,625 worth of treasure.
How to reach
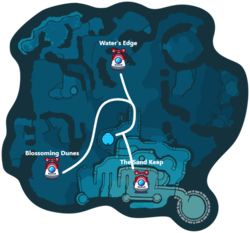
This cave is found at the foot of large sand castle. Directly across from the Water's Edge base, there is a ramp that provides easy access to the entrance on the right (even during high tide, there is no water surrounding the ramp). From The Sand Keep base, the entrance can be found at the end of the bottom road populated with Armored Cannon Larva. Alternatively, Oatchi can jump over the sand castle's walls, allowing for an easy shortcut to the foot of the structure.
Notes
Olimar's Voyage Log
Sublevel 1
|
The following article or section is in need of assistance from someone who plays Pikmin 4. |
- Treasures:
- Enemies:
- Obstacles:
- Sprinkler × 2
- Water Geyser × 2
- Tools:
- Wild Pikmin:
 Blue Pikmin × 5 (Sprouts)
 Blue Pikmin × 5 (inside Jellyfloat)
 Ice Pikmin × 5 (Sprouts)
- Others:
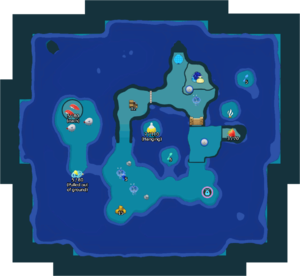
The first thing you'll notice about this cave is the excessive amounts of water, so keeping your Blue Pikmin alive will be a must. The first thing you should do is send Oatchi with a squad of Blue Pikmin to get the Sunseed Berry (it's in the area past the small step) as there are no enemies over there, and the Blue Pikmin will allow you to transport it without turning off the sprinklers. After that, take a stroll down the beach to pluck some Ice Pikmin and deal with the two Lesser Spotted Jellyfloats. There are two water geysers, fifteen Gold Nuggets, and a path up to a building spot in this area. But taking out the Jellyfloats first would be a good idea as they'll just get in the way. If you're having trouble with these enemies, remember that freezing an airborne Jellyfloat causes it to die instantly upon hitting the ground, and doing this with the second one will cause no harm to come to the Blue Pikmin it's holding. For the nuggets, once again Blue Pikmin can transport them without having to worry about the water. Use five Blue Pikmin to fish the False Lollipop out of the river, and head for the sponge on the right to find two Maestros of Flavor guarded by two Blowhogs. Without Red Pikmin, dealing with these twins can get really annoying if they're too close together. Wait until they're separated and use Oatchi's Charge to attack the first one while the other is none the wiser. Once you're done over here, head up the hill to get the Maternal Sculpture down from the ceiling. To transport it, use seven Blue Pikmin or freeze the middle lake using Ice Pikmin if you have enough. Use twelve Raw Materials to build the valve and turn off the sprinklers to make things easier. The passage to the next sublevel is behind an iron fence only the Recruit can pass through. Use them to take care of the Jellyfloat and knock down the Dirt Wall so Oatchi can join you. Once all the enemies are defeated, you should be able to finish up here with ease. Grab the Flarlic by freezing the Hydro jelly with Ice Pikmin, and pluck the five Blue Pikmin on the island hidden behind said Jelly.
Sublevel 2
|
The following article or section is in need of assistance from someone who plays Pikmin 4. |
- Treasures:
- Enemies:
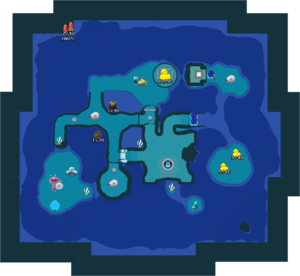
 Fiery Blowhog × 3
 Greater Spotted Jellyfloat × 1
 Peckish Aristocrab × 1
 Fiery Dweevil × 2
- Obstacles:
- Tools:
- Wild Pikmin:
 Ice Pikmin × 5 (Sprouts)
- Others:
Sublevel 3
|
The following article or section is in need of assistance from someone who plays Pikmin 4. |
- Treasures:
- Enemies:
- Obstacles:
- Tools:
- Wild Pikmin:
 Blue Pikmin × 5 (Sprouts)
 Blue Pikmin × 5 (Sprouts hidden in seaweed)
- Others:
Sublevel 4
|
The following article or section is in need of assistance from someone who plays Pikmin 4. |
- Treasures:
- Enemies:
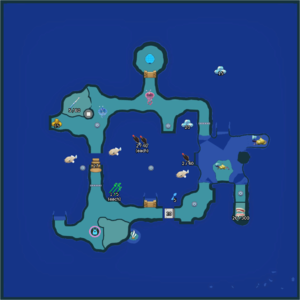
 Masterhop × 1
- Obstacles:
- Tools:
- Wild Pikmin:
 Blue Pikmin × 15 (Sprouts)
- Others:
 Candypop Bud × 2 (Blue)
Gallery
|
This article or section is in need of more images. |
Names in other languages
| Language | Name | Meaning |
|---|---|---|
| 海底リゾート? Kaitei Risōto |
Seafloor Resort | |
(traditional) |
海底度假村 Hǎidǐ Dùjiǎcūn |
Seafloor Resort |
(simplified) |
海底度假村 Hǎidǐ Dùjiǎcūn |
Seafloor Resort |
| Zeebodemresort | Seabed resort | |
| Station des fonds marins | Seabed station | |
| Meeresgrundgrotte | Seabed Grotto | |
| Località sottomarina | Underwater resort | |
| 해저 리조트 Haejeo Rijoteu |
Seafloor Resort | |
| Balneário marinho | Marine spa | |
| Balneario marino | Marine spa |
See also
|
The following article or section is in need of assistance from someone who plays Pikmin 4. |
