Enemy: Difference between revisions
Voldemort64 (talk | contribs) (→Gallery: Fixed Typo) |
(Undo: The images aren't particularly helpful to the reader. This article serves as a hub article for readers to check specific enemy articles. They can find images there. The images currently in the page are enough for illustration purposes.) |
||
| Line 299: | Line 299: | ||
{{clear}} | {{clear}} | ||
==Trivia== | ==Trivia== | ||
Revision as of 13:26, November 23, 2018
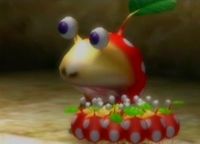
The Pikmin encounter a multitude of enemies on PNF-404. With few exceptions, these are both predators and prey, and they have varied characteristics and appearances. Defeating enemies constitutes a major part of gameplay in all Pikmin games.
Enemies have varied attacks, and some take advantage of hazards to cause damage to Pikmin who are not immune to them. Offensively, enemies either eat Pikmin or hurt them with attacks, both melee and projectile-based, and with effects that range from pushing the Pikmin off to outright killing them. A few enemies are incapable of directly killing Pikmin.
Killed enemies may drop pellets, which can be brought to an Onion to exchange for Pikmin seeds. Defeated enemies that leave a corpse can also be returned to an Onion, the Research Pod, or the SPERO, being exchanged for Pokos in the case of the latter two. An enemy under the effect of an ultra-bitter spray will vanish when its health drops to zero; nectars or sprays then have a chance of dropping instead.
Some enemies contain important items like ship parts, treasures, or fruits, which they drop when defeated; these will still be dropped even if the creature was petrified. Most downed enemies will also safely release any Pikmin in their grasp, regardless of any apparently fatal damage caused when the Pikmin was trapped (like the Cloaking Burrow-nit's impalement). This allows otherwise doomed Pikmin to be saved.
Bosses
- Main article: Boss.
Boss enemies are tougher than standard enemies, but also rarer. They usually have to be defeated to obtain a plot-critical object.
Behavior
Most enemies roam around in a specific location of the area, leaving only to chase after or run away from Pikmin or leaders. Some enemies are quite dedicated to their initial spots, returning to them after wandering too far. The locations in which enemies can be found sometimes depend on their nature. For instance, the fur-coated Hairy Bulborbs are better suited to cold environments, and as such, are commonly found in ice-themed caves.
Enemies are normally killed by Pikmin attacks, which becomes easier the more Pikmin are attacking. They can also inadvertently kill themselves by ingesting White Pikmin, falling off pits, or rarely, by coming into contact with certain hazards.
As threats to Pikmin, enemies can attack in a variety of ways, the most common one being eating them. They can also crush them, kill them with a hazard they're vulnerable to, and knock them out with an explosion, among other methods. For some of these attacks, there is a cap on the number of Pikmin that can be affected by it. For instance, in Pikmin, a Red Bulborb may only grab and eat three Pikmin at most with a single bite, but in Pikmin 2, five can fall prey to the same bite. The exception to this is the enemies in Hey! Pikmin, which more often than not, kill Pikmin and damage Olimar by simply touching them.
Interactions
For the most part, every enemy is its own entity, interacting only with the Pikmin and leaders. Some enemies, however, have passive or active interactions with the environment, other enemies, or miscellaneous objects.
Environment interactions
- In Pikmin 3, most enemies will be unable to detect Pikmin and leaders if they are hiding under tall plants.
- In Pikmin 2, if an Emperor Bulblax gets close to a bomb-rock, it will eat it without needing to be coaxed into doing so.
- The fire on a Fiery Bulblax or a Pyroclasmic Slooch's back will be put out should it go into water. Fiery Bulblaxes reignite once they leave the water, and Slooches reignite if they touch another's fire trail.
- If a member of the Mandiblard family touches water, it will steadily lose health, and if it is near a wooden bridge and not in pursuit, it will begin deconstructing it.
- Wogpoles and Puckering Blinnows will start flailing around if they're on dry land, but they are able to swim freely if they're underwater.
Cooperation

Some creatures keep a bond with others. To maximize the chances of survival, some enemies can be seen next to others, normally of their own species, and oftentimes interacting with them when a fight for survival is taking place. Dwarf Red Bulborbs, Dwarf Bulbears, etc. are often found next to larger enemies of the same species or of the species they are mimicking. When under attack in Pikmin, they may scream in order to wake up their larger allies.
Other creatures choose to follow a leader, normally of their own family. An example is the Bulbmin, who lose all sense of control should their leader perish, and the Scornets, who obey the command of the Scornet Maestro.
Hostility
Hostility between enemies is non-existent, but cases of enemies damaging each other are not. Some enemies may, if inadvertently, hurt others. This normally happens when they try to kill Pikmin or leaders. Not many enemy attacks are made to hurt others, but the following are:
- The Empress Bulblax can kill its young by rolling into them.
- A Gatling Groink can damage other enemies with its shots (including other Groinks), but not itself.
- A lithopod's boulders can harm other enemies or even the launcher itself.
- The Raging Long Legs and Baldy Long Legs can stomp on and kill other enemies, particularly on the Angle Maze and Tropical Forest, respectively.
- Volatile Dweevils and Careening Dirigibugs can harm other enemies with their bomb-rocks.
- In Pikmin 3, Yellow Wollywogs can kill or injure other enemies if they land on them.
- Skutterchucks can harm and kill other enemies if their crystal nodules land on them. They can even kill themselves.
As a gameplay element
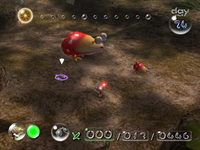
In the games, enemy locations are relatively evenly spread, in order to maximize the balance between exploration and combat, as to not overwhelm the player. More important locations, however, are generally covered by stronger enemies, requiring the player to excel in combat skill if they are to obtain the rewards that lie behind them. Analogously, easier enemies are encountered closer to the landing sites and the first floors of caves.
Enemies that are killed do not reappear until the leaders leave, regardless of leaving a corpse. Some enemies do, however, respawn after an in-game day has passed, or after a cave is entered and exited, although others might require the passing of some full days before returning. In addition, some only appear in specific days, as is the case with the Goolix and the Mamuta on The Impact Site. Besides respawning, some enemies can actually revive after they've been considered dead, and a few have a natural health regeneration mechanic.
Intelligence-wise, enemies have a very simplistic artificial intelligence system. Some bosses are hard-coded to perform more specific actions and reply to more specific events, but for the most part, enemies can recognize the presence of a Pikmin, when to attack, when to shake Pikmin off, when to return to their home spot, and not much else. On top of that, their path recognition systems are non-existent: when they want to reach a spot, they head directly towards it, with no regard to any walls or obstacles. Most of the time, there are no obstacles in the way (or if there are, they can be slid through), but otherwise, this can lead to them getting stuck behind them, endlessly walking in place.
Enemies also do not take walls into account for their vision, chasing, or animations. They can see prey through walls, they will walk into them if their target is on the other side, and if they are close enough to attack, they can reach Pikmin and leaders through the wall; this is especially notable for enemies with long reach, like the Cloaking Burrow-nit. Regardless, the Hermit Crawmad has the ability to climb up walls, as demonstrated in tile sublevels with pools, such as sublevel one of The Giant's Bath.
These simplicities, however, are required to minimize the development costs and the processor usage, given that more complex path recognition systems could end up lowering the game's framerate. Another trick to minimize processor usage is to simply not render or recognize any enemy that lies beyond the camera's reach. These tricks allow the game to run smoothly without severely compromising the game and the enemies' livelihood.
List of enemies
The following is a list of enemies in the Pikmin series. Names in bold belong to enemies that are considered bosses. You may also browse the available categories on Pikipedia, with the top one being Enemies.
In Pikmin
 Armored Cannon Beetle
 Beady Long Legs
 Breadbug
 Burrowing Snagret
 Dwarf Bulbear
- [icon] Dwarf Red Bulborb
 Emperor Bulblax
 Female Sheargrub
 Fiery Blowhog
 Goolix
 Honeywisp
 Iridescent Flint Beetle
 Male Sheargrub
 Mamuta
 Pearly Clamclamp
 Puffstool
 Puffy Blowhog
 Shearwig
 Smoky Progg
 Spotty Bulbear
 Spotty Bulborb
 Swooping Snitchbug
 Water Dumple
 Wogpole
 Wollywog
 Yellow Wollywog
- See also: [[::Category:Pikmin 1 enemies|Pikmin enemies category]].
In Pikmin 2
 Anode Beetle
 Anode Dweevil
 Antenna Beetle
 Armored Cannon Beetle Larva
 Beady Long Legs
 Breadbug
 Bulbmin
 Bulborb Larva
 Bumbling Snitchbug
 Burrowing Snagret
 Careening Dirigibug
- [icon] Caustic Dweevil
 Cloaking Burrow-nit
 Creeping Chrysanthemum
 Decorated Cannon Beetle
 Doodlebug
 Dwarf Bulbear
 Dwarf Orange Bulborb
- [icon] Dwarf Red Bulborb
 Emperor Bulblax
 Empress Bulblax
 Female Sheargrub
 Fiery Blowhog
 Fiery Bulblax
 Fiery Dweevil
 Gatling Groink
 Giant Breadbug
 Greater Spotted Jellyfloat
 Hairy Bulborb
 Hermit Crawmad
 Honeywisp
 Iridescent Flint Beetle
 Iridescent Glint Beetle
 Lesser Spotted Jellyfloat
 Male Sheargrub
 Mamuta
 Man-at-Legs
 Mitite
 Munge Dweevil
 Orange Bulborb
 Pileated Snagret
 Puffy Blowhog
 Raging Long Legs
 Ranging Bloyster
 Ravenous Whiskerpillar
 Red Bulborb
 Segmented Crawbster
 Shearwig
 Skitter Leaf
 Snow Bulborb
 Spotty Bulbear
 Swooping Snitchbug
 Titan Dweevil
 Toady Bloyster
 Ujadani
 Unmarked Spectralids
 Volatile Dweevil
 Water Dumple
 Waterwraith
 Watery Blowhog
 Withering Blowhog
 Wogpole
 Wollywog
 Yellow Wollywog
- See also: [[::Category:Pikmin 2 enemies|Pikmin 2 enemies category]] and Piklopedia.
In Pikmin 3
 Arachnode
 Arctic Cannon Larva
 Armored Cannon Larva
 Armored Mawdad
 Baldy Long Legs
 Bearded Amprat
 Bug-Eyed Crawmad
 Bulborb
 Burrowing Snagret
 Calcified Crushblat
 Desiccated Skitter Leaf
 Dwarf Bulbear
- [icon] Dwarf Bulborb
 Dwarf Orange Bulborb
 Female Sheargrub
 Fiery Blowhog
 Flighty Joustmite
 Hermit Crawmad
 Iridescent Flint Beetle
 Joustmite
 Male Sheargrub
 Medusal Slurker
- [icon] Mysterious Life Form
 Nectarous Dandelfly
 Orange Bulborb
 Peckish Aristocrab
 Phosbat
 Plasm Wraith
 Puckering Blinnow
 Puffy Blowhog
 Pyroclasmic Slooch
 Quaggled Mireclops
- [icon] Red Spectralid
 Sandbelching Meerslug
 Scornet
 Scornet Maestro
 Shaggy Long Legs
 Shearwig
 Skeeterskate
 Skitter Leaf
 Skutterchuck
 Spotty Bulbear
 Sputtlefish
 Swarming Sheargrub
 Swooping Snitchbug
 Toady Bloyster
 Vehemoth Phosbat
 Waddlepus
 Water Dumple
 Watery Blowhog
 Whiptongue Bulborb
- [icon] White Spectralid
 Wogpole
- [icon] Yellow Spectralid
 Yellow Wollywog
- See also: [[::Category:Pikmin 3 enemies|Pikmin 3 enemies category]].
In Hey! Pikmin
 Crumbug
 Coppeller
 Mockiwi
 Spornet
 Crested Mockiwi
 Sparrowhead
 Male Sheargrub
 Puffstalk
 Shooting Spiner (Female)
 Puckering Blinnow
 Eye-Stalker Bulbeel
 Large Splurchin
 Shearblug
 Widemouthed Anode Beetle
 Young Yellow Wollywog
 Crystalline Crushblat
 Speargrub
 Crammed Wraith
 Seedbagger
 Skutterchuck
 Grabbit
 Fireflinger Groink
 Flatterchuck
 Shooting Spiner (Male)
 Sporegrub
 Red Bubblimp
 Starnacle
 Elongated Crushblat
 Electric Spectralid
 Spiny Coppeller
 Flying Spotted Jellyfloat
 Yellow Wollywog
 Fireflap Bulborb
 Fiery Blowlet
 Fiery Dwarf Bulblax
 Electripede
 Firesnout Beetle
 Fiery Young Yellow Wollywog
 Clicking Slurker
 Stuffed Bellbloom
 Puffy Blubbug
 Blubbug
 Centipare
 Stony Flint Beetle
 Adult Centipare
 Muggonfly
 Swooping Snitchbug
 Bulborb
 Long Water Dumple
 Armurk
 Electric Cottonade
 Queen Shearwig
 Fiery Blowhog
 Luring Slurker
 Emperor Bulblax
 Leech Hydroe
 Berserk Leech Hydroe
- See also: [[::Category:Hey! Pikmin enemies|Hey! Pikmin enemies category]] and Hey! Pikmin logs.
In-game encyclopedias
- Main articles: Enemy reel, Piklopedia, Indigenous Life (Exploration Notes), and Hey! Pikmin logs.
The enemy reel is a special movie at the end of Pikmin. It showcases short clips featuring all enemies in the game, accompanied by a minor description of each.
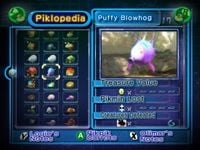
The Piklopedia is a catalog of enemies and plants, available before entering an area at the start of a day in Pikmin 2. This list is filled with enemy entries as they are killed in the game. Each entry also details the amount of Pokos the enemy is worth, how many of them have been killed so far, Olimar and Louie's notes, and it allows the player to view them roaming around and eat thrown Pikpik carrots, using a free camera mode.
The Indigenous Life Exploration Notes are a series of data files containing a few tips about how some of the more common enemies work, especially bosses. They also have a stylized drawing of the situation they describe.
The logs in Hey! Pikmin are similar to the Piklopedia, but do not allow direct interaction with the creatures, and only contain Olimar's notes.
Trivia
- When the player first delivers an enemy to the Research Pod, a cutscene plays with the Hocotate ship complaining that it's not a treasure, although it's still good for some Pokos. However, if an enemy of this species has already been delivered to an Onion before on the current playthrough, the Research Pod will just accept the enemy like normal without a cutscene. The cutscene can later be played by delivering a new species of enemy that has never been delivered to an Onion.[1]
Names in other languages
| Language | Name | Meaning | Notes |
|---|---|---|---|
| Ennemi | Enemy | ||
| Inimigo | Enemy | Translation taken from the Pikmin instruction manual. |
See also
References
- ^ YouTube video explaining what does and doesn't trigger the Hocotate ship's corpse complaint cutscene
| Hazards | ||||||||||||||||||||
|---|---|---|---|---|---|---|---|---|---|---|---|---|---|---|---|---|---|---|---|---|
| ||||||||||||||||||||
| Other hazards |

