Radar: Difference between revisions
(Diarrea) |
(Fixed minor error) |
||
| (80 intermediate revisions by 21 users not shown) | |||
| Line 1: | Line 1: | ||
{{game icons|p=y|p2=y|p3=y|hp=y}} | {{game icons|p=y|p2=y|p3=y|p4=y|hp=y}} | ||
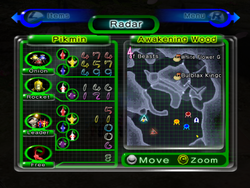
[[File:Pikmin 2 radar.png|thumb | [[File:Pikmin 2 radar.png|thumb|250px|The radar as it appears in ''[[Pikmin 2]]''.]] | ||
The '''radar''' ({{j|レーダー|Rēdā}}) is a mechanic present in all [[Pikmin | {{for|the radar in Pikmin Bloom|Detector}} | ||
The '''radar''' ({{j|レーダー|Rēdā}}, lit.: "Radar") is a mechanic present in all {{pg}}. It allows the player to view an [[area]]'s layout, as well as the location of various important objects, such as [[Pikmin family|Pikmin]], the [[Onion]](s), and [[:Category:Collectibles|collectible objects]]. In {{p1}}, the radar is unlocked by collecting the [[Whimsical Radar]]. In {{p2}}, it is available from the start. In {{p3}}, it is unlocked when the [[KopPad]] is found. In {{p4}}, it is unlocked as soon as the player obtains their tablet from [[Collin]]. | |||
The | |||
The [[controls]] needed to access the radar, pan it and zoom it vary from game to game: | |||
{|class="wikitable" | {|class="wikitable" | ||
!Game !! style="width:64px" | Open !! style="width: | !Game !! style="width:64px" | Open !! style="width:96px" | Pan !! style="width:96px" | Zoom | ||
|- | |- | ||
! | ! {{p1}} | ||
| align="center"|{{button|gc|y|size=x24px}} | | align="center"|{{button|gc|y|size=x24px}} | ||
| rowspan="2" align="center"| {{button|gc|stick|size=x24px}} | |||
| rowspan="2" align="center"| {{button|gc|c|size=x24px}} | |||
|- | |- | ||
! | ! {{p2}} | ||
| align="center"|{{button|gc|start|size=x24px}} | | align="center"|{{button|gc|start|size=x24px}} | ||
|- | |- | ||
!''[[New Play Control! | ! ''[[New Play Control!]]'' games | ||
| align="center"|{{button| | | align="center"|{{button|wii|+|size=x24px}} | ||
| align="center"|{{button|wii|stick|size=x24px}} | |||
| align="center"|{{button|wii|padud|size=x24px}} | |||
|- | |||
! {{p3}} | |||
| align="center"|{{button|wiiu|-|size=x24px}} | |||
| align="center"|{{button|wiiu|stylus|size=x24px}} | |||
| align="center"|Can't zoom | |||
|- | |||
! {{p3d}} | |||
| align="center"|{{button|switch|-|size=x24px}} | |||
| align="center"|{{button|switch|lstick|size=x24px}}<br>{{button|switch|lstickclick}} to speed up | |||
| align="center"|{{button|switch|rstick|size=x24px}} | |||
|- | |||
! {{p1+2}} | |||
| align="center"|{{button|switch|+|size=x24px}} | |||
| align="center"|{{button|switch|lstick|size=x24px}} | |||
| align="center"|{{button|switch|rstick|size=x24px}} | |||
|- | |||
! {{p4}} | |||
| align="center"|{{button|switch|+|size=x24px}} | |||
| align="center"|{{button|switch|lstick|size=x24px}} | |||
| align="center"|{{button|switch|rstick|size=x24px}}<br>{{button|switch|rstickclick}} to reset zoom | |||
|- | |- | ||
!{{hp}} | ! {{hp}} | ||
| align="center"|{{button|3ds|l}}/{{button|3ds|r}} | | align="center"|{{button|3ds|l}}/{{button|3ds|r}} | ||
| align="center"| | | align="center"|Can't pan | ||
| align="center"| | | align="center"|Can't zoom | ||
|} | |} | ||
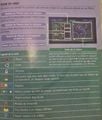
In the first two games and their remakes, the screen that contains the radar also enumerates how many Pikmin are with the current leader, of each type, how many Pikmin there are in the Onions, of each type, and how many Pikmin are roaming through the area, of all types. In addition, the screen also shows the total number of ship parts obtained, in ''Pikmin''. | In the first two games and their remakes, the screen that contains the radar also enumerates how many Pikmin are with the current leader, of each type, how many Pikmin there are in the Onions, of each type, and how many Pikmin are roaming through the area, of all types. In addition, the screen also shows the total number of ship parts obtained, in ''Pikmin''. | ||
The radar is disabled during [[Challenge Mode (disambiguation)|Challenge Mode]], but not [[Mission Mode]] | The radar is disabled during [[Challenge Mode (disambiguation)|Challenge Mode]], but not [[Mission Mode]]. It is completely disabled in any 2-player game mode, except in {{p3d}}. | ||
== | == Functionality == | ||
In | === In ''Pikmin'' === | ||
In ''Pikmin'', the radar is found in [[Olimar's monitor]], once the [[Whimsical Radar]] [[ship part]] is collected. It is on the right-hand side of the screen, and shows an outlined map of the current area. White stars on the map are the locations of ship parts. The map shows colored dots for Pikmin locations; red dots are Red Pikmin, yellow dots are Yellow Pikmin, blue ones are Blue Pikmin, and green dots are Pikmin that are buried in the ground. It also shows Pikmin statistics on the left. | |||
==In ''Pikmin | === In ''Pikmin 2'' === | ||
In ''Pikmin 2'', the radar is what the [[pause menu]] opens to by default. It works the same as in ''Pikmin'', except it does not outline locations of treasures, and it is available from the very beginning of the game. | |||
=== In ''Pikmin 3'' === | |||
The radar is the default app on the [[KopPad]], and if [[Off-TV Play]] is off, the map will follow the current leader as they move. | |||
Touching the GamePad in this state will pause gameplay, if it is not already paused. With Off-TV Play disabled, the [[camera]] on the TV screen will also move upwards and point down in a birds-eye view. The player can drag their finger or stylus on the touchscreen in order to pan around; the TV screen camera will also pan accordingly. Effectively, this feature allows the player to view all around the area from a birds-eye view, either with the stylized KopPad map, or from the actual in-game camera. | Touching the GamePad in this state will pause gameplay, if it is not already paused. With Off-TV Play disabled, the [[camera]] on the TV screen will also move upwards and point down in a birds-eye view. The player can drag their finger or stylus on the touchscreen in order to pan around; the TV screen camera will also pan accordingly. Effectively, this feature allows the player to view all around the area from a birds-eye view, either with the stylized KopPad map, or from the actual in-game camera. | ||
| Line 42: | Line 71: | ||
If Off-TV Play is on and the player has the screen showing the KopPad, attempting to disable Off-TV Play with {{button|wiiu|-}} will merely show a message saying that it is impossible to switch. Several bits of decorative [[Koppaite text]] can also be found next to icons and buttons. | If Off-TV Play is on and the player has the screen showing the KopPad, attempting to disable Off-TV Play with {{button|wiiu|-}} will merely show a message saying that it is impossible to switch. Several bits of decorative [[Koppaite text]] can also be found next to icons and buttons. | ||
==In '' | In [[Bingo Battle]], the radar cannot be controlled and shows the entire stage at once. It is also limited to the GamePad, giving the player controlling the GamePad a slight advantage. | ||
{{game | |||
In {{hp}}, the | === In ''Pikmin 3 Deluxe'' === | ||
The radar in {{p3d}} must be opened up with {{button|switch|-}}, or {{button|switch|+}} if P1 is using a solo right joycon (and cannot be opened by P2 using a solo joycon regardless of which joycon they are using; their {{button|switch|-}}/{{button|switch|+}} is instead set to pause the game). Since there is no GamePad like in ''Pikmin 3'', the player cannot follow the radar as they play on a different screen, and opening the radar pauses gameplay. Likewise, it is not possible to unpause gameplay while keeping the radar's functionalities open – the icon that would do this still exists in the radar in this game, but is not a button that can be pressed. | |||
The full map of the area is available right from the start, but like in ''Pikmin 3'', there is a {{w|Fog of war#Simulations and games|fog of war}} effect, and it works in the same way, The only difference being that unvisited portions are simply more transparent, but still visible. | |||
Like in ''Pikmin 3'', entering the sunset stage will make the top toggle between the message "Pikmin in Danger" and an overview of how many Pikmin there are in danger of being left behind. When outside of the sunset stage, that portion will instead present the current [[Story Mode]] objective. | |||
[[Enemy]] locations are visible in explored parts of the area. | |||
In [[Bingo Battle]], each player can open the radar on their side of the screen. This radar does not pause gameplay, cannot be controlled and shows the whole stage at once. Although it is not normally possible to move while the radar is up, the player can control their leader if they are [[throw|holding]] a Pikmin. | |||
=== In ''Pikmin 4'' === | |||
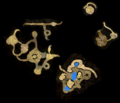
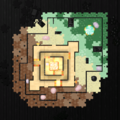
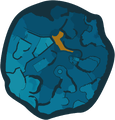
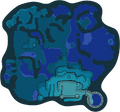
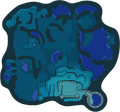
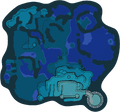
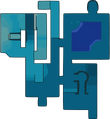
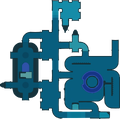
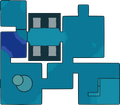
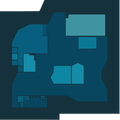
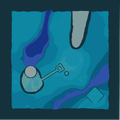
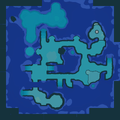
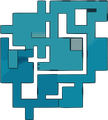
In {{p4}}, the radar is accessed from the [[Tablet]], via the Radar Map application. The radar's design features blue colours, the shade of which changes based on elevation, with a thick navy border surrounding the edge of the area. Bases are indicated by pairs of magenta circles. After purchasing the [[Survey Drone]] from the lab, it is possible to drop up to three pins in red, yellow, or blue by pressing {{button|switch|y}}. It is also possible to make the player face a certain direction by moving the cursor and pressing {{button|switch|zl}}. | |||
=== In ''Hey! Pikmin'' === | |||
[[File:Hey! Pikmin radar.jpg|thumb|The radar opened in [[Peculiar Rockfall]].]] | |||
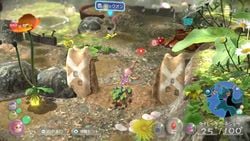
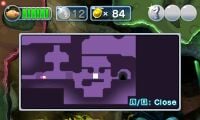
In {{hp}}, the Radar Map is not present at the beginning of the game but is rewarded to the player once 2,000 [[Sparklium]] has been collected. The Radar Map can be toggled by pressing {{button|3ds|l}}/{{button|3ds|r}}. [[Boss]] areas and [[Over Wintry Mountains]] do not allow the use of the Radar Map. | |||
Initially, the Radar Map only shows the explored parts of the current [[area]], with parts further away from Olimar covered by a darker color. Once that area is completed (regardless of whether the player got all [[treasure]]s), its entire map is revealed for subsequent times the player enters the area. | |||
Here are the icons used in the Radar Map: | |||
{| class="wikitable" | {| class="wikitable" | ||
!Object | !Object | ||
! | !Appearance | ||
|- | |- | ||
| Olimar || Big white dot | | Olimar || Big white dot | ||
| Line 61: | Line 106: | ||
| Moved obstacles/built bridges || Dark blue | | Moved obstacles/built bridges || Dark blue | ||
|- | |- | ||
| | | [[Doorway]]s || Gray-black holes | ||
|- | |- | ||
| Treasures || Glimmering | | Treasures || Glimmering | ||
|} | |} | ||
{{todo|Get images of these symbols and add them to the main legend table.}} | |||
== Appearance == | |||
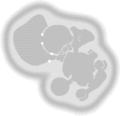
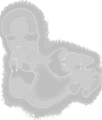
In the first two games, the radar shows a monochromatic representation of the [[area]]'s terrain, only really highlighting the walls, water, and the locations of gates. Some icons point out the location of [[ship part]]s, [[treasure]]s, [[Onion]]s, and a few other things. While the first two games use the same radar presentations, they have differing art-styles for their radar textures: ''Pikmin''{{'s}} area maps are depicted with a smooth style and a blurry fadeout for the edges of the map, while ''Pikmin 2''{{'s}} area maps are drawn in a non-smooth style more similar to pixel art, with a more matte fadeout for the edges of the map. | |||
In ''Pikmin 3'', it provides a map of the area, stylized so that water, terrain, structures, and boundary walls are high-contrast and easy to distinguish, but textured to be similar to the actual terrain. There are several icons for all sorts of important objects. As ''Pikmin 3 Deluxe'' has slightly different area textures than ''Pikmin 3'', the radar textures are also changed in the ''Deluxe'' version. | |||
In ''Hey! Pikmin'', the radar is monochromatic, with terrain represented by dark colors and in-bounds areas represented by light colors. The front side of areas uses a blue color scheme and the back side uses a purple color scheme. | |||
==Go Here!== | == Go Here! == | ||
In ''Pikmin 3'', players have the ability to tell leaders (and their army of [[Pikmin family|Pikmin]]) to go to a specific spot on the map automatically, so that they may do something else with a different leader. In order to use the Go Here! functionality, the player must first collect the [[ | In ''Pikmin 3'' and ''Pikmin 4'', players have the ability to tell leaders and [[Oatchi]] (and their army of [[Pikmin family|Pikmin]]) to go to a specific spot on the map automatically, so that they may do something else with a different leader. In order to use the Go Here! functionality, the player must first collect the [[data file]] located on the other side of the [[crystal wall]] at the [[Garden of Hope]]'s landing site in ''Pikmin 3'', free Brittany in ''Pikmin 3 Deluxe'', or reach Command level 2 in ''Pikmin 4''. | ||
===Choosing a destination=== | === Choosing a destination === | ||
With the gameplay paused, a [[File:GoHerePyramid.png|16px]] appears on the center of the map app. When the map is panned, the pyramid stays on the center, and hence, follows the panning. As the shape moves, a set of arrows originating from the current leader mark a trail from the leader's icon on the map to the spot the pointer is at. After a small delay, a | With the gameplay paused and the radar open, a [[File:GoHerePyramid.png|16px]] appears on the center of the map app. When the map is panned, the pyramid stays on the center, and hence, follows the panning. As the shape moves, a set of arrows originating from the current leader mark a trail from the leader's icon on the map to the spot the pointer is at. After a small delay, a prompt with the leader's icon and the words "Go Here!" will appear in a non-obstructive location of the screen. Tapping this button in ''Pikmin 3'', or pressing {{button|switch|a}} in ''Pikmin 3 Deluxe'' will make the leader take the path shown towards the target location. In the case of ''Pikmin 3 Deluxe'', {{button|switch|a}} can be pressed before this prompt appears. There are scenarios in which it is not possible to use the Go Here! command, as detailed below. | ||
===Path algorithm=== | === Path algorithm === | ||
The planned path is always the shortest one required in order to reach the destination. This path-finding system also takes into account insurmountable [[obstacles]] and water, disallowing the travel if the player tries to enter a body of water with non-[[Blue Pikmin|Blue]] or non-[[Winged Pikmin]] in their party. [[Hazard]]s and [[Enemy|enemies]] are ignored when deciding the path, but uncharted terrain is considered and not allowed. If the player places the destination point in an uncharted or invalid location (like a body of water, as stated above), the pyramid marker will turn pink, and the "Go Here!" button will be grayed out. If the path to a certain location is blocked off by an uncleared obstacle or any other feature that can't be overcome, the shown path will still trace to the point of the obstacle, where it then displays a pink ❌ sign, and the rest of the path with pink arrows, meaning the leader can only reach the point marked by the ❌ sign. To note is that the Go Here! feature will not work while the leader is [[pluck]]ing, [[dodging]], [[spray]]ing, in pain from being hurt, lying down on the ground (for instance, from getting [[electricity|zapped]]), captured by an [[enemy]], | The planned path is always the shortest one required in order to reach the destination. This path-finding system also takes into account insurmountable [[obstacles]] and water, disallowing the travel if the player tries to enter a body of water with non-[[Blue Pikmin|Blue]] or non-[[Winged Pikmin]] in their party. [[Hazard]]s and [[Enemy|enemies]] are ignored when deciding the path, but uncharted terrain is considered and not allowed. If the player places the destination point in an uncharted or invalid location (like a body of water, as stated above), the pyramid marker will turn pink, and the "Go Here!" button will be grayed out. If the path to a certain location is blocked off by an uncleared obstacle or any other feature that can't be overcome, the shown path will still trace to the point of the obstacle, where it then displays a pink ❌ sign, and the rest of the path with pink arrows, meaning the leader can only reach the point marked by the ❌ sign. To note is that the Go Here! feature will not work while the leader is [[pluck]]ing, [[dodging]], [[spray]]ing, in pain from being hurt, lying down on the ground (for instance, from getting [[electricity|zapped]]), captured by an [[enemy]], on top of a [[lily pad]], and strangely, on the first two ledges in the Tropical Wilds where the [[Armored Cannon Larva]] is. | ||
===Leader movement=== | === Leader movement === | ||
If the leader reaches their destination successfully, a dialog message will appear on-screen with their icon, and a message stating that they reached their target spot. If not, they'll explain why the path didn't work. They'll also give up if they get stuck on something for a few seconds, like a wall or enemy carcass. If the leader is [[Health|damaged]] during their walk, they will cancel their task altogether. | If the leader reaches their destination successfully, a dialog message will appear on-screen with their icon, and a message stating that they reached their target spot. If not, they'll explain why the path didn't work. They'll also give up if they get stuck on something for a few seconds, like a wall or enemy carcass. If the leader is [[Health|damaged]] during their walk, they will cancel their task altogether. | ||
The player can use leaders under the Go Here! function, but most action inputs will not work, and the leaders will continue moving by themselves. The exception is the [[whistle]] button, which will make the current leader stop in their place and cancel the Go Here! walk, and the ability to use the KopPad, most notably, the [[#Camera|camera]] feature. A small bubble appears near the leader's head notifying the player that it is possible to cancel. | The player can use leaders under the Go Here! function, but most action inputs will not work, and the leaders will continue moving by themselves. The exception is the [[whistle]] button, which will make the current leader stop in their place and cancel the Go Here! walk, and the ability to use the KopPad, most notably, the [[#Camera|camera]] feature. A small bubble appears near the leader's head notifying the player that it is possible to cancel. | ||
Leaders under the Go Here! function move at a speed slower than manual running, and the exact speed depends on what Pikmin are on their group. In order to make sure no Pikmin lags behind, the leaders walk at the same pace as the slowest Pikmin in the group (given that [[Maturity|leaf]] Pikmin are at the slowest maturity, and that [[Purple Pikmin]] are slower than other Pikmin types). However, they have a maximum speed cap that stops them from going faster than what a player-controlled leader would run. This speed controlling mechanic has the pro of allowing any Pikmin to follow the leader without fear of lagging behind, but also the con of being slower than if the player were to take the leader there on their own. | Leaders under the Go Here! function move at a speed slower than manual running, and the exact speed depends on what Pikmin are on their group. In order to make sure no Pikmin lags behind, the leaders walk at the same pace as the slowest Pikmin in the group (given that [[Maturity|leaf]] Pikmin are at the slowest maturity, and that [[Purple Pikmin]] are slower than other Pikmin types). However, they have a maximum speed cap that stops them from going faster than what a player-controlled leader would run. This speed controlling mechanic has the pro of allowing any Pikmin to follow the leader without fear of lagging behind, but also the con of being slower than if the player were to take the leader there on their own. Leaders become [[Idle#Leaders|idle]] upon reaching their destination, which also means that if there are buried Pikmin close by the destination, they will automatically begin [[pluck]]ing after saying the arrival message. | ||
==Legend== | == Replay == | ||
{{stub|section=y}} | |||
While in the [[day results menu]] and [[mission results menu]] in ''Pikmin 3'', the radar is used to provide a replay for the past day or mission. In {{p3}} for Wii U, the replay is always on the GamePad. The player can use the touchscreen to move the seek bar. In {{p3d}}, the replay menu is opened by pressing {{button|switch|-}}, and the seek bar is moved with {{button|switch|rstick}}. | |||
== Mini radar == | |||
[[File: P3DX Prerelease Garden of Hope Dirt.jpg|thumb|250px|A gameplay scene with the minimap visible.]] | |||
In {{p3d}}, there is a small version of the radar visible during gameplay, in the form of a circular minimap in the lower right corner of the screen. The map in this view is quite different from the standard view, being much more in the style of {{p1}} and {{p2}}. Terrain is shown in dark blue, [[water]] is shown in light blue, and [[out of bounds]] terrain is shown in black. Walls are shown as light blue lines. [[Fruit]], [[leader]]s, [[Pikmin family|Pikmin]], [[obstacle]]s, the [[S.S. Drake]], and the current signal (if there is one) are shown as icons on the map, or around the edge if they are outside the range of the mini radar. Unlike the standard radar in ''Pikmin 3 Deluxe'', unexplored portions do not show up, and the player sees the blue background grid instead. | |||
This mini radar only exists in [[Story Mode]]. When playing with two players, each player's screen gets its own radar. The mini radar can be zoomed in and out slightly, between two levels of zoom, by tilting {{button|switch|rstick}} up or down. | |||
== Legend == | |||
{{game help|p3d}} | |||
The radar can show the following icons: | The radar can show the following icons: | ||
{|class="wikitable" style="max-width: 70%" | {|class="wikitable" style="max-width: 70%" | ||
! Meaning !! ''Pikmin'' icon !! ''Pikmin 2'' icon !! ''Pikmin 3'' icon !! Description | ! Meaning !! ''Pikmin'' icon !! ''Pikmin 2'' icon !! ''Pikmin 3'' icon !! ''Pikmin 4'' icon !! Description | ||
|- | |- | ||
| [[Leader]] | | [[Leader]] | ||
| style = "background-color: #404060; text-align: center;" | [[File:Pikmin radar Olimar.png]] | | style = "background-color: #404060; text-align: center;" | [[File:Pikmin radar Olimar.png]] | ||
| style = "background-color: #404060; text-align: center;" | [[File:Pikmin 2 radar Olimar.png]] [[File:Pikmin 2 radar Louie.png]] | | style = "background-color: #404060; text-align: center;" | [[File:Pikmin 2 radar Olimar.png]] [[File:Pikmin 2 radar Louie.png]] | ||
| style = "background-color: #406040; text-align: center;" | [[File: | | style = "background-color: #406040; text-align: center;" | [[File:P3 Leader Icons.png]] | ||
| style = "background-color: #406040; text-align: center;" | [[File:P4 Leader Icon.png]] | |||
| Position and facing direction of each leader. In ''Pikmin 2'', red represents Olimar, and blue, the other leader. In ''Pikmin 3'', tapping a different leader's bubble will switch to that leader without unpausing the gameplay. | | Position and facing direction of each leader. In ''Pikmin 2'', red represents Olimar, and blue, the other leader. In ''Pikmin 3'', tapping a different leader's bubble will switch to that leader without unpausing the gameplay. | ||
|- | |- | ||
| Line 98: | Line 163: | ||
| style = "background-color: #404060; color: #FFF; text-align: center;" | N/A | | style = "background-color: #404060; color: #FFF; text-align: center;" | N/A | ||
| style = "background-color: #406040; text-align: center;" | [[File:FruitFinderStar.png]] | | style = "background-color: #406040; text-align: center;" | [[File:FruitFinderStar.png]] | ||
| Shows the location of a [[ship part]] or [[ | | style = "background-color: #406040; text-align: center;" | [[File:Treasure P4 icon.png]] | ||
| Shows the location of a [[ship part]], [[fruit]] or [[treasure]], even if inside an [[enemy]]. The ''Pikmin 3'' icon shows a yellow star if the object hasn't been seen yet, and the fruit's icon otherwise. | |||
|- | |- | ||
| [[Pikmin family|Pikmin]] | | [[Pikmin family|Pikmin]] | ||
| Line 104: | Line 170: | ||
| style = "background-color: #404060; text-align: center;" | [[File:Pikmin 2 radar Pikmin.png]] | | style = "background-color: #404060; text-align: center;" | [[File:Pikmin 2 radar Pikmin.png]] | ||
| style = "background-color: #406040; text-align: center;" | [[File:Pikmin 3 radar Pikmin.png]] | | style = "background-color: #406040; text-align: center;" | [[File:Pikmin 3 radar Pikmin.png]] | ||
| style = "background-color: #406040; text-align: center;" | [[File:Pikmin 4 radar Pikmin.png]] | |||
| The location of the regular Pikmin. | | The location of the regular Pikmin. | ||
|- | |- | ||
| | | Buried Pikmin | ||
| style = "background-color: #404060; text-align: center;" | [[File:Pikmin radar burrowed.png]] | | style = "background-color: #404060; text-align: center;" | [[File:Pikmin radar burrowed.png]] | ||
| style = "background-color: #404060; text-align: center;" | [[File:Pikmin 2 radar burrowed.png]] | | style = "background-color: #404060; text-align: center;" | [[File:Pikmin 2 radar burrowed.png]] | ||
| style = "background-color: #406040; color: #FFF; text-align: center;" | (Same as regular Pikmin) | |||
| style = "background-color: #406040; color: #FFF; text-align: center;" | (Same as regular Pikmin) | | style = "background-color: #406040; color: #FFF; text-align: center;" | (Same as regular Pikmin) | ||
| The location of buried Pikmin, of any type. | | The location of buried Pikmin, of any type. | ||
| Line 115: | Line 183: | ||
| style = "background-color: #404060; color: #FFF; text-align: center;" | N/A | | style = "background-color: #404060; color: #FFF; text-align: center;" | N/A | ||
| style = "background-color: #404060; text-align: center;" | [[File:Pikmin 2 radar Bulbmin.png]] | | style = "background-color: #404060; text-align: center;" | [[File:Pikmin 2 radar Bulbmin.png]] | ||
| style = "background-color: #406040; color: #FFF; text-align: center;" | N/A | |||
| style = "background-color: #406040; color: #FFF; text-align: center;" | N/A | | style = "background-color: #406040; color: #FFF; text-align: center;" | N/A | ||
| The location of Bulbmin. | | The location of Bulbmin. | ||
| Line 122: | Line 191: | ||
| style = "background-color: #404060; text-align: center;" | [[File:Pikmin 2 radar Onion.png]] | | style = "background-color: #404060; text-align: center;" | [[File:Pikmin 2 radar Onion.png]] | ||
| style = "background-color: #406040; color: #FFF; text-align: center;" | [[File:Pikmin 3 radar Onion.png]] | | style = "background-color: #406040; color: #FFF; text-align: center;" | [[File:Pikmin 3 radar Onion.png]] | ||
| style = "background-color: #406040; color: #FFF; text-align: center;" | [[File:Pikmin 4 radar Onion.png]] | |||
| Position of each Onion. | | Position of each Onion. | ||
|- | |- | ||
| Line 127: | Line 197: | ||
| style = "background-color: #404060; text-align: center;" | [[File:S.S. Dolphin icon.png]] | | style = "background-color: #404060; text-align: center;" | [[File:S.S. Dolphin icon.png]] | ||
| style = "background-color: #404060; text-align: center;" | [[File:Hocotate ship icon.png]] | | style = "background-color: #404060; text-align: center;" | [[File:Hocotate ship icon.png]] | ||
| style = "background-color: #406040; color: #FFF; text-align: center;" | [[File:S.S. Drake icon.png| | | style = "background-color: #406040; color: #FFF; text-align: center;" | [[File:S.S. Drake icon.png|64px]] | ||
| Location of the main ship: the [[S.S. Dolphin]], [[Hocotate ship]], or [[S.S. | | style = "background-color: #406040; color: #FFF; text-align: center;" | [[File:S.S. Beagle icon.png]] [[File:S.S. Dolphin P4 radar icon.png]] | ||
| Location of the main ship: the [[S.S. Dolphin]], [[Hocotate ship]], [[S.S. Drake]] or [[S.S. Beagle]]. | |||
|- | |- | ||
| [[Research Pod]] / [[SPERO]] | | [[Research Pod]] / [[SPERO]] | ||
| Line 134: | Line 205: | ||
| style = "background-color: #404060; text-align: center;" | [[File:Pikmin 2 radar Research Pod.png]] | | style = "background-color: #404060; text-align: center;" | [[File:Pikmin 2 radar Research Pod.png]] | ||
| style = "background-color: #406040; color: #FFF; text-align: center;" | [[File:SPERO icon.png]] | | style = "background-color: #406040; color: #FFF; text-align: center;" | [[File:SPERO icon.png]] | ||
| style = "background-color: #406040; color: #FFF; text-align: center;" | N/A | |||
| Location of the treasure-collecting floating vessel. | | Location of the treasure-collecting floating vessel. | ||
|- | |- | ||
| Line 140: | Line 212: | ||
| style = "background-color: #404060; text-align: center;" | [[File:Cave icon.png]] | | style = "background-color: #404060; text-align: center;" | [[File:Cave icon.png]] | ||
| style = "background-color: #406040; color: #FFF; text-align: center;" | N/A | | style = "background-color: #406040; color: #FFF; text-align: center;" | N/A | ||
| style = "background-color: #406040; text-align: center;" | [[File:Cave P4 icon.png|40px]] | |||
| Hole used to enter a cave or the next sublevel in a cave. | | Hole used to enter a cave or the next sublevel in a cave. | ||
|- | |- | ||
| Line 146: | Line 219: | ||
| style = "background-color: #404060; text-align: center;" | [[File:Cave complete icon.png]] | | style = "background-color: #404060; text-align: center;" | [[File:Cave complete icon.png]] | ||
| style = "background-color: #406040; color: #FFF; text-align: center;" | N/A | | style = "background-color: #406040; color: #FFF; text-align: center;" | N/A | ||
| style = "background-color: #406040; text-align: center;" | [[File:Cave P4 Completed icon.png|32px]] | |||
| If a cave has no more treasure left to collect, it will be represented with this icon. | | If a cave has no more treasure left to collect, it will be represented with this icon. | ||
|- | |- | ||
| Line 151: | Line 225: | ||
| style = "background-color: #404060; color: #FFF; text-align: center;" | N/A | | style = "background-color: #404060; color: #FFF; text-align: center;" | N/A | ||
| style = "background-color: #404060; text-align: center;" | [[File:Pikmin 2 radar geyser.png]] | | style = "background-color: #404060; text-align: center;" | [[File:Pikmin 2 radar geyser.png]] | ||
| style = "background-color: #406040; color: #FFF; text-align: center;" | N/A | |||
| style = "background-color: #406040; color: #FFF; text-align: center;" | N/A | | style = "background-color: #406040; color: #FFF; text-align: center;" | N/A | ||
| Location of a cave's exit geyser. | | Location of a cave's exit geyser. | ||
|- | |||
| [[Dandori Battle]] | |||
| style = "background-color: #404060; color: #FFF; text-align: center;" | N/A | |||
| style = "background-color: #404060; color: #FFF; text-align: center;" | N/A | |||
| style = "background-color: #406040; color: #FFF; text-align: center;" | N/A | |||
| style = "background-color: #406040; text-align: center;" | [[File:Dandori Battle P4 icon.png|40px]] | |||
| Location of a Dandori Battle. | |||
|- | |||
| [[Dandori Challenge]] | |||
| style = "background-color: #404060; color: #FFF; text-align: center;" | N/A | |||
| style = "background-color: #404060; color: #FFF; text-align: center;" | N/A | |||
| style = "background-color: #406040; color: #FFF; text-align: center;" | N/A | |||
| style = "background-color: #406040; text-align: center;" | [[File:Dandori Challenge P4 icon.png|40px]] | |||
| Location of a Dandori Challenge. | |||
|- | |- | ||
| North | | North | ||
| style = "background-color: #404060; color: #FFF; text-align: center;" | [[File:Pikmin radar arrow.png]] | | style = "background-color: #404060; color: #FFF; text-align: center;" | [[File:Pikmin radar arrow.png]] | ||
| style = "background-color: #404060; color: #FFF; text-align: center;" | [[FIle:Pikmin radar arrow.png]] | | style = "background-color: #404060; color: #FFF; text-align: center;" | [[FIle:Pikmin radar arrow.png]] | ||
| style = "background-color: #406040; color: #FFF; text-align: center;" | [[File:NorthIcon.png]] | | style = "background-color: #406040; color: #FFF; text-align: center;" | [[File:NorthIcon.png]] [[File:P3 Compass Icon.png|64px]] | ||
| style = "background-color: #406040; color: #FFF; text-align: center;" | [[File:P4 Compass Icon.png|64px]] | |||
| The icon used to represent which direction is north. It stays permanently on the top-left corner of the map, regardless of panning. | | The icon used to represent which direction is north. It stays permanently on the top-left corner of the map, regardless of panning. | ||
|- | |- | ||
| | | [[Segment]] portal | ||
| style = "background-color: #404060; color: #FFF; text-align: center;" | N/A | | style = "background-color: #404060; color: #FFF; text-align: center;" | N/A | ||
| style = "background-color: #404060; color: #FFF; text-align: center;" | N/A | | style = "background-color: #404060; color: #FFF; text-align: center;" | N/A | ||
| style = "background-color: #406040; color: #FFF; text-align: center;" | [[File:ArrowIcon.png]] | | style = "background-color: #406040; color: #FFF; text-align: center;" | [[File:ArrowIcon.png]] | ||
| Entrance or exit point between | | style = "background-color: #406040; color: #FFF; text-align: center;" | N/A | ||
| Entrance or exit point between segments, pointing to the exit. Tapping a portal icon will center the map on the matching portal. | |||
|- | |- | ||
| Signal | | Signal | ||
| Line 170: | Line 261: | ||
| style = "background-color: #404060; color: #FFF; text-align: center;" | N/A | | style = "background-color: #404060; color: #FFF; text-align: center;" | N/A | ||
| style = "background-color: #406040; color: #FFF; text-align: center;" | [[File:Pikmin 3 signal icon.png]] | | style = "background-color: #406040; color: #FFF; text-align: center;" | [[File:Pikmin 3 signal icon.png]] | ||
| style = "background-color: #406040; color: #FFF; text-align: center;" | N/A | |||
| The location of the current signal. This icon also emits large circular yellow waves from time to time. | | The location of the current signal. This icon also emits large circular yellow waves from time to time. | ||
|} | |} | ||
| Line 180: | Line 272: | ||
In ''Pikmin 3'', multi-part fruits also have different icons, and grapes have icons that represent different levels of individual grape collection. Upon collecting 10 different types of fruit, the Fruit Finder will be unlocked. Fruits will be then shown on the KopPad whether the area has been discovered yet or not. | In ''Pikmin 3'', multi-part fruits also have different icons, and grapes have icons that represent different levels of individual grape collection. Upon collecting 10 different types of fruit, the Fruit Finder will be unlocked. Fruits will be then shown on the KopPad whether the area has been discovered yet or not. | ||
==Map textures== | == Map textures == | ||
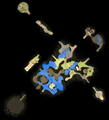
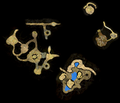
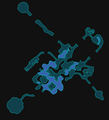
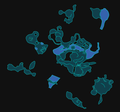
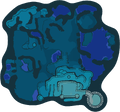
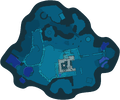
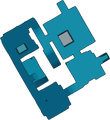
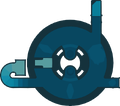
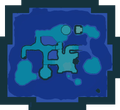
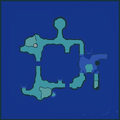
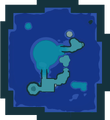
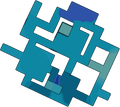
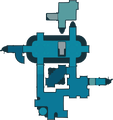
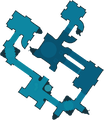
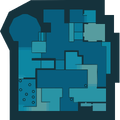
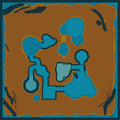
These are the textures used by the games to represent the areas on the radar. | These are the textures used by the games to represent the areas on the radar. | ||
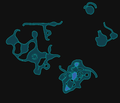
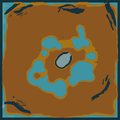
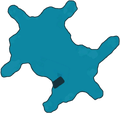
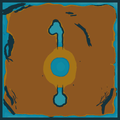
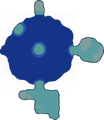
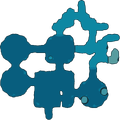
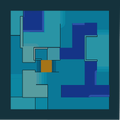
For the first two games, these are the raw textures, without any tinting or resizing applied. They do have some empty space for in-game icon alignment purposes, but the following images have that space cropped for convenience. In all textures up corresponds to the North, except for The Final Trial one, in which the opposite is true. | |||
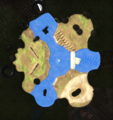
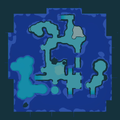
For ''Pikmin 3'', each | For ''Pikmin 3'', each [[segment]] has its own texture, and in the following images, the textures were aligned by hand, and when justified, cropped (with a fade-in effect). | ||
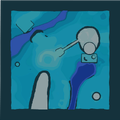
===''Pikmin''=== | For ''Pikmin 4'', the base terrain is one texture, while every body of water or mud has its own texture placed on top of the base terrain in the right location. In the following images, the water bodies have been manually placed. | ||
=== ''Pikmin'' === | |||
<gallery> | <gallery> | ||
IS texture.png|[[The Impact Site]]. | IS texture.png|[[The Impact Site]]. | ||
| Line 196: | Line 290: | ||
</gallery> | </gallery> | ||
===''Pikmin 2''=== | === ''Pikmin 2'' === | ||
<gallery> | <gallery> | ||
VoR texture.png|[[Valley of Repose]]. | VoR texture.png|[[Valley of Repose]]. | ||
| Line 205: | Line 298: | ||
</gallery> | </gallery> | ||
===''Pikmin 3''=== | ==== Cave sublevels ==== | ||
{{todo|Add all radar map textures of cave sublevels that never change.}} | |||
<gallery> | |||
CavernOfChaosLastSublevelRadar.png|[[Cavern of Chaos]], sublevel 10. | |||
</gallery> | |||
=== ''Pikmin 3'' === | |||
<gallery> | <gallery> | ||
Tropical Wilds map.png|[[Tropical Wilds]]. | Tropical Wilds map.png|[[Tropical Wilds]]. | ||
| Line 214: | Line 313: | ||
</gallery> | </gallery> | ||
==Oddities== | ==== ''Pikmin 3 Deluxe'' ==== | ||
===''Pikmin 2'' manual=== | <gallery> | ||
Tropical Wilds map P3D.png|Regular radar map of the Tropical Wilds. | |||
Garden of Hope map P3D.png|Regular radar map of the Garden of Hope. | |||
Distant Tundra map P3D.png|Regular radar map of the Distant Tundra. | |||
Twilight River map P3D.png|Regular radar map of the Twilight River. | |||
Formidable Oak map P3D.png|Regular radar map of the Formidable Oak. | |||
Tropical Wilds minimap.png|Mini radar map of the Tropical Wilds. | |||
Garden of Hope minimap.png|Mini radar map of the Garden of Hope. | |||
Distant Tundra minimap.png|Mini radar map of the Distant Tundra. | |||
Twilight River minimap.png|Mini radar map of the Twilight River. | |||
Formidable Oak minimap.png|Mini radar map of the Formidable Oak. | |||
</gallery> | |||
==== Bingo Battle ==== | |||
<gallery> | |||
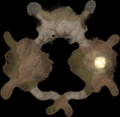
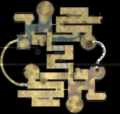
Shaded Terrace radar.png|[[Shaded Terrace]]. | |||
Stagnant Sea radar.png|[[Stagnant Sea]]. | |||
Twisted Cavern radar.png|[[Twisted Cavern]]. | |||
Arid Metropolis radar.png|[[Arid Metropolis]]. | |||
Rusted Labyrinth radar.png|[[Rusted Labyrinth]]. | |||
Jigsaw Fortress radar.png|[[Jigsaw Fortress]]. | |||
Blooming Terrace radar.png|[[Blooming Terrace]]. | |||
Parched Brook radar.png|[[Parched Brook]]. | |||
Buried Pond radar.png|[[Buried Pond]] (Layout A/B). | |||
Buried Pond C radar.png|Buried Pond (Layout C). | |||
Sandpit Kingdom radar.png|[[Sandbox Kingdom]]. | |||
Corroded Maze radar.png|[[Corroded Maze]]. | |||
Jigsaw Colosseum radar.png|[[Jigsaw Colosseum]]. | |||
</gallery> | |||
=== ''Pikmin 4'' === | |||
<gallery> | |||
Rescue Command Post map.png|[[Rescue Command Post]]. | |||
Sun-Speckled Terrace map.png|[[Sun-Speckled Terrace]], main story. | |||
Sun-Speckled Terrace OST map.png|Sun-Speckled Terrace, Olimar's Shipwreck Tale. | |||
Blossoming Arcadia map.png|[[Blossoming Arcadia]], main story. | |||
Blossoming Arcadia OST map.png|Blossoming Arcadia, Olimar's Shipwreck Tale. | |||
Serene Shores high tide map.png|[[Serene Shores]] before noon, main story. | |||
Serene Shores low tide map.png|Serene Shores after noon, main story. | |||
Serene Shores OST high tide map.png|Serene Shores before noon, Olimar's Shipwreck Tale. | |||
Serene Shores OST low tide map.png|Serene Shores after noon, Olimar's Shipwreck Tale. | |||
Hero's Hideaway map.png|[[Hero's Hideaway]], main story. | |||
Hero's Hideaway OST map.png|Hero's Hideaway, Olimar's Shipwreck Tale. | |||
Giant's Hearth map.png|[[Giant's Hearth]]. | |||
Primordial Thicket map.png|[[Primordial Thicket]]. | |||
</gallery> | |||
==== Cave sublevels ==== | |||
<gallery> | |||
Burrow of Beginnings map.png|[[Burrow of Beginnings]]. | |||
Last-Frost Cavern map.png|[[Last-Frost Cavern]]. | |||
Crackling Cauldron Sublevel 1 map.png|[[Crackling Cauldron]], sublevel 1. | |||
Crackling Cauldron Sublevel 2 map.png|Crackling Cauldron, sublevel 2. | |||
Aquiferous Summit Sublevel 1 map.png|[[Aquiferous Summit]], sublevel 1. | |||
Aquiferous Summit Sublevel 2 map.png|Aquiferous Summit, sublevel 2. | |||
Industrial Maze Sublevel 1 map.png|[[Industrial Maze]], sublevel 1. | |||
Industrial Maze Sublevel 2 map.png|Industrial Maze, sublevel 2. | |||
Hectic Hollows Sublevel 1 map.png|[[Hectic Hollows]], sublevel 1. | |||
Hectic Hollows Sublevel 2 map.png|Hectic Hollows, sublevel 2. | |||
Drafty Gallery Sublevel 1 map.png|[[Drafty Gallery]], sublevel 1. | |||
Drafty Gallery Sublevel 2 map.png|Drafty Gallery, sublevel 2. | |||
Drafty Gallery Sublevel 3 map.png|Drafty Gallery, sublevel 3. | |||
Drafty Gallery Sublevel 4 map.png|Drafty Gallery, sublevel 4. | |||
Secluded Courtyard Sublevel 1 map.png|[[Secluded Courtyard]], sublevel 1. | |||
Secluded Courtyard Sublevel 2 map.png|Secluded Courtyard, sublevel 2. | |||
Secluded Courtyard Sublevel 3 map.png|Secluded Courtyard, sublevel 3. | |||
Sightless Passage map.png|[[Sightless Passage]]. | |||
Kingdom of Beasts Sublevel 1 map.png|[[Kingdom of Beasts]], sublevel 1. | |||
Kingdom of Beasts Sublevel 2 map.png|Kingdom of Beasts, sublevel 2. | |||
Kingdom of Beasts Sublevel 3 map.png|Kingdom of Beasts, sublevel 3. | |||
Kingdom of Beasts Sublevel 4 map.png|Kingdom of Beasts, sublevel 4. | |||
Kingdom of Beasts Sublevel 5 map.png|Kingdom of Beasts, sublevel 5. | |||
Kingdom of Beasts Sublevel 6 map.png|Kingdom of Beasts, sublevel 6. | |||
Seafloor Resort Sublevel 1 map.png|[[Seafloor Resort]], sublevel 1. | |||
Seafloor Resort Sublevel 2 map.png|Seafloor Resort, sublevel 2. | |||
Seafloor Resort Sublevel 3 map.png|Seafloor Resort, sublevel 3. | |||
Seafloor Resort Sublevel 4 map.png|Seafloor Resort, sublevel 4. | |||
Subzero Sauna Sublevel 1 map.png|[[Subzero Sauna]], sublevel 1. | |||
Subzero Sauna Sublevel 2 map.png|Subzero Sauna, sublevel 2. | |||
Subzero Sauna Sublevel 3 map.png|Subzero Sauna, sublevel 3. | |||
Below-Grade Discotheque Sublevel 1 map.png|[[Below-Grade Discotheque]], sublevel 1. | |||
Below-Grade Discotheque Sublevel 2 map.png|Below-Grade Discotheque, sublevel 2. | |||
Below-Grade Discotheque Sublevel 3 map.png|Below-Grade Discotheque, sublevel 3. | |||
Below-Grade Discotheque Sublevel 4 map.png|Below-Grade Discotheque, sublevel 4. | |||
Below-Grade Discotheque Sublevel 5 map.png|Below-Grade Discotheque, sublevel 5. | |||
Engulfed Castle Sublevel 1 map.png|[[Engulfed Castle]], sublevel 1. | |||
Engulfed Castle Sublevel 2 map.png|Engulfed Castle, sublevel 2. | |||
Engulfed Castle Sublevel 3 map.png|Engulfed Castle, sublevel 3. | |||
Engulfed Castle Sublevel 4 map.png|Engulfed Castle, sublevel 4. | |||
Engulfed Castle Sublevel 5 map.png|Engulfed Castle, sublevel 5. | |||
Doppelgänger's Den Sublevel 1 map.png|[[Doppelgänger's Den]], sublevel 1. | |||
Doppelgänger's Den Sublevel 2 map.png|Doppelgänger's Den, sublevel 2. | |||
Doppelgänger's Den Sublevel 3 map.png|Doppelgänger's Den, sublevel 3. | |||
Doppelgänger's Den Sublevel 4 map.png|Doppelgänger's Den, sublevel 4. | |||
Frozen Inferno Sublevel 1 map.png|[[Frozen Inferno]], sublevel 1. | |||
Frozen Inferno Sublevel 2 map.png|Frozen Inferno, sublevel 2. | |||
Frozen Inferno Sublevel 3 map.png|Frozen Inferno, sublevel 3. | |||
Frozen Inferno Sublevel 4 map.png|Frozen Inferno, sublevel 4. | |||
Plunder Palace Sublevel 1 map.png|[[Plunder Palace]], sublevel 1. | |||
Plunder Palace Sublevel 2 map.png|Plunder Palace, sublevel 2. | |||
Plunder Palace Sublevel 3 map.png|Plunder Palace, sublevel 3. | |||
Plunder Palace Sublevel 4 map.png|Plunder Palace, sublevel 4. | |||
Plunder Palace Sublevel 5 map.png|Plunder Palace, sublevel 5. | |||
Ultimate Testing Range Sublevel 1 map.png|[[Ultimate Testing Range]], sublevel 1. | |||
Ultimate Testing Range Sublevel 2 map.png|Ultimate Testing Range, sublevel 2. | |||
Ultimate Testing Range Sublevel 3 map.png|Ultimate Testing Range, sublevel 3. | |||
Ultimate Testing Range Sublevel 4 map.png|Ultimate Testing Range, sublevel 4. | |||
Ultimate Testing Range Sublevel 5 map.png|Ultimate Testing Range, sublevel 5. | |||
Dream Home map.png|[[Dream Home]]. | |||
Cradle of the Beast Sublevel 1 map.png|[[Cradle of the Beast]], sublevel 1. | |||
Cradle of the Beast Sublevel 2 map.png|Cradle of the Beast, sublevel 2. | |||
Cradle of the Beast Sublevel 3 map.png|Cradle of the Beast, sublevel 3. | |||
The Mud Pit Sublevel 1 map.png|[[The Mud Pit]], sublevel 1. | |||
The Mud Pit Sublevel 2 map.png|The Mud Pit, sublevel 2. | |||
The Mud Pit Sublevel 3 map.png|The Mud Pit, sublevel 3. | |||
Subterranean Swarm Sublevel 1 map.png|[[Subterranean Swarm]], sublevel 1. | |||
Subterranean Swarm Sublevel 2 map.png|Subterranean Swarm, sublevel 2. | |||
Subterranean Swarm Sublevel 3 map.png|Subterranean Swarm, sublevel 3. | |||
Subterranean Swarm Sublevel 4 map.png|Subterranean Swarm, sublevel 4. | |||
Subterranean Swarm Sublevel 5 map.png|Subterranean Swarm, sublevel 5. | |||
Cavern for a King Sublevel 1 map.png|[[Cavern for a King]], sublevel 1. | |||
Cavern for a King Sublevel 2 map.png|Cavern for a King, sublevel 2. | |||
Cavern for a King Sublevel 3 map.png|Cavern for a King, sublevel 3. | |||
Cavern for a King Sublevel 4 map.png|Cavern for a King, sublevel 4. | |||
Cavern for a King Sublevel 5 map.png|Cavern for a King, sublevel 5. | |||
Cavern for a King Sublevel 6 map.png|Cavern for a King, sublevel 6. | |||
Cavern for a King Sublevel 7 map.png|Cavern for a King, sublevel 7. | |||
Cavern for a King Sublevel 8 map.png|Cavern for a King, sublevel 8. | |||
Cavern for a King Sublevel 9 map.png|Cavern for a King, sublevel 9. | |||
Cavern for a King Sublevel 10 map.png|Cavern for a King, sublevel 10. | |||
Cavern for a King Sublevel 11 map.png|Cavern for a King, sublevel 11. | |||
Cavern for a King Sublevel 12 map.png|Cavern for a King, sublevel 12. | |||
Cavern for a King Sublevel 13 map.png|Cavern for a King, sublevel 13. | |||
Cavern for a King Sublevel 14 map.png|Cavern for a King, sublevel 14. | |||
Cavern for a King Sublevel 15 map.png|Cavern for a King, sublevel 15. | |||
Cavern for a King Sublevel 16 map.png|Cavern for a King, sublevel 16. | |||
Cavern for a King Sublevel 17 map.png|Cavern for a King, sublevel 17. | |||
Cavern for a King Sublevel 18 map.png|Cavern for a King, sublevel 18. | |||
Cavern for a King Sublevel 19 map.png|Cavern for a King, sublevel 19. | |||
Cavern for a King Sublevel 20 map.png|Cavern for a King, sublevel 20. | |||
</gallery> | |||
==== Dandori Battle ==== | |||
<gallery> | |||
Trial Run map.png|[[Trial Run]]. | |||
Battle in a Box map.png|[[Battle in a Box]]. | |||
Dandori Castle map.png|[[Dandori Castle]]. | |||
Leafy Showdown map.png|[[Leafy Showdown]]. | |||
Hot Sandy Duel map.png|[[Hot Sandy Duel]]. | |||
Final Battle map.png|[[Final Battle]]. | |||
</gallery> | |||
==== Dandori Challenge ==== | |||
<gallery> | |||
Dandori Day Care map.png|[[Dandori Day Care]]. | |||
Hotshock Canyon map.png|[[Hotshock Canyon]]. | |||
Rockaway Cellars map.png|[[Rockaway Cellars]]. | |||
Test Tubs map.png|[[Test Tubs]]. | |||
Ice-Cross Course map.png|[[Ice-Cross Course]]. | |||
Hefty Haulway map.png|[[Hefty Haulway]]. | |||
Aerial Incinerator map.png|[[Aerial Incinerator]]. | |||
Strategic Freezeway map.png|[[Strategic Freezeway]]. | |||
Planning Pools map.png|[[Planning Pools]]. | |||
Toggle Training map.png|[[Toggle Training]]. | |||
Cliff-Hanger's Hold map.png|[[Cliff-Hanger's Hold]]. | |||
Oasis of Order map.png|[[Oasis of Order]]. | |||
</gallery> | |||
==== Trial of the Sage Leaf ==== | |||
<gallery> | |||
Bulblaxes map.png|[[Trial of the Sage Leaf#1st Story: Bulblaxes|1st Story: Bulblaxes]]. | |||
Snow Problem map.png|[[Trial of the Sage Leaf#2nd Story: Snow Problem|2nd Story: Snow Problem]]. | |||
Dig Deep map.png|[[Trial of the Sage Leaf#3rd Story: Dig Deep|3rd Story: Dig Deep]]. | |||
Dandori Seas map.png|[[Trial of the Sage Leaf#4th Story: Dandori Seas|4th Story: Dandori Seas]]. | |||
The White Key map.png|[[Trial of the Sage Leaf#5th Story: The White Key|5th Story: The White Key]]. | |||
Gimmick Gambit map.png|[[Trial of the Sage Leaf#6th Story: Gimmick Gambit|6th Story: Gimmick Gambit]]. | |||
One Fell Jump map.png|[[Trial of the Sage Leaf#7th Story: One Fell Jump|7th Story: One Fell Jump]]. | |||
Crowded Kitchen map.png|[[Trial of the Sage Leaf#8th Story: Crowded Kitchen|8th Story: Crowded Kitchen]]. | |||
Turf Turmoil map.png|[[Trial of the Sage Leaf#9th Story: Turf Turmoil|9th Story: Turf Turmoil]]. | |||
The Purple Key map.png|[[Trial of the Sage Leaf#Final Story: The Purple Key|Final Story: The Purple Key]]. | |||
</gallery> | |||
== Oddities == | |||
=== ''Pikmin 2'' manual === | |||
{{todo|Get info for the Japanese instruction manuals.}} | {{todo|Get info for the Japanese instruction manuals.}} | ||
The instruction manuals for ''Pikmin 2'' and ''New Play Control! Pikmin 2'' have a section explaining how the radar works, and in most versions, a legend of its symbols. The legend for the dots that represent the Pikmin is different between all types of manual, and all of them have some quirks to point out. | The instruction manuals for ''Pikmin 2'' and ''New Play Control! Pikmin 2'' have a section explaining how the radar works, and in most versions, a legend of its symbols. The legend for the dots that represent the Pikmin is different between all types of manual, and all of them have some quirks to point out. | ||
| Line 231: | Line 514: | ||
</gallery> | </gallery> | ||
===''Pikmin 3'' radar=== | === ''Pikmin 3'' radar === | ||
The radar in ''Pikmin 3'' has a number of peculiarities and [[mistake]]s to it. | The radar in ''Pikmin 3'' has a number of peculiarities and [[mistake]]s to it. | ||
With [[Off-TV Play]] disabled, if the map app's orientation is set to be the same as the camera's angle, there is a desynchronization between the angle shown on the KopPad and the TV screen's angle, on certain places. This can make it quite difficult to pan while looking at the TV screen. The following locations are affected, and the angles provided here are estimates: | With [[Off-TV Play]] disabled, if the map app's orientation is set to be the same as the camera's angle, there is a desynchronization between the angle shown on the KopPad and the TV screen's angle, on certain places. This can make it quite difficult to pan while looking at the TV screen. The following locations are affected, and the angles provided here are estimates: | ||
*The cave with the [[Velvety Dreamdrop]] | * The cave with the [[Velvety Dreamdrop]] in the [[Tropical Wilds]] has a 45° difference. | ||
*The [[Calcified Crushblat]]'s arena has a 100° difference. | * The [[Calcified Crushblat]]'s arena has a 100° difference. | ||
*Charlie's | * Charlie's crash site in the [[Distant Tundra]] has a 90° difference. | ||
*The | * The wooden bridge leading to the [[Vehemoth Phosbat]] arena has a 15° difference. | ||
*The first | * The first segment of the Vehemoth Phosbat's arena has a 100° difference. | ||
*The actual arena itself has a 45° difference. | * The actual arena itself has a 45° difference. | ||
*The [[Shaggy Long Legs]]' arena on the Distant Tundra has a 15° difference. | * The [[Shaggy Long Legs]]' arena on the Distant Tundra has a 15° difference. | ||
*The top of the [[Formidable Oak]], | * The top of the [[Formidable Oak]], on the outside, has a 45° difference. | ||
*Inside the Formidable Oak, the corridor area has a 45° difference, and the | * Inside the Formidable Oak, the corridor area has a 45° difference, and the first main segment after has a 90° difference; the second main segment with the lights is unaffected. | ||
Other oddities exist with the TV screen: | Other oddities exist with the TV screen: | ||
*By sliding the map on top of the [[Scornet Maestro]]'s arena, toggling between the arena and the pathway leading up to it, and looking at the TV screen, one can notice that the "railing" on the pathway is considerably more simplistic and less detailed if the camera is focusing on the arena – notably, it's lacking the red leaves. | * By sliding the map on top of the [[Scornet Maestro]]'s arena, toggling between the arena and the pathway leading up to it, and looking at the TV screen, one can notice that the "railing" on the pathway is considerably more simplistic and less detailed if the camera is focusing on the arena – notably, it's lacking the red leaves. | ||
*If the player has a [[saved game]] that includes a day after the Scornet Maestro has been defeated, and then returns to a day where they have not yet visited the arena, the camera will reveal the boss [[Glitches in Pikmin 3#T-pose Scornet Maestro|high up in the center of the arena]], in a T-pose. This is because the model is being used as a placeholder for the cutscene that triggers once the player goes to the top of the tree. | * If the player has a [[saved game]] that includes a day after the Scornet Maestro has been defeated, and then returns to a day where they have not yet visited the arena, the camera will reveal the boss [[Glitches in Pikmin 3#T-pose Scornet Maestro|high up in the center of the arena]], in a T-pose. This is because the model is being used as a placeholder for the cutscene that triggers once the player goes to the top of the tree. | ||
*In a day after the [[Quaggled Mireclops]]'s defeat, if the player starts the day and pans the radar to the boss's corpse, they might be able to see [[Pellet#Other colors|pellets of other colors]] on the TV screen. | * In a day after the [[Quaggled Mireclops]]'s defeat, if the player starts the day and pans the radar to the boss's corpse, they might be able to see [[Pellet#Other colors|pellets of other colors]] on the TV screen. | ||
==Gallery== | == Gallery == | ||
{{image|Images from ''Pikmin 3 Deluxe'''s other modes.}} | |||
<gallery> | <gallery> | ||
Pikmin radar.png|The radar in ''Pikmin''. | Pikmin radar.png|The radar in ''Pikmin''. | ||
NPC! Pikmin radar.jpg|The radar in | NPC! Pikmin radar.jpg|The radar in ''New Play Control! Pikmin''. | ||
KopPad map Go Here.jpg|The radar in ''Pikmin 3''. | KopPad map Go Here.jpg|The radar in ''Pikmin 3''. | ||
P3D Bingo Battle Radar.jpg|The radar in [[Bingo Battle]] in ''Pikmin 3 Deluxe''. | |||
</gallery> | </gallery> | ||
==Names in other languages== | == Names in other languages == | ||
{| | {| class="responsive-col" | ||
|- style="vertical-align:top" | |- style="vertical-align:top" | ||
| | |'''Radar''' | ||
''Radar Map'' | {{Foreignname | ||
|Jap=レーダー | |||
|JapR=Rēdā | |||
|JapM=Radar | |||
|FraE=Radar | |||
|FraEM=Radar | |||
|Ger=Radar | |||
|GerM=Radar | |||
|Ita=Radar | |||
|ItaM=Radar | |||
|Kor=레이더 | |||
|KorR=leideo | |||
|KorM=Radar | |||
|Spa=Radar | |||
|SpaM=Radar | |||
}} | |||
|'''Radar (KopPad)''' | |||
{{foreignname | |||
|Jap=Gレーダー | |||
|JapR=GRēdā | |||
|JapM=GRadar | |||
|ChiTrad=G雷達 | |||
|ChiTradR= | |||
|ChiTradM=GRadar | |||
|ChiSimp=G雷达 | |||
|ChiSimpR= | |||
|ChiSimpM=GRadar | |||
|Fra=KopRadar | |||
|FraM=- | |||
|Ger=KopRadar | |||
|GerM=- | |||
|Ita=Radar KopPad | |||
|ItaM=- | |||
|Kor=G레이더 | |||
|KorR=GRaeideo | |||
|KorM=GRadar | |||
|Spa=KopRadar | |||
|SpaM=- | |||
}} | |||
|'''Mini radar''' | |||
{{Foreignname | |||
|SpaA=Minirradar | |||
|SpaAM=Mini-radar | |||
}} | |||
|'''Radar Map (''Hey! Pikmin'')''' | |||
{{foreignname | {{foreignname | ||
|Jap=レーダーマップ | |Jap=レーダーマップ | ||
| Line 277: | Line 606: | ||
|SpaM=Map | |SpaM=Map | ||
}} | }} | ||
| | |} | ||
'' | |||
'''Go Here''' | |||
{{foreignname | {{foreignname | ||
|Jap= | |Jap=ここまで移動 | ||
|JapR= | |JapR=Koko made idō | ||
|JapM= | |JapM=Go here | ||
|Fra= | |ChiTrad=移動到此 | ||
|FraM= | |ChiTradR= | ||
|Ger= | |ChiTradM=Go here | ||
|GerM= | |ChiSimp=移动到此 | ||
|Ita= | |ChiSimpR= | ||
|ItaM= | |ChiSimpM=Go here | ||
|Spa= | |Fra=Aller ici | ||
|SpaM= | |FraM=Go Here | ||
|Ger=Ziel | |||
|GerM=Target | |||
|Ita=Dirigiti qui | |||
|ItaM=Go Here | |||
|Kor=여기까지 이동 | |||
|KorR=yeogikkaji idong | |||
|KorM=Go here | |||
|Spa=Ir hasta aquí | |||
|SpaM=Go Here | |||
}} | |||
'''Fruit Finder''' | |||
{{Foreignname | |||
|SpaA=Buscador de fruta | |||
|SpaAM=Fruit finder | |||
}} | |||
'''Replay''' | |||
{{Foreignname | |||
|SpaA=Repetición | |||
|SpaAM=Replay | |||
}} | }} | ||
==See also== | == See also == | ||
*[[KopPad]] | *[[KopPad]] | ||
*[[Detector]] | |||
*[[Area]] | *[[Area]] | ||
*[[HUD]] | *[[HUD]] | ||
[[Category:Gameplay]] | [[Category:Gameplay]] | ||
Revision as of 11:14, August 3, 2024
- For the radar in Pikmin Bloom, see Detector.
The radar (レーダー?, lit.: "Radar") is a mechanic present in all Pikmin games. It allows the player to view an area's layout, as well as the location of various important objects, such as Pikmin, the Onion(s), and collectible objects. In Pikmin, the radar is unlocked by collecting the Whimsical Radar. In Pikmin 2, it is available from the start. In Pikmin 3, it is unlocked when the KopPad is found. In Pikmin 4, it is unlocked as soon as the player obtains their tablet from Collin.
The controls needed to access the radar, pan it and zoom it vary from game to game:
| Game | Open | Pan | Zoom |
|---|---|---|---|
| Pikmin | |||
| Pikmin 2 | |||
| New Play Control! games | |||
| Pikmin 3 | Can't zoom | ||
| Pikmin 3 Deluxe | |||
| Pikmin 1+2 | |||
| Pikmin 4 | |||
| Hey! Pikmin | Can't pan | Can't zoom |
In the first two games and their remakes, the screen that contains the radar also enumerates how many Pikmin are with the current leader, of each type, how many Pikmin there are in the Onions, of each type, and how many Pikmin are roaming through the area, of all types. In addition, the screen also shows the total number of ship parts obtained, in Pikmin.
The radar is disabled during Challenge Mode, but not Mission Mode. It is completely disabled in any 2-player game mode, except in Pikmin 3 Deluxe.
Functionality
In Pikmin
In Pikmin, the radar is found in Olimar's monitor, once the Whimsical Radar ship part is collected. It is on the right-hand side of the screen, and shows an outlined map of the current area. White stars on the map are the locations of ship parts. The map shows colored dots for Pikmin locations; red dots are Red Pikmin, yellow dots are Yellow Pikmin, blue ones are Blue Pikmin, and green dots are Pikmin that are buried in the ground. It also shows Pikmin statistics on the left.
In Pikmin 2
In Pikmin 2, the radar is what the pause menu opens to by default. It works the same as in Pikmin, except it does not outline locations of treasures, and it is available from the very beginning of the game.
In Pikmin 3
The radar is the default app on the KopPad, and if Off-TV Play is off, the map will follow the current leader as they move.
Touching the GamePad in this state will pause gameplay, if it is not already paused. With Off-TV Play disabled, the camera on the TV screen will also move upwards and point down in a birds-eye view. The player can drag their finger or stylus on the touchscreen in order to pan around; the TV screen camera will also pan accordingly. Effectively, this feature allows the player to view all around the area from a birds-eye view, either with the stylized KopPad map, or from the actual in-game camera.
The map is not fully rendered from the get-go. A fog of war effect makes it so that the map only renders places visited by the leaders. The TV screen's camera will not show unexplored sections. Once a zone of the map is rendered, it stays that way forever, even if the player returns to a previous day after saving; this can be reset by restarting from day 1. Uncharted areas merely show the background of the KopPad – a blue and cyan grid. This method of charting is not divided in cells or predefined zones, but is rather quite smooth, with nearly each pixel of the map having an individual "charted" or "uncharted" state. The map is automatically charted as the gameplay takes place, and approximately one camera-width of content can be revealed from any one position.
Two buttons exist on the top left and top right corners of the map app. The icon on the top-left allows the player to toggle the map orientation between always having the north point up (an "N" icon with a triangle pointing upwards), or the same orientation as the camera (a compass icon). Changing this will also change the TV screen's overhead camera. The button on the top-right shows Alph's silhouette, and is used to toggle the gameplay pause. If the icon is stopped, the gameplay is paused, but if the icon shows a walking animation, the gameplay continues taking place while the player is examining the map. In this mode, all of the map app's functionalities continue to work as normal, but switching apps will forcefully pause the gameplay. It should be noted that the top-right button does not work with Off-TV Play enabled.
When sunset is approaching, the top of the map app will periodically switch between the message "Pikmin in Danger", and the current amount of Pikmin of each type that will be left behind during the sunset, unless they're gathered in time.
If Off-TV Play is on and the player has the screen showing the KopPad, attempting to disable Off-TV Play with ![]() will merely show a message saying that it is impossible to switch. Several bits of decorative Koppaite text can also be found next to icons and buttons.
will merely show a message saying that it is impossible to switch. Several bits of decorative Koppaite text can also be found next to icons and buttons.
In Bingo Battle, the radar cannot be controlled and shows the entire stage at once. It is also limited to the GamePad, giving the player controlling the GamePad a slight advantage.
In Pikmin 3 Deluxe
The radar in Pikmin 3 Deluxe must be opened up with ![]() , or
, or ![]() if P1 is using a solo right joycon (and cannot be opened by P2 using a solo joycon regardless of which joycon they are using; their
if P1 is using a solo right joycon (and cannot be opened by P2 using a solo joycon regardless of which joycon they are using; their ![]() /
/![]() is instead set to pause the game). Since there is no GamePad like in Pikmin 3, the player cannot follow the radar as they play on a different screen, and opening the radar pauses gameplay. Likewise, it is not possible to unpause gameplay while keeping the radar's functionalities open – the icon that would do this still exists in the radar in this game, but is not a button that can be pressed.
is instead set to pause the game). Since there is no GamePad like in Pikmin 3, the player cannot follow the radar as they play on a different screen, and opening the radar pauses gameplay. Likewise, it is not possible to unpause gameplay while keeping the radar's functionalities open – the icon that would do this still exists in the radar in this game, but is not a button that can be pressed.
The full map of the area is available right from the start, but like in Pikmin 3, there is a fog of war effect, and it works in the same way, The only difference being that unvisited portions are simply more transparent, but still visible.
Like in Pikmin 3, entering the sunset stage will make the top toggle between the message "Pikmin in Danger" and an overview of how many Pikmin there are in danger of being left behind. When outside of the sunset stage, that portion will instead present the current Story Mode objective.
Enemy locations are visible in explored parts of the area.
In Bingo Battle, each player can open the radar on their side of the screen. This radar does not pause gameplay, cannot be controlled and shows the whole stage at once. Although it is not normally possible to move while the radar is up, the player can control their leader if they are holding a Pikmin.
In Pikmin 4
In Pikmin 4, the radar is accessed from the Tablet, via the Radar Map application. The radar's design features blue colours, the shade of which changes based on elevation, with a thick navy border surrounding the edge of the area. Bases are indicated by pairs of magenta circles. After purchasing the Survey Drone from the lab, it is possible to drop up to three pins in red, yellow, or blue by pressing ![]() . It is also possible to make the player face a certain direction by moving the cursor and pressing
. It is also possible to make the player face a certain direction by moving the cursor and pressing ![]() .
.
In Hey! Pikmin
In Hey! Pikmin, the Radar Map is not present at the beginning of the game but is rewarded to the player once 2,000 Sparklium has been collected. The Radar Map can be toggled by pressing ![]() /
/![]() . Boss areas and Over Wintry Mountains do not allow the use of the Radar Map.
. Boss areas and Over Wintry Mountains do not allow the use of the Radar Map.
Initially, the Radar Map only shows the explored parts of the current area, with parts further away from Olimar covered by a darker color. Once that area is completed (regardless of whether the player got all treasures), its entire map is revealed for subsequent times the player enters the area.
Here are the icons used in the Radar Map:
| Object | Appearance |
|---|---|
| Olimar | Big white dot |
| Pikmin | Smaller light red/blue/yellow dots, clearer against darker background |
| Obstacles | Light blue, even afterwards as background |
| Moved obstacles/built bridges | Dark blue |
| Doorways | Gray-black holes |
| Treasures | Glimmering |
|
To do: Get images of these symbols and add them to the main legend table. |
Appearance
In the first two games, the radar shows a monochromatic representation of the area's terrain, only really highlighting the walls, water, and the locations of gates. Some icons point out the location of ship parts, treasures, Onions, and a few other things. While the first two games use the same radar presentations, they have differing art-styles for their radar textures: Pikmin's area maps are depicted with a smooth style and a blurry fadeout for the edges of the map, while Pikmin 2's area maps are drawn in a non-smooth style more similar to pixel art, with a more matte fadeout for the edges of the map.
In Pikmin 3, it provides a map of the area, stylized so that water, terrain, structures, and boundary walls are high-contrast and easy to distinguish, but textured to be similar to the actual terrain. There are several icons for all sorts of important objects. As Pikmin 3 Deluxe has slightly different area textures than Pikmin 3, the radar textures are also changed in the Deluxe version.
In Hey! Pikmin, the radar is monochromatic, with terrain represented by dark colors and in-bounds areas represented by light colors. The front side of areas uses a blue color scheme and the back side uses a purple color scheme.
Go Here!
In Pikmin 3 and Pikmin 4, players have the ability to tell leaders and Oatchi (and their army of Pikmin) to go to a specific spot on the map automatically, so that they may do something else with a different leader. In order to use the Go Here! functionality, the player must first collect the data file located on the other side of the crystal wall at the Garden of Hope's landing site in Pikmin 3, free Brittany in Pikmin 3 Deluxe, or reach Command level 2 in Pikmin 4.
Choosing a destination
With the gameplay paused and the radar open, a ![]() appears on the center of the map app. When the map is panned, the pyramid stays on the center, and hence, follows the panning. As the shape moves, a set of arrows originating from the current leader mark a trail from the leader's icon on the map to the spot the pointer is at. After a small delay, a prompt with the leader's icon and the words "Go Here!" will appear in a non-obstructive location of the screen. Tapping this button in Pikmin 3, or pressing
appears on the center of the map app. When the map is panned, the pyramid stays on the center, and hence, follows the panning. As the shape moves, a set of arrows originating from the current leader mark a trail from the leader's icon on the map to the spot the pointer is at. After a small delay, a prompt with the leader's icon and the words "Go Here!" will appear in a non-obstructive location of the screen. Tapping this button in Pikmin 3, or pressing ![]() in Pikmin 3 Deluxe will make the leader take the path shown towards the target location. In the case of Pikmin 3 Deluxe,
in Pikmin 3 Deluxe will make the leader take the path shown towards the target location. In the case of Pikmin 3 Deluxe, ![]() can be pressed before this prompt appears. There are scenarios in which it is not possible to use the Go Here! command, as detailed below.
can be pressed before this prompt appears. There are scenarios in which it is not possible to use the Go Here! command, as detailed below.
Path algorithm
The planned path is always the shortest one required in order to reach the destination. This path-finding system also takes into account insurmountable obstacles and water, disallowing the travel if the player tries to enter a body of water with non-Blue or non-Winged Pikmin in their party. Hazards and enemies are ignored when deciding the path, but uncharted terrain is considered and not allowed. If the player places the destination point in an uncharted or invalid location (like a body of water, as stated above), the pyramid marker will turn pink, and the "Go Here!" button will be grayed out. If the path to a certain location is blocked off by an uncleared obstacle or any other feature that can't be overcome, the shown path will still trace to the point of the obstacle, where it then displays a pink ❌ sign, and the rest of the path with pink arrows, meaning the leader can only reach the point marked by the ❌ sign. To note is that the Go Here! feature will not work while the leader is plucking, dodging, spraying, in pain from being hurt, lying down on the ground (for instance, from getting zapped), captured by an enemy, on top of a lily pad, and strangely, on the first two ledges in the Tropical Wilds where the Armored Cannon Larva is.
Leader movement
If the leader reaches their destination successfully, a dialog message will appear on-screen with their icon, and a message stating that they reached their target spot. If not, they'll explain why the path didn't work. They'll also give up if they get stuck on something for a few seconds, like a wall or enemy carcass. If the leader is damaged during their walk, they will cancel their task altogether.
The player can use leaders under the Go Here! function, but most action inputs will not work, and the leaders will continue moving by themselves. The exception is the whistle button, which will make the current leader stop in their place and cancel the Go Here! walk, and the ability to use the KopPad, most notably, the camera feature. A small bubble appears near the leader's head notifying the player that it is possible to cancel.
Leaders under the Go Here! function move at a speed slower than manual running, and the exact speed depends on what Pikmin are on their group. In order to make sure no Pikmin lags behind, the leaders walk at the same pace as the slowest Pikmin in the group (given that leaf Pikmin are at the slowest maturity, and that Purple Pikmin are slower than other Pikmin types). However, they have a maximum speed cap that stops them from going faster than what a player-controlled leader would run. This speed controlling mechanic has the pro of allowing any Pikmin to follow the leader without fear of lagging behind, but also the con of being slower than if the player were to take the leader there on their own. Leaders become idle upon reaching their destination, which also means that if there are buried Pikmin close by the destination, they will automatically begin plucking after saying the arrival message.
Replay
|
This section is a stub. You can help Pikipedia by expanding it. |
While in the day results menu and mission results menu in Pikmin 3, the radar is used to provide a replay for the past day or mission. In Pikmin 3 for Wii U, the replay is always on the GamePad. The player can use the touchscreen to move the seek bar. In Pikmin 3 Deluxe, the replay menu is opened by pressing ![]() , and the seek bar is moved with
, and the seek bar is moved with ![]() .
.
Mini radar
In Pikmin 3 Deluxe, there is a small version of the radar visible during gameplay, in the form of a circular minimap in the lower right corner of the screen. The map in this view is quite different from the standard view, being much more in the style of Pikmin and Pikmin 2. Terrain is shown in dark blue, water is shown in light blue, and out of bounds terrain is shown in black. Walls are shown as light blue lines. Fruit, leaders, Pikmin, obstacles, the S.S. Drake, and the current signal (if there is one) are shown as icons on the map, or around the edge if they are outside the range of the mini radar. Unlike the standard radar in Pikmin 3 Deluxe, unexplored portions do not show up, and the player sees the blue background grid instead.
This mini radar only exists in Story Mode. When playing with two players, each player's screen gets its own radar. The mini radar can be zoomed in and out slightly, between two levels of zoom, by tilting ![]() up or down.
up or down.
Legend
|
The following article or section is in need of assistance from someone who plays Pikmin 3 Deluxe. |
The radar can show the following icons:
| Meaning | Pikmin icon | Pikmin 2 icon | Pikmin 3 icon | Pikmin 4 icon | Description |
|---|---|---|---|---|---|
| Leader | File:P4 Leader Icon.png | Position and facing direction of each leader. In Pikmin 2, red represents Olimar, and blue, the other leader. In Pikmin 3, tapping a different leader's bubble will switch to that leader without unpausing the gameplay. | |||
| Collectible | N/A | 
|
Shows the location of a ship part, fruit or treasure, even if inside an enemy. The Pikmin 3 icon shows a yellow star if the object hasn't been seen yet, and the fruit's icon otherwise. | ||
| Pikmin | File:Pikmin 4 radar Pikmin.png | The location of the regular Pikmin. | |||
| Buried Pikmin | (Same as regular Pikmin) | (Same as regular Pikmin) | The location of buried Pikmin, of any type. | ||
| Bulbmin | N/A | N/A | N/A | The location of Bulbmin. | |
| Onions | 
|

|
Position of each Onion. | ||
| Ship | Location of the main ship: the S.S. Dolphin, Hocotate ship, S.S. Drake or S.S. Beagle. | ||||
| Research Pod / SPERO | N/A | N/A | Location of the treasure-collecting floating vessel. | ||
| Cave entrance / sublevel hole | N/A | N/A | Hole used to enter a cave or the next sublevel in a cave. | ||
| Completed cave entrance | N/A | N/A | If a cave has no more treasure left to collect, it will be represented with this icon. | ||
| Exit geyser | N/A | N/A | N/A | Location of a cave's exit geyser. | |
| Dandori Battle | N/A | N/A | N/A | Location of a Dandori Battle. | |
| Dandori Challenge | N/A | N/A | N/A | Location of a Dandori Challenge. | |
| North | The icon used to represent which direction is north. It stays permanently on the top-left corner of the map, regardless of panning. | ||||
| Segment portal | N/A | N/A | N/A | Entrance or exit point between segments, pointing to the exit. Tapping a portal icon will center the map on the matching portal. | |
| Signal | N/A | N/A | N/A | The location of the current signal. This icon also emits large circular yellow waves from time to time. |
Besides those, the radar also illustrates the following:
- Water, with stripes that alternate between dark and light, in the first two games, or blue color in Pikmin 3.
- Obstacles, in Pikmin 3, with an icon for each. Some of these icons have more than one version that signify how much more of the obstacle is left to clear.
- The leaders' footsteps in the past few seconds, in Pikmin 3.
In Pikmin 3, multi-part fruits also have different icons, and grapes have icons that represent different levels of individual grape collection. Upon collecting 10 different types of fruit, the Fruit Finder will be unlocked. Fruits will be then shown on the KopPad whether the area has been discovered yet or not.
Map textures
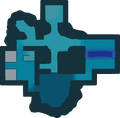
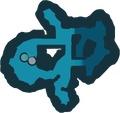
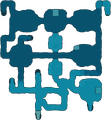
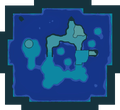
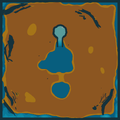
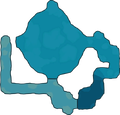
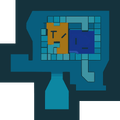
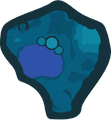
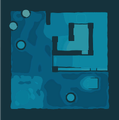
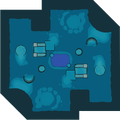
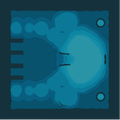
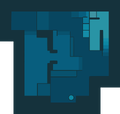
These are the textures used by the games to represent the areas on the radar.
For the first two games, these are the raw textures, without any tinting or resizing applied. They do have some empty space for in-game icon alignment purposes, but the following images have that space cropped for convenience. In all textures up corresponds to the North, except for The Final Trial one, in which the opposite is true.
For Pikmin 3, each segment has its own texture, and in the following images, the textures were aligned by hand, and when justified, cropped (with a fade-in effect).
For Pikmin 4, the base terrain is one texture, while every body of water or mud has its own texture placed on top of the base terrain in the right location. In the following images, the water bodies have been manually placed.
Pikmin
Pikmin 2
Cave sublevels
|
To do: Add all radar map textures of cave sublevels that never change. |
Cavern of Chaos, sublevel 10.
Pikmin 3
Pikmin 3 Deluxe
Bingo Battle
Buried Pond (Layout A/B).
Pikmin 4
Sun-Speckled Terrace, main story.
Blossoming Arcadia, main story.
Serene Shores before noon, main story.
Hero's Hideaway, main story.
Cave sublevels
Crackling Cauldron, sublevel 1.
Aquiferous Summit, sublevel 1.
Industrial Maze, sublevel 1.
Hectic Hollows, sublevel 1.
Drafty Gallery, sublevel 1.
Secluded Courtyard, sublevel 1.
Kingdom of Beasts, sublevel 1.
Seafloor Resort, sublevel 1.
Subzero Sauna, sublevel 1.
Below-Grade Discotheque, sublevel 1.
Engulfed Castle, sublevel 1.
Doppelgänger's Den, sublevel 1.
Frozen Inferno, sublevel 1.
Plunder Palace, sublevel 1.
Ultimate Testing Range, sublevel 1.
Cradle of the Beast, sublevel 1.
The Mud Pit, sublevel 1.
Subterranean Swarm, sublevel 1.
Cavern for a King, sublevel 1.
Dandori Battle
Dandori Challenge
Trial of the Sage Leaf
Oddities
Pikmin 2 manual
|
To do: Get info for the Japanese instruction manuals. |
The instruction manuals for Pikmin 2 and New Play Control! Pikmin 2 have a section explaining how the radar works, and in most versions, a legend of its symbols. The legend for the dots that represent the Pikmin is different between all types of manual, and all of them have some quirks to point out.
The GameCube North American version lists the five main Pikmin colors but bizarrely, a sixth color as well: a soft pink color. It is unknown what this color is meant to represent. The GameCube European version only lists the five main Pikmin types. The US version of New Play Control! remake's instruction manual doesn't have a legend, and only has a shorter overview of how the radar works. It does however have a list of the radar dot colors some pages ahead, in the section describing the differences between Pikmin types. Finally, the European New Play Control! Pikmin 2 manual brings back the legend of symbols, and includes an explanation of the dark green color used to represent buried Pikmin sprouts.
All instruction manuals use a very dark purple for the Purple Pikmin, which is different from the light magenta seen in-game.
Pikmin 3 radar
The radar in Pikmin 3 has a number of peculiarities and mistakes to it.
With Off-TV Play disabled, if the map app's orientation is set to be the same as the camera's angle, there is a desynchronization between the angle shown on the KopPad and the TV screen's angle, on certain places. This can make it quite difficult to pan while looking at the TV screen. The following locations are affected, and the angles provided here are estimates:
- The cave with the Velvety Dreamdrop in the Tropical Wilds has a 45° difference.
- The Calcified Crushblat's arena has a 100° difference.
- Charlie's crash site in the Distant Tundra has a 90° difference.
- The wooden bridge leading to the Vehemoth Phosbat arena has a 15° difference.
- The first segment of the Vehemoth Phosbat's arena has a 100° difference.
- The actual arena itself has a 45° difference.
- The Shaggy Long Legs' arena on the Distant Tundra has a 15° difference.
- The top of the Formidable Oak, on the outside, has a 45° difference.
- Inside the Formidable Oak, the corridor area has a 45° difference, and the first main segment after has a 90° difference; the second main segment with the lights is unaffected.
Other oddities exist with the TV screen:
- By sliding the map on top of the Scornet Maestro's arena, toggling between the arena and the pathway leading up to it, and looking at the TV screen, one can notice that the "railing" on the pathway is considerably more simplistic and less detailed if the camera is focusing on the arena – notably, it's lacking the red leaves.
- If the player has a saved game that includes a day after the Scornet Maestro has been defeated, and then returns to a day where they have not yet visited the arena, the camera will reveal the boss high up in the center of the arena, in a T-pose. This is because the model is being used as a placeholder for the cutscene that triggers once the player goes to the top of the tree.
- In a day after the Quaggled Mireclops's defeat, if the player starts the day and pans the radar to the boss's corpse, they might be able to see pellets of other colors on the TV screen.
Gallery
|
This article or section is in need of more images. Particularly: |
The radar in Bingo Battle in Pikmin 3 Deluxe.
Names in other languages
Radar
|
Radar (KopPad)
|
Mini radar
|
Radar Map (Hey! Pikmin)
|
Go Here
| Language | Name | Meaning |
|---|---|---|
| ここまで移動? Koko made idō |
Go here | |
(traditional) |
移動到此 | Go here |
(simplified) |
移动到此 | Go here |
| Aller ici | Go Here | |
| Ziel | Target | |
| Dirigiti qui | Go Here | |
| 여기까지 이동 yeogikkaji idong |
Go here | |
| Ir hasta aquí | Go Here |
Fruit Finder
| Language | Name | Meaning |
|---|---|---|
| Buscador de fruta | Fruit finder |
Replay
| Language | Name | Meaning |
|---|---|---|
| Repetición | Replay |
