
Mission Mode

Mission Mode (ミッション?, lit.: "Mission") is an alternate gameplay mode in Pikmin 3. It replaces the Challenge Mode found in previous games. In Mission Mode, the player completes challenges, with three different types existing. Each one has a time limit of between five and fifteen minutes, and awards the player with a ranking based on how well they performed on the mission.
The following rankings exist, and are sorted from worst to best: no medal, bronze, silver, gold, and platinum. The requirements for each ranking vary between stages and mission types. When a stage is complete, a quick summary of the objects collected or enemies killed is displayed, and the player is given a final score. The player can then watch a replay of the entire session.
Gameplay in this mode is mostly identical to that of Story Mode in the way it is controlled, and that the player never starts out with any ultra-spicy sprays, although it is possible to get some via Burgeoning Spiderworts and/or ultra-spicy nectar on certain stages. However, there are a few mission type-specific rules, and there is also the fact that the player always has the Dodge Whistle and none of the other spacesuit gear. If a leader loses all of their health or if a Pikmin extinction takes place, the mission is aborted.
Types
There are three types of mission, each with a different objective, scoring system, and rules.
Collect Treasure!
The goal in Collect Treasure! mode is to retrieve as many fruits, Nuggets, and enemy carcasses as possible within a limited amount of time. Players can find Pikmin to use either at the starting point, buried, scattered across the map, hidden below plants in small groups, or inside certain enemies, like the Medusal Slurker. In most Missions, there is no Onion, meaning that players cannot grow any more Pikmin than the ones provided throughout the stage, although Twilight Hollow Remix and Beastly Caverns have Onions. For stages with no Onions, any recovered enemy corpses go into the SPERO to exchange for Pokos. When Onions are present, the corpses are instead brought to them to create more Pikmin as well as earning Pokos. Additionally, Beastly Caverns is the only stage to have pellets, which will only create more Pikmin and not earn Pokos. Regardless of stage, all fruits and Nuggets are taken to the SPERO to be converted to Pokos. The player's score is based on how many total Pokos were earned. Collecting all of the objects that can be converted to Pokos in the stage instantly finishes the Mission, and the time left is awarded to the player as extra points, with each stage giving a different value per second remaining.
Battle Enemies!
The objective of this mode is to defeat enemies to score points. Each enemy type is worth a certain amount of points; for example, the Swooping Snitchbug holds 30 points. Only a few Pikmin are available on the map, and the player must bring back enemies to the Onion in order to increase their Pikmin army. As such, the player needs a careful balance between combat and reinforcements to be efficient. The enemy's score is instantly added to the score counter the second the enemy dies. Once the timer is up, the points the player gains are counted as their score, but if all enemies are killed, the mission ends right away and the player receives extra points based on the time left. Some stages in this mode are remixed versions of Story Mode areas, featuring different object placement to the story versions of these areas, with sections of the area not relevant to the stage blocked off by large cinderblocks.
Defeat Bosses!

|
The following article or section is in need of assistance from someone who plays Pikmin 3. |
Missions in this mode require the player to defeat one of the main bosses in Story Mode (including the Plasm Wraith, but not any of the difficult enemies considered "midbosses") with a given assortment of Pikmin and time limit. To fight a boss in this mode, it must be defeated in Story Mode first. The player's medal is determined by the time left over. The Pikmin death count has nothing to do with scoring, but is still shown on the results screen. The health of each boss reflects the Normal difficulty level in Story Mode.
Stage
|
The following article or section is in need of assistance from someone who plays Pikmin 3. |
|
The following article or section is in need of assistance from someone who plays Pikmin 3 Deluxe. |
There are 36 stages in Mission Mode, of which 16 are downloadable content in the original Pikmin 3 but are part of the base game in Pikmin 3 Deluxe. All stages support 2-player split-screen co-op. In the original Pikmin 3, Tropical Forest Remix, Tropical Wilds Remix, and Fortress of Festivity are free stages, and are only added to the game if it is updated. Unlike the Challenge Mode in previous games, Mission Mode is available from the start of the game, but certain requirements must be met in order to unlock some stages.
For Pikmin 3 on the Wii U, bosses in Defeat Bosses! mode are only made available once they're defeated in Story Mode for the first time (regardless of collecting their spoils). For the other mission categories, players start out with only one stage available, and they must obtain at least a bronze medal in order to unlock the next stage on the line. For the missions that aren't downloadable content, the previous mission must be beat before the next one can be unlocked.
For Pikmin 3 Deluxe, Defeat Bosses! missions follow the same unlock requirements as before, but for the Collect Treasure! and Battle Enemies! missions, the player starts with the first five stages. Completing one stage, regardless of medals, unlocks 5 stages from the first and second Wii U DLC pack, depending on which mode the player plays in. Once all of those are beaten, stages from the third DLC pack from the Wii U version are unlocked.
Collect Treasure!
Battle Enemies!
Defeat Bosses!
Co-op
Before starting a stage, it is possible to choose between single-player or 2-player co-op mode. In co-op, player 1 is on the left of the screen, while player 2 is on the right of the screen. If the stage has more than two leaders available, either player can switch to the leader that is not being used. Players share sprays, so any sprays used will deduct from the counter of both players. Co-op high scores are listed separately from single-player high scores. The "Go Here!" function cannot be used in co-op.
After Hours
After Hours is a feature that was added in Pikmin 3 Deluxe. If the player's time is up when they are playing through a normal mission, they will be sent to the results screen, but a button labeled "Continue" (with an "After Hours" blurb) will be present. Picking this option allows the game to continue where the player left off, but without a goal or a chance to increase the score they got. This allows the player to check out how the rest of their mission would have gone if they hadn't run out of time, so they can better plan for next time, or to just complete the mission without caring for the score.
When the mode is entered, the gameplay resumes from the exact point the player left at, after a brief "Ready... Go!" pause. Everything is the same, except now the music changes to a simple track, the clock present during gameplay is replaced with a pink "After Hours" box, and the timer (now pink) counts up instead of down. This timer has no purpose other than showing to the player how much longer they are taking to complete the mission. The player can now finish the stage like normal, lose, retry the entire mission from the start, or quit from the pause menu. Finishing the stage successfully will bring the results screen up again, the game will tally everything up, and show the player a total score, although this time the results screen makes note that this was in After Hours mode, including a blurb that shows how much extra time was needed. This score is not saved and, naturally, this time there is no option to play After Hours in.
Players can only enter After Hours when they run out of time, so the option isn't present if the goal was met, if a leader was knocked out, or if all Pikmin have been lost. In addition, it is not present during Defeat Bosses! missions, and although the Side Stories game mode is similar to Mission Mode, it does not have After Hours. When the player presses the button to enter After Hours mode, the game asks if they are sure they wish to continue playing, and reminds them that no record will be saved. Regardless of the player's choice, the game will save the score obtained so far and then proceed to leave or to resume gameplay, depending on the choice. If the player loses the mission during After Hours, the game simply marks the stage as played, saves, and returns to the mission category's mission selection menu. But by completing the stage successfully, the game will save when the results screen is left in order to mark the mission as complete, but nothing else. This is useful, for instance, to unlock stages 6 to 10 of a category, since the player needs to have completed stages 1 to 5 first.
Oddly, due to a glitch, playing in handheld mode will result in the rendering resolution to be increased when the game enters After Hours mode.
Unwinnable conditions
Aside from Defeat Bosses! missions, the only way for a mission to end is if either there is a total Pikmin extinction, or if a leader it knocked out. When either of these two events occur, the Pikmin extinction or the knocked-out leader cutscenes play and the stage will instantly end. However, during certain Defeat Bosses! stages, losing a certain type of Pikmin prompts a message notifying the player that the boss can no longer be defeated and asks whether the player would like to keep playing. The message states "You are now unable to attack the boss name. Do you want to keep playing anyway?".
This can be seen when:
- There are no more Rock Pikmin in the Armored Mawdad's stage when none of its crystals have been destroyed. If at least one crystal has been destroyed (excluding the mandibles), the message does not appear.
- There are no more Winged Pikmin in the Scornet Maestro's stage.
- There are no more Rock Pikmin in the Quaggled Mireclops' stage when its crystal has not been fully destroyed. If its crystal has been destroyed, the message does not appear.
Just like the Collect Treasures! and Battle Enemies! stages, if there is a total Pikmin extinction or a leader knockout, the stage will instantly end.
Rankings
- See also: Global rankings.
There are five essential rankings for each stage: No ranking, Bronze, Silver, Gold, and Platinum. No ranking simply means that the player did not get enough points to earn a medal. The criteria for getting medals is different for each game mode, with the points differing every stage. Platinum medals mean that the player has collected all treasure and defeated all enemies before the time limit . Any time after the Platinum medal is acquired will be added as a time bonus to the original score, with a certain amount of additional points per second remaining, that depends on the stage. For Defeat Bosses!, only the time matters, and the quicker a boss is defeated, the better the medal; if it is defeated too late, the player might not receive any medal.
The game keeps track of the five best scores in both single-player and co-op. These scores are only accessible on the results screen at the end of a successful mission, but the top score is available on the screen before the mission begins.
Details
Each medal has a different look based on its ranking and the game mode. The loading screen tips state that each medal gives the player an honorary title, though nothing change in the game whatsoever. In the score tally screen, when a medal is obtained, a Pikmin can also be heard cheering the player. While hard to understand due to the Pikmin's voice, when slowed down, the different voice clips can be figured out.[1] The following table illustrates the medals for all rankings, as well as the title given by the tips and the cheers said by the Pikmin.
| Collect Treasure! | Battle Enemies! | Defeat Bosses! | Title | Pikmin cheer | |
|---|---|---|---|---|---|
| Bronze | Lieutenant | "Good!" | |||
| Silver | Captain | "Great!" | |||
| Gold | General | "Excellent!" | |||
| Platinum | Royalty | "Perfect!" |
The medals are visible on the screen with the mission's briefings. A second medal appears if the challenge was completed in co-op mode. The platinum medals also have the Koppaite text ![]()
![]()
![]()
![]()
![]()
![]()
![]()
![]()
![]()
![]()
![]()
![]()
![]()
![]() on them, which means "Pikmin Platinum".
on them, which means "Pikmin Platinum".
The fanfare that plays when the player acquires a platinum medal or successfully defeats a boss: 0:06
Points
Every collectable fruit, nugget, and enemy each give a certain amount of points. In order to achieve a Platinum Medal, every fruit and enemy must be retrieved in Collect Treasures!, every enemy must be defeated in Battle Enemies!, and the boss must be defeated in Defeat Bosses!. Bonus points will be given for every second left on the timer. The following list shows the amount of points each object gives in Mission Mode stages:
| Icon | Name | Points |
|---|---|---|
| Astringent Clump | 100 | |
| Blonde Imposter | 200 (Whole fruit) 100 (Each part) | |
| Citrus Lump | 70 | |
| Crimson Banquet | 1000 (Whole fruit) 20, 80, 80, 160, 160, 500 (Each part) | |
| Crunchy Deluge | 100 | |
| Cupid's Grenade | 20 | |
| Dapper Blob | 50 | |
| Dawn Pustules | 400 (Whole fruit) 20 (Each part) | |
| Delectable Bouquet | 80 | |
| Disguised Delicacy | 100 (Whole fruit) 50 (Each part) | |
| Dusk Pustules | 200 (Whole fruit) 10 (Each part) | |
| Face Wrinkler | 70 | |
| Fire-Breathing Feast | 500 | |
| Golden Grenade | 100 | |
| Golden Sunseed | 200 | |
| Heroine's Tear | 500 | |
| Insect Condo | 100 | |
| Juicy Gaggle | 20 | |
| Lesser Mock Bottom | 50 | |
| Mock Bottom | 200 | |
| Nuggets | Variable (Whole pile) 3 (Each nugget) | |
| Pocked Airhead | 300 | |
| Portable Sunset | 80 | |
| Scaly Custard | 80 | |
| Searing Acidshock | 50 | |
| Seed Hive | 200 | |
| Slapstick Crescent | 300 | |
| Stellar Extrusion | 200 (Whole fruit) 100 (Each part) | |
| Sunseed Berry | 50 | |
| Tremendous Sniffer | 200 | |
| Velvety Dreamdrop | 100 | |
| Wayward Moon | 1000 | |
| Zest Bomb | 70 |
| Icon | Name | Points |
|---|---|---|
| Arachnode | 25 | |
| Arctic Cannon Larva | 50 | |
| Armored Cannon Larva | 50 | |
| Baldy Long Legs | 100* | |
| Bearded Amprat | 50 | |
| Bug-Eyed Crawmad | 100 | |
| Bulborb | 50 | |
| Burrowing Snagret | 90 | |
| Calcified Crushblat | 70 | |
| Desiccated Skitter Leaf | 5 | |
| Dwarf Bulbear | 20 | |
| Dwarf Bulborb | 15 | |
| Dwarf Orange Bulborb | 50 | |
| Female Sheargrub | 5 | |
| Fiery Blowhog | 30 | |
| Flighty Joustmite | 30* | |
| Hermit Crawmad | 30 | |
| Iridescent Flint Beetle | N/A* | |
| Joustmite | 30 | |
| Male Sheargrub | 5 | |
| Medusal Slurker | 15 | |
| Nectarous Dandelfly | N/A* (5) | |
| Orange Bulborb | 50 | |
| Peckish Aristocrab | 100* | |
| Phosbat | 5* | |
| Phosbat Pod | N/A** (1) | |
| Puckering Blinnow | 15 | |
| Puffy Blowhog | 50 | |
| Pyroclasmic Slooch | 20 | |
| Red Spectralids | 10* | |
| Scornet | 5* | |
| Shaggy Long Legs | N/A* (100) | |
| Shearwig | 5 | |
| Skeeterskate | 5 | |
| Skitterleaf | 5 | |
| Skutterchuck | 5 | |
| Spotty Bulbear | 70 | |
| Sputtlefish | 30 | |
| Swarming Sheargrub | 5 | |
| Swooping Snitchbug | 30 | |
| Toady Bloyster | 50 | |
| Waddlepus | 30 | |
| Water Dumple | 30 | |
| Watery Blowhog | 30 | |
| Whiptongue Bulborb | 50 | |
| White Spectralids | 10* | |
| Wolpole | 5 | |
| White Spectralids | 10* | |
| Yellow Wollyhop | 30 |
TEMPORARY TITLE
| Stage | Name | Pikmin, Candypop Buds and Onions |
Requirements | Time limit | |||
|---|---|---|---|---|---|---|---|
| Bronze | Silver | Gold | Platinum | ||||
| 1 | Tropical Forest | 1000 | 1400 | 1800 | 2100 | 7:00 | |
| 2 | Silver Lake | 1500 | 2000 | 2500 | 2920 | 8:00 | |
| 3 | Thirsty Desert | 1500 | 2000 | 2700 | 3340 | 10:00 | |
| 4 | Twilight Hollow | 1500 | 2000 | 2500 | 3240 | 10:00 | |
| 5 | Shaded Garden | 1500 | 2000 | 2500 | 3180 | 8:00 | |
| 6 | Tropical Forest Remix | 800 | 1100 | 1500 | 1810 | 8:00 | |
| 7 | Silver Lake Remix | 750 | 1500 | 2250 | 3000 | 9:00 | |
| 8 | Thirsty Desert Remix | 2500 | 3500 | 4500 | 5125 | 8:00 | |
| 9 | Twilight Hollow Remix | 1800 | 2300 | 2800 | 3300 | 9:00 | |
| 10 | Shaded Garden Remix | 800 | 1300 | 1800 | 2400 | 8:00 | |
| 11 | Fortress of Festivity | 2000 | 3000 | 4500 | 5900 | 12:00 | |
| 12 | The Rustyard | 1100 | 1400 | 1700 | 1950 | 7:00 | |
| 13 | Beastly Caverns | 2000 | 2500 | 3000 | 3500 | 12:00 | |
| 14 | Forgotten Cove | 900 | 1800 | 2700 | 3480 | 11:00 | |
| 15 | Clockwork Chasm | 700 | 1000 | 1500 | 2185 | 13:00 | |
| Stage | Name | Pikmin, Candypop Buds and Onions |
Requirements | Time limit | |||
|---|---|---|---|---|---|---|---|
| Bronze | Silver | Gold | Platinum | ||||
| 1 | Tropical Forest | 250 | 400 | 550 | 650 | 7:00 | |
| 2 | Silver Lake | 200 | 400 | 600 | 720 | 8:00 | |
| 3 | Thirsty Desert | 200 | 300 | 400 | 520 | 8:00 | |
| 4 | Twilight Hollow | 150 | 250 | 350 | 465 | 9:00 | |
| 5 | Shaded Garden | 300 | 400 | 550 | 685 | 9:00 | |
| 6 | Tropical Wilds Remix | 450 | 600 | 800 | 935 | 13:00 | |
| 7 | Garden of Hope Remix | 300 | 500 | 700 | 830 | 7:00 | |
| 8 | Distant Tundra Remix | 310 | 460 | 610 | 760 | 9:00 | |
| 9 | Twilight River Remix | 250 | 350 | 450 | 555 | 10:00 | |
| 10 | Formidable Oak Remix | 250 | 500 | 750 | 1000 | 5:55 | |
| 11 | Fortress of Festivity | 250 | 400 | 550 | 690 | 7:30 | |
| 12 | The Rustyard | 220 | 260 | 300 | 345 | 6:00 | |
| 13 | Beastly Caverns | 200 | 275 | 350 | 450 | 6:00 | |
| 14 | Forgotten Cove | 330 | 550 | 670 | 840 | 9:00 | |
| 15 | Clockwork Chasm | 150 | 250 | 350 | 475 | 7:00 | |
| Stage | Name | Pikmin and Candypop Buds |
Requirements | Time limit | |||
|---|---|---|---|---|---|---|---|
| Bronze | Silver | Gold | Platinum | ||||
| 1 | Armored Mawdad | 6:00 - 4:01 | 4:00 - 3:01 | 3:00 - 2:01 | 2:00 - 0:00 | 8:00 | |
| 2 | Vehemoth Phosbat | 10:00 - 8:01 | 8:00 - 6:01 | 6:00 - 4:01 | 4:00 - 0:00 | 15:00 | |
| 3 | Sandbelching Meerslug | 8:00 - 6:01 | 6:00 - 4:01 | 4:00 - 3:01 | 3:00 - 0:00 | 13:00 | |
| 4 | Scornet Maestro | 8:00 - 6:01 | 6:00 - 4:01 | 4:00 - 3:01 | 3:00 - 0:00 | 10:00 | |
| 5 | Quaggled Mireclops | 10:00 - 8:01 | 8:00 - 6:01 | 6:00 - 4:01 | 4:00 - 0:00 | 15:00 | |
| 6 | Plasm Wraith | 10:00 - 8:01 | 8:00 - 6:01 | 6:00 - 5:01 | 5:00 - 0:0 | 12:00 | |
Downloadable content
- Main article: Downloadable content.
Pikmin 3 is the first Pikmin game in the series to have downloadable content. On October 1st, 2013 – during that month's Nintendo Direct – Iwata announced downloadable content for Pikmin 3's Mission Mode. These stages are for Collect Treasure! mode, and Nintendo offers Tropical Forest Remix for free if players update their game.
On November 6th, 2013, a second DLC pack was made available for purchase. This DLC consists of five remixed Story mode maps for Battle Enemies! Nintendo offers Tropical Wilds Remix for free if players update Pikmin 3.
On December 2nd, 2013, a third DLC pack became available for purchase. This consists of five stages for Collect Treasure! and Battle Enemies! (totaling in ten stage) and takes place on entirely new areas. Olimar and Louie are playable in stages 13 through 15, but Louie must be rescued before he can be used. Nintendo offers both versions of Fortress of Festivity for free for those who update Pikmin 3.
All downloadable stages are part of the base game in Pikmin 3 Deluxe.
Badges
In Pikmin 3 Deluxe, there are nine badges the player can gain from playing Mission mode:
- Dreams of Adventure: Finish any Mission Mode stage.
- Greenhorn: Earn a bronze medal in any Mission Mode stage.
- Getting Closer: Earn a silver medal in any Mission Mode stage.
- Good as Gold: Earn a gold medal in any Mission Mode stage.
- Dedicated Adventurer: Earn a total of 10 platinum medals from playing Mission Mode stages.
- Game Hunter: Earn a medal of any merit in every Battle enemies! stage.
- Treasure Hunter: Earn a medal of any merit in every Collect treasure! stage.
- Big Game Hunter: Earn a medal of any merit in every Defeat bosses! stage.
- Mission Partner: Play Mission Mode with a second player.

Dreams of Adventure. The badge shows Alph looking at a medal.

Greenhorn. The badge shows a bronze medal.

Getting Closer. The badge shows a silver medal.

Good as Gold. The badge shows a gold medal.

Dedicated Adventure. The badge shows a platinum medal.

Game Hunter. The badge shows a Bulborb with a crown.

Treasure Hunter. The badge shows a pile of gold nuggets with a crown.

Big Game Hunter. The badge shows the Plasm Wraith with a crown.

Mission Partner. The badge shows two Joy-Cons.


Gallery

Artwork of the SPERO, made for the Official Nintendo Magazine.

The results screen for fighting against the Armored Mawdad.
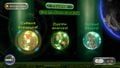
The main Mission Mode menu in Pikmin 3.
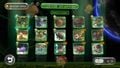
Battle Enemies! stage selection menu.


Trivia

- Mission Mode and Bingo Battle are the only modes in Pikmin 3 in which players can find Purple and White Pikmin.
- The music that plays during all stages, with the exception of stages 11 to 15, was used in all of the Pikmin 3 trailers.
- Mission Mode and Bingo Battle have an exclusive mini-boss: the Baldy Long Legs. It appears plentifully in both modes, although it is never found in Story Mode. Instead, there is the similar arachnorb, the Shaggy Long Legs.
- This is likely due to how long the Shaggy Long Legs fight can be, which would be impractical for a time-sensitive challenge.
- If a new record is achieved, and said record does not fit on the world rankings chart, the word "Unexpected" (US), "Invalid" (Europe), or "想定外? (lit.: "unexpected")" (Japanese) will appear in the score's bubble on the ranking screen. The bubble will also be pointing outside of the chart to the right.[2][3] This is true for Pikmin 3 Deluxe as well.[4]
- If the player goes into the Defeat Bosses! mission selection screen and highlights the Plasm Wraith's mission, they can then pan the radar on the GamePad to the northwest, where they will find a second enemy bubble, out of bounds. This bubble represents the Mysterious Life-Form, according to the game's files.[5]
- The icons for the first 5 Collect Treasure! stages all feature a Pikmin carrying a nugget while facing right, and each icon features a different type of Pikmin. The icons for the first 5 Battle Enemies! stages all feature a mini-boss or a similarly tough enemy.
Names in other languages
| Language | Name | Meaning | Notes |
|---|---|---|---|
| ミッション? Misshon |
Mission | ||
(traditional) |
任務 | Mission | |
(simplified) |
任务 | Mission | |
| Missions | Missions | ||
| Missionen | Missions | ||
| Missioni | Missions | ||
| 미션 misyon |
Mission | ||
| Misiones | Missions | ||
| Режим миссии / Режим задание Rezhim missii / Rezhim zadaniye |
Mission mode / Task mode | Names taken from Nintendo's official Russian website |
After hours
| Language | Name | Meaning |
|---|---|---|
| Fuori orario | After-hours | |
| Tiempo extra | Extra time | |
| Prórroga | Extension |
Medal
| English | (traditional) |
(simplified) |
||||||
|---|---|---|---|---|---|---|---|---|
| Medal | Medalla | |||||||
| Bronze | Bronce | |||||||
| Silver | Plata | |||||||
| Gold | Oro | |||||||
| Platinum | Platino |
Collect Treasure!
|
Battle Enemies!
|
Defeat Bosses!
|
See also
External links
References
- ^ YouTube video of sound effect trivia in Pikmin 3 (at 02:27), published on June 10th, 2019, retrieved on June 11th, 2019
- ^ YouTube video of a run that triggered the "Unexpected" message (at 02:36)
- ^ YouTube video of a world record that triggered the "Invalid" message (at 02:08)
- ^ Got a high score in Silver Lake, past the leaderboards graphics into the unknowns of "unexpected"! on Reddit post, published on November 7th, 2020, retrieved on December 1st, 2020
- ^
/content/CMCmn/generator/mapE/mis_boss.szs/1.txt, line 93 –Metaboss's (Mysterious Life-Form) coordinates are at-5650.00000000 0.00000000 6330.00000000. Same file, line 12 –Metaboss2's (Plasm Wraith) coordinates are at4000.00000000 0.00000000 -5750.00000000. Filedefault.txt, line 12 –UFO's (S.S. Drake) coordinates are at4880.00000000 150.00000000 -5440.00000000.
Tables for locations
- Pikmin
Ship parts are listed in order of the final results menu
Enemies are listed alphabetically; then their quantity; how many days it takes for them to respawn; notes about the enemy (including their drops)
Pellets and Posies are listed in Pikmin type order, with pellets first and then Posies - the lower size comes first
Tools and obstacles are listed alphabetically (merged the Tools and Obstacles); their quantity; any notes
Others are listed alphabetically; could include rubble, vegetation, and other stuff
- Pikmin 3
Fruits are listed alphabetically and with their icons; their amounts are then listed; their juice amounts are listed in two columns (1 for Normal/Hard difficulty, 1 for Ultra-Spicy difficulty); a notes column exists, saying general info about their location
Enemies are listed alphabetically; then their quantity; how many days it takes for them to respawn; notes about the enemy (including their drops)
Pellets and Posies are listed in Pikmin type order, with pellets first and then Posies - the lower size comes first
Tools and obstacles are listed alphabetically (merged the Tools, Obstacles, and some Vegetation- minus the Burgeoning Spiderwort); their quantity; any notes
Data files are listed in the game order
Others are listed alphabetically; could include eggs, gear, Onions and similar stuff
- Pikmin 4
Treasures and enemies listed in Treasure Catalog / Piklopedia (Pikmin 4) order
Castaways listed from Challenges then Battles
Onions and Flarlics listed in Pikmin type order, Flarlics at the end
Pellets listed before Pellet Posies
Tools and obstacles, and Other objects listed alphabetically
Raw materials listed in size order.
Forest of Hope
Objects
| Name | Required? | Notes |
|---|---|---|
| Yes | Guarded by two Dwarf Bulborbs | |
| Yes | Behind a black reinforced wall | |
| Yes | On a slightly raised ledge | |
| Yes | Inside of a Burrowing Snagret | |
| Yes | Guarded by an Armored Cannon Beetle | |
| Yes | On an island surrounded by water | |
| Yes | Guarded by a Spotty Bulborb | |
| No | Guarded by a Spotty Bulborb and two Dwarf Bulborbs |
| Name | Quantity | Spawning | Notes | |
|---|---|---|---|---|
| 1 | Respawns after 5 days | Drops three 1-pellets | ||
| 3 | 1 | Does not respawn | Drops seven 1-pellets, one 5-pellet, and the Geiger Counter | |
| 2 | Respawns after 5 days | Drops seven 1-pellets and one 5-pellet | ||
| 11 | Respawns after 4 days | Drops one 1-pellet | ||
| 9 | 6 | Respawns after 4 days | ||
| 3 | Spawns after day 4 Respawns after 4 days |
|||
| 3 | 2 | Spawns after day 2 Respawns after 1 day |
Drops two 1-pellets and two 5-pellets | |
| 1 | Spawns after day 5 Respawns after 1 day |
Drops two 1-pellets and two 5-pellets | ||
| 6 | 2 | Respawns after 4 days | Drops one 1-pellet | |
| 2 | Respawns after 4 days | |||
| 2 | Spawns after day 4 Respawns after 4 days |
|||
| 7 | 5 | Respawns after 5 days | ||
| 2 | Spawns after day 6 Respawns after 5 days |
|||
| 1 | Spawns after day 14 Respawns after 5 days |
Drops three 1-pellets | ||
| 4 | Respawns after 1 day | |||
| Name | Quantity | Notes | |
|---|---|---|---|
| 1 | Does not respawn | ||
| 4 | Does not respawn | ||
| 1 | Does not respawn | ||
| 1 | Does not respawn | ||
| 1 | Despawns after day 4 Respawns after 1 day | ||
| 7 | Despawns after day 4 Respawns after 1 day | ||
| 20 | 10 | Spawns on day 2 only | |
| 10 | Spawns between days 3 and days 4 Does not respawn | ||
| 30 | 10 | Despawns after day 4 Respawns after 1 day | |
| 20 | Spawns after day 5 Respawns after 1 day | ||
| Name | Quantity | Notes | |
|---|---|---|---|
| 2 | |||
| 1 | Requires 9 bomb-rocks to be fully destroyed | ||
| 1 | Weighs 10 | ||
| 2 | |||
| 5 | |||
| 3 | |||
| 3 | Requires 3 bomb-rocks to be fully destroyed | ||
| Name | Quantity | Notes | |
|---|---|---|---|
| 15 | |||
| 4 | |||
| 6 | |||
| [icon] Rubble | 1 | ||
| 1 | |||
![[icon]](/index.php?title=Special:Upload&wpDestFile=Rubble_icon.png)
Tropical Wilds
Objects
| Name | Quantity | Juice | Notes | |
|---|---|---|---|---|
| Non-Ultra-Spicy | Ultra Spicy | |||
| 1 (6 parts) | 3.0 | 1.5 | Inside of the Sandbelching Meerslug | |
| 1 | 0.5 | 0.25 | On a raised platform surrounded by water | |
| 1 | 1.0 | 0.5 | Partially buried | |
| 1 (20 parts) | 1 | 0.5 | ||
| 1 | 1.5 | 0.75 | Hanging from a vine | |
| 1 (2 parts) | 1 | 0.5 | Inside of the Shaggy Long Legs | |
| 1 | 1.5 | 0.75 | Partially buried | |
| 1 | 0.5 | 0.25 | Inside of the Medusal Slurker | |
| 1 | 1.0 | 0.5 | ||
| 1 | 2.0 | 1.0 | On a high ledge surrounded by water | |
| 1 | 2.5 | 1.25 | Partially buried | |
| 1 | 1.5 | 0.75 | On a raised platform | |
| 1 | 1.0 | 0.5 | Inside of the Calcified Crushblat | |
| 1 | 2.5 | 1.25 | Partially buried; surrounded by water | |
| 1 (2 parts) | 1.0 | 0.5 | Hanging from a vine | |
| 2 | 1.0 (2.0 total) | 0.5 (1.0 total) | One is inside of the Armored Cannon Larva One is underneath a Flukeweed | |
| 1 | 1.5 | 0.75 | Inside of the Peckish Aristocrab | |
| Name | Quantity | Spawning | Notes |
|---|---|---|---|
| 1 | Respawns every X days | Drops the Velvety Dreamdrop | |
| 1 | Spawns after the day 1 tutorial respawns every X days |
||
| 1 | Respawns every X days | Drops the Searing Acidshock | |
| 3 | Each spawns after the day 1 tutorial respawns every X days |
||
| 7 | Respawns every X days | 3 are underneath a Flukeweed | |
| 2 | Respawns every X days | ||
| 2 | Respawns every X days | ||
| 1 | Spawns after the day 1 tutorial respawns every X days |
||
| 10 (9 in Pikmin 3 Deluxe) | Respawns every X days; one less in Pikmin 3 Deluxe | 5 are underneath a Flukeweed | |
| 1 | Respawns every X days | Drops the Juicy Gaggle | |
| 1 | Respawns every X days | ||
| 1 | Respawns every X days | Drops the Zest Bomb | |
| 7 | Respawns every X days | ||
| 3 | 1 spawns after the day 1 tutorial respawns every X days |
||
| 1 | Does not respawn once defeated | Drops the Crimson Banquet and the Folded Data Glutton | |
| 1 | Does not respawn once defeated | Drops the Disguised Delicacy | |
| 2 | Respawns every X days | ||
| 2 | Respawns every X days | ||
| 8 | Respawns every X days | ||
| 1 | Respawns every X days | ||
| 7 | Spawns after the day 1 tutorial respawns every X days |
||
| 2 | Respawns every X days | ||
| 2 | Spawns after the day 1 tutorial respawns every X days |
Each drops 1 nectar | |
| 2 | Respawns every X days |
| Name | Quantity | Notes | |
|---|---|---|---|
| 20 | 14 1-Pellet Posies | Only 4 Red 1-Pellet Posies during the day 1 tutorial | |
| 4 5-Pellet Posies | Only 1 Red 5-Pellet Posy during the day 1 tutorial | ||
| 2 10-Pellet Posies | |||
| 1 | 1 5-pellet | ||
| Name | Quantity | Notes | |
|---|---|---|---|
| 1 | |||
| 3 | Brown | Requires | |
| Brown | Requires | ||
| Red | Requires | ||
| 1 | Weighs 20 | ||
| 6 | 1 contains the 36 fragments 2 contain data files (Pikmin 3) only 3 (5 in Pikmin 3 Deluxe) contain Bomb Rocks | ||
| 4 | |||
| 1 | |||
| 6 | 1 holds a Bomb Rock; 1 holds a nectar egg 1 holds a Winged 5-pellet; 1 holds a Velvety Dreamdrop 1 holds 3 Female Sheargrubs; 1 holds 5 Male Sheargrubs | ||
| 2 | |||
| 1 | Weighs 10 | ||
| 3 | |||
| 19 | |||
| 1 | |||
Sun-Speckled Terrace
Objects
| Name | Quantity | Sparklium | Notes |
|---|---|---|---|
| 1 | On a high ledge | ||
| 2 | Each inside of some breakable pots | ||
| 1 | Oatchi must be able to Jump to collect this treasure | ||
| 1 | Each inside of some breakable pots | ||
| 1 | The Aquiferous Summit must be completed to access the treasure | ||
| 1 | On a raised platform | ||
| 1 | Attached to a fence; requires a Rush from Oatchi | ||
| 1 | Fully buried | ||
| 1 | Behind a yellow clipboard | ||
| 1 | Partially buried; the Aquiferous Summit must be completed to access the treasure | ||
| 1 | Partially buried; on a high ledge | ||
| 1 | On a high ledge | ||
| 1 | Inside of the Porquillion; the Aquiferous Summit must be completed to access the treasure |
| Name | Location |
|---|---|
| Dandori Challenge | |
| Dandori Battle |
| Name | Quantity | Notes |
|---|---|---|
| 1 | Behind the paper bag | |
| 1 | Partially buried | |
| 1 | Partially buried |
| Name | Quantity | Notes |
|---|---|---|
| 10 | One guards the Meandering Slope base, alongside a Bulborb | |
| 4 | One guards the Meandering Slope base, alongside a Dwarf Bulborb; each drops 1 raw material | |
| 3 | One guards the Rugged Scaffold base; each drops 1 raw material | |
| 5 | None | |
| 7 | N/A | |
| 1 | Drops one 1-pellet, three 1-pellets, and two 5-pellets | |
| 2 | Each has a 51% chance to drop 1 raw material | |
| 1 | Drops the Talisman of Life (Moon), the Aquiferous Summit must be completed to reach the enemy | |
| 4 |
| Name | Quantity | Notes | |
|---|---|---|---|
| 21 | 14 1-Pellet Posies | ||
| 5 5-Pellet Posies | |||
| 2 10-Pellet Posies | |||
| Name | Quantity | Notes | |
|---|---|---|---|
| 1 | Weighs 10 | ||
| 10 | 2 | Contains the Lesser Mock Bottom | |
| 4 | Contains nothing | ||
| 4 | Contains the two Perforated Rafts | ||
| 3 | 1 | Requires 22 raw materials | |
| 1 | Requires 23 raw materials | ||
| 1 | Requires 39 raw materials | ||
| 1 | Requires 15 raw materials | ||
| 2 | 1 | grey handled; weighs 10 | |
| 1 | yellow handled; weighs 10 | ||
| 6 | Each contains 10 raw materials | ||
| 2 | 1 | Has 5333 HP; drops 4 raw materials, 2 per segment | |
| 1 | Has 8000 HP; drops 6 raw materials, 2 per segment | ||
| 1 | Has 5333 HP; drops 4 raw materials, 2 per segment | ||
| 3 | Each weighs 10 | ||
| 1 | |||
| 2 | 1 | Requires 20 Ice Pikmin (or an Ice Blast) to freeze | |
| 1 | Requires 30 Ice Pikmin (or an Ice Blast) to freeze | ||
| Name | Quantity | Notes | |
|---|---|---|---|
| 7 | 4 | ||
| 5 | |||
| 20 | |||
| 20 | |||
| 23 | |||
| 25 | |||
| 26 | |||
| 90 | 2 | 1 from each nectar egg (25% to drop) | |
| 2 | 1 from each White Spectralids (51% to drop) | ||
| 3 | 1 from each Fiery Blowhog (100% to drop) | ||
| 4 | 1 from each Bulborb (100% to drop) | ||
| 4 | 4 from the electric gate | ||
| 5 | 5 from the breakable pot near the Lesser Mock Bottom | ||
| 10 | 4 from the dirt wall with 5333 HP, 6 from the dirt wall with 8000 HP | ||
| 60 | 10 from each dirt-mound | ||
| Name | Quantity | Notes | |
|---|---|---|---|
| 2 | None | ||
| 2 | Each has a 75% to drop nectar, a 20% to drop 1 raw material, and a 5% of ultra-spicy nectar | ||
Blossoming Arcadia
Objects
| Name | Quantity | Notes |
|---|---|---|
| 1 | ||
| 1 | Fully buried | |
| 1 | Inside of a dirt-mound | |
| 1 | ||
| 3 | Each may be inside of a Waddlequaff | |
| 1 | May be inside of a Waddlequaff | |
| 1 | Partially buried | |
| 1 | Underneath an active sprinkler | |
| 1 | On a high ledge | |
| 1 | Fully buried; on a high ledge | |
| 1 | 10 Mitites are underneath the treasure | |
| 1 | Partially buried | |
| 1 | On a high ledge; the Sightless Passage must be completed to access the treasure | |
| 1 | Inside of the Mamuta; the Sightless Passage must be completed to access the treasure | |
| 1 | Inside of the Burrowing Snagret | |
| 1 | May be inside of a Waddlequaff | |
| 1 | Half-submerged in water | |
| 1 |
| Name | Location |
|---|---|
| Dandori Challenge 1 | |
| Dandori Challenge 2 | |
| Dandori Battle |
| Name | Quantity | Notes |
|---|---|---|
| 1 | Partially buried | |
| 1 | Partially buried |
| Name | Quantity | Notes |
|---|---|---|
| 3 | Each drops 1 raw material | |
| 4 | Each drops 1 raw material | |
| 5 | ||
| 1 | Drops one 1-pellet, three 1-pellets, and two 5-pellets | |
| 2 | 1 group drops 1 raw material each; 1 group has an 80% chance to drop nectar, and a 20% chance to drop ultra-spicy nectar | |
| 3 | Each has a 51% chance to drop 1 raw material | |
| 6 | Each drops 1 nectar; the Sightless Passage must be completed to reach two of these enemies | |
| 2 | One guards the Sunwashed Plateau base; each drops 1 raw material | |
| 8 | One is inside of a nectar egg | |
| 1 | Drops the Brush of Wisdom | |
| 4 | One may contain 3 Cupid's Grenade; one may contain the Searing Acidshock; one may contain the Octoplus; each drops 1 raw material | |
| 2 | Each drops 1 raw material | |
| 1 | Drops the Shake-a-Smile; the Sightless Passage must be completed to reach the enemy | |
| 4 | Each drops 1 raw material |
| Name | Quantity | Notes | |
|---|---|---|---|
| 14 | 9 1-Pellet Posies | ||
| 4 5-Pellet Posies | |||
| 1 10-Pellet Posies | |||
| Name | Quantity | Notes | |
|---|---|---|---|
| 19 | 3 | 1 contains 1 group of 10 Mitites; 2 contain 1 raw material each | |
| 4 | 2 contain 1 raw material each; 2 contain nothing | ||
| 4 | Contains nothing | ||
| 8 | Contains nothing | ||
| 3 | 1 | Requires 29 raw materials | |
| 1 | Requires 33 raw materials | ||
| 1 | Requires 40 raw materials | ||
| 1 | Requires 16 raw materials; turns off the sprinkler | ||
| 8 | 1 | Contains the Orbital Communication Sphere | |
| 3 | Each contains 1 Bomb rock each | ||
| 4 | Each contains 10 raw materials | ||
| 1 | Has 8000 HP; drops 6 raw materials, 2 per segment | ||
| 2 | Each has 8000 HP; each drops 6 raw materials, 2 per segment | ||
| 1 | Has 30000 HP; drops 6 raw materials, 2 per segment | ||
| 2 | Each has 4000 HP; drops 6 raw materials, 2 per segment | ||
| 4 | |||
| 1 | Turned off by the clay valve | ||
| 1 | Requires 30 Ice Pikmin (or an Ice Blast) to freeze | ||
| Name | Quantity | Notes | |
|---|---|---|---|
| 7 | 12 | ||
| 15 | |||
| 20 | |||
| 24 | |||
| 30 | |||
| 30 | |||
| 30 | |||
| 90 | 2 | 1 from each Swooping Snitchbg (100% to drop) | |
| 2 | 1 from each Bearded Amprat | ||
| 2 | 1 from each nectar egg (25% to drop) | ||
| 2 | 1 from each Creeping Chrysanthemum (100% to drop) | ||
| 3 | 1 from each Joustmite (100% to drop) | ||
| 3 | 1 from each White Spectralids (51% to drop) | ||
| 4 | 1 from each Waddlequaff (100& to drop) | ||
| 4 | 1 from each Yellow Wollyhop | ||
| 4 | 2 from the breakable pots in the Burrowing Snagret's arena; 2 from the breakable pots near the one containing Mitites | ||
| 6 | 6 from the dirt wall | ||
| 10 | 1 from each Mitite underneath the breakable pot (100% to drop) | ||
| 12 | 6 from each electric gate | ||
| 40 | 10 from each dirt-mound | ||
| Name | Quantity | Notes | |
|---|---|---|---|
| 2 | None | ||
| 3 | One contains a Downy Snagret; two have a 75% to drop nectar, a 20% to drop 1 raw material, and a 5% of ultra-spicy nectar | ||