Emperor Bulblax
| |||
|---|---|---|---|
| Appears in | Pikmin, Pikmin 2, Pikmin 4, Hey! Pikmin | ||
| Scientific name | Oculus supremus | ||
| Family | Grub-dog | ||
| Areas | The Final Trial, The Last Lair | ||
| Caves | Bulblax Kingdom, Cavern of Chaos, Hole of Heroes, Kingdom of Beasts | ||
| Challenge Mode stages | Emperor's Realm | ||
| Dandori Challenge stages | None | ||
| Dandori Battle stages | None | ||
| 2-Player Battle stages | None | ||
| Attacks | |||
|
The following article or section is in need of assistance from someone who plays Pikmin 4. |
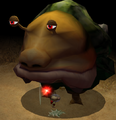
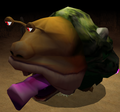
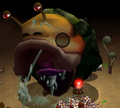
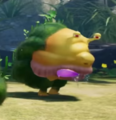
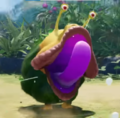
The Emperor Bulblax (ダイオウデメマダラ?, lit.: "Bug-eyed Spotted Great King") is the second-largest known species of the Grub-dog family right after the Empress Bulblax. It serves as the final boss in the first Pikmin game, dropping the last ship part needed to complete the game.
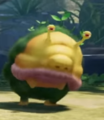
The Emperor Bulblax is different than most members of the Grub-dog family as it has a sludgy and melted appearance, smaller eyes, and a more flexible tongue. Moss grows upon its thick hide, giving its body a greenish color and serving as camouflage, and it even bears tall mushrooms called blaxcaps (デメマダラタケ?, lit.: "Spotted Bug-eye Mushroom"), fern-like stems, both of which are missing in Pikmin 2, and what appears to be rocks embedded into its back.
This beast usually hides in the ground to ambush prey, catching them with its long, sticky tongue. Its soft face is its only weak point to attack, but since it doesn't discriminate much when eating things, it can be led to swallow something a bit less tasteful than Pikmin – namely, bomb-rocks.
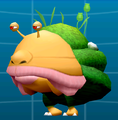
It varies a bit between the four games, being a lot smaller in Pikmin 2 and being much weaker, to the point where the ones fought outside of Bulblax Kingdom have less health than a Fiery Bulbax, which is not considered a boss. In addition, it has the least health of any boss in the game. In Hey! Pikmin, it is normally unreachable and needs to be coaxed into eating a bomb rock before any damage can be done. In Pikmin 4, they vary in size and appear with foliage on their backs, leading them to use their original camouflage method of disguising as a stone. A larger variant, reminiscent of its original appearance, exists as the Sovereign Bulblax.
Stats
|
To do: Find out its health in Hey! Pikmin by retreiving the value from the game files. |
| Game | Weight | Max. carriers |
Seeds | Value | Health | Regen. |
|---|---|---|---|---|---|---|
| N/A | N/A | N/A | N/A | 30000 | Unknown | |
| 20 | 30 | 30 | 1300[note 1] | No | ||
| N/A | N/A | N/A | Unknown | Unknown |
- ^ The one in Bulblax Kingdom has 1800 HP.
Notes
Olimar's voyage log
Reel notes
Olimar's notes
Louie's notes
Hey! Pikmin logs
Pikmin Nintendo Player's Guide
Pikmin 2 Nintendo Player's Guide
Behavior
Pikmin
The Emperor Bulblax (retroactively a Sovereign Bulblax) is the final boss in Pikmin. It lies buried in the ground at The Final Trial inside the center of the sandy arena north of the landing site, visible only by the mossy growth on its back protruding from the ground. When approached, the Bulblax will rear up and roar, knocking Olimar and the Pikmin back, and will then proceed to attack by licking Pikmin into its mouth with a large purple tongue. If Pikmin are latched onto it or located under it, it will jump to shake off any Pikmin on it, and crush any Pikmin underneath. Once it reaches beneath half of its maximum health, it will add a new attack to its arsenal: jumping high up into the air, and eventually dropping onto the army of Pikmin.
One can tell when it is willing to use its tongue by observing its salivation: if it's drooling, that means it will soon attack by using its tongue, gobbling up any Pikmin in front of it. The tongue is large and has no limit on the number of deaths it can cause. When it's in a jumping phase, one can foresee a jump by knowing that its eyes widen just before it hops.
Once defeated, the Emperor Bulblax will go into a particularly long death animation, where it writhes around while drooling and appears to be sucked underground, leaving behind the Secret Safe and five randomly colored 5-pellets.
It's usually a good idea to devote a single day to removing obstacles and clearing the path, only dealing with the Bulblax the following day since the battle itself can often be time-consuming. The Bulblax must be defeated in a single day since any damage done on one day will not carry over, and if the day is ended before it is killed, then it will be at full health the next day. However, experienced players can cover all of The Final Trial in a single day, which is a must for a 6 day run.
Pikmin 2
In Pikmin 2, these beasts are much weaker due to their diminished size. They are found only underground. The hide is not very mossy, but the backside of the beast is still green and slimy, as well as invulnerable. Due to the hide lacking any plantlife, they use a different camouflage where only the eyestalks are exposed, blending in with the sandy floor of caves. They seem to be younger than the specimen encountered in the original Pikmin.
They still eat the now huge bomb-rocks, but must be coaxed into doing so instead as Yellow Pikmin no longer have the ability to handle those explosive objects. All other abilities are retained, except for the jumping phase. It is replaced by a roaring phase when the Bulblax is about a quarter until death; it will make other Bulblaxes join the fight and drag existing Mitites out of the ground, which will scare the Pikmin into a frenzy.
Luckily, unlike in the previous game, an Emperor Bulblax can only eat a maximum of 9 Pikmin at a time. When it dies, the Bulblax spins around and roars, whipping gobs of saliva everywhere until it shrinks down to a pre-determined size for easier carrying.
This creature is found on the last sublevel (7) of the Bulblax Kingdom, where it is larger and stronger than normal; two are found on sublevel 4 of the Cavern of Chaos and sublevel 10 of the Hole of Heroes; and three are in the Emperor's Realm in Challenge Mode.
Hey! Pikmin
The creature never leaves its central spot in the arena, although it can bury down. When the battle begins, the boss will idle for a bit, then start turning towards Captain Olimar. Once it is facing him, it will stop, ready a bite for a few seconds, and then lunge in, chomping at the floor. While it is getting ready to chomp, it won't rotate any further, giving Olimar and the Pikmin time to escape the area of attack. After the bite, it will simply repeat the cycle. Captain Olimar will take damage from this bite and be launched away, and if it manages to get Pikmin, it will gobble them up, up to a maximum of four. Any Pikmin that are thrown at it while its face is in reach because of a bite will just bounce back.
If the Emperor Bulblax chomps a bomb rock on the floor, it will chew on it until it blows up in its mouth. This causes a small amount of damage. Stunned, it will topple forward onto the floor, and stay there motionless for some seconds. Eventually, it will jump back up, and start burrowing into the ground. When it does this, two Crumbugs pop out from behind the grass. After some seconds, the boss will spring back out from underneath the ground and restart the cycle. While the creature is lying down, unconscious from the bomb blast, Pikmin can be thrown at its face to damage it further. To note is that when the boss collapses onto the floor, it can harm Olimar if he's underneath, but Pikmin will merely be shoved away, and also that if it manages to eat two bomb rocks, the resulting damage and stun time will be the same as if it caught just one. Amusingly, if the chomp attack captures any Crumbugs, the Emperor Bulblax will chew on them and eat them.
If its health reaches two thirds when it is being attacked by the Pikmin, it will jump up and shake them off, and will then lick its lips twice. This signals the next attack: a horizontal tongue swipe in front of it. Any Pikmin caught by this attack, up to four, will get killed right away, and Olimar can also take damage from it; bomb rocks will be ignored by this attack. From this point on, its attack pattern will also change: after it turns to face Olimar, it will instead start shaking, and then jump, and in mid-air, quickly turn to face Olimar's new position. After this, it will also perform the lip licking and tongue swiping from before, and only after that does it perform the chomp attack and restart the cycle. When it starts shaking to jump, two Sparrowheads appear from behind it, and before long, they will get near Olimar, one on each side. They will swoop down while the boss is licking its lips.
When its health reaches the final third, it will once again jump up, shaking the Pikmin off, perform the lick attack, and will burrow down and then unburrow. From here on out, four Sparrowheads will appear instead of two, with two on each side.
It can be noted that bomb rock explosions on its face will cause no damage. For unknown reasons, the boss can miss a bomb rock that is right in front of it and not eat it. This could be due to the way the physics work in this particular area, since the movement, hitboxes, etc. are all adjusted to rotate around a circular path.
Strategy
|
The following article or section contains guides. |
Pikmin
Pikmin
Venture through The Final Trial with a large army composed primarily of Red Pikmin, as well as some Yellow Pikmin. As a reminder, Red Pikmin are the most powerful Pikmin type and Yellow Pikmin can carry bomb-rocks. When you enter the large sandy arena at the end of the area, don't immediately confront the Emperor Bulblax in the center of it. Instead, sneak around it and destroy the bramble gate at the back of the arena. Behind it is a large supply of invaluable bomb-rocks at your disposal that are stored in small pipe structures. Have your Yellow Pikmin claim every bomb-rock as you possibly can, and then return to the arena after dismissing them by the gate's pillars. Awaken the Emperor Bulblax safely by walking up to it after dismissing all of your Pikmin, calling them back immediately after you get up.
The Emperor Bulblax will begin the battle by turning to Olimar or his Pikmin and attempting to eat them using its tongue – this is where the bomb-rocks come into play. Get an armed Yellow Pikmin into your squad and, with good timing, have the Yellow Pikmin throw the bomb-rock it is holding into the Emperor Bulblax's gaping maw. It will eat the bomb-rock and be briefly stunned afterward by the resulting explosion, buying precious time to inflict serious damage. While the Emperor Bulblax is stunned, throw as many Red Pikmin onto its face as you possibly can. When the Emperor Bulblax comes to, it will jump to shake off Pikmin. Only call your Pikmin back before it lands to maximize the damage inflicted. If there are Pikmin under the beast, call them back before the Emperor Bulblax jumps to save them from being crushed. Rinse and repeat until the boss reaches half health.
At this point, the Emperor Bulblax will begin using a rather devastating new jumping attack. You will have to pay special attention to the Emperor Bulblax's face to anticipate what it will do. If the boss is drooling, it will use its tongue to feed on Pikmin. If it isn't drooling, exercise extreme caution because it will begin using its new attack. When its eyes widen, immediately move out of the area to avoid it landing on Olimar or his Pikmin squad. Continue attacking the Emperor Bulblax until it is defeated once and for all.
You may also let the Emperor Bulblax consume your Yellow Pikmin and the bomb-rocks they hold at the expense of it being stunned for a shorter amount of time. More bomb-rocks will equal a longer stun time, but you may also want to lower the volume of your television because the sound of many bomb-rocks exploding at once can be very loud. Throwing Pikmin into the mouth of the Emperor Bulblax will only result in Pikmin dying. Pikmin may be thrown at the face of the Emperor Bulblax at any point in time. Attacking the legs also causes the boss pain, but is not recommended for obvious reasons. Throwing Pikmin onto its head when it is distracted is riskier than using bomb-rocks, but it's much simpler and possibly the only feasible option for people attempting to accomplish a zero-death run.
In New Play Control! Pikmin, the only ways to have Yellow Pikmin stun the enemy with a bomb-rock are to either let the Pikmin be eaten or time the throw correctly so that the bomb-carrying Pikmin throws the bomb-rock into the Bulblax's open mouth. The latter option, of course, will stun the Emperor Bulblax for a longer time than simply allowing it to eat the Pikmin.
Leaders
In Pikmin, the beast cannot be damaged with Captain Olimar's punch.
Speedrunning
One of the fastest strategies to beating it in Pikmin for the GameCube is to gather several bomb-rocks, place the carrier Pikmin near it, and when it is readying to eat them, call them back so that they drop the bombs on the floor. The boss will instead gulp on the bomb-rocks and become paralyzed for a considerable amount of time. Afterward, quickly throw your Pikmin army at its face path (starting with the Reds). With enough speed, the creature should be defeated in a single cycle. This strategy will not work in New Play Control! Pikmin.
Pikmin 2
Pikmin
Bring a small group of Purple Pikmin (10 or more) and toss them right in between the eyes; in no time at all, the beast will be defeated. If you don't have enough, use Red Pikmin and other Pikmin types, but be prepared to use sprays in case your numbers dwindle. One way to kill it without Purple Pikmin is to bring a group of 10 White Pikmin, as they are fast, or any of the original Pikmin, to fight and throw all on the Bulblax's face and the battle will be over in from 30 seconds to about a minute.
Where bomb-rocks are available, making it eat them is the safest strategy, and if the beast is underwater, the only strategy. By standing near a bomb-rock and running away before the boss strikes with its tongue, it is possible to make it eat the explosive instead, causing a high amount of damage. This method can be a bit time-consuming, however.
Leaders
In Pikmin 2, it is possible to kill an Emperor Bulblax without Pikmin. The first method is to lure the Bulblax into eating bomb-rocks, should there be any nearby, until it succumbs to the explosions. Another is to punch it while petrified. However, this requires about 50 sprays under non-stop punching. More damage can be dealt with the Rocket Fist upgrade; using said upgrade would require twenty fewer sprays. It is one of the only two bosses in the game the leaders can hit, the other being the Waterwraith.
Speedrunning
By far, the quickest method is to rapidly throw Purple Pikmin at it, even when buried. If the player is fast enough, it'll have suffered almost fatal damage by the time it is ready to fight and should succumb soon after.
Hey! Pikmin
Right when the battle starts, start moving either right or left to grab a bomb rock. The boss will be turning to keep up with you as you move. You should have enough time to grab a bomb rock. When you see the Emperor Bulblax start to growl, throw the bomb rock at the center of its shadow on the floor, and run in the opposite direction. If it didn't catch the bomb rock, hurry to grab another one on the opposite end and try again. If it caught it, stand nearby, but not under the shadow, since that will just result in you getting knocked back when the boss collapses. As soon as it does, throw Pikmin at its face.
You should bring its health down to two thirds, so when you hear the Pikmin squeal, whistle them and start running to the other corner of the arena. When the Emperor Bulblax burrows down, two Crumbugs will appear, so get ready to throw Pikmin. You can start throwing Pikmin at them while they are in mid-air for an easy kill. To take out Crumbugs on the floor, try to be at a medium distance from it, and aim a bit closer to you than you normally would, to compensate for the angled throw trajectory in this area.
With its health at two thirds, its attack pattern will change. Go to one of the corners of the arena, and grab a bomb rock while you're there if you can. Make sure you're flush to a corner when it starts shaking with its snout low since that means it will jump up to readjust its angle, and end up facing near the corner. As soon as it lands from the jump, run to the opposite corner, so you can escape both the tongue swipe attack and the Sparrowheads that will appear. Keep in mind that a Sparrowhead can still come your way, and it is possible for it to still be in attack mode, so if you see one, take it out before it touches your group of Pikmin. You can also take the chance that you're in a corner to get another bomb rock. Eventually, the boss will face you again, and you can throw another bomb rock on the floor.
When its health reaches the last third, the only change will be that four Sparrowheads will appear instead of two. Repeat the process until the boss is dead. If you want to complete the battle quickly and don't want to risk the Emperor Bulblax missing a bomb rock, you can try collecting two bomb rocks whenever possible, and when the beast is readying its chomp attack, place both bombs, in slightly different positions. This vastly increases the chances of one being snatched. Also, to note is that the creature cannot be coaxed into chomping one of the bomb rock generators, as it will not reach them.
Technical information
Creature
| Pikmin technical information (?) | |||
|---|---|---|---|
| Internal name | king
| ||
| HP | 30000 | ||
| Pikmin 2 technical information (?) | |||
|---|---|---|---|
| Internal name | kingchappy
| ||
| Global properties (List) | |||
| ID | Japanese comment | Property | Value |
| s000 | friction(not used) | Friction | 0.5 |
| s001 | wallReflection | Unknown (wall bounce speed multiplier?) | 0.5 |
| s002 | faceDirAdjust | Unknown | 0.25 |
| s003 | accel | Acceleration | 0.1 |
| s004 | bounceFactor | Unknown (bounce when it hits the ground?) | 0.3 |
| fp00 | ライフ | HP | 1300 |
| fp01 | マップとの当り | Unknown (related to slopes) | 60 |
| fp02 | ダメージスケールXZ | Horizontal damage scale | 0.1 |
| fp03 | ダメージスケールY | Vertical damage scale | 0.15 |
| fp04 | ダメージフレーム | Damage scale duration | 0.35 |
| fp05 | 質量 | Unknown (weight?) | 0.1 |
| fp06 | 速度 | Move speed | 45 |
| fp08 | 回転速度率 | Rotation acceleration | 0.02 |
| fp09 | テリトリー | Territory radius | 300 |
| fp10 | ホーム範囲 | "Home" radius | 30 |
| fp11 | プライベート距離 | "Private" radius | 70 |
| fp12 | 視界距離 | Sight radius | 500 |
| fp13 | 視界角度 | FOV | 130 |
| fp14 | 探索距離 | Unknown (exploration radius?) | 500 |
| fp15 | 探索角度 | Unknown (exploration angle?) | 120 |
| fp16 | 振り払い率 | Successful shake rate | 1 |
| fp17 | 振り払い力 | Shake knockback | 200 |
| fp18 | 振り払いダメージ | Shake damage | 1 |
| fp19 | 振り払い範囲 | Shake range | 60 |
| fp20 | 攻撃可能範囲 | Unknown (shock attack max range?) | 130 |
| fp21 | 攻撃可能角度 | Unknown (shock attack max angle?) | 30 |
| fp22 | 攻撃ヒット範囲 | Unknown (attack hit range?) | 80 |
| fp23 | 攻撃ヒット角度 | Unknown (attack hit angle?) | 50 |
| fp24 | 攻撃力 | Attack damage | 5 |
| fp25 | 視界高 | Unknown (height visibility?) | 50 |
| fp26 | 探索高 | Unknown (exploration height?) | 50 |
| fp27 | ライフの高さ | HP wheel height | 90 |
| fp28 | 回転最大速度 | Rotation speed | 30 |
| fp29 | 警戒時間 | Unknown (warning time?) | 15 |
| fp30 | 警戒ライフ | Unknown | 30 |
| fp31 | ライフ回復率 | Regeneration rate | 0 |
| fp32 | LOD半径 | Off-camera radius | 60 |
| fp33 | マップとのあたりポリゴンの選定 | Collision processing radius | 30 |
| fp34 | ピクミンとのあたり | Pikmin damage radius | 20 |
| fp35 | 石化時間 | Petrification duration | 1 |
| fp36 | ヒップドロップダメージ | Purple Pikmin drop damage | 10 |
| fp37 | 地震気絶確立 | Purple Pikmin stun chance | 0.05 (5%) |
| fp38 | 地震気絶時間 | Purple Pikmin stun time | 10 |
| ip01 | 振り払い打撃A | Shake mode 1 – hit count | 6 |
| ip02 | 振り払い張付1 | Shake mode 1 – Pikmin requirement | 5 |
| ip03 | 振り払い打撃B | Shake mode 2 – hit count | 12 |
| ip04 | 振り払い張付2 | Shake mode 2 – Pikmin requirement | 10 |
| ip05 | 振り払い打撃C | Shake mode 3 – hit count | 17 |
| ip06 | 振り払い張付3 | Shake mode 3 – Pikmin requirement | 20 |
| ip07 | 振り払い打撃D | Shake mode 4 – hit count | 22 |
| Specific properties | |||
| ID | Japanese comment | Property | Value |
| fp01 | 要旋回角度(deg) | Unknown (required turning angle?) | 60 |
| fp02 | 出現までの距離 | Sight radius while hiding underground | 60 |
| fp03 | 雄たけび有効角度(deg) | Unknown (roar angle?) | 180 |
| fp04 | 雄たけび有効範囲 | Unknown (roar angle?) | 300 |
| fp05 | 爆弾ダメージ | Bomb-rock damage | 200 |
| fp06 | 見えない範囲 | Angle it'll spam the stomp attack at if all Pikmin and leaders near it are within that angle | 80 |
| fp07 | 旋回終了角度 | Unknown (turning angle end?) | 40 |
| fp08 | 踏み潰し範囲 | Range of the stomp attack | 45 |
| fp09 | 出現振り払い範囲 | Shake range when emerging from the ground | 100 |
| fp10 | 出現振り払い力 | Shake knockback when emerging from the ground | 200 |
| fp11 | 歩きアニメスピード | Unknown (walk animation speed?) | 1 |
| fp12 | 死雄たけび率 | Unknown (death roar rate?) | 0 |
| fp13 | フリック雄たけび率 | Unknown (shake roar rate?) | 0.5 |
| fp14 | 白ピクミン | White Pikmin poison damage | 200 |
| fp15 | bigスケール | Scale (Bulblax Kingdom) | 1.5 |
| fp16 | bigライフ | HP (Bulblax Kingdom) | 1800 |
| fp17 | big速度 | Move speed (Bulblax Kingdom) | 45 |
| fp18 | big回転速度率 | Rotation speed (Bulblax Kingdom) | 0.02 |
| fp19 | big回転最大速度 | Unknown (max rotation speed in Bulblax Kingdom?) | 30 |
| fp20 | big攻撃可能角度 | Unknown | 30 |
| fp21 | big攻撃ヒット範囲 | Unknown | 120 |
| ip01 | 潜伏までの期間 | Unknown | 500 |
| ip02 | 出現までの期間 | Unknown | 0 |
| ip03 | 爆弾ダメージ時間 | Time stunned after eating a bomb-rock | 180 |
Back
The mossy growth visible when the creature is buried in Pikmin is a separate entity.
| Pikmin technical information (?) | |||
|---|---|---|---|
| Internal name | kingback
| ||
| HP | N/A | ||
Other information
- Technical name in The Official Nintendo Player's Guide: Emperor Grub-Dog
- Size: Body length: 130mm, as per the e-card
- Pikmin 2 Piklopedia number: #73
- Musical theme:
In the Super Smash Bros. series
The Emperor Bulblax appears as one of the spirits in Super Smash Bros. Ultimate's Spirits mode.
It appears as a puppet fighter of a giant King K. Rool, with the attributes of making the enemy hard to launch or make flinch (super armor) and forcing the match into a stamina-based mode as opposed to the typical damage-based mode.
Naming
- See also: Grub-dog family#Naming.
- Common name: Emperor Bulblax. It is the largest male member of the grub-dog family, which earned it the title of emperor. The reason for it to be called Bulblax instead of Bulborb is unknown, but it could be due to the creature being considerably different from common grub-dogs. The term seems to be used in two ways, grub-dogs that are important to the social structure, and grub-dogs that have a protected hide and melted features. The Emperor Bulblax seems to qualify for both. The name Bulblax is only represented in the English localization, with no difference in name from Bulborbs change being present in Japanese.
- Japanese nickname: ダイオウデメマダラ?. It is the same as the Japanese name.
- Japanese name: ダイオウデメマダラ?. ダイオウ? means "great king", デメ? means "bug-eyed", and マダラ? means "spots".
- Scientific name: Oculus supremus, Oculus is the Bulborb genus, and supremus means "supreme" in Latin.
- Internal names: The creature's internal name in both games refers to it as a king – the king of the Chappy (Bulborbs) – with the name
kingin Pikmin andkingchappyin the sequel. - Prerelease: None.
Names in other languages
| Language | Name | Meaning |
|---|---|---|
| ダイオウデメマダラ? Daiō Deme Madara |
Bug-eyed Spotted Great King | |
| Keizerbulblax | Emperor-Bulblax | |
| Empereur Bulblax (Pikmin) Roi Bulblax (Pikmin 2) |
Emperor Bulblax King Bulblax | |
| Bulblax Empereur (Hey! Pikmin) | Emperor Bulblax | |
| Roi Bulblax (Hey! Pikmin) | King Bulblax | |
| Fürst Knollenauge | Lord Bulb-Eye | |
| Bulbico Imperiale | Imperial Bulbic | |
| 대왕툭눈점박이 | Bug-eyed Spotted Great King | |
| Bulbo emperador | Emperor bulb |
Gallery
Pikmin
Pikmin 2
The Emperor Bulblax in the Piklopedia from Pikmin 2.
The creature's e-card, #13 (19th yellow card).
Hey! Pikmin
The starting location of The Last Lair. The creature can be seen in the background.
In the Creature Log.
Pikmin 4
Trivia
|
To do: Expand on the Cavern of Chaos glitch and move it to the glitches page. |
- Captain Olimar's notes for the Emperor Bulblax say that moss and plants grow on its back in rainy seasons. In Pikmin 2, these beasts only appear in caves, which, added with the presumably younger age, might explain why so much moss is absent on the beast's back, as the moss only has the cave's moisture to grow with.
- The Emperor Bulblax's attacks and appearance may be based on the real-life frog. They both bury or immerse themselves with only their eyes and backs exposed while hunting, use their long sticky tongues to catch small things passing by (in this case, the Pikmin), they can both jump higher than most other creatures, both look similar in appearances, and both make loud croaking noises.
- The Emperor Bulblax is one of three bosses in Pikmin to reappear in Pikmin 2, alongside Beady Long Legs and the Burrowing Snagret.
- The Emperor Bulblax is one of the three creatures in the whole Pikmin series to have plant-life growing on the beast, the other two being the Quaggled Mireclops and the Flatterchuck.
- There is a peculiarity pertaining to the Emperor Bulblaxes on sublevel four of the Cavern of Chaos. After waking one up, lure it to the smaller island and stand on top of it whilst the Emperor Bulblax approaches. It will repeatedly attempt to lick its target but fail each time. If the leader then walks away from the beast, it will freeze in place. Returning to the smaller island will cause the Emperor Bulblax to enter its walking animation but remain stationary.
- In Pikmin, the creature's tongue is exactly 14.94 centimeters long.[source needed]
- A rough copy of the Emperor Bulblax from Pikmin 2 exists in unused files in Pikmin 3.
- In the first two Pikmin games the Emperor Bulblax's eyelids are only modelled on the outside, allowing the player to see straight through the inside of them.[1]
See also
References
- ^ Twitter post on Twitter, published on April 26th, 2023, retrieved on May 15th, 2023
- Pikmin 1
- Pikmin 2
- Pikmin 4
- Hey! Pikmin
- Grub-dog family
- Pikmin 1 enemies
- Pikmin 2 enemies
- Pikmin 4 enemies
- Hey! Pikmin enemies
- Bosses
- Crushing enemies
- Pikmin-eating enemies
- The Final Trial
- Bulblax Kingdom
- Hole of Heroes
- Cavern of Chaos
- Lushlife Murk
- Burrowing enemies
- Disguising enemies
- Pikmin 2 Challenge Mode
- Final bosses
- Pikmin 1 bosses
- Pikmin 2 bosses
- Pikmin 4 bosses
- Hey! Pikmin bosses


