Clockwork Chasm: Difference between revisions
(Added music.) |
No edit summary |
||
| (46 intermediate revisions by 21 users not shown) | |||
| Line 1: | Line 1: | ||
[[File:ClockworkChasm.jpg|thumb|250px|The [[conveyor belt]]s and conveyor switches of the level.]] | |||
{{image}} | {{image}} | ||
'''Clockwork Chasm''' ({{j|機械仕掛けのブルース|Kikaijikake no Burūsu|Clockwork Blues}}) is a [[Mission Mode]] stage in {{p3}}. It is a metal-themed area, featuring many small platforms where Pikmin can easily fall off into the [[pit]], and showcases [[Conveyor belt|conveyor belts and switches]]. The stage is playable in the Collect Treasure! and Battle Enemies! modes. In the original ''Pikmin 3'', it was released as [[downloadable content]] on {{date|2|December|2013}}, while in {{p3d}}, it is part of the base game and can be unlocked in each of the 2 modes by completing the first 10 stages in that mode. | |||
'''Clockwork Chasm''' | |||
{{stub|<br> | |||
*Add an Overview and Key sections sections, like on the area article policy. | |||
*Add guides. | |||
}} | |||
{{ | ==Collect Treasure!== | ||
|map=ClockworkChasmCollectTreasuremap.png | {{infobox mission | ||
| | |map = ClockworkChasmCollectTreasuremap.png | ||
| | |red = {{tt|25|All leaf}} | ||
|rock = 10 | |rock = {{tt|10|All leaf}} | ||
|blue = {{tt|40|All leaf}} | |||
| | |time = 13:00 | ||
|blue = 40 | |bronze = 700 | ||
| | |silver = 1000 | ||
| | |gold = 1500 | ||
|bronze = | |platinum = 2185 | ||
|silver = | |||
|gold = | |||
|platinum = 2185 | |||
|music = [[Music in Pikmin 3#Mission Mode (Levels 12-15)|Mission Mode (Levels 12-15)]] | |music = [[Music in Pikmin 3#Mission Mode (Levels 12-15)|Mission Mode (Levels 12-15)]] | ||
}} | }} | ||
=== | ===Objects=== | ||
*{{icon| | ;Leaders | ||
*{{icon| | *{{icon|Brittany|y|v=neutral}} (player 2's starting leader) | ||
*{{icon| | *{{icon|Olimar|y|v=neutral}} (player 1's starting leader) | ||
*{{icon|Louie|y|v=neutral}} (after being freed) | |||
The order in ''Pikmin 3'' is Olimar, Brittany, Louie. The [[action menu|order]] in ''Pikmin 3 Deluxe'' is identical. | |||
=== | ;Pikmin | ||
{| class="wikitable sortable" | |||
! class="unsortable" | Icon | |||
!Type | |||
!Amount | |||
! class="unsortable" | Location(s) | |||
|- | |||
|[[File:Red Pikmin P3 icon.png|32px]] | |||
|[[Red Pikmin]] | |||
|25 | |||
|10 leaf Pikmin standing under the [[SPERO]].<br>5 leaf Pikmin buried near a pile of [[fragment]]s.<br>5 leaf Pikmin buried near a [[Face Wrinkler]].<br>5 leaf Pikmin standing near a [[Bug-Eyed Crawmad]]. | |||
|- | |||
|[[File:Rock Pikmin P3 icon.png|32px]] | |||
|[[Rock Pikmin]] | |||
|10 | |||
|5 leaf Pikmin standing near a pond full of [[Puckering Blinnow]]s.<br>5 leaf Pikmin buried at the end of a narrow path. | |||
|- | |||
|[[File:Blue Pikmin P3 icon.png|32px]] | |||
|[[Blue Pikmin]] | |||
|40 | |||
|Two groups of 5 leaf Pikmin buried near a [[Yellow Wollywog]].<br>5 leaf Pikmin buried near 2 [[Dwarf Orange Bulborb]]s.<br>5 leaf Pikmin buried near three [[Juicy Gaggle]]s.<br>5 leaf Pikmin buried near a [[Heroine's Tear]].<br>5 leaf Pikmin standing near ½ of a [[Stellar Extrusion]].<br>5 leaf Pikmin buried near a [[Calcified Crushblat]].<br>5 leaf Pikmin buried near a [[Waddlepus]]. | |||
|} | |||
== | ;Treasures and Enemies | ||
{| class="wikitable sortable" | |||
! class="unsortable" | Icon | |||
!Name | |||
!Amount | |||
!Value | |||
!Total value | |||
|- | |||
|[[File:Juicy Gaggle icon.png|32px]] | |||
|[[Juicy Gaggle]] | |||
|3 | |||
|[[File:Poko P3 icon.png|12px]] × 20 | |||
|[[File:Poko P3 icon.png|12px]] × 60 | |||
|- | |||
|[[File:Sunseed Berry FF icon.png|32px]] | |||
|[[Sunseed Berry]] | |||
|1 | |||
|[[File:Poko P3 icon.png|12px]] × 50 | |||
|[[File:Poko P3 icon.png|12px]] × 50 | |||
|- | |||
|[[File:Face Wrinkler icon.png|32px]] | |||
|[[Face Wrinkler]] | |||
|1 | |||
|[[File:Poko P3 icon.png|12px]] × 70 | |||
|[[File:Poko P3 icon.png|12px]] × 70 | |||
|- | |||
|[[File:Stellar Extrusion icon.png|32px]] | |||
|[[Stellar Extrusion]] | |||
|½ | |||
|[[File:Poko P3 icon.png|12px]] × 200 <small>(Whole fruit)</small><br>[[File:Poko P3 icon.png|12px]] × 100 <small>(Each part)</small> | |||
|[[File:Poko P3 icon.png|12px]] × 100 | |||
|- | |||
|[[File:Golden Sunseed icon.png|32px]] | |||
|[[Golden Sunseed]] | |||
|1 | |||
|[[File:Poko P3 icon.png|12px]] × 200 | |||
|[[File:Poko P3 icon.png|12px]] × 200 | |||
|- | |||
|[[File:Pocked Airhead icon.png|32px]] | |||
|[[Pocked Airhead]] | |||
|1 | |||
|[[File:Poko P3 icon.png|12px]] × 300 | |||
|[[File:Poko P3 icon.png|12px]] × 300 | |||
|- | |||
|[[File:Heroine's Tear icon.png|32px]] | |||
|[[Heroine's Tear]] | |||
|1 | |||
|[[File:Poko P3 icon.png|12px]] × 500 | |||
|[[File:Poko P3 icon.png|12px]] × 500 | |||
|- | |||
|[[File:Nugget icon.png|32px]] | |||
|[[Nugget]] | |||
|110 <small>(Piles of 33 and 77)</small> | |||
|[[File:Poko P3 icon.png|12px]] × 3 | |||
|[[File:Poko P3 icon.png|12px]] × 330 | |||
|- | |||
|[[File:Spirit BE enemy icon.png|32px]] | |||
|[[Enemy]] | |||
|2 <small>({{icon|Armored Cannon Larva|v=P3|y}})</small><br>1 <small>({{icon|Calcified Crushblat|y}})</small><br>4 <small>({{icon|Dwarf Orange Bulborb|v=P3|y}})</small><br>1 <small>({{icon|Hermit Crawmad|v=P3|y}})</small><br>13 <small>({{icon|Puckering Blinnow|y}})</small><br>2 <small>({{icon|Skutterchuck|y}})</small><br>1 <small>({{icon|Toady Bloyster|v=P3|y}})</small><br>1 <small>({{icon|Waddlepus|y}})</small><br>1 <small>({{icon|Yellow Wollywog|v=P3|y}})</small> | |||
|[[File:Poko P3 icon.png|12px]] × 50 <small>([[Armored Cannon Larva]])</small><br>[[File:Poko P3 icon.png|12px]] × 70 <small>([[Calcified Crushblat]])</small><br>[[File:Poko P3 icon.png|12px]] × 15 <small>([[Dwarf Orange Bulborb]])</small><br>[[File:Poko P3 icon.png|12px]] × 30 <small>([[Hermit Crawmad]])</small><br>[[File:Poko P3 icon.png|12px]] × 15 <small>([[Puckering Blinnow]])</small><br>[[File:Poko P3 icon.png|12px]] × 5 <small>([[Skutterchuck]])</small><br>[[File:Poko P3 icon.png|12px]] × 50 <small>([[Toady Bloyster]])</small><br>[[File:Poko P3 icon.png|12px]] × 30 <small>([[Waddlepus]])</small><br>[[File:Poko P3 icon.png|12px]] × 30 <small>([[Yellow Wollywog]])</small> | |||
|[[File:Poko P3 icon.png|12px]] × 575 | |||
|} | |||
;Obstacles | |||
*{{icon| | *{{icon|Crystal wall|y}} × 1 | ||
*{{icon|Dirt wall|y}} × 3 | *{{icon|Dirt wall|y}} × 3 | ||
*{{icon| | |||
*{{icon|Bridge|v=P3|y}} × | ;Tools | ||
{{columns|2| | |||
*{{icon|Bouncy Mushroom|y}} × 1 | |||
*{{icon|Bridge|v=P3|y}} (Brown) {{icon|Fragment|y}} × 30 (piles of 10 and 20) | |||
*{{icon|Climbing stick|y}} × 1 | *{{icon|Climbing stick|y}} × 1 | ||
*{{icon|Conveyor belt|y}} × 22 | |||
*{{icon|Conveyor switch|y}} × 4 | |||
*{{icon|Geyser|y}} × 1 | *{{icon|Geyser|y}} × 1 | ||
}} | |||
==Battle | ;Others | ||
{{ | *{{icon|Ultra-Spicy Nectar|v=P3|y}} × 2 | ||
|be = y | |||
|map = ClockworkChasmDefeatEnemiesmap.png | ==Battle Enemies!== | ||
{{infobox mission | |||
|red = {{tt|4| | |be = y | ||
|map = ClockworkChasmDefeatEnemiesmap.png | |||
|yellow = {{tt|15| | |red = {{tt|4|All leaf}} | ||
|winged = {{tt|12| | |yellow = {{tt|15|5 flower, 10 leaf}} | ||
|blue = {{tt|10| | |winged = {{tt|12|2 flower, 10 leaf}} | ||
| | |wingedcb = 1 | ||
|blue = {{tt|10|7 flower, 3 leaf}} | |||
|bronze = | |time = 7:00 | ||
|silver = | |bronze = 150 | ||
|gold = | |silver = 250 | ||
|platinum = 475 | |gold = 350 | ||
|platinum = 475 | |||
|music = [[Music in Pikmin 3#Mission Mode (Levels 12-15)|Mission Mode (Levels 12-15)]] | |music = [[Music in Pikmin 3#Mission Mode (Levels 12-15)|Mission Mode (Levels 12-15)]] | ||
|noicons = y | |||
}} | }} | ||
=== | ===Objects=== | ||
;Leaders | |||
*{{icon| | *{{icon|Brittany|y|v=neutral}} (player 2's starting leader) | ||
*{{icon| | *{{icon|Olimar|y|v=neutral}} (player 1's starting leader) | ||
*{{icon| | *{{icon|Louie|y|v=neutral}} (only present when playing in co-op) | ||
=== | ;Starting Pikmin | ||
{| class="wikitable sortable" | |||
! class="unsortable" | Icon | |||
!Type | |||
!Amount | |||
! class="unsortable" | Location(s) | |||
|- | |||
|[[File:Red Pikmin P3 icon.png|32px]] | |||
|[[Red Pikmin]] | |||
|4 | |||
|4 leaf Pikmin inside a [[Medusal Slurker]] in the south side of the map. | |||
|- | |||
|[[File:Yellow Pikmin P3 icon.png|32px]] | |||
|[[Yellow Pikmin]] | |||
|15 | |||
|10 leaf Pikmin and 5 flower Pikmin buried in the north side of the map. | |||
|- | |||
|[[File:Winged Pikmin P3 icon.png|32px]] | |||
|[[Winged Pikmin]] | |||
|12 | |||
|2 flower Pikmin buried under the [[Master Onion]].<br>10 leaf Pikmin inside a [[Medusal Slurker]] in the north side of the map. | |||
|- | |||
|[[File:Blue Pikmin P3 icon.png|32px]] | |||
|[[Blue Pikmin]] | |||
|10 | |||
|7 flower Pikmin buried under the [[Master Onion]].<br>3 leaf Pikmin standing in the middle of an elevated section. | |||
|} | |||
;Enemies | |||
{| class="wikitable sortable" | |||
! class="unsortable" | Icon | |||
!Name | |||
!Amount | |||
!Value | |||
!Total value | |||
|- | |||
|[[File:Skutterchuck icon.png|32px]] | |||
|[[Skutterchuck]] | |||
|1 | |||
|[[File:Spirit BE enemy icon.png|12px]] × 5 | |||
|[[File:Spirit BE enemy icon.png|12px]] × 5 | |||
|- | |||
|[[File:Male Sheargrub P3 icon.png|32px]] | |||
|[[Male Sheargrub]] | |||
|12 | |||
|[[File:Spirit BE enemy icon.png|12px]] × 5 | |||
|[[File:Spirit BE enemy icon.png|12px]] × 60 | |||
|- | |||
|[[File:Skeeterskate icon.png|32px]] | |||
|[[Skeeterskate]] | |||
|4 | |||
|[[File:Spirit BE enemy icon.png|12px]] × 5 | |||
|[[File:Spirit BE enemy icon.png|12px]] × 20 | |||
|- | |||
|[[File:Dwarf Bulborb P3 icon.png|32px]] | |||
|[[Dwarf Bulborb]] | |||
|2 | |||
|[[File:Spirit BE enemy icon.png|12px]] × 15 | |||
|[[File:Spirit BE enemy icon.png|12px]] × 30 | |||
|- | |||
|[[File:Medusal Slurker icon.png|32px]] | |||
|[[Medusal Slurker]] | |||
|2 | |||
|[[File:Spirit BE enemy icon.png|12px]] × 15 | |||
|[[File:Spirit BE enemy icon.png|12px]] × 30 | |||
|- | |||
|[[File:Swooping Snitchbug P3 icon.png|32px]] | |||
|[[Swooping Snitchbug]] | |||
|3 | |||
|[[File:Spirit BE enemy icon.png|12px]] × 30 | |||
|[[File:Spirit BE enemy icon.png|12px]] × 90 | |||
|- | |||
|[[File:Hermit Crawmad P3 icon.png|32px]] | |||
|[[Hermit Crawmad]] | |||
|2 | |||
|[[File:Spirit BE enemy icon.png|12px]] × 30 | |||
|[[File:Spirit BE enemy icon.png|12px]] × 60 | |||
|- | |||
|[[File:Flighty Joustmite icon.png|32px]] | |||
|[[Flighty Joustmite]] | |||
|1 | |||
|[[File:Spirit BE enemy icon.png|12px]] × 30 | |||
|[[File:Spirit BE enemy icon.png|12px]] × 30 | |||
|- | |||
|[[File:Bearded Amprat icon.png|32px]] | |||
|[[Bearded Amprat]] | |||
|1 | |||
|[[File:Spirit BE enemy icon.png|12px]] × 50 | |||
|[[File:Spirit BE enemy icon.png|12px]] × 50 | |||
|- | |||
|[[File:Baldy Long Legs icon.png|32px]] | |||
|[[Baldy Long Legs]] | |||
|1 | |||
|[[File:Spirit BE enemy icon.png|12px]] × 100 | |||
|[[File:Spirit BE enemy icon.png|12px]] × 100 | |||
|} | |||
;Obstacles | |||
*{{icon|Electric gate|v=P3|y}} × 1 | *{{icon|Electric gate|v=P3|y}} × 1 | ||
*{{icon|Large crystal|y}} × 1 | |||
*{{icon|Reinforced wall|v=P3|y}} × 1 | *{{icon|Reinforced wall|v=P3|y}} × 1 | ||
*{{icon|Geyser|y}} × 1 | |||
*{{icon| | ;Tools | ||
*{{icon|Conveyor belt|y}} × 18 | |||
*{{icon|Conveyor switch|y}} × 5 | |||
*{{icon|Geyser|y}} × 2 | |||
;Plants and Fungi | |||
*{{icon|Burgeoning Spiderwort|v=P3|y}} × 1 | |||
*{{icon|Candypop Bud|v=P3 winged|y}} (Winged) × 1 | |||
;Others | |||
*{{icon|Master Onion|v=P3|y}} × 1 | |||
==World records== | |||
{{world records | date = {{date|20|June|2016}} | cts = 17635 | ctc = 15865 | bes = 3485 | bec = 3505 | p3 = y}} | |||
{{world records | date = {{date|27|June|2022}} | cts = 18565 | ctc = 17515 | bes = 3805 | bec = 3745 | p3d = y}} | |||
==Gallery== | |||
<gallery> | |||
Clockwork Chasm CT icon.png|Collect Treasure! icon. | |||
Clockwork Chasm BE icon.png|Battle Enemies! icon. | |||
WiiU screenshot GamePad 012BD.jpg|A screenshot showing some conveyor belts and a Dwarf Orange Bulborb. This is located near the landing site. | |||
Nepeta10.jpg|Screenshot showing a pool with some Puckering Blinnows. | |||
Brittany knockout.jpg|Brittany losing all her [[health]]. | |||
</gallery> | |||
==Trivia== | ==Trivia== | ||
*If the overhead map is displayed from the right angle, and scrolled to the corners of the map, a metal chain-mesh fence can be seen surrounding the perimeter of the area. | *If the overhead map is displayed from the right angle, and scrolled to the corners of the map, a metal chain-mesh fence can be seen surrounding the perimeter of the area on the TV screen. | ||
*This is the only Mission Mode stage to have bottomless [[pits]]. | *This is the only Mission Mode stage to have bottomless [[pits]]. | ||
==Names in other languages== | |||
{{Foreignname | |||
|Jap=機械仕掛けのブルース | |||
|JapR=Kikaijikake no Burūsu | |||
|JapM=Clockwork Blues | |||
|Fra=Le blues du mécano | |||
|FraM=Blues of the mechanic | |||
|SpaE=Páramo Industrial | |||
|SpaEM=Industrial Moor | |||
|Ger=Maschinenpark | |||
|GerM=Machine park | |||
|Ita=Blues meccanico | |||
|ItaM=Mechanical blues | |||
}} | |||
{{missions}} | {{missions}} | ||
[[Category:Downloadable content]] | |||
[[Category: | |||
Revision as of 04:52, July 7, 2024

|
This article or section is in need of more images. |
Clockwork Chasm (機械仕掛けのブルース?, lit.: "Clockwork Blues") is a Mission Mode stage in Pikmin 3. It is a metal-themed area, featuring many small platforms where Pikmin can easily fall off into the pit, and showcases conveyor belts and switches. The stage is playable in the Collect Treasure! and Battle Enemies! modes. In the original Pikmin 3, it was released as downloadable content on December 2nd, 2013, while in Pikmin 3 Deluxe, it is part of the base game and can be unlocked in each of the 2 modes by completing the first 10 stages in that mode.
|
This article is a stub. You can help Pikipedia by expanding it.
|
Collect Treasure!
| Clockwork Chasm Collect Treasure! | |||||||||
|---|---|---|---|---|---|---|---|---|---|

| |||||||||
| Starting Pikmin | |||||||||
| |||||||||
| Requirements | |||||||||
| |||||||||
| Time limit | 13:00 | ||||||||
| Music | Mission Mode (Levels 12-15) | ||||||||
Objects
- Leaders
The order in Pikmin 3 is Olimar, Brittany, Louie. The order in Pikmin 3 Deluxe is identical.
- Pikmin
| Icon | Type | Amount | Location(s) |
|---|---|---|---|
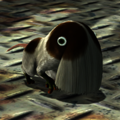
| Red Pikmin | 25 | 10 leaf Pikmin standing under the SPERO. 5 leaf Pikmin buried near a pile of fragments. 5 leaf Pikmin buried near a Face Wrinkler. 5 leaf Pikmin standing near a Bug-Eyed Crawmad. | |
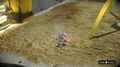
| Rock Pikmin | 10 | 5 leaf Pikmin standing near a pond full of Puckering Blinnows. 5 leaf Pikmin buried at the end of a narrow path. | |
| Blue Pikmin | 40 | Two groups of 5 leaf Pikmin buried near a Yellow Wollywog. 5 leaf Pikmin buried near 2 Dwarf Orange Bulborbs. 5 leaf Pikmin buried near three Juicy Gaggles. 5 leaf Pikmin buried near a Heroine's Tear. 5 leaf Pikmin standing near ½ of a Stellar Extrusion. 5 leaf Pikmin buried near a Calcified Crushblat. 5 leaf Pikmin buried near a Waddlepus. |
- Treasures and Enemies
| Icon | Name | Amount | Value | Total value |
|---|---|---|---|---|
| Juicy Gaggle | 3 | |||
| Sunseed Berry | 1 | |||
| Face Wrinkler | 1 | |||
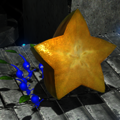
| Stellar Extrusion | ½ | |||
| Golden Sunseed | 1 | |||
| Pocked Airhead | 1 | |||
| Heroine's Tear | 1 | |||
| Nugget | 110 (Piles of 33 and 77) | |||
| Enemy | 2 ( 1 ( 4 ( 1 ( 13 ( 2 ( 1 ( 1 ( 1 ( |
- Obstacles
 Crystal wall × 1
 Dirt wall × 3
- Tools
 Bouncy Mushroom × 1
 Bridge (Brown)
  Fragment × 30 (piles of 10 and 20)
 Climbing stick × 1
 Conveyor belt × 22
 Conveyor switch × 4
 Geyser × 1
- Others
Battle Enemies!
| Clockwork Chasm Battle Enemies! | |||||||||||
|---|---|---|---|---|---|---|---|---|---|---|---|

| |||||||||||
| Starting Pikmin | |||||||||||
| |||||||||||
| Requirements | |||||||||||
| |||||||||||
| Time limit | 7:00 | ||||||||||
| Music | Mission Mode (Levels 12-15) | ||||||||||
Objects
- Leaders
 Brittany (player 2's starting leader)
 Olimar (player 1's starting leader)
 Louie (only present when playing in co-op)
- Starting Pikmin
| Icon | Type | Amount | Location(s) |
|---|---|---|---|
| Red Pikmin | 4 | 4 leaf Pikmin inside a Medusal Slurker in the south side of the map. | |
| Yellow Pikmin | 15 | 10 leaf Pikmin and 5 flower Pikmin buried in the north side of the map. | |
| Winged Pikmin | 12 | 2 flower Pikmin buried under the Master Onion. 10 leaf Pikmin inside a Medusal Slurker in the north side of the map. | |
| Blue Pikmin | 10 | 7 flower Pikmin buried under the Master Onion. 3 leaf Pikmin standing in the middle of an elevated section. |
- Enemies
| Icon | Name | Amount | Value | Total value |
|---|---|---|---|---|
| Skutterchuck | 1 | |||
| Male Sheargrub | 12 | |||
| Skeeterskate | 4 | |||
| Dwarf Bulborb | 2 | |||
| Medusal Slurker | 2 | |||
| Swooping Snitchbug | 3 | |||
| Hermit Crawmad | 2 | |||
| Flighty Joustmite | 1 | |||
| Bearded Amprat | 1 | |||
| Baldy Long Legs | 1 |
- Obstacles
 Electric gate × 1
 Large crystal × 1
 Reinforced wall × 1
- Tools
- Conveyor belt × 18
- Conveyor switch × 5
- Geyser × 2
- Plants and Fungi
 Burgeoning Spiderwort × 1
 Candypop Bud (Winged) × 1
- Others
 Master Onion × 1
World records
In Pikmin 3, these are the world records for the challenge, as obtained from the in-game global rankings feature. The following scores were retrieved on June 20th, 2016. Since the in-game leaderboards have been compromised, it is impossible to obtain more up-to-date legitimate records from the game, though players may have obtained higher scores since.
- Collect Treasure!
- Solo:
 × 17635
 - Co-op: × 15865
- Solo:
- Battle Enemies!
- Solo:
 × 3485
 - Co-op: × 3505
- Solo:
In Pikmin 3 Deluxe, these are the world records for the challenge, as obtained from the in-game global rankings feature. The following scores were retrieved on June 27th, 2022.
- Collect Treasure!
- Solo: × 18565
- Co-op: × 17515
- Solo:
- Battle Enemies!
- Solo: × 3805
- Co-op: × 3745
- Solo:
Gallery
Collect Treasure! icon.
Battle Enemies! icon.

A screenshot showing some conveyor belts and a Dwarf Orange Bulborb. This is located near the landing site.

Screenshot showing a pool with some Puckering Blinnows.
Brittany losing all her health.


Trivia
- If the overhead map is displayed from the right angle, and scrolled to the corners of the map, a metal chain-mesh fence can be seen surrounding the perimeter of the area on the TV screen.
- This is the only Mission Mode stage to have bottomless pits.
Names in other languages
| Language | Name | Meaning |
|---|---|---|
| 機械仕掛けのブルース? Kikaijikake no Burūsu |
Clockwork Blues | |
| Le blues du mécano | Blues of the mechanic | |
| Maschinenpark | Machine park | |
| Blues meccanico | Mechanical blues | |
| Páramo Industrial | Industrial Moor |