User:Twins1105/Sandbox
Sandbox to hold my W.I.P. edits for certain articles.
Pikmin
Stuff relating to Pikmin
The Forest of Hope test
| Twins1105/Sandbox | |
|---|---|
| Ship parts | 8 |
| Pikmin discovered | |
| Requirements | Recover 1 ship part[1] |
| Music | The Forest of Hope |
The Forest of Hope (希望の森?, lit.: "Forest of Hope") is the second area in Pikmin. It is set in a temperate forest with a mix of wide-open spaces and narrow corridors. It contains 8 ship parts and is unlocked after collecting the first ship part, the Main Engine, in The Impact Site. Yellow Pikmin are discovered in this area. The enemies in this area are fairly easy compared to the other areas, with several Spotty Bulborbs, Dwarf Bulborbs, and Sheargrubs. This area was reused in Pikmin 2 as the basis for the Awakening Wood.
General layout
|
The following article or section is in need of assistance from someone who plays Pikmin. |
Most of this area consists of vast plains with some gates and high walls that block several paths. There is a small lake near the main plain. The most common enemies here are Spotty Bulborbs and Dwarf Bulborbs. This area contains an assortment of red and yellow pellets, as well as two wooden bridges that can be built to gain access to a small piece of land containing the Sagittarius. Behind the stone wall at the landing area is a yellow 20 pellet on a high tree stump that requires Yellow Pikmin to reach. To the north is the arena where the Armored Cannon Beetle is fought and to the southwest is the ledge where the Burrowing Snagrets are.
The bomb-rocks in this area are located inside tin cans. The first one is near the great plain with Spotty Bulborbs, another one is near the place where the Yellow Onion is originally found. The last can is in the place where the Nova Blaster is found. On the first day the area is visited, some are found out of the cans, three resting in front of one of the stone walls that can be destroyed after obtaining Yellow Pikmin.
Although water defends access to the Geiger Counter, the Radiation Canopy, and the Sagittarius, it is possible to collect these parts with Yellow Pikmin; thus, the area can be completed uniquely with them.
In Challenge Mode, there are a lot more Bulborbs, and Spotty Bulbears can also be found where the Armored Cannon Beetle and Burrowing Snagrets are found in story mode (the former location also has a Pearly Clamclamp).
Objects
- Ship parts
| Icon | Name | Location |
|---|---|---|
| Eternal Fuel Dynamo | Beyond the wooden gate near the landing site. | |
| Whimsical Radar | Beyond the rock wall beside the the Yellow Onion's discovery location, atop a ledge. | |
| Extraordinary Bolt | Slightly ahead of the Whimsical Radar and behind a rock wall. | |
| Nova Blaster | Past the black wooden gate near the landing site, and past a few Bulborbs. | |
| Shock Absorber | Past the wooden gate near the landing site on the ledge with water to the left. Blue Pikmin can follow Olimar through the water while all other types need to be thrown onto the ledge. | |
| Radiation Canopy | Near the Nova Blaster are two wooden gates, the first of which is submerged in water. This part is beyond both, and guarded by a nearby Armored Cannon Beetle. | |
| Geiger Counter | To the left of the Yellow Onion's discovery location, is a rock wall. Beyond it is a group of Bulborbs and a cardboard box that leads to a ledge with three Burrowing Snagrets. The one closest to the far ledge needs to be taken out in order to collect the part. | |
| Sagittarius | Directly beyond the landing site, ahead of the wooden gate, is a large pool of water. This part is on an island at the far end that can be accessed by building two wooden bridges. |
- Enemies
 Dwarf Bulborb × 11
 Spotty Bulborb × 7 (+2 starting day 5)
 Iridescent Flint Beetle × 2, starting day 3 (+1 starting day 6)
 Honeywisp × 3
 Female Sheargrub × 6 (+3 starting day 5)
 Male Sheargrub × 4 (+2 starting day 5)
 Wolpole × 4
 Armored Cannon Beetle × 1
 Burrowing Snagret × 3 (after the one with Geiger Counter is defeated, it never returns)
 Swooping Snitchbug × 1, starting day 15
- Obstacles
 White wooden gate × 3
 Black wooden gate × 2
 Gray rock wall × 3
 Black rock wall × 1
 Cardboard box × 1
- Tools
 Wooden bridge × 2
- Vegetation
 Pellet Posy × 25 (20 after day 4)
 Clover × 15
 Dandelion × 4
 Grass × 6
- Other
- Broken shell × 1
Guide
|
The following article or section contains guides. |
There are ways to complete this area without the use of Blue Pikmin. This guide will explain how to get the parts the way they were intended.
After landing, use some Pikmin to break down the white wooden gate. On the other side, and to the right, is the Eternal Fuel Dynamo which needed at least 40 Pikmin to carry. Use the Dwarf Bulborbs and pellet posies to grow your count to this and collect the part. Continuing to the right, there is another white wooden gate which needs to be destroyed. On the other side, there is a handful of Dwarf Bulborbs and a single Bulborb, defeat these. Move further into the area and discover the Yellow Onion, and using the pellets and corpses, grow your Yellow Pikmin count to 20-25. Pick up all the bomb rocks, near the wall and in the can, and use them to blow up the white rock wall. In this next area, there are some male and female Sheargrubs along with the Whimsical Radar. Collect the radar and continue through the area. Using 9 bomb rocks, blow up the black rock wall and collect the Extraordinary Bolt behind it. Continuing down the path, you'll reach an open area with a black wooden gate, white rock wall, and some bulborbs. Kill the bulborbs and use the remaining bomb-rocks to blow up the wall. If you do not have enough bombs, that is okay. Break down the black wooden gate, head through and kill the bulborbs in your way. At the end of this path you'll find the Nova Blaster, the only non-mandatory part in this area, along with more bomb-rocks. Collect the part and more bomb-rocks, if needed, to blow up the wall from before. Head back to the landing site, and go back through the first gate you broke down. This time we'll be heading left. Throw a minimum of 30 Pikmin onto the ledge and climb up the root to the left of said ledge to join your Pikmin. On this raised platform, There is the Shock Absorber and a Spotty Bulborb. Kill the Spotty Bulborb and collect the part. For the remaining 3 parts, Blue Pikmin are required.
After discovering Blue Pikmin, take a handful and head through the wall to the north of the landing site. Head through the black wooden gate and to the left you'll see a white wooden gate in some water. Use your Blue Pikmin to destroy this gate and then the other gate up the slope behind it. The Radiation Canopy is found in this area protected by an Armored Cannon Beetle. Defeat said beetle and collect the part. From the landing site, head through the southern exit towards the water. There are 2 wooden bridges that need to be built in order to collect the Sagittarius, one of which require Blue Pikmin. Build both bridges and collect the part. The final part is located in an area that can be accessed from where the Yellow Onion was found, so head there. Once you are there, you should notice another rock wall near the tin can, blow this up with bomb-rocks. Through the wall is a couple of bulborbs, whom you should dispose off, and a cardboard box. Head into the water with Blue Pikmin, and use them to push the box out the way. Head across the newly opened bridge, where you'll be attack by up to 3 Burrowing Snagrets. One of these snagrets holds the final part, the Geiger Counter. Dispose of them and collect the final part.
In Challenge Mode
| Twins1105/Sandbox | |
|---|---|
| Requirements | Unlocked with Challenge Mode |
| Music | The Forest of Hope |
The Forest of Hope in Challenge Mode is a diverse stage, featuring some peaceful sections and some sections with enemies. There are a lot of things to collect and a lot of time to collect them, with the maximum score being 569 and the time limit being 18 minutes and 54 seconds.
Object breakdown
| Pikmin source | Seeds | Amount | Total |
|---|---|---|---|
| Starting Reds | 3 | 3 | |
| Starting Yellows | 3 | 3 | |
| Starting Blues | 3 | 3 | |
| Red 1 pellets | 2 | 6 | 12 |
| Red 5 pellets | 5 | 2 | 10 |
| Red 10 pellets | 10 | 1 | 10 |
| Red 20 pellets | 20 | 1 | 20 |
| Yellow 1 pellets | 2 | 6 | 12 |
| Yellow 5 pellets | 5 | 2 | 10 |
| Yellow 10 pellets | 10 | 1 | 10 |
| Yellow 20 pellets | 20 | 1 | 20 |
| Blue 1 pellets | 2 | 5 | 10 |
| Blue 5 pellets | 5 | 2 | 10 |
| Blue 10 pellets | 10 | 2 | 20 |
| Blue 20 pellets | 20 | 1 | 20 |
| Pellet Posy | 2 | 7 | 14 |
| Dwarf Bulbear | 5 | 10 | 50 |
| Dwarf Bulborb | 4 | 19 | 76 |
| Pearly Clamclamp | 50 | 2 | 100 |
| Spotty Bulborb | 12 | 8 | 96 |
| Spotty Bulbear | 15 | 4 | 60 |
| Total | 569 | ||
Gallery
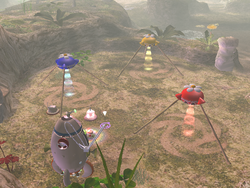
Overview of the landing site in Challenge Mode.
Further into the dirt section, on the way to the area where Yellow Pikmin are found.
A nearby reinforced wall, still open.
Section where the Extraordinary Bolt can be found.
The area before the Armored Cannon Beetle's arena.
The location of the Shock Absorber.
The bridges leading up to the Sagittarius.
The area before the Burrowing Snagret arena.
Preview image on the area selection menu.
The Forest of Hope in Challenge Mode.
Maps
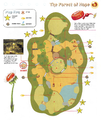
Official map from the Official Nintendo Player's Guide.
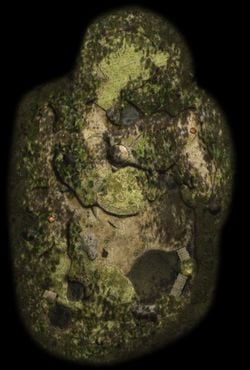
The radar pattern of The Forest of Hope.
The radar pattern of The Forest of Hope in the Nintendo Switch version of Pikmin 1.
Trivia
- It is possible to complete this area in one day, as can be seen on low day runs.[2]
- Blue Pikmin are not needed to complete the area. The bridge to the Sagittarius can be reached by non-Blue Pikmin, provided they're whistled to the island quickly enough, the gate leading to the Armored Cannon Beetle can be destroyed with bomb-rock Yellow Pikmin placed on top of the gate's structure, and the cardboard box before the Burrowing Snagrets can be pushed by throwing Pikmin on top of it, and moving them to the back of the box, or by simply using a long throw.
- In the late prototype stages of the game, a Puffstool was on the small plateau overlooking the lake in the place of the Burrowing Snagrets.
- The music in this area reappears in Super Smash Bros. Brawl and Super Smash Bros. for Wii U, on the stages Distant Planet and Garden of Hope, respectively. Parts of its melody are also used for the theme of the Blossoming Arcadia in Olimar's Shipwreck Tale.
- All ship parts whose name begins with the letter "E" are in the Forest of Hope.
Names in other languages
| Language | Name | Meaning |
|---|---|---|
| 希望の森? Kibō no mori |
Forest of Hope | |
| La Forêt de l'espoir La Forêt de l'Espoir (loading screen) |
The Forest of hope The Forest of Hope | |
| La Forêt de l'Espoir | The Forest of Hope | |
| Wald der Hoffnung | Forest of Hope | |
| Foresta Speranza | Hope Forest | |
| 희망의 숲 huimang-ui sup |
Forest of Hope | |
| El Bosque de la Esperanza | The Forest of Hope |
See also
References
- ^ YouTube video showing that The Forest of Hope will only unlock when the player has at least one ship part (at 04:42)
- ^ YouTube video Jhawk4's Pikmin world record speedrun, published on June 15th, 2020
Pikmin World name machine translations
More direct machine translations of the original Japanese track names for Pikmin World using Deepl, Google Translate, and Jisho.
- Pikmin
- Carry, fight, multiply, and be consumed
- Select a ship's log
- Prologue
- Panoramic view
- The Impact Site
- The Forest of Hope
- The Forest Navel
- The Distant Spring
- The Final Trial
- Giant creature approaching
- The last giant creature
- Let's challenge
- Challenge results announcement
- New record achieved
- Onion found!
- Meeting
- Spaceship part found!
- Spaceship part appears!
- Spaceship part recovery complete!
- Spaceship power up!
- Spaceship complete!
- Night is coming
- It was my mistake...
- Today's records
- Time's up, it's time to head into space...
- Escape, and crash...
- Live as a Pikmin
- Spaceship completed, time to go to space!
- Escape and head to planet Hocotate
- Complete disaster record
- The people who organized this journey
- Complete creature record
- Song of Love (CM Version No.1)
- Song of Love (CM version No.2)
- Song of Love (French CM Version)
P1S Ship Part Icons
Using the ship part icons from Pikmin 1 (Nintendo Switch) in place of the current unofficial icons.
Location map
Table
Pikmin 2
Stuff relating to Pikmin 2
Up to 2999 Pokos
Color Test
Notes in other languages
Olimar's journal (Japanese)
“最初に目撃した時は、巨大な水棲生物かと思いびっくりしたが、実はただの巨像だった。一安心だ。もしこんなブサイクな生物が実在しておそってきたら、無様に逃げまどうしかなかっただろう……。”
“When I first saw it, I was startled, thinking it was a giant aquatic creature, but in fact it was just a colossal statue. I was relieved. If such an ugly creature had actually existed and attacked me, I would have had no choice but to clumsily run away...”
Sales pitch (Japanese)
Pikmin Adventure
Stuff relating to Pikmin Adventure
Pikmin Adventure area infobox
An area infobox for the challenges in Pikmin Adventure.
| Bulborb Forest | |
|---|---|

| |
| Challenge type | Standard |
| Master Rank time | 2:10 |
| Area style | Spring |
| Next area | Boss of the Beebs |
| Music | Spring area |
Pikmin Adventure controls
Controls for Nintendo Land and Pikmin Adventure based on User:PopitTart/Controls.
Pikmin Adventure
Nintendo Land allows two controller types in the Pikmin Adventure attraction; The Wii U GamePad for the first and the sideways Wii Remote for the other players.
Nintendo Land plaza
| Action | GamePad controls | Notes |
|---|---|---|
| Move | Supports analog movement. | |
| Rotate camera | The right stick can only be used to turn the camera left and right. The GamePad can be used to look up and down alongside correcting the camera if the GamePad is rotated. | |
| Swap to menu/plaza | Toggles between the menu and the plaza. | |
| Jump | Three consecutive jumps cause the Mii to jump higher each time. Jumps can cause interactions with statues. | |
| First person perspective | held |
Pikmin Adventure GamePad controls
In Pikmin Adventure, the GamePed player does the majority of the important actions by pressing on the touchscreen.
| Action | GamePad | Notes |
|---|---|---|
| Move | held |
Doesn't support analog movement. |
| Whistle | tapped or held |
|
| Punch/throw Pikmin | tap |
|
| Change next Pikmin type | tap icon |
Only available in advanced challenges. |
| Dodge | swipe |
Cannot be done if a Mii Pikmin player is being carried |
| Pause/resume | ||
| Skip cutscene |
Pikmin Adventure Wii Remote controls
In Pikmin Adventure, the Wii Remote player needs to hold the controller sideways to play properly.
| Action | Wii Remote | Notes |
|---|---|---|
| Move | Doesn't support analog movement. | |
| Jump | ||
| Attack | Attack changes depending on the currently worn power-up. | |
| Double attack | Can only be done after reaching level 5 or higher. Attack changes depending on the currently worn power-up. | |
| Triple attack | Can only be done after reaching level 10 or higher. Attack changes depending on the currently worn power-up. | |
| Charged attack | Hold |
Attack changes depending on the currently worn power-up. |
| Air attack | Attack changes depending on the currently worn power-up. | |
| Latched attack |
Pikmin Adventure enemy list
The following lists the appearance of enemies in each level in Pikmin Adventure.
Enemies found in Bulborb Forest
Bulborb (red) × 9
Creepy Beeb × 18
Bulborb (yellow) × 1
Enemies found in Boss of the Beebs
Bulborb (red) × 18
Creepy Beeb × 15
Bulborb (yellow) × 1
King Beeb × 3
Enemies found in Five Seconds to Takeoff
Creepy Beeb × 28
Bulborb (red) × 1
Enemies found in Overthrow the Bulblord
Bulblord × 1
Enemies found in Cannon Smash
Creepy Beeb × 12
Bulborb (yellow) × 6
Bulborb (red) × 6
Enemies found in King Beeb is Back
Bulborb (red) × 15
Bulborb (yellow) × 14
Telescoping Pumphog × 12
Creepy Beeb × 30
King Beeb × 1
Enemies found in Through the Darkness
King Beeb × 7
Bulborb (red) × 7
Bulborb (yellow) × 5
Enemies found in Swamp Master
Enemies found in Lord of a Barren Land
Blowhog × 5
Telescoping Pumphog (invincible) × 9
Bombardier Beeb × 5
King Beeb × 4
Bulborb (red) × 10
Bulborb (yellow) × 5
Bilious Bulborb × 1
Enemies found in Burst the Giant Balloon
Bombardier Beeb × 9
Bulborb (red) × 8
Bulborb (yellow) × 5
King Beeb × 4
Blowhog × 7
Notes in other languages
Bulborb (Pikmin Adventure)
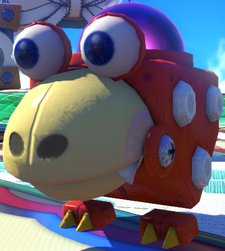
Monita's notes
Hey! Pikmin
Stuff relating to Hey! Pikmin
Spark dandelion
The spark dandelion is a small tool that lights up when Yellow Pikmin are thrown at it. When activated, it will hold the Yellow Pikmin in place as it lights up an area around it, allowing for Bloominous Stemples to bloom. The spark dandelion will immediately be turned off once the Yellow Pikmin are whistled at.
The name comes from the Japanese Hey! Pikmin guidebook, where it was given the name スパークタンポポ? (lit.: "Spark dandelion").
Locations
- Ravaged Rustworks
- Space of Silence: The only spark dandelions in the game appear here. They are found in the room containing the Silence Breaker, where they act as electrical tools that the player has to use in order to activate nearby Bloominous Stemples and reach the treasure.
Hey! Pikmin area table
A table of Hey! Pikmin areas based on a previous edit of Brilliant Garden.
Main areas
| Code | Image | Name | Treasures | Available Pikmin |
|---|---|---|---|---|
| 1-A | 
|
First Expedition | ||
| 1-B | 
|
Cavern of Confusion | ||
| 1-C | 
|
Mushroom Valley | ||
| 1-D | Back-and-Forth Road | |||
| 1-E | 
|
The Shadow in the Brush | ||
| 1-X | 
|
Cherrystone Pass |
Special areas
| Image | Name | amiibo required? | Reward(s) |
|---|---|---|---|
|
Secret Spot 1 | No | |
|
Secret Spot 2 | Yes | |
|
Secret Spot 3 | Yes | |
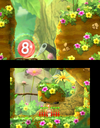
|
Secret Spot 4 | No | |
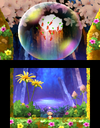
|
Sparklium Springs | No |
Rocks: |
Main areas
| Code | Image | Name | Treasures | Available Pikmin |
|---|---|---|---|---|
| 2-A | 
|
Foaming Lake | ||
| 2-B | 
|
Serene Stream | ||
| 2-C | 
|
Glowing Bloom Pond | ||
| 2-D | The Shallow End | |||
| 2-E | 
|
The Keeper of the Lake | ||
| 2-X | 
|
Treacherous Currents |
Special areas
| Image | Name | amiibo required? | Reward(s) |
|---|---|---|---|

|
Secret Spot 5 | Yes | |
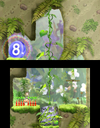
|
Secret Spot 6 | No | |

|
Secret Spot 7 | Yes | |

|
Secret Spot 8 | No | |
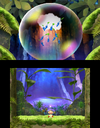
|
Sparklium Springs | No |
Rocks: |
Pikmin 4
Stuff relating to Pikmin 4
Objects
Treasures
 Brush of Wisdom × 1 (inside Burrowing Snagret)
 Cupid's Grenade × 3 (may be inside Waddlequaff)
 Daughter Doll Head × 1
 Floral Instigator × 1
 Harmonic Synthesizer × 1
 Mechanical Harp (Memory Song) × 1
 Mooching Vase × 1 (fully buried)
 Octoplus × 1 (may be inside Waddlequaff)
 Orbital Communication Sphere × 1 (in dirt mound)
 Searing Acidshock × 1 (may be inside Waddlequaff)
 Shake-a-Smile × 1 (inside Mamuta)
 Sphere of Fuzzy Feelings × 1 (completely buried)
 Sticky Jewel × 1
 Sweat-Soaked Blue Bird × 1
 Unfloatable Boat × 1
 Velvety Dreamdrop × 1 (partially buried)
 Wayward Moon × 1
 Wind Detector × 1 (partially buried)
Onions
 Flarlic × 1
 Yellow Onion × 1
Enemies
 Bearded Amprat × 2 (Drops 1 raw material each)
 Burrowing Snagret × 1 (Drops 1 treasure)
 Creeping Chrysanthemum × 2 (Drops 1 raw material each)
 Downy Snagret × 8 (1 inside an egg)
 Iridescent Flint Beetle × 1 (Drops 2 × 1 pellet, 3 × nectar, 2 × 5 pellet)
 Joustmite × 3 (Drops 1 raw material each)
 Mamuta × 1 (Drops 1 treasure)
 Mitite × 20 (2 groups)
- A group of 10 that drop 1 raw material each beneath some breakable pots
- A group of 10 that has an 80% chance of dropping nectar and a 20% chance of dropping ultra-spicy nectar each beneath the Harmonic Synthesizer
 Skitter Leaf × 5
 Swooping Snitchbug × 2 (Drops 1 raw material each)
 Waddlequaff × 4 (Drops 1 raw material each)
 White Spectralids × 3 (51% chance to drop 1 raw material each)
 Yellow Spectralids × 6 (Drops 1 nectar each)
 Yellow Wollyhop × 4 (Drops 1 raw material each)
Obstacles
 Breakable pot × 19 (4 groups)
- A group of 3 in which 1 has 1 raw material
- A group of 4 in which 2 have 1 raw material each
- A group of 4 that holds nothing
- A group of 8 blocking a cave entrance
 Dirt wall × 1 (Drops 2 raw material per phase, has 8000 HP)
 Electric gate × 2 (Drops 2 raw material per phase, has 8000 HP each)
 Reinforced wall × 1 (Requires 3 Bomb Rocks, drops 2 raw material per phase, has 30000 HP)
 Ice wall × 2 (Drops 2 raw material per phase, has 4000 HP each)
 Sprinkler × 1
Tools
 Clay bridge × 3 (Requires 29, 33, and 40 raw material)
 Clay valve × 1 (Requires 16 raw material)
 Climbing wall × 1 (Requires 11 raw material)
 Dirt-mound × 8 (10 raw material × 4, bomb rock × 3, Orbital Communication Sphere × 1)
 Potted mushroom × 4
Others
 Pile of raw material × 7 (Piles of 12, 15, 20, 24, and 3 piles of 30)
Obstacles
 Bag × 1 (10 weight)
 Dirt wall × 2 (drops 2 raw material per phase, has 8000 HP)
 Electric gate × 1 (drops 2 raw material per phase, has 8000 HP)
 Paper bag × 3
 Breakable pot × 10 (A group of 4 in which 2 hold treasures, a group of 4 that holds nothing, and a group of 2 in which one hold 5 raw materials and one holds treasure)
 Potted plant × 1
 Water body × 2 (requires 20 and 30 Ice Pikmin to freeze)
Tools
 Clay bridge × 3 (requires 22, 23, and 39 raw material)
 Climbing wall × 1 (requires 15 raw material)
 Clipboard × 2 (One regular weighing 10 and one yellow weighing 10)
 Dirt-mound × 6 (contains 10 raw materials each)
Other
 Burgeoning Spiderwort × 2
 Egg × 2 (75% chance of nectar, 20% chance of 1 raw material, 5% of ultra-spicy nectar)
 Pellet Posy × 21 (14 × 1 pellet, 5 × 5 pellet, 2 × 10 pellet)
 Raw material pile × 7 (piles of 4, 5, 20, 20, 23, 25, and 26)
P4 character page
W.I.P. P4 character page built off of the character preload page.
| Dash | |
|---|---|
| |
| Name | Dash |
| Gender | Male |
| Age | Unknown |
| Eye color | Black |
| Hair color | Varies |
| Home planet | Flukuey |
| Known related characters | None |
| Height | Unknown |
| First game | Pikmin 4 |
| Latest game | Pikmin 4 |
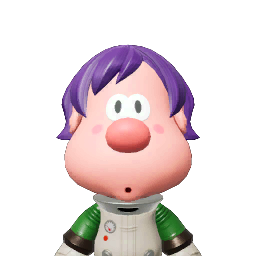
Dash (ダックス?, lit.: "Dachshund") is a leafling castaway introduced in Pikmin 4. He is always the first leafling from a Dandori Battle to be cured.
Appearance
By default Dash wears a dull white space suit with green sleeves and white gloves. He has short hair, a round nose, and two large eyes with visible pupils.
Dash's spacesuit will instead be colored red if the Rescue Corps selected color is also green. His hair color is dependent on the color of the leafling that turned out to be him when cured.
The Rescue Officer can reproduce Dash's appearance with the following options:
| Character creator options | |||
|---|---|---|---|
 Skin tone 3 Skin tone 3
|
 Body type 2 Body type 2
|
 Face type 8 Face type 8
|
 Hair style 5 Hair style 5
|
ID badge
Professional Spelunker
Home Planet
He's known for saying, "You can always find
me in the pits!" He'll take the leap into any
cave, no matter how dangerous it is.
Quotes
| Requirement | Quote |
|---|---|
| Talk to Dash for the first time. |
“Wow... I've been drawn to caves for most of my life, but I haven't run into danger like this in a long time.”
“My life's quite precious to me... Thanks for helping. After all, I can only poke around in caves if I'm alive, right?”
“Oh, I should introduce myself... I'm Dash. I've explored all over the universe, thanks to my family's deep pockets.”
|
| Talk to Dash for the second time. |
“The captain warned me that she'd be very angry if I got stranded again, so I can't go explore any caves.”
“Oh, hey—I just had the best idea! Starting right now, I'm going to recognize you as my top... well, only... pupil!”
“I need you to explore the caves around this planet on my behalf. You'll have to make it through them all the way to the exits.”
|
| I'd like to start by seeing what kinds of skills you have. Make your way through 5 caves, and report back. | |
| I can't tell you how disappointed I am not to be able to do this myself, but I've got high hopes for your tenacity. | |
| Be very careful around the creatures here. You can't explore more caves for me if you don't make it safely back to the surface! | |
| Wow! I knew I saw promise in you. I'm a great judge of caving potential. Next, try making your way through 10 caves. | |
| You, my star pupil, are making great progress to support my life's work! | |
| There may be a lot of danger, but isn't that just part of the thrill of getting to explore caves?! | |
| You keep up an impressive pace when you explore! For your next target, how about... 15 caves? | |
| Listening to your reports after you explore each cave gets me itching to dive back underground myself. | |
| If you start to feel unsafe, go back to the surface for a while. Knowing when to quit is essential when you explore caves. | |
| You really seem to understand the true "spirit" of caves now! For your final effort, make your way through every cave! | |
| It sure does seem like this planet has a remarkable variety in its many caves. | |
| The caves here are full of mystery and adventure, with creatures and treasures that point to a fascinating culture! | |
| It seems I do have excellent judgment. You really are a top-notch pupil, both in name and reality! | |
| In recognition of your great achievements, I'd like to offer this phrase I keep in mind as parting words to you. "You can always find me in the pits!" I hope we get a chance to explore some caves together one day. | |
| You seem to be traveling through those caves at a good clip. Drop your latest report on me. | |
| I want to help you discover the "spirit" of caves. You should continue your endeavor to explore even more of them. | |
| What's this?! You've already completed your travels! Whoa! You're miles ahead of what I was expecting. | |
| My title of Cave Researcher feels even more mediocre in the face of your great achievements. You've done amazing work! | |
| I see you've already made your way through several caves. I would expect no less from my star pupil! | |
| Your attitude... the way you take on these caves so enthusiastically... It's like when I first discovered the underground world. | |
| About that "Industrial Maze" matter you reported... That sounded extremely interesting! The caves repeatedly show evidence of intelligent life-forms that evolved in an entirely different way from us. Machinery that keeps working forever, floors that float in the air... It sure does stir the imagination! | |
| When I heard your report about the Secluded Courtyard, I was moved by the beauty of the silence you described. White sand spread out with a pattern in it. Hard botanical cylinders arranged here and there. There even seems to be significance to how the flat rocks are lined up... These are traces of a civilization we don't know. | |
| Among the many caves you've been to, my sense of aesthetic is most drawn to the Seafloor Resort. The marine-blue water, the expansive sandy beach, the beautiful, strange, and sometimes dangerous aquatic creatures... The constant sound of flowing water must've been peaceful as well. | |
| The building-block clearing like out of a fairy tale, the pastel-colored floor that creates a tranquil and bright mood... Thriving giant mushrooms to jump and play on... It does feel dreamy, like the name Dream Home implies. It shows the playfulness possible when a culture matures... This cave really stokes one's inner adventurer and poet! | |
| The Mud Pit you reported on... a lake of poisonous mucus where spores and mycelia are interwoven. I'm so jealous that you got to explore that cave and get all sticky and mucky hiking through it! After all, the more hardship, the bigger the sense of accomplishment when you make it to the end! | |
| The caves here are full of mystery and adventure, with creatures and treasures that point to a fascinating culture! | |
| Talk to Dash while playing as Oatchi. | This is embarrassing to admit, but I've been stranded in caves countless times, only to be saved by Rescue Pups like you. |
| Talk to Dash while playing as Oatchi. | I live my life bouncing from adventure to adventure, so sadly I can't have a dog. |
| Talk to Dash while looking like him. | A few years ago, I was diving in a cave made of a mirror-like substance. Wherever I looked, I saw countless copies of myself. You and I look so much alike, it brought back memories from that eerie experience. |
Naming
Dash's name may allude to Dachshunds.
Names in other languages
| Language | Name | Meaning |
|---|---|---|
| ダックス? Dakkusu |
From ダックスフンド? (lit.: "Dachshund") | |
(traditional) |
臘臘 | |
(simplified) |
腊腊 | |
| Teck | From "teckel" (Dachshund) | |
| Tex | From "Teckel" (Dachshund) | |
| Dack | From "Dackel" (Dachshund) | |
| Dash | - | |
| 닥스 Dakseu |
From 닥스훈트 (Dachshund) | |
| Salchi | From "cão-salsicha" (sausage dog) | |
| Teckel | From "Teckel" (Dachshund) |
Gallery
|
This article or section is in need of more images. |
See also
|
The following article or section is in need of assistance from someone who plays Pikmin 4. |
| Characters | |
|---|---|
| Leaders | Olimar • Louie • The President • Alph • Brittany • Charlie • Rookie Rescue Officer • Oatchi • Moss |
| Rescue Corps | Collin • Shepherd • Russ • Dingo • Yonny • Bernard |
| Ships | S.S. Dolphin • S.S. Dolphin II • Hocotate ship • S.S. Drake • SPERO • S.S. Beagle • S.S. Shepherd |
| Other | Castaway • Leafling • Minor characters • Pikmin |
Pikmin 4 enemy parameters
Parameters for Pikmin 4's enemies, taken from DT_TekiParameter.uasset, along side what they likely do.
ActorName - Internal name for the actor
CarryWeightMin - Minimum carry weight
CarryWeightMax - Maximum carry weight
CarryWeightMinVs - Minimum carry weight in Dandori Battle
CarryWeightMaxVs - Maximum carry weight n Dandori Battle
CarryIncPikmins - Sprouts produced by the Onion
MaxLife - HP value
Kira - Sparklium value?
Poko - Dandori point value in Dandori Challenge?
VsScore - Dandori point value in Dandori Battle?
BombHit - Bomb Rock explosions needed to kill the actor?
BombInsideHit - Bomb Rocks consumed needed to kill the actor?
PoisonHit - White Pikmin consumed needed to kill actor?
PurpleDirectHit - Purple Pikmin latching on needed to kill actor?
PressHit - ???
IceBombHit - Ice Blast explosions needed to freeze actor?
IceBombInsideHit - Ice Blast consumptions needed to freeze actor?
FreezeHit - Ice Pikmin damage needed to freeze enemy?
FreezeInsideHit - Ice Pikmin consumption needed to freeze enemy?
FreezeDamageRatio - How much Ice Pikmin damage adds up to freeze wheel?
CrushHit - Damage taken from crush attacks?
FrozenCrushDamageRate - Damage taten from crush while frozen?
SnowBallDamage - Damage taken from snowballs?
StoneDamage - Damage taken from Pebble Pitcher?
ThunderStopTime - How long actor is paralyzed by Lightning Shock?
CrushStopTime - ???
CrushKnockBackSpeed - ???
FlashbangRate - ???
FreezeDropType - Type of drops if actor is killed while frozen
DropStationPieceNum - How many Glow pellets actor drop?
URODistanceThesholds - ???
PlayerDamage - Damage it deals to the player?
OtherDamage - Damage it deals to other actors?
FlashBangTargetWeight - ???
Pikmin 4 Cave Types
The 10 different cave types in Pikmin 4, taken from the folder names in Carrot4/Terrain/Cave/Type, with a few caves that use said themes.
Aquarium - Set in an aquarium tank. Used in Planning Pools
Blocks - Set in a room similar to Pikmin 2's Toybox theme. Used in Trial Run, Battle in a Box, and Final Battle
Brick - Walls and elevated areas are made out of bricks. Used in Crackling Cauldron
Common - Unknown
Concrete - Made out of tiles not to dissimilar to Pikmin 2's Tiles theme. Used in Subzero Sauna
Garden - Walls made out of bamboo and rocks. Used in Aquiferous Summit
Last - Used in sublevel 20 of Cavern for a King
Metal - Very similar style and assets to Pikmin 2's Metal theme. Used in Below-Grade Discotheque
Sand - Similar in style to Blocks, except with sand. Used in Dandori Castle, Leafy Showdown, and Hot Sandy Duel
Soil - Walls made out of soil. Used in Hectic Hollows, Engulfed Castle
Other
Notes reordering
Director of Destiny
Pikmin 2
Olimar's journal
- GameCube - US English
* Press
* Press
* While holding Pikmin, press
- GameCube - British English
* Press
* Hold
* While holding Pikmin, press
- Wii
* Press
* Hold
* While holding Pikmin, press
- Nintendo Switch
* Press
* Hold
* While holding Pikmin, press
- GameCube - Japanese
●
●
● When dismissed with
● While holding a Pikmin with
- Wii - Japanese
・
・
・When dismissed with
・While holding a Pikmin with
- Switch - Japanese
・
・
・When dismissed with
・While holding a Pikmin with
Sales pitch
- Japanese
Pikmin 4
Schnauz's notes
Olimar's notes
Louie's notes
Courage Reactor
Olimar's journal
- GameCube - US English
- GameCube - British English / Wii / Switch
- GameCube - Japanese
Sales pitch
- Japanese
The following is a list of media related to the Pikmin series, including games relating to Pikmin, or games with Pikmin content.
Main series
Spin-offs
Pikmin Puzzle Card
(Pikmin 2, 2004)Hey! Pikmin
(2017)Pikmin Bloom
(2021)
Re-releases
New Play Control! Pikmin
(2008)Pikmin 3 Deluxe
(2020)
Web browser games
Pikmin.com SpaceForce
(2001)Pikmin Treasure Hunt
(2004)Pikmin Finder
(2023)Pikmin 100
(Pikmin Garden, 2024)
Other Pikmin media
Photos with Pikmin
(2013)Pikmin Safari
(2013)Pikmin Short Movies
(2014)Pikmin Garden
(2023)
Media with Pikmin content
Super Smash Bros. Brawl
(2008)Pikmin Adventure
(Nintendo Land, 2012)
- ^ YouTube video demonstrating the requirement of 85 Pikmin for the Safe (at 05:08)
