User:Twins1105/Sandbox
Sandbox to hold my W.I.P. edits for certain articles.
Pikmin
Stuff relating to Pikmin
P1S Ship Part Icons
Using P1S ship part icons in place of the current unofficial icons.
Pikmin 2
Stuff relating to Pikmin 2
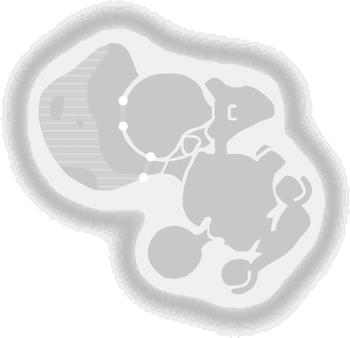
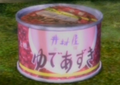
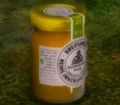
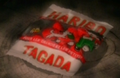
Treasure Series Gallery
Tests for new ways of showing treasure series in Pikmin 2.
List
Nintendo Switch
North America GameCube/Wii
Nintendo Switch
North America GameCube/Wii


Europe GameCube/Wii
Japan GameCube/Wii
Pikmin Adventure
Stuff relating to Pikmin Adventure
Pikmin Adventure area infobox
| Bulborb Forest | |
|---|---|

| |
| Challenge type | Standard |
| Master Rank time | 2:10 |
| Area style | Spring |
| Next area | Boss of the Beebs |
| Music | Spring area |
Pikmin Adventure controls
Controls for Nintendo Land and Pikmin Adventure based on User:PopitTart/Controls.
Pikmin Adventure
Nintendo Land allows two controller types in the Pikmin Adventure attraction; The Wii U GamePad for the first and the sideways Wii Remote for the other players.
Nintendo Land plaza
| Action | GamePad controls | Notes |
|---|---|---|
| Move | Supports analog movement. | |
| Rotate camera | The right stick can only be used to turn the camera left and right. The GamePad can be used to look up and down alongside correcting the camera if the GamePad is rotated. | |
| Swap to menu/plaza | Toggles between the menu and the plaza. | |
| Jump | Three consecutive jumps cause the Mii to jump higher each time. Jumps can cause interactions with statues. | |
| First person perspective | held |
Pikmin Adventure GamePad controls
In Pikmin Adventure, the GamePed player does the majority of the important actions by pressing on the touchscreen.
| Action | GamePad | Notes |
|---|---|---|
| Move | held |
Doesn't support analog movement. |
| Whistle | tapped or held |
|
| Punch/throw Pikmin | tap |
|
| Change next Pikmin type | tap icon |
Only available in advanced challenges. |
| Dodge | swipe |
Cannot be done if a Mii Pikmin player is being carried |
| Pause/resume | ||
| Skip cutscene |
Pikmin Adventure Wii Remote controls
In Pikmin Adventure, the Wii Remote player needs to hold the controller sideways to play properly.
| Action | Wii Remote | Notes |
|---|---|---|
| Move | Doesn't support analog movement. | |
| Jump | ||
| Attack | Attack changes depending on the currently worn power-up. | |
| Double attack | Can only be done after reaching level 5 or higher. Attack changes depending on the currently worn power-up. | |
| Triple attack | Can only be done after reaching level 10 or higher. Attack changes depending on the currently worn power-up. | |
| Charged attack | Hold |
Attack changes depending on the currently worn power-up. |
| Air attack | Attack changes depending on the currently worn power-up. | |
| Latched attack |
Pikmin Adventure enemy list
The following lists the appearance of enemies in each level in Pikmin Adventure.
Enemies found in Bulborb Forest
Bulborb (red) × 9
Creepy Beeb × 18
Bulborb (yellow) × 1
Enemies found in Boss of the Beebs
Bulborb (red) × 18
Creepy Beeb × 15
Bulborb (yellow) × 1
King Beeb × 3
Enemies found in Five Seconds to Takeoff
Creepy Beeb × 28
Bulborb (red) × 1
Enemies found in Overthrow the Bulblord
Bulblord × 1
Enemies found in Cannon Smash
Creepy Beeb × 12
Bulborb (yellow) × 6
Bulborb (red) × 6
Enemies found in King Beeb is Back
Bulborb (red) × 15
Bulborb (yellow) × 14
Telescoping Pumphog × 12
Creepy Beeb × 30
King Beeb × 1
Enemies found in Through the Darkness
King Beeb × 7
Bulborb (red) × 7
Bulborb (yellow) × 5
Enemies found in Swamp Master
Enemies found in Lord of a Barren Land
Blowhog × 5
Telescoping Pumphog (invincible) × 9
Bombardier Beeb × 5
King Beeb × 4
Bulborb (red) × 10
Bulborb (yellow) × 5
Bilious Bulborb × 1
Enemies found in Burst the Giant Balloon
Bombardier Beeb x9
Red Bulborb x7
Yellow Bulborb x5
Telescoping Pumphog x3
King Beeb x4
Blowhog x 7
Notes in other languages
Bulborb (Pikmin Adventure)

Monita's notes
“Dieser Krabbler schläft am Tag und wird bei Störungen schnell rabiat. ◆ In der Pikmin-Welt wimmelt es
nur so von Punktkäfern, und sie geben auch tolle Plüsch-Souvenirs ab!”
Hey! Pikmin
Stuff relating to Hey! Pikmin
Spark dandelion

The spark dandelion is a small tool that lights up when Yellow Pikmin are thrown at it. When activated, it will hold the Yellow Pikmin in place as it lights up an area around it, allowing for Bloominous Stemples to bloom. The spark dandelion will immediately be turned off once the Yellow Pikmin are whistled at.
The name comes from the Japanese Hey! Pikmin guidebook, where it was given the name スパークタンポポ? (lit.: "Spark dandelion").
Locations
- Ravaged Rustworks
- Space of Silence: The only spark dandelions in the game appear here. They are found in the room containing the Silence Breaker, where they act as electrical tools that the player has to use in order to activate nearby Bloominous Stemples and reach the treasure.
Hey! Pikmin area table
A table of Hey! Pikmin areas based on a previous edit of Brilliant Garden.
Main areas
| Code | Image | Name | Treasures | Available Pikmin |
|---|---|---|---|---|
| 1-A | 
|
First Expedition | ||
| 1-B | 
|
Cavern of Confusion | ||
| 1-C | 
|
Mushroom Valley | ||
| 1-D |
|
Back-and-Forth Road | ||
| 1-E | 
|
The Shadow in the Brush | ||
| 1-X | 
|
Cherrystone Pass |

Special areas
| Image | Name | amiibo required? | Reward(s) |
|---|---|---|---|

|
Secret Spot 1 | No | |

|
Secret Spot 2 | Yes | |

|
Secret Spot 3 | Yes | |

|
Secret Spot 4 | No | |

|
Sparklium Springs | No |
Rocks: |
Main areas
| Code | Image | Name | Treasures | Available Pikmin |
|---|---|---|---|---|
| 2-A | 
|
Foaming Lake | ||
| 2-B | 
|
Serene Stream | ||
| 2-C | 
|
Glowing Bloom Pond | ||
| 2-D |
|
The Shallow End | ||
| 2-E | 
|
The Keeper of the Lake | ||
| 2-X | 
|
Treacherous Currents |

Special areas
| Image | Name | amiibo required? | Reward(s) |
|---|---|---|---|

|
Secret Spot 5 | Yes | |

|
Secret Spot 6 | No | |

|
Secret Spot 7 | Yes | |

|
Secret Spot 8 | No | |

|
Sparklium Springs | No |
Rocks: |
Pikmin 4
Stuff relating to Pikmin 4
Pikmin 4 enemy parameters
Parameters for Pikmin 4's enemies, taken from DT_TekiParameter.uasset, along side what they likely do.
ActorName - Internal name for the actor
CarryWeightMin - Minimum carry weight
CarryWeightMax - Maximum carry weight
CarryWeightMinVs - Minimum carry weight in Dandori Battle
CarryWeightMaxVs - Maximum carry weight n Dandori Battle
CarryIncPikmins - Sprouts produced by the Onion
MaxLife - HP value
Kira - Sparklium value?
Poko - Dandori point value in Dandori Challenge?
VsScore - Dandori point value in Dandori Battle?
BombHit - Bomb Rock explosions needed to kill the actor?
BombInsideHit - Bomb Rocks consumed needed to kill the actor?
PoisonHit - White Pikmin consumed needed to kill actor?
PurpleDirectHit - Purple Pikmin latching on needed to kill actor?
PressHit - ???
IceBombHit - Ice Blast explosions needed to freeze actor?
IceBombInsideHit - Ice Blast consumptions needed to freeze actor?
FreezeHit - Ice Pikmin damage needed to freeze enemy?
FreezeInsideHit - Ice Pikmin consumption needed to freeze enemy?
FreezeDamageRatio - How much Ice Pikmin damage adds up to freeze wheel?
CrushHit - Damage taken from crush attacks?
FrozenCrushDamageRate - Damage taten from crush while frozen?
SnowBallDamage - Damage taken from snowballs?
StoneDamage - Damage taken from Pebble Pitcher?
ThunderStopTime - How long actor is paralyzed by Lightning Shock?
CrushStopTime - ???
CrushKnockBackSpeed - ???
FlashbangRate - ???
FreezeDropType - Type of drops if actor is killed while frozen
DropStationPieceNum - How many Glow pellets actor drop?
URODistanceThesholds - ???
PlayerDamage - Damage it deals to the player?
OtherDamage - Damage it deals to other actors?
FlashBangTargetWeight - ???
Bomb Rock
| |||
|---|---|---|---|
| The Bomb Rock's icon in Pikmin 4. | |||
| Games | Pikmin 2, Pikmin 3, Pikmin 4 | ||
| Function | Explodes after being thrown or interacted with. | ||
| How to obtain | |||
The Bomb Rock (バクダン岩?, lit.: "Bomb rock"; formatted as bomb-rock prior to Pikmin 3) is an explosive rock found in the Pikmin games. Upon being activated, a Bomb Rock's fuse starts going down (represented by a colored wheel in the first two games), and when it reaches zero, the bomb causes a violent explosion, capable of damaging enemies, leaders, some obstacles and knocking back and subsequently killing any Pikmin.
How it works has changed, in some fashion, in every entry. In the first and third games, it can be carried by Pikmin, but only by Yellow Pikmin in the former. In Pikmin 2, is slightly larger and serve as an obstacle instead of a tool, with the exception of the 2-Player Battle stage Hostile Territory, where it can be picked up and thrown by leaders. It also appears as an item in 2-Player Battle and Bingo Battle. In Pikmin 4 it's instead an item used by leaders and can be either found in the field or bought from Russ for 8 raw materials per Bomb Rock after accumulating a total of 3000 Sparklium. In the side story Olimar's Shipwreck Tale, Bomb Rocks are similarly found scattered around the four areas, and Olimar gains additional Bomb Rocks as milestone bonuses for recovering 2 and then 13 ship parts.
Pikmin 4 Cave Types
The 10 different cave types in Pikmin 4, taken from the folder names in Carrot4/Terrain/Cave/Type, with a few caves that use said themes.
Aquarium - Set in an aquarium tank. Used in Planning Pools
Blocks - Set in a room similar to Pikmin 2's Toybox theme. Used in Trial Run, Battle in a Box, and Final Battle
Brick - Walls and elevated areas are made out of bricks. Used in Crackling Cauldron
Common - Unknown
Concrete - Made out of tiles not to dissimilar to Pikmin 2's Tiles theme. Used in Subzero Sauna
Garden - Walls made out of bamboo and rocks. Used in Aquiferous Summit
Last - Used in sublevel 20 of Cavern for a King
Metal - Very similar style and assets to Pikmin 2's Metal theme. Used in Below-Grade Discotheque
Sand - Similar in style to Blocks, except with sand. Used in Dandori Castle, Leafy Showdown, and Hot Sandy Duel
Soil - Walls made out of soil. Used in Hectic Hollows, Engulfed Castle
Cutscene cleanup
Cleaning up the cutscene page
Throughout the Pikmin series, various cutscenes play at certain times. While these cutscenes are playing, the player usually has no control over the game, other than to advance the text, or to skip the cutscene. There are several different types of cutscenes, and they can be either played out by the entities in the game world in real time, or pre-rendered like a movie.
Pikmin
Opening
In the opening cutscene, Captain Olimar is shown flying in the S.S. Dolphin. The camera changes to show a meteor that shortly after crashes into the ship. The ship then comes flaming down towards the Pikmin Planet, losing various parts as it falls. The game then begins at The Impact Site, with Olimar lying down, unconscious. After waking up and looking around, he realizes his ship is wrecked.
This is what Olimar says after the crash.
The player can now take control of Olimar and begin the first day.
Bad ending
If the player has less than 25 of the required ship parts by the end of the 30th day, Olimar will attempt to leave the planet in a haste, but the engine explodes and the ship crashes back to the ground. After the game's statistics are shown, the Pikmin are seen carrying Olimar's unconscious body to the Red Onion, and Olimar pops out as a Pikmin hybrid.
Neutral ending
If the 30th day ends, and Olimar has the 25 required ship parts, he'll try to take off. Olimar quickly runs towards the ship, turns back to take a last look at the Pikmin, and then takes off in a hurry. A Red, Yellow, and Blue Pikmin, all in the leaf stage, will stay and watch Olimar fly away, a bit confused as to why their leader left so quickly. The screen shows Olimar sailing peacefully, albeit bothered that he had to leave so abruptly.
Good ending
If the player manages to retrieve every ship part before the 30th day, Olimar can go back home fully prepared. When the Secret Safe is retrieved, a small cutscene shows the ship fixing itself for the final time, complete with several shots of the Dolphin's complicated setup. Olimar takes a closer look and jumps in glee.
Night falls, and Olimar must leave. Before going in, he turns back at the Pikmin, who are all in a straight line looking at him. They then turn their heads to the left in order, forming a little wave. Olimar waves goodbye in the hope that they'll understand. The Pikmin then turn their heads right in order, forming another small wave. With a sigh, Olimar just shakes his head and proceeds to take off. Shortly after, a Spotty Bulborb appears, and the line of Pikmin, now knowing what to do, thanks to Olimar, are quick to fight it off. The S.S. Dolphin is shown flying in space, and several Onions, even some with previously unseen types, are seen following it.
Credits
- See also: Credits.
The background consists of a shot of the Pikmin Planet, half covered in shade. The credits then roll from bottom to top. Occasionally, images of Olimar's adventure on the planet will appear behind the text, and sometimes comets shoot by. If the player collects all 30 ship parts, the Enemy Reel will play after this. The credits are a pre-rendered cinematic.
Enemy reel
- Main article: Enemy reel.
If the player gets the good ending, a montage of the creatures in the game will play after the credits. This montage consists of pre-rendered beta footage. In the Wii version a flower background was added to fill in the widescreen image while keeping the original footage. In the Nintendo Switch version the enemy reel was re-recorded using footage of the final game.
Video of the New Play! Control version of the enemy reel on YouTube
Recording of the Nintendo Switch version of the enemy reel on YouTube
Direct rip of the Nintendo Switch version of the enemy reel on YouTube
Minor cutscenes
- When a ship part is collected, a brief cutscene plays showing the part being beamed up to the S.S Dolphin. Then, the screen shows a summary with its name alongside dialogue from Olimar. When collecting the Whimsical Radar, the camera will move towards the back of the ship to get a better view of the part appearing on the ship.
Pikmin 2
In Pikmin 2, the major cutscenes can be re-seen in the bonuses menu option on the title screen. These are all in the form of pre-rendered video sequences.
Opening Cinema
This cutscene also plays if the player is idle on the title screen for long enough.
"Hocotate Freight is a long-haul, deep-space shipping company.
One day, its only employee of any merit, Captain Olimar...
...crashed on an uncharted planet while on an interstellar vacation.
There, he was aided by the indigenous creatures which he called Pikmin.
In the end, Captain Olimar escaped...
But in Olimar's absence, his employer, Hocotate Freight...
ran into financial difficulties..."
Olimar is then shown returning to Hocotate, after which he speaks to the President.
"Olimar! I'm so glad you're safe! Yes, very glad. Quite glad. But...
Sadly, I have an announcement that is not so glad:
Our company is going under. Yes. We're finished...
On his first mission, Louie here met a ravenous space bunny...
And his entire load of golden Pikpik brand carrots was eaten!
I took out an enormous loan to repay the debt from this loss!
I decided to sell off corporate assets to repay the loan...
But the only asset we had to sell was your ship, the S.S. Dolphin.
As for the rest of our loan...
We have no means to repay it!"
Horrified, Olimar drops a bottle cap he brought along.
"Olimar! What is that?
You brought that back as a souvenir for your kid?"
Louie's eyes pop out, bewildered. The ship then analyzes the bottle cap.
"Treasure! Treasure! Treasure! Money! Money! Money! Money!
Initiating valuation of recovered treasure. This artifact is worth...
100 Pokos!
This thing's worth 100 Pokos?! That's more than a year's salary!"
The President gladly exclaims:
"WHAT?!? There are MORE on that planet? They can repay our debt!
Louie! You dolt! Look alive! You must depart immediately!
...With Captain Olimar!"
The ship is shown taking off in great haste, as they head to the Pikmin Planet.
Debt Repayment Cinema
Once the debt is payed, this cutscene plays. The ship talks to the two leaders about returning to Hocotate.
"Mission complete! You've earned 10,000 Pokos!
Now Hocotate Freight will be prosperous and debt free until the end of time! ...Probably.
Prepare to blast off! We return to Hocotate triumphantly!"
Olimar takes off, unhappy that he had to go in such a hurry. He looks behind him to the Pikmin planet. He then remembers about the Pikmin that helped him, imagining their faces on the planet's surface. He faces forward again to resume flying, only to realize something and he looks back again, seeing that Louie is not in his cockpit. It's too late to go back, as the ship is already warping. The camera then zooms back to show part of the planet.
Credits
- See also: Credits.
In this cutscene, the credits roll from bottom to top. In the background, several clips of Louie are seen, showing him lost and wandering around the landscape, sometimes getting into trouble. The environment has been recorded in real life, and Louie was superimposed on top of it.
Goal Completion Cinema
This cutscene plays when the player continues the game after repaying the debt. It shows Olimar and the President discussing the fact that there are more treasures on the planet. The President starts talking to Olimar:
"Thanks to you, our company has been saved! Hurrah!
What?!? There's still more treasure? ...Good gravy!
If we collect it all, we'll be filthy rich!
Louie!"
The President points at where Louie should be, and the camera pans to show he's not there.
"...Where's Louie?
What?!? You lost him?
In that case...
I shall go!"
Treasure Completion Cinema
This cutscene plays when all 201 treasures have been collected. It shows Olimar taking off, leaving the Pikmin, which are outside of their Onions. While the President chuckles with glee, Olimar starts getting a bit emotional, until he notices the planet's surface, bewildered. The Pikmin start glowing with colors of their respective types, and soon, the ground is covered with several lights. The camera shows the Pikmin dancing while watching their leader go. After a while, Olimar looks up, to notice that the three main Onions have followed him for one last ride. After a while, the Onions return, and Olimar rides back to his home, rather happy.
After that, a general shot of the Pikmin planet is shown, demonstrating quite a resemblance to Earth. Seven flowers pop up on the screen, and with letters that write "Pikmin 2". Finally, the game shows on the screen the message "The End".
Louie's Dark Secret
Louie's Dark Secret is unlocked once the player gets a "pink flower" rating on every Challenge Mode level, obtained by completing the levels without deaths. It's only present in the Bonuses menu.
The short cutscene explains what really happened to the golden Pikpik carrot cargo.
"The President entrusted Louie with the golden Pikpik carrots.
But Louie couldn't suppress his powerful hunger...
And he ate every last one.
Then he falsified his report to the president...
...Which led to Hocotate Freight accruing an insurmountable debt..."
Minor cutscenes
- When a treasure is collected, a brief cutscene plays showing the object being beamed up to the ship or Research Pod. Then, the screen shows a summary with its name, price, and a close-up of the object. There are some frames where it's possible to press
 /
/  in order to skip some states of the cutscene, making it end faster; it's possible to achieve this simply by spamming the button.[2]
 - If the player chooses to quit a cave from the pause menu, either in the main story mode or Challenge Mode, the Ship's research pod will beam the leader(s) up and take them to safety. In the main story mode, the Pikmin will not be visible, implying they were beamed prior to the cutscene, but in Challenge Mode, the Pikmin remain on the ground, showing that the leaders quit without them.
- Whenever a cave or sublevel is entered, a cutscene shows the leader(s) and Pikmin jumping down.
- If a cave is exited through a geyser, a cutscene plays showing the leader(s) and Pikmin jumping on it and being expelled. The camera remains pointed at the geyser for a few extra seconds, so that, if there are any Bulbmin in the player's party, the cutscene can have enough time to show that the creatures do not follow the party to the surface.
- When a 2-Player Battle game ends, a cutscene highlighting the victory condition takes place.
Pikmin 3
|
This section is a stub. You can help Pikipedia by expanding it. |
Opening
This explains Koppai's expedition to find a planet with edible matter. The voice actor Julian Macfarlane narrates the cutscene. In this cutscene, many minor planets can be seen, that all have no known food supply.
"Galactic date: 20XX.
At the far reaches of space lies a planet at the brink of ruin...
Screen is no longer black and Koppai appears.
The planets name: Koppai.
Due to a booming population, booming appetites, and a basic lack of planning,
A small bar graph appears near the planet with unreadable text, presumably representing the amount of food on the planet.
Koppai's inhabitants have all but exhausted their food supply.
Bars in the graph shorten to nearly nothing.
Their only hope is to find another planet with edible matter.
Accordingly, they send unmanned scout vessels called "SPEROs" out into space.
Many SPEROs venture out to other planets.
To their dismay, the search is proving fruitless.
All the SPEROs report back as negative and X's appear on each planet seen.
Just as they're about to give up...
PNF-404, the most far out planet, gets discovered by a SPERO.
The final vessel reports back with news of a miraculous discovery.
SPERO reads the planet as "positive."
They mobilize to investigate the planet, which they name PNF-404.
Alph, Brittany, and Charlie are shown.
Koppai's last hope rests on three intrepid explorers.
The Drake and its crew initiate the hyper drive sequence, flying it very close to the planet.
At last the explorers' 279,000-light-year voyage nears its end.
But as they initiate the landing sequence...
Various warning messages appear around the ship, which then explodes, hurling the leaders away from it.
Something goes horribly wrong."
A now "real" scene of the leaders hurdling towards PNF-404 appears, as well as the words "Pikmin 3"/"Pikmin 3 Deluxe", as its theme briefly plays.
Charlie's introduction
Yellow Pikmin look at Charlie while the camera is viewing from his perspective. After he comes to, they flee, and the camera then zooms out, revealing him and the Distant Tundra.
Alph's introduction
After Alph falls in his crash site in Tropical Wilds. It is a little more sophisticated than Charlie's.
Brittany's introduction
Alph gets a signal from Brittany, he finds a piece of fruit, and the Rock Pikmin destroy a gate.
Endings
After the cutscene showing the Koppaites leaving PNF-404, there is a brief intermission by the narrator, in which he gives a summary of the adventure's results and the consequences it will have back at Koppai. There are four possible narrations, detailed here.
Modest supply
Reasonable supply
Healthy supply
Bountiful supply
Tutorials
A few tutorials play at key points in the game, which force the player to do certain actions in a semi-cinematic way.
- On the first day, when Charlie is exploring the Distant Tundra, he is eventually surrounded by a group of wild Yellow Pikmin. The game then teaches the player how to whistle, throw and dismiss (dismissing is not done in Pikmin 3 Deluxe), by having Charlie attempt those three things in order to shoo away the Yellow Pikmin.
- When Alph finds the trapped Red Onion, a tutorial makes Alph throw the Pikmin at it.
- Upon collecting the KopPad, Alph attempts to find the S.S. Drake's location, and to do so, the player must pan the radar.
- In Pikmin 3 Deluxe only, when Alph finds the first dirt wall, there's a tutorial on how to charge.
- When Alph finds the first Rock Pikmin, a tutorial takes place where the Rock Pikmin attempt to crack open a crystal with the Rock Onion in it. The player can either stand and watch as they do so, or whistle them and throw them at it, which are the only two options.
- When Alph and Brittany are reunited on the Garden of Hope, a tutorial takes place with Alph throwing Brittany and some Pikmin atop a ledge, and then Brittany throw the Pikmin up the second ledge to get fruit. This tutorial teaches about throwing and switching leaders.
Minor cutscenes
- A small cutscene plays when Charlie's section of the first day ends, which shows him being ambushed by the Vehemoth Phosbat as the Yellow Pikmin flee.
- At the end of the first day, there is a brief cutscene with Alph explaining how he should go in orbit for the night.
- When landing on the Distant Tundra for the first time, a cutscene shows Alph and Brittany's separation.
- Every boss has an introduction and defeat cutscene.
- At the start of every Mission Mode stage, a brief cutscene shows the general layout of the stage as the leaders warm up.
- Every time a data file is collected by the main leader, the action pauses, they spin in place in celebration, and open up the file on the KopPad.
Hey! Pikmin
Intro
- US version
- [The S.S. Dolphin II is seen flying through space.]
- “A typical day for a space shipment pilot...”
- “Hocotate Freight's own...”
- “Captain Olimar!”
- “Here we see him heading home to Planet Hocotate after finishing a delivery.”
- “"Engaging warp in 5."”
- “3!”
- “2!”
- “1!”
- [The ship zooms off.]
- “Olimar couldn't wait to get home to spend time with his family.”
- “But fate had other plans for our intrepid captain.”
- “A terrible sight snapped him out of his daydream...”
- “Something had gone wrong with the warp.”
- “Olimar dodged left and right to get to safety...”
- [The ship, seen from a first-person perspective, impacts against two asteroids.]
- “But his engines took a hit and he lost control.”
- [The ship plummets towards "an alien planet", as a second object detaches from it.]
- “"Brace for a crash landing!"”
- [Scene changes to some Pikmin frolicking around the master Onion.]
- [The S.S. Dolphin II comes crashing down like a comet, terrorizing the Pikmin.]
- [The ship crashes against the ground, knocking some Pikmin into the air.]
- European version
- [The S.S. Dolphin II is seen flying through space.]
- “Hocotate Freight Intergalactic Courier Vessel”
- “S.S. Dolphin II”
- “Veteran Pilot, Captain Olimar”
- “After a hard day's work, Olimar heads towards home.”
- “"Engaging warp in 5."”
- “"3!"”
- “"2!"”
- “"1!"”
- [The ship zooms off.]
- “"Finally! A day off to spend time with the kids."”
- “No sooner has Olimar sighed these words...”
- “...than he comes out of warp to a terrifying sight.”
- “This isn't Hocotate! Something has gone wrong.”
- “Olimar scrambles to avoid the asteroids...but to no avail.”
- [The ship, seen from a first-person perspective, impacts against two asteroids.]
- “Controls unresponsive. Engine offline.”
- [The ship plummets towards "an alien planet", as a second object detaches from it.]
- “His ship plunges towards the surface of an alien planet.”
- [Scene changes to some Pikmin frolicking around the master Onion.]
- [The S.S. Dolphin II comes crashing down like a comet, terrorizing the Pikmin.]
- [The ship crashes against the ground, knocking some Pikmin into the air.]
Ending
- US version
- [Captain Olimar is inside the S.S. Dolphin II, the ship is talking to him.]
- “Great work, Captain Olimar!”
- “The ship part is ours!”
- “I feel bad for the creature we had to take it from...”
- “But at least the part itself seems to be intact.”
- “Now there's nothing stopping us from going home to Hocotate.”
- “Let's get that part in place so we can take off!”
- [Olimar nods and gets on his chair.]
- [Scene changes to outside the ship, focusing on it.]]
- [Several Pikmin surround Olimar as he looks at them.]
- “Captain Olimar? It's time to head out.”
- [Olimar walks away and gets beamed up into the S.S. Dolphin II's pod.]
- [The S.S. Dolphin II's pod attaches to the main rocket.]
- “At long last, we'll be home soon.”
- [The ship shoots up into the sky and the Onion follows.]
- [The ship flies out of the atmosphere and the Onion stays behind.]
- “Good-bye, Pikmin.”
- [The ship is flying through space.]
- “Engaging warp in 5.”
- “3!”
- “2!”
- “1!”
- [The ship zooms off.]
- [Credits roll.]
- “Olimar couldn't wait to get home to spend time with his family.”
- “And indeed, fate had plans for our intrepid captain.”
- “A welcome sight snapped him out of his daydream...”
- [The ship flies off to Hocotate.]
- “"Thanks for everything, Pikmin."”
- [Fade out.]
- “The End”
- European version
- [Captain Olimar is inside the S.S. Dolphin II, the ship is talking to him.]
- “Great work, Captain Olimar!”
- “The ship part is ours!”
- “I feel bad for the creature we had to take it from...”
- “But at least the part itself seems to be intact.”
- “Now there's nothing stopping us from going home to Hocotate.”
- “Let's get that part in place so we can take off!”
- [Olimar nods and gets on his chair.]
- [Scene changes to outside the ship, focusing on it.]]
- [Several Pikmin surround Olimar as he looks at them.]
- “Captain Olimar? It's time to head out.”
- [Olimar walks away and gets beamed up into the S.S. Dolphin II's pod.]
- [The S.S. Dolphin II's pod attaches to the main rocket.]
- “At long last, we'll be home soon.”
- [The ship shoots up into the sky and the Onion follows.]
- [The ship flies out of the atmosphere and the Onion stays behind.]
- “Goodbye, Pikmin.”
- [The ship is flying through space.]
- “"Engaging warp in 5."”
- “"3!"”
- “"2!"”
- “"1!"”
- [The ship zooms off.]
- [Credits roll.]
- “"At last. I'll finally get to spend time with the kids."”
- “No sooner has Olimar sighed these words...”
- “...than he comes out of warp to a familiar sight.”
- [The ship flies off to Hocotate.]
- “"Thanks for everything, Pikmin."”
- [Fade out.]
- “The End”
Common cutscenes
Attraction mode
For Pikmin and Pikmin 2, as well as the New Play Control! releases, if the player is idle on the title screen for long enough, the game will start showing a bit of gameplay, to show new players how the game works. Because of the different controls, these vary between game and between the GameCube originals and New Play Control! releases. These pre-rendered cutscenes appear in the order listed below, and loop over to the first one after the last one plays.[3][4][5][6] The Nintendo Switch versions of Pikmin 1 and Pikmin 2 remove these cutscenes entirely.
Pikmin 3 does not have any attraction mode cutscene, but the player can rewatch the prologue cutscene by staying about 4 minutes on the title screen. This cutscene can also be watched by starting a new game. If the player watches it by staying on the title screen, they will have to restart the game (once the cutscene finishes) to watch it again; waiting again will not trigger the cutscene a second time.
- Pikmin
- This video demonstrates Pikmin being called out of an Onion, it shows the ability to dismiss the group, and how that should be used to choose the right Pikmin type to carry the appropriate pellets, shows Pikmin being plucked, and shows how they can take down gates together. Curiously, the latter clip shows 19 total Pikmin in the landing site of The Forest of Hope at the start of day 2. This is impossible in the final game since the player needs at least 20 Pikmin to finish day 1, and there is no way for Pikmin to die until after that gate has been destroyed.
- The second one shows a Spotty Bulborb being attacked and its corpse being carried afterwards. Then, it demonstrates the fact that Red Pikmin cannot reach high ledges, but Yellow Pikmin can. Those Red Pikmin are shortly afterwards shown helping the Yellow Pikmin carry the pellet that was on the ledge. It then shows Pikmin carrying a pellet against a Breadbug's strength, it shows an Iridescent Flint Beetle being attacked, and a path covered with Sheargrubs, to which the player goes back the way they came.
- This video shows a bridge being built, and some Pikmin crossing it after it's done, it shows the Yellow Pikmin's ability to carry bomb-rocks, and it demonstrates the difference between throwing and touching them, and throwing and calling them. It also shows 2 bomb-rock-wielding Pikmin being thrown near an enemy, and one of them throwing its explosive to kill the Dwarf Bulborb, while the other goes back into the group. Afterwards, it shows a stone gate being taken down with bomb-rocks, a twig being built and climbed on, and ends with some Pikmin carrying a ship part to the S.S. Dolphin.
- The final video in the loop shows Pikmin being eaten by a Dwarf Bulborb, squashed by a Yellow Wollywog, squashed by an Armored Cannon Beetle rock, blown off the ground by a Puffy Blowhog, burned from a Fiery Blowhog, and it ends with some Pikmin drowning in a pool of water.
- Pikmin 2
- A video demonstrating the hazards. Louie is shown accidentally drowning and setting ablaze some Pikmin, after which Olimar shows up and demonstrates that the whistle can be used to save them. Louie is then shown poisoning a Red Pikmin on accident, but shortly afterwards saving it with a whistle. Finally, Louie is shown walking into an electric gate and being electrocuted.
- The intro cinematic.
- This video shows the various abilities and how sprays work. It begins by showing Purple Pikmin's strength, White Pikmin's poisoning abilities, and their immunity, Red Pikmin's fire resistance, Blue Pikmin's ability to remain underwater and Yellow Pikmin's resistance to electricity. Afterwards, it shows the ultra-spicy spray being used to make enemy killing and task completion faster, and finally, it demonstrates an enemy being petrified with an ultra-bitter spray.
- This cutscene shows how Burgeoning Spiderworts work, how bridges are made, how bags can be walked on, it shows the entrance to caves, the interior and their treasures, and their exit geyser. Afterwards, it shows a couple of strong enemies and bosses.
- A video that shows the multiplayer aspect of the game. It begins by showing some clips of two players playing cooperatively in Challenge Mode, and then it shows two players battling against one another in 2-Player Battle, and the various game mechanics in that mode.
- The intro cutscene, once again.
- This video shows basic Pikmin actions: the ability to pluck them off the ground, their ability to carry objects, fight against enemies, be controlled with the
 , and destroy obstacles.
 - The final video of the loop shows Pikmin being taken out of Onions and the ship, them being dismissed, the ability to choose a different Pikmin type from the group, while holding a Pikmin, and the cooperative aspect of the game's 2 controllable leaders.
- New Play Control! Pikmin
- This video shows that plucks and throws Pikmin, shows Pikmin carrying pellets, and shows that
 can whistle Pikmin.
 - This movie shows how can be used to open an Onion's menu, shows that
 can be used to dismiss, shows that switches Pikmin type while holding a Pikmin with , and shows that
  can swarm.
 - A video showing the Main Engine being carried and delivered, Yellow Pikmin collecting some bomb-rocks, two bomb-rock-carrying Pikmin being thrown at an enemy, but only one throwing its bomb, Yellow Pikmin blowing up a gate, but with one of them caught in an explosion, and being used to instruct Pikmin to take down a gate and a Spotty Bulborb.
- This video shows Pikmin being eaten by a Dwarf Bulborb, swallowed a Spotty Bulborb, tossed by a Swooping Snitchbug, blown by a Puffy Blowhog, run over by an Armored Cannon Beetle's rock, crushed by a Wollywog and being set ablaze by nearby fire geyser. Finally, it shows Pikmin being thrown and defeating a Dwarf Red Bulborb, killing two Red Bulborbs, flipping over an Iridescent Flint Beetle and carrying its spoils, and knocking off nectar from a Honeywisp.
- A fifth movie can be found exclusively in the Japanese release. It remixes clips from the other four movies and features karaoke lyrics to Ai no Uta, which plays throughout.
- New Play Control! Pikmin 2
- The first cutscene shows the Onion menu being accessed with , some Pikmin being withdrawn, it shows that can be used to dismiss the group, shows that can be used to switch Pikmin types while holding , shows being used to swarm and shows them being ordered in that fashion to attack and destroy a gate.
- This video shows the Sunseed Berry being collected, shows that leaders can be switched with
 , shows that
  can be used to deploy an ultra-spicy spray, as well as some Pikmin attacking a Spotty Bulborb while powered up, and shows that
  deploys an ultra-bitter spray, by using it on a Yellow Wollywog.
 - The introduction cutscene.
- This cutscene shows a single Purple Pikmin carrying a red 10 pellet, shows two White Pikmin being eaten by a Spotty Bulborb, who then dies of poisoning, shows White Pikmin destroying a poison emitter, Red Pikmin destroying a fire geyser, Blue Pikmin walking underwater, and Yellow Pikmin tearing down and destroying an electric gate.
- A video showing the leaders and Pikmin walking about, building a bridge, running from a Creeping Chrysanthemum, entering a cave, White Pikmin unearthing a buried Essence of Rage, Blue Pikmin carrying the Temporal Mechanism, the leaders and Pikmin escaping to the surface via a geyser, fighting a Hairy Bulborb, running around a Gatling Groink, being knocked down by an Emperor Bulblax, being buried by a Mamuta, avoiding an Empress Bulblax, and ends with the leaders and Pikmin exploring around the Awakening Wood.
- This video explains the rules and mechanics for Challenge Mode while showing two-player footage, including The Key being delivered and a geyser appearing. It then shows 2-Player Battle and the various mechanics of the mode.
- This cutscene shows Louie gawking at a Red Pikmin sprout, the same clip as on the cutscene for the first day, and shows that can pluck Pikmin. It then shows being used to throw a Pikmin at a Pellet Posy and a pellet, shows Pikmin delivering pellets and the Onion expelling more seeds, and shows that can whistle Pikmin.
- Similar to the Japan-only Ai no Uta movie in the original Pikmin, an exclusive movie found only in the Japanese release of New Play Control! 2 will play with the song Tane no Uta, which also features karaoke lyrics. This movie can also be accessed instantly if the player has both and held down on the title screen when the attraction mode begins.
Sunset
- Main article: Sunset.
At the end of each day, a cutscene takes place showing the leaders gathering their Pikmin, and getting on their ship. Another cutscene after that shows the ship taking off, and wild creatures roaming below. If any Pikmin were left behind, they'll be shown getting eaten. After these cutscenes, the player is presented with the day's statistics.
Minor cutscenes
Other, smaller cutscenes play at certain times during the gameplay.
- In all games, at the start of each day, a cutscene shows the game's spaceship landing, as well as any unlocked Onions.
- Whenever a ship part or treasure is delivered, there is a cutscene that shows the object being sucked by the main ship. If the S.S. Dolphin is ready to go to another area after that, a short cutscene plays showing the ship fixing itself and improving in shape. In Pikmin 2, when a treasure is collected, the player is given a chance to look around the treasure they just collected using
 /
/  .
. - Some cutscenes play whenever some special events happen on the progression of the storyline. These are usually followed by Olimar's monologs or the Ship's dialogs:
- When a Pikmin extinction occurs, a cutscene plays, showcasing the leader(s) looking around in disappointment and ending the day.
- Should a leader lose all their health, a cutscene shows the leader collapsing to the floor. In Pikmin 2, the ship beams him up, and in Pikmin, the screen fades out to black and the day ends.
In Pikmin 2, minor explanation cutscenes will make it impossible for the player to press a button for a few seconds after the cutscene is over. The player can still move the leader about, however.
Music samples
Speeding up
|
This section is a stub. You can help Pikipedia by expanding it. |
There are some ways to speed up or outright skip certain cutscenes.
In Pikmin 2, holding ![]() /
/ ![]() will make any text that is being written out show up faster. Pressing
will make any text that is being written out show up faster. Pressing ![]() /
/ ![]() however will write out all of the text in the box at once. When all of the text is written down in the box, the game prompts the player to press
however will write out all of the text in the box at once. When all of the text is written down in the box, the game prompts the player to press ![]() /
/ ![]() to continue. Upon pressing it, the text currently in the box scrolls up, before the next bit of text starts. If
to continue. Upon pressing it, the text currently in the box scrolls up, before the next bit of text starts. If ![]() /
/ ![]() is held down, this vertical scroll is also sped up. So, the fastest way to go through conversation boxes is to press and hold
is held down, this vertical scroll is also sped up. So, the fastest way to go through conversation boxes is to press and hold ![]() /
/ ![]() when the text begins to write, press
when the text begins to write, press ![]() /
/ ![]() right after to continue – while keeping the first button held down – and then to let go and re-hold
right after to continue – while keeping the first button held down – and then to let go and re-hold ![]() /
/ ![]() for the next block.
for the next block.
In Pikmin 3, simply tapping ![]() (or
(or ![]() for Deluxe) twice will skip the cutscene completely.
for Deluxe) twice will skip the cutscene completely.
Gallery
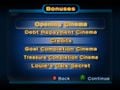
The Bonuses menu in Pikmin 2 from which the player can rewatch the cutscenes of the game.

The credits sequence in Pikmin 3.


Trivia
- In Pikmin's bad ending, the game picks random Pikmin to watch Olimar take off, and later, to carry him to an Onion. The game will not pick Pikmin from types the player does not have.
- Amusingly, if the player terminates their last day on the planet of the Pikmin via a Pikmin extinction in the first game, three Pikmin will still see Olimar take off on his ship, and there will still be random Pikmin to take him to the Onion.
- Pikmin that are suffering from a hazard will continue doing so during a cutscene, in Pikmin 2. This can prove fatal for the Pikmin, as the player is almost always unable to save them in time.
- Humorously, when Olimar and Louie are heading to the Pikmin planet in Pikmin 2, the Hocotate ship closely dodges a meteor, perhaps as a reference to the impact that caused Olimar to crash on the planet in the first game.
- When the Valley of Repose is entered for the first time at the start of a new game, there is one frame where the player can press
 /
/  in order to toggle the camera's zoom. Nothing will happen in the cutscene, but as soon as gameplay starts, the camera will move outwards. The sound of the camera changing can be heard at the start of the Valley of Repose landing cutscene.[7]
 - Pikmin 2's attract mode cutscenes appear to have a continuity of Olimar teaching Louie the basics of controlling the Pikmin.
- In Pikmin 2, if Pikmin are part of a cutscene (e.g.: ultra-spicy spray introduction and treasure collection cutscenes) and are under a status effect, their respective effect timers will continue to count down for the length of the cutscene, and lose their effect sooner than other Pikmin. This is best seen when Pikmin are under the effects of an ultra-spicy spray and deliver a treasure. The Pikmin involved will lose their effects sooner than any other Pikmin sprayed at the same time. This is true as well for the enemy used for the ultra-bitter spray introduction cutscene. Despite this, the ultra-spicy and ultra-bitter introduction cutscenes are very short, as the game pauses soon after it starts to display its respective message. Because of this, the cutscene's effects are negligible.
- Pikmin 2's pre-rendered cutscenes take up a majority of the storage space on the disc. This is due to them being saved in the .thp file format (a type of video file used exclusively in Gamecube and Wii games), which is extremely inefficient at storing data, being essentially just a collection of .jpg files played in sequence.
See also
References
- ^ YouTube video demonstrating the requirement of 85 Pikmin for the Safe (at 05:08)
- ^ YouTube video demonstrating how mashing / makes the treasure collection cutscene finish faster, published on January 8th, 2021, retrieved on January 16th, 2021
- ^ YouTube video showing the attraction mode from Pikmin
- ^ YouTube video showing the cutscenes of the Attraction Mode from Pikmin 2
- ^ YouTube video showing the cutscenes of the Attraction Mode from New Play Control! Pikmin
- ^ YouTube video showing the cutscenes of the Attraction Mode from New Play Control! Pikmin 2
- ^ YouTube video of the camera zoom button being pressed before the Valley of Repose cutscene begins, published on December 22nd, 2018, retrieved on December 22nd, 2018