Menu
|
|
|
The following article or section is in need of assistance from someone who plays Pikmin 3. |
|
The following article or section is in need of assistance from someone who plays Hey! Pikmin. |
|
This article or section is in need of more images. Particularly: |
The Pikmin games have some menus that allow the player to pick an action or change an option. These can directly or indirectly affect gameplay. The menus in the series are normally decorated with a bubble theme. Generally, the throw button can be used to confirm an option, and the whistle button can be used to go back to the previous menu.
These menus appear commonly throughout the Pikmin games. For the most part, they share the same behavior in each game.
Title screen
The title screen menu allows the player to begin the game, start an alternative game mode, or open the options. This menu is presented upon booting up the game, but after some other minor screens. If the player does not press anything on the title screen, they will be taken to the attraction mode cutscenes in the first two games.
Pikmin
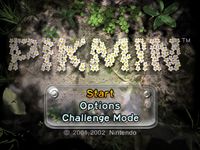
The screen fades in to some tree's leaves passing by the camera. As the camera goes down, it eventually stops near the ground, where the flowers of some Pikmin can be seen, spelling out the game's name. The words "PRESS START" ("PRESS ![]() " in New Play Control! Pikmin) then appear below that, and, in the bottom, the copyright information.
" in New Play Control! Pikmin) then appear below that, and, in the bottom, the copyright information.
After pressing the requested button (although ![]() also works in the GameCube version), a menu with three options appears: "Start", "Options", and "Challenge Mode", with the last one only being there if Challenge Mode has been unlocked. The first option takes the player to the saved game selection screen, the second one to the options screen, and the third one to the Challenge Mode screen.
also works in the GameCube version), a menu with three options appears: "Start", "Options", and "Challenge Mode", with the last one only being there if Challenge Mode has been unlocked. The first option takes the player to the saved game selection screen, the second one to the options screen, and the third one to the Challenge Mode screen.
Pikmin 2
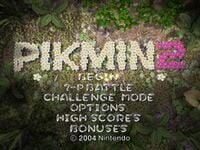
The screen fades in to show the camera moving down a tree's trunk, with some enemies roaming around it. When it gets to ground level, it stops, showing some white-flowered Pikmin spelling out "PIKMIN" with their leaves, and to the right, some pink-flowered Pikmin spelling out "2". At this point, "PRESS START" (or "PRESS ![]() ", in New Play Control! Pikmin 2) appears below the Pikmin, and in the bottom of the screen, the copyright information.
", in New Play Control! Pikmin 2) appears below the Pikmin, and in the bottom of the screen, the copyright information.
After pressing the button (although ![]() can also be pressed in the GameCube version), a menu with the following options appears:
can also be pressed in the GameCube version), a menu with the following options appears:
- BEGIN: Starts the game, by taking the player to the saved game selection menu.
- 2-P BATTLE: Enters the 2-Player Battle menu.
- CHALLENGE MODE: Enters the Challenge Mode menu, but only after it is unlocked in the main game mode.
- OPTIONS: Enters the options menu.
- HIGH SCORES: Enters the high scores menu.
- BONUSES: Enters the bonuses menu.
This screen comes in four seasons, picked at random each time:
- Spring: The tree's branches have several leaves, and the trunk has Anode Dweevils (although with yellow feelers as opposed to red) and Ravenous Whiskerpillars roaming around. The ground has a varied assortment of flowers and plants.
- Summer: The tree is a cherry blossom tree. There are no creatures on it, and the ground is filled with foliage.
- Autumn: The tree's leaves are all orange and red, and the tree itself has no creatures wandering about. The ground has several fallen leaves and a few plants.
- Winter: The tree has no leaves, but has Cloaking Burrow-nits walking through it and Swooping Snitchbugs flying by. The ground is mostly covered in snow, and has a few plants, also covered in snow.
There are a few easter eggs in this screen, activated by pressing some buttons. The Pikmin also behave according to a group of algorithms called Boids, which simulate how birds flock together in real life.[1]
Pikmin 3
|
The following article or section is in need of assistance from someone who plays Pikmin 3. |
The screen fades in to show a detailed portion of PNF-404, on a forest-like location. A tree trunk can be seen in the distance, and a river takes most of the attention of the scene. Occasionally, Pikmin of varying types are seen moving about in the distance. The game's logo gradually fades in, and the message "PRESS ![]() /
/ ![]() " appears. After any of those buttons are pressed or the touchscreen is tapped, the three menu bubbles appear. On the bottom left, there is a small copyright message, and on the bottom right, the version number.
" appears. After any of those buttons are pressed or the touchscreen is tapped, the three menu bubbles appear. On the bottom left, there is a small copyright message, and on the bottom right, the version number.
The "Story" button leads to the day selection screen, the "Mission" button to the Mission Mode screen, and the "Bingo Battle" button to the Bingo Battle screen. The "Mission" button will have an eShop icon coming out of it if there is downloadable content available, regardless of it being purchased already or not.
Interestingly, the terrain shown on the title screen bears a striking resemblance to the Awakening Wood's west corridor. The trunk stump seen on the title screen, as well as the surrounding area closer to the screen, matches with the small open space where the Geographic Projection can be found. The river path further beyond on the title screen matches all the way with the path south of the treasure in the Awakening Wood. Finally, at the end of the path, there is a curved tree. This is almost exactly the same tree with the Snagret Hole. This can be best seen using a model editor for both pieces of terrain, since the water and perspective don't allow one to see the connection very clearly.
Options
The options menu allows the player to set up some of the game's options. These normally have minimal impact on the gameplay, and as such, are merely changed according to the player's preferences. Pikmin 3 lacks any sort of options screen, with the only customizable "core" game setting being the control scheme, which is set on the pause menu.
Pikmin
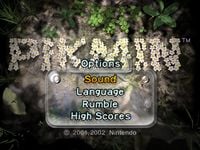
This menu belongs to the same screen as the title screen's menu. It has the following items:
- Sound: Enters another menu with the following options:
- Stereo/Mono: Allows the player to switch between stereo and mono sound. This option is missing in New Play Control! Pikmin.
- Music Volume: Allows the player to set the volume at which the music plays.
- SFX Volume: Allows the player to set the volume at which the sound effects play.
- Language: This menu is only present in the European version of the GameCube game, and it opens another menu, which allows the player to choose English, French ("Français"), German ("Deutsch"), Spanish ("Español") or Italian ("Italiano"). When this menu is exited, the player is taken back to the title screen menu.
- Rumble: Only present in the GameCube releases, this menu opens another one, with the options "ON" and "OFF". This is used to enable or disable the controller's rumbling for when, amongst other things, the leader is hit. This is absent in New Play Control! Pikmin.
- High Scores: Takes the player to the high scores menu.
- Message (メツセージ?): This option is only present in the Japanese version. It toggles between hiragana and katakana text and kanji text, in order to help younger readers. This is a common feature in Japanese Nintendo games.
Pikmin 2
Quitting this menu via ![]() /
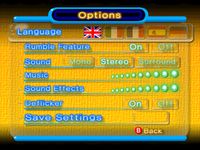
/ ![]() does not save the chosen options. The last item on the menu must be accessed in order for that to happen. This menu contains the following options:
does not save the chosen options. The last item on the menu must be accessed in order for that to happen. This menu contains the following options:
- Language: Only present in the European version of the GameCube game, this menu item shows 5 flags, one for each available language's country. In order: English (British flag), Italian (Italian flag), French (French flag), Spanish (Spanish flag) and German (German flag).
- Rumble feature: This item contains two buttons, "On" and "Off". This enables or disables the controller rumble for when, for instance, the leader is hit. This is absent in New Play Control! Pikmin 2.
- Sound: This allows the player to change the sound settings between "Mono", "Stereo" and "Surround". This option does not exist in New Play Control! Pikmin 2.
- Music: Allows the player to set the music's volume.
- Sound Effects: Allows the player to set the sound effects' volume.
- Deflicker: Allows the player to enable the graphics deflicker. When enabled, the graphics look softer, and when disabled, they look sharper. When this option is highlighted, an image of Pikmin carrying a red pellet appears, to help show the player how the graphics look with and without the deflicker.
- Save Settings: When this option is picked with
 /
/  , the settings are saved, and the menu is left.
 - Phonetic Serif (せリフのふりがな?): Only present in the Japanese version, this option allows players to enable or disable the hirigana and katakana that appears above kanji symbols in the game dialog to help younger players read the text with less difficulty. This feature is often provided in Japanese Nintendo games.
Saved game selection
This menu allows the player to select which saved game to play on. There are three saved games, and each one can store info on a session, like the current game day, the collected ship parts or treasures, etc. Upon selecting a saved game, the player will continue from where they left off in the respective slot. This means that they are taken to the area selection screen in order to start a new day, unless they quit after entering a cave's sublevel or emerging from one. When the player chooses an empty saved game, they start the story mode from beginning. Because Pikmin 3 only has one saved game, this screen is absent in that game.
This screen is similar between Pikmin and Pikmin 2. There are three large bubbles in the center of the screen, with the day number of the respective saved game inside, just like the day counter on the in-game HUD. On the bottom of the screen, there is some information regarding the highlighted saved game, such as the number of obtained ship parts and number of Pikmin of each type, in Pikmin, and the amount of Pokos, salvaged treasures and play time, as well as the cave and sub-level, if any, in Pikmin 2. On this screen, the player can press ![]() /
/ ![]() to copy the currently highlighted saved game onto another one, or
to copy the currently highlighted saved game onto another one, or ![]() /
/ ![]() to erase it.
to erase it.
In New Play Control! Pikmin, the player can press ![]() and
and ![]() to change the day they will play on, allowing them to retry from a specific day, provided the highlighted saved game is in day 2 or beyond. In Pikmin 2 for the GameCube, the number of treasures at the bottom of the screen appears as the currently collected total, followed by a slash and the total of treasures in the game – 201 (but only after the debt has been repaid).
to change the day they will play on, allowing them to retry from a specific day, provided the highlighted saved game is in day 2 or beyond. In Pikmin 2 for the GameCube, the number of treasures at the bottom of the screen appears as the currently collected total, followed by a slash and the total of treasures in the game – 201 (but only after the debt has been repaid).
In Pikmin and Pikmin 2, each save is referred to as "Ship's Log", but in the former, there is also a message on this screen that refers to them as "Data Files" ("Choose a Data File"), and an option on the pause menu that refers to the concept as a "save". Finally, in Pikmin 3, the saved games are not given a term at all. Because of the lack of consensus and the existence of data files as items in Pikmin 3, this menu is hence referred to as the "saved game selection" menu.
Each orb in Pikmin 2 has some colored mist inside. Each color represents something about the respective saved game slot, but it is currently unknown what.
Day selection
There is only one saved game per Wii U account in Pikmin 3, but the player is given the choice to retry from a previous day; this is the screen that allows them to do so. Because of this, this menu won't appear if the player has no story mode progress on their profile.
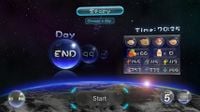
To the left, some bubbles represent the days in the story, and the largest bubble represents the currently highlighted day. It is possible to switch back and forth between days with these bubbles. To the right is a quick rundown of the stats at the start of the highlighted day. It shows bubbles that get filled with leader icons as they are available, as well as Louie's icon when he's on the ship. This box also contains info for the number of fruits gathered, how many bottles of juice are left, and how many of each type of Pikmin there are on the Onions.
At the bottom of the screen, there is a button to start on the chosen day. If the player chooses a day that is not the latest one, a warning will appear notifying the player that if they save at the end of that day, all progress on record from there on will be deleted so that the story can progress from that point. The first day's bubble is called "NEW", indicating that starting from this "day" will begin the story mode's progress from the start. Interestingly, highlighting this bubble will show that the leaders brought seven bottles of juice with them as provisions, but four of them got lost with the crash landing. There also exists an extra bubble on a completed file, showing "END". It contains the final count of Pikmin and shows Olimar's icon instead of Louie's. The Start button is darkened and unusable if the END bubble is highlighted.
On the GamePad, the voyage log of the day prior to the chosen one will be displayed. On a completed file, the END bubble will show the otherwise unavailable entry for the last day of the voyage.
Area selection
This menu allows the player to choose which area to start the next day on, out of all the ones they have unlocked.
Pikmin
In Pikmin, a preview image of the area appears on the right side of the screen, as well as some stars that represent the area's parts. A gray star indicates an uncollected ship part, and a yellow one indicates it has been collected. The bottom of the screen shows the total number of salvaged ship parts, and the total number of Pikmin, of each type. On the top-right corner, a day counter can be seen, much like the one on the in-game HUD. On the bottom-right, a box tells the player that they can press ![]() /
/ ![]() to open Olimar's voyage log. The player may also press
to open Olimar's voyage log. The player may also press ![]() /
/ ![]() to open a message box, asking them if they want to remain or return to the title screen.
to open a message box, asking them if they want to remain or return to the title screen.
Pikmin 2
In Pikmin 2, the day counter has been moved to the right side of the screen, a bit to the bottom. At the top of the screen, there is a box indicating that ![]() /
/ ![]() opens the Piklopedia, a box indicating that
opens the Piklopedia, a box indicating that ![]() /
/ ![]() opens the Treasure Hoard, and, at the center, the number of collected Pokos. On the bottom of the screen, there is the name of the highlighted area, as well as a list of the caves in it, with the number of collected treasures and total treasures of the cave to the right of its name. A box for the number of collected above ground treasures and total above ground treasures also exists. The player can press
opens the Treasure Hoard, and, at the center, the number of collected Pokos. On the bottom of the screen, there is the name of the highlighted area, as well as a list of the caves in it, with the number of collected treasures and total treasures of the cave to the right of its name. A box for the number of collected above ground treasures and total above ground treasures also exists. The player can press ![]() /
/ ![]() to open a prompt, asking them if they wish to remain in this menu or go to the title screen.
to open a prompt, asking them if they wish to remain in this menu or go to the title screen.
The ship that floats around changes appearance after the debt has been repaid, as is the case with the in-game ship. If all treasures in a cave of above ground have been collected, the number will sparkle. Before the debt has been repaid, a division bar appears under the total number of collected Pokos, with the debt's value under it, the number of treasures in unvisited caves is absent altogether, and the total number of cave and above-ground treasures does not appear until after all have been collected in that location. After the debt is gone, the goal number at the top is removed, the number of treasures in unvisited caves appears as "--/--", and the total number of above ground or cave treasures appears after the area or cave is first accessed.
Pikmin 3
|
The following article or section is in need of assistance from someone who plays Pikmin 3. |
In Pikmin 3, this menu takes place on the S.S. Drake's big monitor, and is opened right away at the start of each day, but there are some scenarios in which it is not. For instance, if Captain Charlie had been rescued the day before, the crew will comment on it and only then will the menu be opened, and if Louie landed on the Garden of Hope, the menu is skipped altogether. If a new area is discovered, the Drake's monitor will show a collage of images of the area, give it a name, the Koppaites will talk about the area, and only then will the player be able to select the area.
The player can tap on any part of an area on the map to highlight it. Once highlighted, its name will appear on the top-left corner, with a mysterious description written in Koppaite text right below it. To the top-right is a counter of the current day number and how many bottles of juice are still available. Still on the Drake's screen, on the bottom-right, there is a frame that automatically cycles between images of the area. This gallery will also contain the three latests pictures taken by the player with the KopPad. On the same frame, there is an indicator of how many pieces of fruit have been gathered, and how many there are, in the area.
On this menu, the player can also press a button to return to the day selection menu, and press ![]() to access the check in functionality.
to access the check in functionality.
Onion
When the player presses the throw button while the leader is under an Onion's beam, the Onion menu will open. In general, this menu allows the player to specify how many Pikmin they want to have with their leader. Because of the Master Onion in Pikmin 3, this menu is radically different in that game.
If the player goes up when the number of Pikmin in the party is already 0, a "boing" sound effect will play, and a message will appear, warning the player about an invalid request. A message will also appear if the player goes down when there are 0 Pikmin in the Onion or if 100 Pikmin are already on the field.
Pikmin and Pikmin 2
The background of this menu is a simple box with the color of the Onion. It contains three boxes with numbers. The top one, accompanied by the symbol of an Onion, indicates the number of Pikmin of that type that are present inside the Onion. The bottom one, with a symbol of Olimar followed by Pikmin, indicates the number of Pikmin of that type that are currently following the leader – as such, this count ignores idle or busy Pikmin. The final number indicates the number of Pikmin in the exchange.
When the player tilts ![]() /
/ ![]() , or presses
, or presses ![]() /
/ ![]() up or down (though only the Control Stick works in Pikmin for the GameCube), the numbers change: pressing up requests one more Pikmin to be stored in the Onion, and pressing down requests one more Pikmin to the group. By pressing the throw button, the player can confirm the exchange, and by pressing the whistle button, they can cancel it. Any Pikmin requested to be added to the party will come down from the Onion, and the Pikmin requested to be removed from it will climb inside.
up or down (though only the Control Stick works in Pikmin for the GameCube), the numbers change: pressing up requests one more Pikmin to be stored in the Onion, and pressing down requests one more Pikmin to the group. By pressing the throw button, the player can confirm the exchange, and by pressing the whistle button, they can cancel it. Any Pikmin requested to be added to the party will come down from the Onion, and the Pikmin requested to be removed from it will climb inside.
In Pikmin 2, the Pikmin that appear alongside the leader symbol change as the number of Pikmin in the party increases or decreases.
The games keep track of how long the player has held up or down while inside the Onion menus. These values are used to determine how quickly to move the Pikmin counter in the specified direction. They increase with time as the player is holding the respective direction, and drop down to 0 when the player releases. In Pikmin, since these values are only updated while inside the Onion menus, and are shared between them without being reset, a player can hold a direction in one of these menus, confirm while still holding the direction, go towards a different Onion (free to do anything with the analog stick in this step), start holding the same direction as they enter the next Onion's menu, and the game will use the same counter speed as the previous menu did. For New Play Control! Pikmin, the same technique works, and works with ![]() as well, though the player has to stick to either the analog stick or the D-pad, since they are not interchangeable mid-trick. In Pikmin 2 and New Play Control! Pikmin 2, the speed is forced to zero whenever an Onion menu is opened, so this trick does not work.
as well, though the player has to stick to either the analog stick or the D-pad, since they are not interchangeable mid-trick. In Pikmin 2 and New Play Control! Pikmin 2, the speed is forced to zero whenever an Onion menu is opened, so this trick does not work.
Pikmin 3
|
The following article or section is in need of assistance from someone who plays Pikmin 3. |
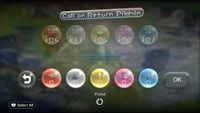
In Pikmin 3, this menu has a button to cancel, a button to confirm, and two buttons for every type of Pikmin associated with the current Onion. The latter buttons appear above and below each Pikmin type icon, and are used to pick more or less of them. These buttons can be held down to speed up the increase or decrease. ![]() /
/ ![]() /
/ ![]() can also be used to highlight the cancel or confirm buttons, or a type of Pikmin. Tilting the stick up or down will do the same as if the "more" or "less" buttons are pressed. The throw button can also be used to confirm, and the whistle button to cancel, except under the stylus mode.
can also be used to highlight the cancel or confirm buttons, or a type of Pikmin. Tilting the stick up or down will do the same as if the "more" or "less" buttons are pressed. The throw button can also be used to confirm, and the whistle button to cancel, except under the stylus mode.
![]() /
/ ![]() can be pressed in order to select all types at the same time. The "more" or "less" commands will then count for all Pikmin at the same time. If there are not enough Pikmin of a certain type in the party or in the Onion, the number will stop changing for that type, but will continue changing for the others.
can be pressed in order to select all types at the same time. The "more" or "less" commands will then count for all Pikmin at the same time. If there are not enough Pikmin of a certain type in the party or in the Onion, the number will stop changing for that type, but will continue changing for the others.
A label at the bottom of the screen will also show how many Pikmin are in the field, in total. It is possible for the player to store Pikmin and call out different ones in a single go, instead of having to store the Pikmin, wait for them to go in, and then call the new ones out.
Pause
By pressing ![]() /
/ ![]() (
(![]() in New Play Control! Pikmin), it is possible access a pause menu. When this menu is opened, the gameplay is halted, making this the primary way of pausing the game. It varies wildly between games.
in New Play Control! Pikmin), it is possible access a pause menu. When this menu is opened, the gameplay is halted, making this the primary way of pausing the game. It varies wildly between games.
Pikmin
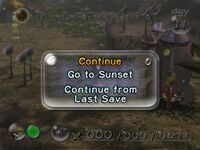
This is a simple menu, with only three options. The first is titled "Continue" and resumes the gameplay. The second option, called "Go to Sunset", opens a sub-menu, asking "Go to Sunset?", and the options "Yes" and "No". By selecting "Yes", the day automatically ends and the sunset cutscenes begin. By picking "No", the player is taken back to the main pause menu. The sunset option is grayed out during Challenge Mode. The third option is called "Continue from Last Save" ("Continue from previous save" in New Play Control! Pikmin), and when picked, a sub-menu opens, asking if the player is sure. By picking "Yes", the player is taken to the saved game selection menu. Picking "No" returns to the main pause menu. This third option is called "Quit Challenge Mode" while in Challenge Mode, and by choosing "Yes" to the question, the game returns to the Challenge Mode screen.
In this menu, the pause button also picks an option. Care should be taken not to accidentally pick an option while attempting to unpause the game.
Pikmin 2
The Pikmin 2 pause menu is a lot more complex, containing the radar and a lot of other information, as well as a menu similar to the one in Pikmin. This menu is separated into three pages, which can be changed by pressing ![]() /
/ ![]() and
and ![]() /
/ ![]() .
.
The "Radar" page contains the radar on the right side, with the name of the area or cave on top of it. To the left is the number of Pikmin on the Onions, on the ship, following the current leader, and idle. These numbers, besides the idle one, are listed for each Pikmin type.
Above ground, the "Menu" page contains a simple menu with the options "Continue" and "Go to Sunset". By choosing "Continue", the gameplay continues, same as if the player had pressed the pause button at any time while on the menu. Picking the option "Go to Sunset" opens a sub-menu, asking "End this day?", and the answers "Yes" or "No". Picking "Yes" ends the day and begins the sunset cutscenes. This page also contains the grand total of Pokos obtained on the bottom. While inside a cave, however, the two options on this page are "Continue" and "Give Up and Escape". Choosing the latter will ask the player if they wish to abandon all their treasure and return to the surface. If Pikmin seeds are left behind, the player will also be warned. In addition, when inside a cave, the total number of Pokos collected while underground will also appear in this page.
The "Items" page contains a list of all collected Exploration Kit treasures. Uncollected treasures appear grayed out, and titled "Incomplete", while collected ones appear in color and named. On the left side of the page, there is information about the sprays, with two sections; the top one dedicated for the ultra-bitter spray and the bottom one for the ultra-spicy spray. Each section contains the current number of sprays and the current number of Burgeoning Spiderwort berries, out of 10. When 10 are collected, the spray counter increases and the berry counter resets to 0.
If playing under Challenge Mode or 2-Player Battle mode, the entire menu is replaced with a simple message box, akin to the one in Pikmin. This contains the option "Continue" and the option "Give Up"/"Quit" (Challenge Mode or 2-Player Battle, respectively). The former unpauses the game, and the latter returns to the respective game mode's main menu, without asking for a confirmation. In Challenge Mode, however, a brief cutscene plays showing the Research Pod beaming the leaders and flying away.
Pikmin 3
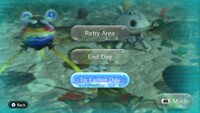
The pause menu in Pikmin 3 is relatively basic, containing 4 options, each of which must be confirmed by the player upon being selected. The "Retry Area" button will restart the current day in the same area. The "End Day" button will instantly end the day and play the sunset cutscene (the player will have to confirm a second time if there are Pikmin in the field that are not safe). The "To Earlier Day" button brings the player back to the day selection menu. The "![]() Mode" button in the lower right toggles the GamePad control scheme between classic mode and stylus mode.
Mode" button in the lower right toggles the GamePad control scheme between classic mode and stylus mode.
Challenge Mode
The Challenge Mode menu allows a player to pick a level in which to face the challenge.
Pikmin
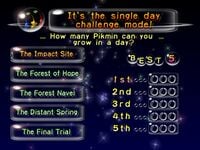
When the menu is entered, some stars can be seen in the background, and the message "It's the single day challenge mode!" zooms by the screen, right-to-left. All menu items gradually enter the screen, and the player can then make their selection of level.
The top of the screen contains the aforementioned message, followed by "How many Pikmin can you grow in a day?". To the right side of the screen, there is a list of the top 5 scores for the currently highlighted level. These are defaulted to "000" until filled.
Pikmin 2
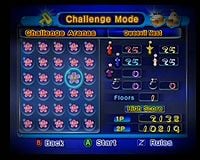
At the left side of the screen is a grid with 5 by 6 bubbles, each one representing a Challenge Mode level. Inside each bubble is an icon that indicates the completion state of the level: a yellow dot means the level is still locked, and other levels need to be completed first, a leaf indicates the level is available, but has yet to be completed, a white flower means the level has been completed, albeit with Pikmin deaths, and a pink flower indicates a completion with no deaths.
On the right half of the screen, there is some information about the currently highlighted level. The top section indicates the starting number of Pikmin for each type (excluding Bulbmin), as well as the starting number of ultra-bitter and ultra-spicy sprays. It also indicates the number of sublevels in the cave. The bottom-right section of this area shows the high score for that level, for both single player and two-player runs. If the level has yet to be completed in a specific player run, the respective score appears as "-----".
The bottom of the screen details some controls for this screen. ![]() /
/ ![]() opens a prompt that asks the player if they want to return to the title screen.
opens a prompt that asks the player if they want to return to the title screen. ![]() /
/ ![]() opens a sub-menu, asking the player if they want to play a single-player or two-player challenge. Picking one of these makes several Pikmin pop out from the Pikmin icons on the right side of the screen, into the icon of the selected level; the number of Pikmin that pop out reflects the number of starting Pikmin in the level, for each type. Finally, pressing
opens a sub-menu, asking the player if they want to play a single-player or two-player challenge. Picking one of these makes several Pikmin pop out from the Pikmin icons on the right side of the screen, into the icon of the selected level; the number of Pikmin that pop out reflects the number of starting Pikmin in the level, for each type. Finally, pressing ![]() /
/ ![]() opens a page detailing the game mode's rules: it indicates that The Key must be delivered in order to advance each sublevel, and that there is a time limit. It also explains what the flower icons for the grid mean.
opens a page detailing the game mode's rules: it indicates that The Key must be delivered in order to advance each sublevel, and that there is a time limit. It also explains what the flower icons for the grid mean.
High scores
This screen contains some records and statistics for runs of the main story mode. Generally, the faster and more efficient the player is, the higher they score in the tables.
Pikmin
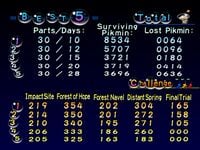
In Pikmin, the top half of the screen contains records for the story mode, while the bottom half contains records for Challenge Mode. In the story mode section, there are four columns, one for the ship parts gathered, one for the days it took to complete, one for the final number of surviving Pikmin, and one for the total of lost Pikmin. There are 5 rows, each one dedicated for a place in the high score table. The Challenge Mode section contains columns for each area, and rows for each of the five top places.
Pikmin 2
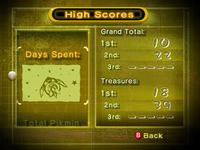
In Pikmin 2, the left side of the screen contains a scrollable list with the categories. The right side contains the top three values for that category, separated into two types: the value when the debt was repaid ("Grand Total") and the value for when all treasures were collected ("Treasures"). Any missing values are filled with "-----" or "--:--". The pictures used for the categories have a stylized simple look. The following categories exist:
- Days Spent: The fewer days spent to complete the game, the better.
- Total Pikmin Lost: The smaller the amount of Pikmin lost, the better. The same applies for the following categories as well.
- Pikmin Lost in Battle
- Pikmin Left Behind
- Pikmin Lost to Fire
- Pikmin Lost to Water
- Pikmin Lost to Electricity
- Pikmin Lost to Explosions
- Pikmin Lost to Poison
- Pikmin Born: The smaller the amount of Pikmin born, the harder it is to complete the game, so the higher the player scores. 1 is added to a type when a Pikmin of that type is born, but is subtracted by 1 when a Pikmin of that type gets converted. As a result, this can lead to negative numbers. All of this also applies to the following categories too.
- Red Pikmin Born
- Yellow Pikmin Born
- Blue Pikmin Born
- White Pikmin Born
- Purple Pikmin Born
- Total Play Time: The less time it takes to complete the game, the better.
A different high score screen also appears after the ending cutscene in Pikmin 2. This screen has a black background and a blue table. It still contains a scrollable list with the categories, but the records are also inside the list. Atop the best 3 scores is the player's score for that category. If this score enters the table, it gets highlighted in yellow on the individual score, and purple on the table. To the right of the screen, 8 pairs of icons appear, indicating the categories represented in each page of the list. The pictures used for this screen are full 3D renders, as opposed to the previously mentioned simplistically-styled images.
Sunset
At the end of each day, after the ship takes off, a screen appears containing an analysis of the day.
Pikmin
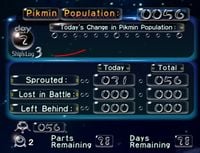
The first screen to appear is a voyage log entry. After closing that, the analysis screen pops in. On the top-right corner, there is the current total of Pikmin. The top section of the screen contains a chart that demonstrates the change in Pikmin population over the course of the day, for each type. It also contains a bubble that says which day it is, and which saved game (named "Ship's Log") the player is playing under.
The central section of the menu contains some birth and death statistics: it numbers how many Pikmin sprouted, died in battle and were left behind, both for the current day and in total throughout the story. The bottom section of the screen indicates how many Pikmin each Onion has, as well as the number of collected parts, the number of parts remaining, and the number of days remaining.
After pressing ![]() /
/ ![]() , a message box appears, asking the player if they wish to save. Should they choose "Don't Save", another message box will appear, asking them if they wish to continue onto the next day ("Continue") or return to the saved game selection menu ("Continue From Last Save").
, a message box appears, asking the player if they wish to save. Should they choose "Don't Save", another message box will appear, asking them if they wish to continue onto the next day ("Continue") or return to the saved game selection menu ("Continue From Last Save").
Pikmin 2
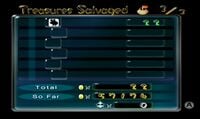
After the ship takes off, the words "Today's Report" appear. A screen like the one on the cave exited menu appears, detailing the treasures salvaged today. After pressing ![]() /
/ ![]() , the Pikmin stats appear, detailing the difference in Pikmin numbers between the previous and the current day. These numbers appear both for individual Pikmin types and for all of them combined. After the numbers are filled up, arrows appear indicating whether the population increased or decreased. By pressing
, the Pikmin stats appear, detailing the difference in Pikmin numbers between the previous and the current day. These numbers appear both for individual Pikmin types and for all of them combined. After the numbers are filled up, arrows appear indicating whether the population increased or decreased. By pressing ![]() /
/ ![]() , the player can switch to a different page that details the deaths. It lists how many Pikmin died battling, from being left behind, from being set ablaze, from drowning, from dying of electrical shock, from exploding, and from choking to death, as well as the combined deaths. These numbers exist both for the current day and the total for the adventure.
, the player can switch to a different page that details the deaths. It lists how many Pikmin died battling, from being left behind, from being set ablaze, from drowning, from dying of electrical shock, from exploding, and from choking to death, as well as the combined deaths. These numbers exist both for the current day and the total for the adventure.
By pressing ![]() /
/ ![]() , the player is taken to the mail menu, that shows them the e-mail received today. The player can press
, the player is taken to the mail menu, that shows them the e-mail received today. The player can press ![]() /
/ ![]() and
and ![]() /
/ ![]() to check the mails of a previous or following day, respectively, between the 20 most recent mails. Interestingly, in the GameCube release, the player can hold down one of the buttons to flip through the pages automatically, but not in the Wii version. At this point, if the player goes back to the Pikmin stats, and then returns to this screen, the e-mail window will rise from the bottom of the screen and squash the sender's icon on the way up.
to check the mails of a previous or following day, respectively, between the 20 most recent mails. Interestingly, in the GameCube release, the player can hold down one of the buttons to flip through the pages automatically, but not in the Wii version. At this point, if the player goes back to the Pikmin stats, and then returns to this screen, the e-mail window will rise from the bottom of the screen and squash the sender's icon on the way up.
Pressing ![]() /
/ ![]() on the e-mail page will make a prompt appear, asking the player if they wish to save or not. If the player chooses "Don't Save", another prompt appears, asking if the player wants to continue the adventure ("Continue"), or if they wish to go to the saved game selection menu ("Start Over From Last Save").
on the e-mail page will make a prompt appear, asking the player if they wish to save or not. If the player chooses "Don't Save", another prompt appears, asking if the player wants to continue the adventure ("Continue"), or if they wish to go to the saved game selection menu ("Start Over From Last Save").
First page of the sunset screen in Pikmin 2, same as the cave exited menu.
The following menus only appear in specific games.
Olimar's monitor
- Main article: Radar.
Although the radar menu is implemented into the pause menu in Pikmin 2, in Pikmin, it is in its own menu, titled "Olimar's monitor"[2], and it can be opened by pressing ![]() /
/ ![]() mid-game. This menu contains the actual radar on the right side, with instructions on how to pan and zoom on the top-right corner. On the top-left corner of the screen, there is the name of the current area. Below that, the number of Pikmin in the squad and in the Onions appears, for each type. Below those, the number of total idle Pikmin in the field. Finally, in the bottom-right corner, the number of collected ship parts is written.
mid-game. This menu contains the actual radar on the right side, with instructions on how to pan and zoom on the top-right corner. On the top-left corner of the screen, there is the name of the current area. Below that, the number of Pikmin in the squad and in the Onions appears, for each type. Below those, the number of total idle Pikmin in the field. Finally, in the bottom-right corner, the number of collected ship parts is written.
By pressing ![]() /
/ ![]() , the player will be taken to a different page, explaining the controls. This one contains an illustration of a GameCube Controller, or a Wii Remote with a Nunchuk attached. Boxes scattered around the screen explain what each button and stick does. The buttons and sticks on the illustration flash in order, with each one flashing three times.
, the player will be taken to a different page, explaining the controls. This one contains an illustration of a GameCube Controller, or a Wii Remote with a Nunchuk attached. Boxes scattered around the screen explain what each button and stick does. The buttons and sticks on the illustration flash in order, with each one flashing three times.
Olimar's voyage log
- Main article: Olimar's voyage log.
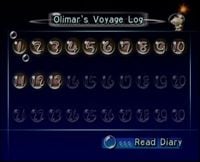
This menu, accessible by pressing ![]() /
/ ![]() in Pikmin's area selection menu, contains a list of Olimar's logs, that he writes at each day's sunset. The screen contains a grid of 10 by 3 bubbles, each with a number inside, referring to the day it was written on. By highlighting a bubble from a previous day, and pressing
in Pikmin's area selection menu, contains a list of Olimar's logs, that he writes at each day's sunset. The screen contains a grid of 10 by 3 bubbles, each with a number inside, referring to the day it was written on. By highlighting a bubble from a previous day, and pressing ![]() /
/ ![]() , the player can open a page with the corresponding log.
, the player can open a page with the corresponding log.
Piklopedia
- Main article: Piklopedia.
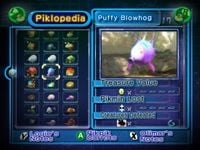
The Piklopedia is a feature in Pikmin 2. Accessed by pressing ![]() /
/ ![]() on the area selection screen, this screen contains a scrollable list of the game's enemies and plants on the right side, with 3 per row (except bosses, which take up an entire row with bigger boxes). The right side of the menu contains a screen showing the currently highlighted enemy, which can be opened further by pressing the throw button. Below that screen are some stats about the creature, like the treasure value, in Pokos, how many Pikmin have been lost to it, and how many of this enemy have been defeated. These values appear as "----" when not applicable.
on the area selection screen, this screen contains a scrollable list of the game's enemies and plants on the right side, with 3 per row (except bosses, which take up an entire row with bigger boxes). The right side of the menu contains a screen showing the currently highlighted enemy, which can be opened further by pressing the throw button. Below that screen are some stats about the creature, like the treasure value, in Pokos, how many Pikmin have been lost to it, and how many of this enemy have been defeated. These values appear as "----" when not applicable.
The bottom of the screen contains instructions on what some buttons do: ![]() /
/ ![]() throws pikpik carrots and zooms in on the creature's screen,
throws pikpik carrots and zooms in on the creature's screen, ![]() /
/ ![]() opens Louie's notes, and
opens Louie's notes, and ![]() /
/ ![]() opens Olimar's notes. Finally, on the top-left and top-right corners of the screen,
opens Olimar's notes. Finally, on the top-left and top-right corners of the screen, ![]() /
/ ![]() and
and ![]() /
/ ![]() appear, indicating that the buttons can be used to open the Treasure Hoard screen.
appear, indicating that the buttons can be used to open the Treasure Hoard screen.
Treasure Hoard
- Main article: Treasure Hoard.
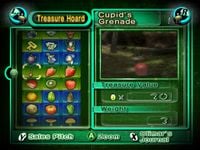
This menu is quite similar to the Piklopedia's screen, and is accessible by pressing ![]() /
/ ![]() on the area selection screen. The left side contains a list of treasures, three per row, and with a background colored green or blue, to separate between the existing series. The right side contains a screen that shows the treasure, as well as two sections detailing its value in Pokos and carrying weight. The bottom of the screen explains what some buttons do. Like the Piklopedia, the throw button zooms in, while
on the area selection screen. The left side contains a list of treasures, three per row, and with a background colored green or blue, to separate between the existing series. The right side contains a screen that shows the treasure, as well as two sections detailing its value in Pokos and carrying weight. The bottom of the screen explains what some buttons do. Like the Piklopedia, the throw button zooms in, while ![]() /
/ ![]() shows Olimar's journal.
shows Olimar's journal. ![]() /
/ ![]() shows the sales pitch. Finally, the top-left and top-right corners show that
shows the sales pitch. Finally, the top-left and top-right corners show that ![]() /
/ ![]() and
and ![]() /
/ ![]() can be used to open the Piklopedia's menu.
can be used to open the Piklopedia's menu.
Cave exited
In Pikmin 2, whenever a cave is completed, a menu appears. The main section of the screen contains a scrollable list of collected treasures in this trip (their names and icons, followed by their value), as well as the number of Pokos earned from enemies. The top-right corner of the screen indicates the total number of treasures in the cave that have been salvaged thus far, and the total number of treasures within (only after all of the cave's treasures have been gathered, or the debt has been repaid). The bottom section of the screen contains the total of Pokos collected from the trip, and the total collected so far. Finally, this section also contains the number of Pikmin killed in the trip. Pressing ![]() /
/ ![]() will make the game ask if the player wants to save. If at the end of the current trip, all of the cave's treasures have been collected, a message saying "CAVE COMPLETE!" will also appear, and confetti will drop from above. If the player waits a few minutes on this state, they can hear Totaka's song.
will make the game ask if the player wants to save. If at the end of the current trip, all of the cave's treasures have been collected, a message saying "CAVE COMPLETE!" will also appear, and confetti will drop from above. If the player waits a few minutes on this state, they can hear Totaka's song.
2-Player Battle
- Main article: 2-Player Battle.
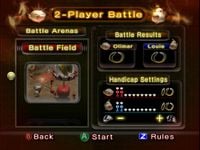
This menu allows the players to set up the battle settings. On the left side, there is a scrollable list with the available levels. The right side contains two sections. The top section has the battle stats, with the number of victories for each player thus far. The bottom half has the handicap settings, where players can adjust their starting number of Pikmin, in increments of five, by pressing ![]() /
/ ![]() and
and ![]() /
/ ![]() . The bottom of the screen lists what some buttons do:
. The bottom of the screen lists what some buttons do: ![]() /
/ ![]() shows a page with the rules (pages can be switched with
shows a page with the rules (pages can be switched with ![]() /
/ ![]() and
and ![]() /
/ ![]() ),
), ![]() /
/ ![]() starts the match, and
starts the match, and ![]() /
/ ![]() asks the players if they wish to return to the title screen. These controls are valid for both players.
asks the players if they wish to return to the title screen. These controls are valid for both players.
The faces of the leaders also change depending on the points one has over the other.
Challenge over
When a Challenge Mode level is over, either by being successfully completed or by ending in a failure (but not by manually quitting from the pause menu), this screen appears, detailing the results of the run.
Pikmin
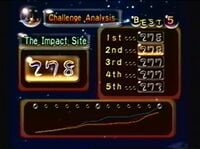
In Pikmin, the menu contains a grid of the 5 best scores on this level, on the right side, and on the left side, the name of the area and the final number of Pikmin. The bottom of the screen contains a chart, much like the one in the sunset screen, that lists the Pikmin population over time. If the current score fits in the table, a small fanfare plays, and both the number on the left side and the equivalent spot on the right side will glow. Pressing the throw button opens a prompt with only a single option: "Save". By choosing this option, the game saves. Although the whistle button can be used to close this prompt without saving, the only way to leave this screen without the game saving is by resetting the console.
Pikmin 2
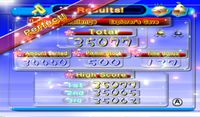
In Pikmin 2, the screen contains a box near the top, with the left side indicating whether it's a single-player challenge or two-player challenge, and the right side indicating the level's name.
The central portion of the screen contains four number bubbles. The topmost central one contains the total of the points earned in the run. The bottom-left one details the amount of points earned in gathered Pokos, the central bottom one indicates the points earned in remaining Pikmin, and the bottom-right contains the points earned in time bonus, judged by the time left before exiting. The bottom section of the screen contains the top 3 high scores for this level and player challenge. If the current score fits in the list of top 3 (even if it is a 0), the Blue and Yellow Onions that can be seen roaming around will drag a copy of the number in the "Total" box and place it in the high score table, pushing the values below further down. If this level changed status between incomplete, complete with deaths, or complete with no deaths, the Onions will also be seen changing the various leaf/white flower icons on the menu to white/pink flowers.
If this is the first time the level has been completed, but Pikmin died in the process, a banner saying "Complete!" will appear on the top-left corner. If the level was complete without Pikmin deaths, confetti will start to rain and a banner with the text "Perfect!" will appear instead; this banner appears regardless of it being the first time the level is completed. After all this, the player can press the throw button, where they will be given the choice to save, in a message box.
Bonuses
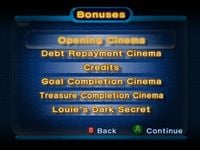
The bonuses menu only appears in Pikmin 2 and New Play Control! Pikmin 2, and it contains the game's pre-rendered cutscenes. These only appear in the list after they play in-game for the first time, excluding the first and last ones.
- Opening Cinema: The opening video, explaining the plot of Pikmin 2.
- Debt Repayment Cinema: The cutscene for when the debt is repaid, showing the leaders heading back home and Louie staying behind.
- Credits: The game's credits, that appear after the debt is paid off. It shows Louie roaming around in real world environments as the credits scroll by.
- Goal Completion Cinema: The cutscene after the credits, and before the Wistful Wild is unlocked. It shows The President joining Captain Olimar.
- Treasure Completion Cinema: The cutscene used when all treasures have been collected. It shows the ship lifting off while the Pikmin give the final goodbye.
- Louie's Dark Secret: Unlocked after obtaining a pink flower in all Challenge Mode levels. It shows what really happened to the golden pikpik carrot cargo.
In addition, in the Japanese version of Pikmin 2, for the GameCube, one more option exists, which gives access to the e-Reader's games.
Final Analysis
At the end of Pikmin, this screen appears. It contains a list of the top 5 scores on three categories: "Parts/Days", "Surviving Pikmin", and "Total Pikmin Lost". It will also indicate what the player's scores in those categories are, for the current playthrough, and if they entered the top score table, they will also be highlighted. The bottom of the screen contains the total of Pikmin sprouted.
After pressing ![]() /
/ ![]() , the player is taken to another screen, that contains the list of existing ship parts, on a 3 by 10 table. The icons for all parts exist, although uncollected parts have their icon's colors inverted. Collected parts also have their name next to the icon. Yellow names are mandatory parts, and cyan names are for optional parts; the optional parts are also the last five on the table. Pressing
, the player is taken to another screen, that contains the list of existing ship parts, on a 3 by 10 table. The icons for all parts exist, although uncollected parts have their icon's colors inverted. Collected parts also have their name next to the icon. Yellow names are mandatory parts, and cyan names are for optional parts; the optional parts are also the last five on the table. Pressing ![]() /
/ ![]() here opens a message box with only one option, "Save", while pressing
here opens a message box with only one option, "Save", while pressing ![]() /
/ ![]() returns to the previous menu.
returns to the previous menu.
Other screens
The games also feature some other screens not listed previously, but these either do not count as menus, as they lack any interactable content, or are too minor to afford their own section.
- Wii Remote security information: In the New Play Control! games, a standard Wii Remote security information screen is presented. After some seconds, the player is allowed to continue, by pressing any button.
- Health and safety warnings: In the US version of Pikmin 2, for the GameCube, when the game is turned on, a standard health and safety warning screen appears. After some seconds, the player is allowed to continue, by pressing any button.
- Nintendo logo: After the two previous screens, if they appear in the game, comes the Nintendo Logo. This logo is blue in the Japanese versions, red in the overseas versions, and white in the New Play Control! games.
- Screen refresh rate: In the European version of Pikmin 2, after the Nintendo Logo, a screen appears asking the player if they want to use 60 Hz mode or 50 Hz mode. The former will only display correctly with compatible televisions.
- Dolby screen: Because Pikmin 2 for the GameCube supports Surround Sound, a screen with the Dolby Pro Logic II logo appears after the Nintendo logo screen (and after the refresh rate screen), for a second.
- Ship menu: In Pikmin 2, White and Purple Pikmin are stored in the ship, as they lack on Onion. In order to access these stored Pikmin via a menu like the Onion menu, the player must first press the throw button while under the ship's light. Then, a small menu has to be navigated, in order to choose which Pikmin type to control the party of: Whites or Purples.
- Cave confirmation: When the player presses the throw button near a cave's entrance, a menu will appear showing the cave's name, the hazards within, the total number of treasures (only after it's been completed or the debt repaid), how many of the treasures are collected, and the number of Pikmin that are entering, as well as how many are on the field. A message also appears asking if the player wishes to go inside. If the player chooses "Yes" when they have no Pikmin, a message will warn them that it is too dangerous to go down alone. In New Play Control! Pikmin 2, the total number of treasures only appears after all treasures in the cave have been collected.
- Sublevel confirmation: When the player presses the throw button near a sublevel hole, a message will appear asking if they wish to delve deeper. If some Pikmin are buried, a message box will appear asking if the player really wants to delve deeper, as ignoring Pikmin sprouts will make those Pikmin be left behind forever. If all Pikmin are buried, a message will appear stating that the leader(s) cannot proceed. Similar messages appear for when the player leaves via a geyser or via the pause menu.
- Geyser confirmation: When the player uses a geyser, a message box appears asking if they want to leave the cave or continue exploring. In Challenge Mode, this warning is slightly different, instead asking if the player wishes to exit the Challenge Mode level.
- Memory card check: If there is any problem with the memory card, such as it being corrupted or not having enough space to create a save, this menu might pop up, asking the player on what action to take. When this happens when the player was about to enter a cave sublevel, Totaka's song can play.
- Debug menus: There are some debug menus hidden inside Pikmin. These cannot be accessed by normal means.
Trivia
- Pressing
 in New Play Control! Pikmin 2's area selection menu will cause the Wii Remote's speaker to sound a "boing!" sound, same as the one heard when picking an invalid number of Pikmin from an Onion menu.
 - In the area selection menu and 2-Player Battle menu of the first two games, it is possible to press the whistle button to abort an area selection, provided the small animated ship or Onions have yet to land.
- In Pikmin's Onion menu, attempting to take out more Blue Pikmin than there are in the Onion results in a message that contains a typo. The message gets filled with the plural name for the Pikmin type, followed by "Pikmin", instead of the singular name. This leads to the message "There are no blues Pikmin to take out." The correct message would be "There are no blue Pikmin to take out." This has been fixed for New Play Control! Pikmin.
- Shooting stars occasionally fall in the area selection screen for the first two games. When the final area is being unlocked, several shooting stars in a row appear for some seconds.
- The Challenge Mode menu in New Play Control! Pikmin has the message at the top in a single line, instead of being split in two. The "several bubbles" motif has also been changed to a "single large bubble" one, as is the case with some other menus in the game.
- The high scores screen at the end of Pikmin 2 contains the top three scores. However, the in-game files for this screen call the image files
best5_<number>, suggesting that at one point, the game was meant to keep track of the five top scores. - In Pikmin, the number of Pikmin inside the Onion on the latter's menu rolls back to 000 after 999. Essentially, the thousands digit is not visible.[3]
- In Pikmin 2, whenever a question dialog box opens, like the one asking the player if they are sure they wish to go to the next sublevel, a dot appears on the top-left corner of the screen for a split second. Only the bottom-right corner of the dot is visible during normal gameplay.
- The Pikmin 2 title screen uses far more than 100 Pikmin at a time. The numbers are as follows:[4]
- "PIKMIN 2": 92 Red Pikmin make up the "P" and "N". 60 Yellow Pikmin make up the "K" and second "I". 84 Blue Pikmin make up the first "I" and "M". 18 Purple Pikmin and 19 White Pikmin make up the "2". Total of 273 Pikmin.
- "Nintendo": 94 Red Pikmin make up the "N", "t", and "d". 54 Yellow Pikmin make up the two "n". 74 Blue Pikmin make up the "i", "e", and "o". Total of 222 Pikmin.
- "ピクミン2?": 68 Red Pikmin make up the "ピ" and "ン". 42 Yellow Pikmin make up the "ミ". 32 Blue Pikmin make up the "ク". 18 Purple Pikmin and 19 White Pikmin make up the "2". Total of 179 Pikmin.
See also
External links
- The Cutting Room Floor articles about Pikmin games – these contain information about miscellaneous elements hidden off-camera, in several menus.
References
- ^ YouTube video demonstrating parameters of the Pikmin 2 title screen
- ^ “Olimar's monitor /
 You can check this screen by pressing the Y Button during the game. Press the Y or B Button to return to the game.” – Information about Olimar's monitor in the corresponding page of the Pikmin instruction manual
- ^ YouTube video showing the Onion menu's counter rolling back after 999
- ^ As per the files in
/user/Ebisawa/title/title.szs/logo.
