Parched Brook: Difference between revisions
KawaiiKiwii (talk | contribs) (added an image) |
mNo edit summary |
||
| Line 11: | Line 11: | ||
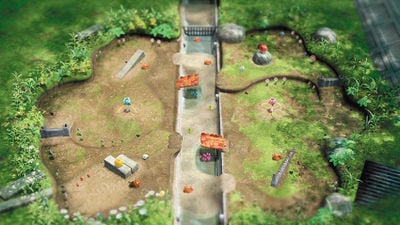
===Layout A=== | ===Layout A=== | ||
[[File: | [[File:Map 22 parched brook a.jpg|thumb|400px|Layout A overview.]] | ||
This layout gives players [[Red Pikmin]] to start with, and [[Blue Pikmin]] can be found. | This layout gives players [[Red Pikmin]] to start with, and [[Blue Pikmin]] can be found. | ||
| Line 58: | Line 58: | ||
'''Other objects''': | '''Other objects''': | ||
*{{icon|Egg|y|v=P3}} × 8 | *{{icon|Egg|y|v=P3}} × 8 | ||
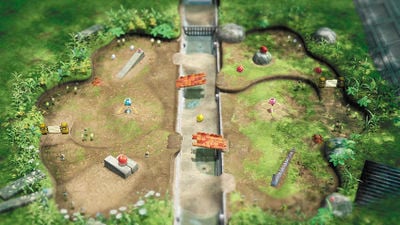
===Layout B=== | ===Layout B=== | ||
[[File: | [[File:Map 23 parched brook b.jpg|thumb|400px|Layout B overview.]] | ||
This layout gives players [[Yellow Pikmin]] to start with, and Blue Pikmin can be found. | This layout gives players [[Yellow Pikmin]] to start with, and Blue Pikmin can be found. | ||
| Line 101: | Line 100: | ||
'''Plants and fungi''': | '''Plants and fungi''': | ||
*{{icon|Pellet Posy|v=P3}} [[Pellet Posy|1-Pellet Posy]] × 32 | *{{icon|Pellet Posy|v=P3}} [[Pellet Posy|1-Pellet Posy]] × 32 | ||
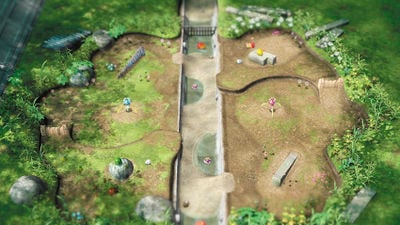
===Layout C=== | ===Layout C=== | ||
[[File: | [[File:Map 24 parched brook c.jpg|thumb|400px|Layout C overview.]] | ||
This layout gives players Red Pikmin to start with, and [[Winged Pikmin]] can be found. | This layout gives players Red Pikmin to start with, and [[Winged Pikmin]] can be found. | ||
| Line 143: | Line 141: | ||
*{{icon|Pellet Posy|v=P3}} [[Pellet Posy|1-Pellet Posy]] × 32 | *{{icon|Pellet Posy|v=P3}} [[Pellet Posy|1-Pellet Posy]] × 32 | ||
==Gallery== | |||
<gallery> | |||
Parched Brook radar.png|Texture used on the [[radar]]. | |||
</gallery> | |||
==Names in other languages== | ==Names in other languages== | ||
| Line 155: | Line 157: | ||
|ItaM=Dry Stream | |ItaM=Dry Stream | ||
}} | }} | ||
{{BB}} | {{BB}} | ||
Revision as of 10:49, May 7, 2023
|
This article is a stub. You can help Pikipedia by expanding it. |
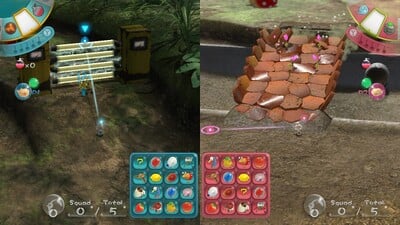
Parched Brook is the eighth stage of Pikmin 3 's Bingo Battle.
Red, Blue, and Winged Pikmin can be found here.
Layouts
The layout unlock order, as explained here, is A, C, B.
Layout A
This layout gives players Red Pikmin to start with, and Blue Pikmin can be found.
Enemies:
 Orange Bulborb × 1
 Bulborb × 1
 Yellow Wollywog × 2
 Dwarf Bulborb × 3
 Male Sheargrub × 6
 Skitter Leaf × 5
 Fiery Blowhog × 1
 Watery Blowhog × 1
 Iridescent Flint Beetle × 2
 Dwarf Orange Bulborb × 3
 Skeeterskate × 2
 Desiccated Skitter Leaf × 2
Fruits:
 Insect Condo ×1
 Citrus Lump × 1
 Golden Sunseed × 1
 Sunseed Berry × 1
Marbles:
 Blue Marble × 1
 Red Marble × 1
Tools:
Obstacles:
 Reinforced wall × 2
 Water body × 4
Plants and fungi:
 1-Pellet Posy × 16
 5-Pellet Posy × 2
Other objects:
 Egg × 8
Layout B
This layout gives players Yellow Pikmin to start with, and Blue Pikmin can be found.
Enemies:
 Bearded Amprat × 2
 Bulborb × 2
 Yellow Wollywog × 2
 Watery Blowhog × 2
 Burrowing Snagret × 2
 Skeeterskate × 2
 Female Sheargrub × 8
 Hermit Crawmad × 2
 Desiccated Skitter Leaf × 4
Fruits:
 Insect Condo × 1
 Heroine's Tear × 1
 Sunseed Berry × 1
 Face Wrinkler × 1
 Golden Sunseed × 2 (in Burrowing Snagrets)
Marbles:
 Red Marble × 2
Tools:
Obstacles:
 Electric gate × 2
 Water body × 4
Plants and fungi:
 1-Pellet Posy × 32
Layout C
This layout gives players Red Pikmin to start with, and Winged Pikmin can be found.
Enemies:
 Bulborb × 1
 Dwarf Bulborb × 3
 Yellow Wollywog × 2
 Male Sheargrub × 4
 Skitter Leaf × 6
 Fiery Blowhog × 1
 Watery Blowhog × 1
 Orange Bulborb × 1
 Dwarf Orange Bulborb × 3
 Waddlepus × 2
 Shearwig × 5
 Armored Cannon Larva × 1
Fruits:
 Face Wrinkler × 1
 Insect Condo × 1
 Zest Bomb × 1
 Heroine's Tear × 1
Tools:
Obstacles:
 Dirt wall × 2
 Water body × 4
Plants and fungi:
 1-Pellet Posy × 32
Gallery
Texture used on the radar.
Names in other languages
| Language | Name | Meaning |
|---|---|---|
| Rigole chantante | Singing Channel | |
| Murmelnder Bach | Murmuring Brook | |
| Rivo asciutto | Dry Stream | |
| Arroyo Rumoroso | Rumorous Stream |


