Waterwraith: Difference between revisions
No edit summary |
CyborgKing0 (talk | contribs) |
||
| Line 205: | Line 205: | ||
==Gallery== | ==Gallery== | ||
{{todo|Get a sceneshot of the Waterwraith without rollers.}} | |||
<gallery> | <gallery> | ||
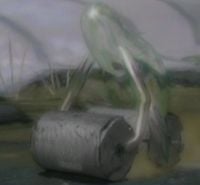
File:Waterwraithcutscene.png|The Waterwraith appears. | File:Waterwraithcutscene.png|The Waterwraith appears. | ||
Revision as of 01:47, June 20, 2015
| |||
|---|---|---|---|
| Appears in | Pikmin 2 | ||
| Scientific name | Amphibio sapiens | ||
| Family | Unknown | ||
| Areas | None | ||
| Caves | Submerged Castle | ||
| Challenge Mode stages | Bully Den | ||
| 2-Player Battle stages | None | ||
| Attacks | Crushes Pikmin | ||
The Waterwraith (アメボウズ?, lit.: "Rain Priest") is a boss from Pikmin 2, found in all of the sub levels of the Submerged Castle and in the Bully Den in Challenge Mode. It can only be defeated by Purple Pikmin; however, the entrance to the cave is flooded, making them impossible to bring along.
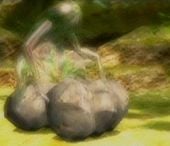
Its appearance is generally humanoid in shape, with the suggestion of a head, body, arms and legs, but without distinct characteristics, and with a watery, transparent body. As a matter of fact, its scientific name is Amphibio sapiens, which is similar to the human's scientific name: Homo sapiens. The ship notes that although it can be seen, its sensors somehow detect nothing, leading to the conclusion that the Waterwraith's physical form is anchored in another dimension. It is one of the most dangerous enemies, as it can instantly kill Pikmin by just rolling over them, and cannot be deterred or defeated until the final floor. However, it does not appear immediately, instead giving the player a five minute grace period before appearing. In the Bully Den, both Waterwraiths will fall when the seconds counter falls to 270, leaving you with only 30 seconds to get settled and prepare. When encountered in the Submerged Castle, but not in the Bully Den, its music will play - music that is played only then.
The Waterwraith is one of the few enemies in Pikmin 2 which has its own background music, along with the Titan Dweevil and the Giant Breadbug. In the Submerged Castle, when it appears, its own music track plays. When it is in the last Sublevel, normal boss music plays and when it has no rollers, a different kind of the normal boss music plays, which has a more positive/silly mood.
The Waterwraith's name is a combination of water, given its watery appearance, and wraith, which means ghost or phantom.
Before the Fight
The Waterwraith will come on any sub level of the Submerged Castle, usually after about 5 minutes. When encountered, the beast falls from the sky. This will give two falling noises followed by two explosion-like sounds and then a noise like a scream underwater. It lifts up its front roller, and smashes it on the ground, crushing any Pikmin underneath. It then commences moving around on its stone 'rollers'. However, before Sublevel 5, there is no way at all to harm it; not even Bomb Rocks will have any effect. With that in mind, there are a few things to remember:
- The player should collect treasures as quickly as possible and avoid collecting corpses. Doing so could allow the player to escape without having the Waterwraith spawn.
- The Waterwraith can kill other enemies and disable traps. This should be used to an advantage.*
- It follows the active captain. This can be used to the player's advantage, similar to the fight with the Ranging Bloyster.*
- It is advise to at least have the Rush Boots power up, which can allow you to qucikly escape the Water wraith.The Stellar Orb also helps to illuminate the area, giving the player a good view of where the Waterwraith is.
- The Waterwraith does not go into small corners, crevices, and dead-ends, making these places safe to hide in.*
- The Captains must quickly collect as many treasures as they can. If they forget to get a treasure, they can always go back and get it later.
- If the player has a very difficult time with the Waterwraith, they can always reset in attempt to get an easier layout for the floor.
- The Waterwraith crushes Pikmin instantly, so it is best to keep all Pikmin with the Captains while it is active.
These tips mostly apply only to the Submerged Castle. Items marked with an * can be used in theBully Den as well.
Battle Strategy

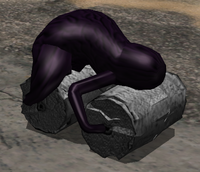
When encountered, it will chase Olimar and any Pikmin nearby, with greater focus on crushing the active Captain. It is invincible to any Pikmin assault, even if petrified, except that of the Purple Pikmin. When a Purple lands on or near the Waterwraith in a fashion that would stun any other beast, it turns a deep shade of purple not dissimilar to that of the Pikmin that cause this state to come about. In this state, it is vulnerable to all Pikmin attacks. When the Wraith's health has been fully depleted, the rollers crumble and the Waterwraith will run aimlessly around the cave, no longer a threat to your Pikmin. Attack with more Purples and then you can easily attack it with other Pikmin. When defeated, it will vanish into nothing, and you will be troubled no more. It drops the Professional Noisemaker, a useful addition to the Exploration Kit the first time you beat it in the Submerged Castle.
Strangely, petrifying the Waterwraith makes it less vulnerable to Purple Pikmin, in which case the Pikmin must be thrown in a perfect arch for enough impact to make the creature susceptible to attack. In other words, Purples make a certain "thudding" sound when they hit an enemy or a plant; when this sound is performed, a creature may also be stunned. These effects can only occur when the Purples have a straight fall downward after they're thrown (the distance in which they fall vertically is irrelevant, as long as it exists). Finally, when all these circumstances are achieved, the Waterwraith may gain damage; this will not happen when Purples are thrown on it without the drop.
Note: In the Submerged Castle, you will only be able to get Purple Pikmin on the final sub level via the Violet Candypop Bud.
In the Bully Den, you will already have 25 Purples, but no other type of Pikmin. Here, there are two Waterwraiths and a variety of other creatures.
Notes
Ship's dialogs
“What is this?!? I can see it with my optical receptors, but my sensors cannot detect it!
Could its physical form be anchored in another dimension? ...Attacking it is futile!
If only we could force it to take on physical form... But in its current state... Krzzzt-zrrrk!
Danger! Danger! Danger!”Olimar's notes
Louie's notes
Nintendo Player's Guide
"The anxious Water wraith appears before the final floor of the Submerged Castle, but you won't be able to defeat it until you use Violet Candypop Buds to create purple Pikmin on the cave's lowest level. One touch from a purple will make the beast temporalily vulnerable."
Glitches
The Waterwraith is the cause of a few glitches in Pikmin 2. It's possible to petrify its rollers, by petrifying the creature on the Piklopedia just as its archive is opened. When the Waterwraith itself lands, it too will be encased in stone, but the roller will revert to its normal state before the creature itself. Petrify it again, and the Wraith is normal, but not the rollers; the Wraith will have problems lifting them. Its audio will get messed up, as it cries with each attempt to pick up the front roller. It is possible to do this in the main game (and Challenge Mode) as well, but the beast won't turn purple when Purple Pikmin are thrown at it. This is because it needs to lift its rollers first. You can also make the Waterwraith float if you have AR by doing the one hit code.
When the Waterwraith pulls the rollers up, petrify it. Then when it wears off, do it again. If your timing is correct you should only petrify its rollers. The Water wraith's arms will be stretched backwards, grabbing the roller that is in mid-air while it sits on the other roller facing the ground, trying to pull back the roller.
It is possible to defeat the Waterwraith while petrified. First, it must be without its rollers, and the player must deplete its health as far as possible. Then, when frozen, if Purple Pikmin are thrown onto it, it should die in that state, shattering and leaving 6-7 pools of nectar and spray of any kind.
Yet another glitch can be performed by knocking it off its rollers, and frantically switching characters, will cause the Waterwraith to appear to "ice skate" instead of sprinting.
It is likely that if the Waterwraith's head comes into contact with the Research Pod after having lost its rollers, another glitch will occur. The outcome is a change in the way it moves: instead of walking, the creature glides along; and any Pikmin that touch it are thrown out-of-the-way, though unharmed. The amount of health it had previous to the glitch occurring determines whether or not it can be damaged in this state.
Another glitch may occur when the Waterwraith attempts to turn around sharp corners. Instead of successfully completing a 360 degrees turn, it may get wedged in the middle of a tight space. This could either be helpful, allowing the player to avoid the Waterwraith, but this glitch could also block crucial pathways, such as a pathway to the next floor. Unfortunately, the only solution for this is to reset.
Yet another glitch happens when the Waterwraith is hit with a Purple Pikmin while running. The Waterwraith may turn clear while in the crouching position, instead of it having a purple hue.
Another possible glitch is known to happen in the Bully Den. The cause of this glitch is unknown, but the effects are strange. When both Water wraith have had their rollers taken away, they will sometimes only frantically run away from Olimar, and will casually walk past Louie and even stop right in front of him, as if they do not even notice him. They can still be attacked, though.
Technical information
Creature
| Pikmin 2 technical information (?) | |||
|---|---|---|---|
| Internal name | blackman
| ||
| Global properties (List) | |||
| ID | Japanese comment | Property | Value |
| s000 | friction(not used) | Friction | 0.5 |
| s001 | wallReflection | Unknown (wall bounce speed multiplier?) | 0.5 |
| s002 | faceDirAdjust | Unknown | 0.25 |
| s003 | accel | Acceleration | 0.1 |
| s004 | bounceFactor | Unknown (bounce when it hits the ground?) | 0.3 |
| fp00 | ライフ | HP | 1500 |
| fp01 | マップとの当り | Unknown (related to slopes) | 50 |
| fp02 | ダメージスケールXZ | Horizontal damage scale | 0.2 |
| fp03 | ダメージスケールY | Vertical damage scale | 0.25 |
| fp04 | ダメージフレーム | Damage scale duration | 0.35 |
| fp05 | 質量 | Unknown (weight?) | 0.01 |
| fp06 | 速度 | Move speed | 80 |
| fp08 | 回転速度率 | Rotation acceleration | 0.04 |
| fp09 | テリトリー | Territory radius | 300 |
| fp10 | ホーム範囲 | "Home" radius | 10 |
| fp11 | プライベート距離 | "Private" radius | 50 |
| fp12 | 視界距離 | Sight radius | 700 |
| fp13 | 視界角度 | FOV | 180 |
| fp14 | 探索距離 | Unknown (exploration radius?) | 250 |
| fp15 | 探索角度 | Unknown (exploration angle?) | 0 |
| fp16 | 振り払い率 | Successful shake rate | 1 |
| fp17 | 振り払い力 | Shake knockback | 250 |
| fp18 | 振り払いダメージ | Shake damage | 0 |
| fp19 | 振り払い範囲 | Shake range | 50 |
| fp20 | 攻撃可能範囲 | Unknown (shock attack max range?) | 30 |
| fp21 | 攻撃可能角度 | Unknown (shock attack max angle?) | 15 |
| fp22 | 攻撃ヒット範囲 | Unknown (attack hit range?) | 30 |
| fp23 | 攻撃ヒット角度 | Unknown (attack hit angle?) | 15 |
| fp24 | 攻撃力 | Attack damage | 10 |
| fp25 | 視界高 | Unknown (height visibility?) | 50 |
| fp26 | 探索高 | Unknown (exploration height?) | 0 |
| fp27 | ライフの高さ | HP wheel height | 100 |
| fp28 | 回転最大速度 | Rotation speed | 3 |
| fp29 | 警戒時間 | Unknown (warning time?) | 0 |
| fp30 | 警戒ライフ | Unknown | 0 |
| fp31 | ライフ回復率 | Regeneration rate | 0 |
| fp32 | LOD半径 | Off-camera radius | 70 |
| fp33 | マップとのあたりポリゴンの選定 | Collision processing radius | 50 |
| fp34 | ピクミンとのあたり | Pikmin damage radius | 30 |
| fp35 | 石化時間 | Petrification duration | 1 |
| fp36 | ヒップドロップダメージ | Purple Pikmin drop damage | 10 |
| fp37 | 地震気絶確立 | Purple Pikmin stun chance | 0 (0%) |
| fp38 | 地震気絶時間 | Purple Pikmin stun time | 60 |
| ip01 | 振り払い打撃A | Shake mode 1 – hit count | 10 |
| ip02 | 振り払い張付1 | Shake mode 1 – Pikmin requirement | 5 |
| ip03 | 振り払い打撃B | Shake mode 2 – hit count | 13 |
| ip04 | 振り払い張付2 | Shake mode 2 – Pikmin requirement | 6 |
| ip05 | 振り払い打撃C | Shake mode 3 – hit count | 16 |
| ip06 | 振り払い張付3 | Shake mode 3 – Pikmin requirement | 9 |
| ip07 | 振り払い打撃D | Shake mode 4 – hit count | 20 |
| Specific properties | |||
| ID | Japanese comment | Property | Value |
| fp01 | ポッド移動速度 | Unknown (roller speed?) | 20 |
| fp02 | 逃げ速度 | Unknown (running speed?) | 250 |
| fp03 | 逃げ回転速度率 | Unknown (rotation speed rate while walking?) | 0.2 |
| fp04 | 逃げ回転最大速度 | Unknown (max rotation speed while walking?) | 30 |
| fp05 | 2段階速度 | Unknown (second stage speed?) | 120 |
| fp06 | 2段階回転速度率 | Unknown (second stage rotation speed?) | 0.04 |
| fp07 | 2段階回転最大速度 | Unknown (second stage max rotation speed?) | 3 |
| fp11 | 歩き速度 | Unknown (walking speed?) | 50 |
| ip01 | 2段階へのタイマー | Unknown (time until second stage?) | 0 |
| ip03 | ドシン停止タイマー | Unknown | 200 |
| ip04 | 逃げ停止タイマー | Unknown (walk time?) | 200 |
| ip05 | 連続逃げタイマー | Unknown (running time?) | 200 |
| ip06 | つかれ停止タイマー | Unknown (rest time?) | 200 |
Rollers
| Pikmin 2 technical information (?) | |||
|---|---|---|---|
| Internal name | tyre
| ||
| Global properties (List) | |||
| ID | Japanese comment | Property | Value |
| s000 | friction(not used) | Friction | 0.5 |
| s001 | wallReflection | Unknown (wall bounce speed multiplier?) | 0.5 |
| s002 | faceDirAdjust | Unknown | 0.25 |
| s003 | accel | Acceleration | 0.1 |
| s004 | bounceFactor | Unknown (bounce when it hits the ground?) | 0.3 |
| fp00 | ライフ | HP | 1800 |
| fp01 | マップとの当り | Unknown (related to slopes) | 50 |
| fp02 | ダメージスケールXZ | Horizontal damage scale | 0.2 |
| fp03 | ダメージスケールY | Vertical damage scale | 0.25 |
| fp04 | ダメージフレーム | Damage scale duration | 0.35 |
| fp05 | 質量 | Unknown (weight?) | 0.01 |
| fp06 | 速度 | Move speed | 30 |
| fp08 | 回転速度率 | Rotation acceleration | 0.1 |
| fp09 | テリトリー | Territory radius | 300 |
| fp10 | ホーム範囲 | "Home" radius | 30 |
| fp11 | プライベート距離 | "Private" radius | 50 |
| fp12 | 視界距離 | Sight radius | 700 |
| fp13 | 視界角度 | FOV | 180 |
| fp14 | 探索距離 | Unknown (exploration radius?) | 0 |
| fp15 | 探索角度 | Unknown (exploration angle?) | 0 |
| fp16 | 振り払い率 | Successful shake rate | 1 |
| fp17 | 振り払い力 | Shake knockback | 150 |
| fp18 | 振り払いダメージ | Shake damage | 0 |
| fp19 | 振り払い範囲 | Shake range | 50 |
| fp20 | 攻撃可能範囲 | Unknown (shock attack max range?) | 30 |
| fp21 | 攻撃可能角度 | Unknown (shock attack max angle?) | 15 |
| fp22 | 攻撃ヒット範囲 | Unknown (attack hit range?) | 30 |
| fp23 | 攻撃ヒット角度 | Unknown (attack hit angle?) | 15 |
| fp24 | 攻撃力 | Attack damage | 10 |
| fp25 | 視界高 | Unknown (height visibility?) | 50 |
| fp26 | 探索高 | Unknown (exploration height?) | 0 |
| fp27 | ライフの高さ | HP wheel height | 100 |
| fp28 | 回転最大速度 | Rotation speed | 10 |
| fp29 | 警戒時間 | Unknown (warning time?) | 0 |
| fp30 | 警戒ライフ | Unknown | 0 |
| fp31 | ライフ回復率 | Regeneration rate | 0 |
| fp32 | LOD半径 | Off-camera radius | 120 |
| fp33 | マップとのあたりポリゴンの選定 | Collision processing radius | 50 |
| fp34 | ピクミンとのあたり | Pikmin damage radius | 10 |
| fp35 | 石化時間 | Petrification duration | 1 |
| fp36 | ヒップドロップダメージ | Purple Pikmin drop damage | 10 |
| fp37 | 地震気絶確立 | Purple Pikmin stun chance | 0.05 (5%) |
| fp38 | 地震気絶時間 | Purple Pikmin stun time | 60 |
| ip01 | 振り払い打撃A | Shake mode 1 – hit count | 1 |
| ip02 | 振り払い張付1 | Shake mode 1 – Pikmin requirement | 1 |
| ip03 | 振り払い打撃B | Shake mode 2 – hit count | 2 |
| ip04 | 振り払い張付2 | Shake mode 2 – Pikmin requirement | 2 |
| ip05 | 振り払い打撃C | Shake mode 3 – hit count | 5 |
| ip06 | 振り払い張付3 | Shake mode 3 – Pikmin requirement | 3 |
| ip07 | 振り払い打撃D | Shake mode 4 – hit count | 10 |
| Specific properties | |||
| ID | Japanese comment | Property | Value |
| fp01 | 回転スピード | Rotation speed | 25 |
Gallery
|
To do: Get a sceneshot of the Waterwraith without rollers. |
Trivia
- The Waterwraith is similar to the Goolix, in that both enemies are watery in appearance and can only be defeated by a certain type of Pikmin.
- Its scientific name, Amphibio sapiens, means "Water Man".
- The French name in this boss's entry, "Spectreau", translates into "Water Specter".
- In the Piklopedia, it is possible that the Waterwraith will roll out-of-bounds.
- The Waterwraith is one of two enemies outside of the Wistful Wild to not appear in the Hole of Heroes, the other being the Giant Breadbug. They both reside in caves within the same area, the Perplexing Pool.
- The Waterwraith seems to be related to a boss of Pikmin 3, the Plasm Wraith. Interestingly, the first form of the Plasm Wraith shares its japanese name with the Waterwraith, as they are both called "Amebouzu". If they are, in fact, related, this would make them the first related "unknown family" creatures.
- Also, just like the Plasm Wraith, which has a unique, golden life meter, the Waterwraith also has a unique life meter; it has 2 separate life meters. one being its own health and the other being for the health of its rollers. Intrestingly, both these creatures have the "Wraith" suffix in their names.
- From sublevel 1 to 4, it might be best to do the Frontier Cavern first, because there you can get the Repugnant Appendage. That will make you walk faster, and you can go hide easily. Having Bulbmin in your team might be a bit better, because those will not be able to leave the cave, and can be crushed without any decrease of Pikmin. Also, going to the Subterranean Complex to get the Stellar Orb is helpful, because the Stellar Orb lights up the area. It is very helpful to be able to see farther, since the Waterwraith can easily sneak up on you.
- The Waterwraith's Japanese name is "Amebouzu", which can be a portmanteau of "amoeba" (written in katakana like "ameba"), an unicellular organism usually found in water, and "umibōzu", which is, in Japanese folklore, a watery creature, with a bald head similar to a Monk.
- In the game's files, the Waterwraith's model contains a dummy texture, that reads "fb dum". This is the texture applied to the model before the shaders are applied:

Names in other languages
| Language | Name | Meaning |
|---|---|---|
| Spectreau | Portmanteau of "spectre" (specter) and "eau" (water). |


