Dandori Challenge: Difference between revisions
(Added a table of stages, moved here from the Cave article.) Tag: Disambiguation links |
(Moving Dandori Kentei trivia to Oasis of Order) |
||
| (10 intermediate revisions by 6 users not shown) | |||
| Line 1: | Line 1: | ||
{{game icons|p4=y}} | {{game icons|p4=y}} | ||
[[File:Dandori Challenge P4 icon.png|thumb|The map icon for Dandori Challenges.]] | [[File:Dandori Challenge P4 icon.png|thumb|The map icon for Dandori Challenges.]] | ||
'''Dandori Challenges''' are special [[cave]]s in ''[[Pikmin 4]]''. While accessed from the [[area]]s in [[Story Mode]], they function more like an alternative game mode, similar to the [[Challenge Mode (Pikmin 2)|Challenge Mode]] from {{p2}} and [[Mission Mode]] from {{p3}}. These challenges are directed by [[leafling]]s, and completing a Dandori Challenge allows the player to rescue that very same leafling [[castaway]]. Pikmin from outside the challenge cannot be taken inside, and the player will instead receive some Pikmin from the leafling directing the challenge. Once completed, a challenge cave is closed so that the leafling does not enter again, but the challenge can be replayed from the [[Rescue Command Post]] once [[Jin]] is saved. | '''Dandori Challenges''' ({{j|ダンドリチャレンジ|Dandori Charenji|Dandori Challenge}}) are special [[cave]]s in ''[[Pikmin 4]]''. While accessed from the [[area]]s in [[Story Mode]], they function more like an alternative game mode, similar to the [[Challenge Mode (Pikmin 2)|Challenge Mode]] from {{p2}} and [[Mission Mode]] from {{p3}}. These challenges are directed by [[leafling]]s, and completing a Dandori Challenge allows the player to rescue that very same leafling [[castaway]]. Pikmin from outside the challenge cannot be taken inside, and the player will instead receive some Pikmin from the leafling directing the challenge. Once completed, a challenge cave is closed so that the leafling does not enter again, but the challenge can be replayed from the [[Rescue Command Post]] once [[Jin]] is saved. | ||
Unlike [[Dandori Battle]]s, completing Dandori Challenges is not required to progress the game's main story. | Unlike [[Dandori Battle]]s, completing Dandori Challenges is not required to progress the game's main story. | ||
| Line 11: | Line 11: | ||
== List of stages == | == List of stages == | ||
{| class="wikitable" style="text-align: center;" | {| class="wikitable" style="text-align: center;" | ||
!Image | !Image | ||
| Line 20: | Line 19: | ||
!Time limit | !Time limit | ||
|- | |- | ||
|[[File:Dandori Day Care | |[[File:P4 Save File Dandori Day Care.png|100px]] | ||
|[[Dandori Day Care]] | |[[Dandori Day Care]] | ||
| | |{{icon|Red Pikmin|v=P4 HUD}} 40 | ||
|90 [[File:Dandori bronze P4 icon.png|35px]] | |90 [[File:Dandori bronze P4 icon.png|35px]] | ||
|100 [[File:Dandori silver P4 icon.png|35px]] | |100 [[File:Dandori silver P4 icon.png|35px]] | ||
| Line 30: | Line 29: | ||
|5:00 | |5:00 | ||
|- | |- | ||
|[[File:Hotshock Canyon | |[[File:P4 Save File Hotshock Canyon.png|100px]] | ||
|[[Hotshock Canyon]] | |[[Hotshock Canyon]] | ||
| | |{{icon|Red Pikmin|v=P4 HUD}} 20<br>{{icon|Yellow Pikmin|v=P4 HUD}} 20 | ||
|100 [[File:Dandori bronze P4 icon.png|35px]] | |100 [[File:Dandori bronze P4 icon.png|35px]] | ||
|130 [[File:Dandori silver P4 icon.png|35px]] | |130 [[File:Dandori silver P4 icon.png|35px]] | ||
| Line 40: | Line 39: | ||
|7:00 | |7:00 | ||
|- | |- | ||
|[[File:Rockaway Cellars | |[[File:P4 Save File Rockaway Cellars.png|100px]] | ||
|[[Rockaway Cellars]] | |[[Rockaway Cellars]] | ||
| | |{{icon|Red Pikmin|v=P4 HUD}} 25<br>{{icon|Rock Pikmin|v=P4 HUD}} 25 | ||
|160 [[File:Dandori bronze P4 icon.png|35px]] | |160 [[File:Dandori bronze P4 icon.png|35px]] | ||
|190 [[File:Dandori silver P4 icon.png|35px]] | |190 [[File:Dandori silver P4 icon.png|35px]] | ||
| Line 50: | Line 49: | ||
|7:00 | |7:00 | ||
|- | |- | ||
|[[File:Test Tubs | |[[File:P4 Save File Test Tubs.png|100px]] | ||
|[[Test Tubs]] | |[[Test Tubs]] | ||
| | |{{icon|Blue Pikmin|v=P4 HUD}} 35<br>{{icon|Rock Pikmin|v=P4 HUD}} 25 | ||
|110 [[File:Dandori bronze P4 icon.png|35px]] | |110 [[File:Dandori bronze P4 icon.png|35px]] | ||
|130 [[File:Dandori silver P4 icon.png|35px]] | |130 [[File:Dandori silver P4 icon.png|35px]] | ||
| Line 60: | Line 59: | ||
|6:00 | |6:00 | ||
|- | |- | ||
|[[File:P4 Ice-Cross Course. | |[[File:P4 Save File Ice-Cross Course.png|100px]] | ||
|[[Ice-Cross Course]] | |[[Ice-Cross Course]] | ||
| | | {{icon|Blue Pikmin|v=P4 HUD}} 45<br>{{icon|Ice Pikmin|v=P4 HUD}} 5<br>{{icon|Candypop Bud|v=P4 ice}} 3 | ||
|100 [[File:Dandori bronze P4 icon.png|35px]] | |100 [[File:Dandori bronze P4 icon.png|35px]] | ||
|120 [[File:Dandori silver P4 icon.png|35px]] | |120 [[File:Dandori silver P4 icon.png|35px]] | ||
| Line 70: | Line 69: | ||
|6:00 | |6:00 | ||
|- | |- | ||
|[[File:P4 Hefty Haulway. | |[[File:P4 Save File Hefty Haulway.png|100px]] | ||
|[[Hefty Haulway]] | |[[Hefty Haulway]] | ||
| | |{{icon|Yellow Pikmin|v=P4 HUD}} 10<br>{{icon|Ice Pikmin|v=P4 HUD}} 5<br>{{icon|Candypop Bud|v=P4 purple}} 2 | ||
|200 [[File:Dandori bronze P4 icon.png|35px]] | |200 [[File:Dandori bronze P4 icon.png|35px]] | ||
|250 [[File:Dandori silver P4 icon.png|35px]] | |250 [[File:Dandori silver P4 icon.png|35px]] | ||
| Line 80: | Line 79: | ||
|7:00 | |7:00 | ||
|- | |- | ||
|[[File:P4 Strategic Freezeway. | |[[File:P4 Save File Aerial Incinerator.png|100px]] | ||
|[[Aerial Incinerator]] | |||
|{{icon|Red Pikmin|v=P4 HUD}} 60<br>{{icon|Candypop Bud|v=P4 winged}} 6 | |||
|220 [[File:Dandori bronze P4 icon.png|35px]] | |||
|250 [[File:Dandori silver P4 icon.png|35px]] | |||
|280 [[File:Dandori gold P4 icon.png|35px]] | |||
|310 [[File:Dandori platinum P4 icon.png|35px]] | |||
|4 | |||
|7:00 | |||
|- | |||
|[[File:P4 Save File Strategic Freezeway.png|100px]] | |||
|[[Strategic Freezeway]] | |[[Strategic Freezeway]] | ||
| | |{{icon|Red Pikmin|v=P4 HUD}} 10<br>{{icon|Ice Pikmin|v=P4 HUD}} 5 | ||
|130 [[File:Dandori bronze P4 icon.png|35px]] | |130 [[File:Dandori bronze P4 icon.png|35px]] | ||
|140 [[File:Dandori silver P4 icon.png|35px]] | |140 [[File:Dandori silver P4 icon.png|35px]] | ||
| Line 90: | Line 99: | ||
|7:00 | |7:00 | ||
|- | |- | ||
|[[File:P4 | |[[File:P4 Save File Planning Pools.png|100px]] | ||
|[[Planning Pools]] | |[[Planning Pools]] | ||
| | |{{icon|Blue Pikmin|v=P4 HUD}} 30<br>{{icon|Yellow Pikmin|v=P4 HUD}} 20 | ||
|160 [[File:Dandori bronze P4 icon.png|35px]] | |160 [[File:Dandori bronze P4 icon.png|35px]] | ||
|190 [[File:Dandori silver P4 icon.png|35px]] | |190 [[File:Dandori silver P4 icon.png|35px]] | ||
| Line 110: | Line 109: | ||
|7:00 | |7:00 | ||
|- | |- | ||
|[[File:P4 Toggle Training. | |[[File:P4 Save File Toggle Training.png|100px]] | ||
|[[Toggle Training]] | |[[Toggle Training]] | ||
| | |{{icon|Rock Pikmin|v=P4 HUD}} 20<br>{{icon|White Pikmin|v=P4 HUD}} 20<br>{{icon|Candypop Bud|v=P4 white}} 2 | ||
|170 [[File:Dandori bronze P4 icon.png|35px]] | |170 [[File:Dandori bronze P4 icon.png|35px]] | ||
|190 [[File:Dandori silver P4 icon.png|35px]] | |190 [[File:Dandori silver P4 icon.png|35px]] | ||
| Line 120: | Line 119: | ||
|7:00 | |7:00 | ||
|- | |- | ||
|[[File:P4 Cliff-Hanger's Hold. | |[[File:P4 Save File Cliff-Hanger's Hold.png|100px]] | ||
|[[Cliff-Hanger's Hold]] | |[[Cliff-Hanger's Hold]] | ||
| | |{{icon|Yellow Pikmin|v=P4 HUD}} 5<br>{{icon|Rock Pikmin|v=P4 HUD}} 10 | ||
|180 [[File:Dandori bronze P4 icon.png|35px]] | |180 [[File:Dandori bronze P4 icon.png|35px]] | ||
|210 [[File:Dandori silver P4 icon.png|35px]] | |210 [[File:Dandori silver P4 icon.png|35px]] | ||
| Line 130: | Line 129: | ||
|7:00 | |7:00 | ||
|- | |- | ||
|[[File:P4 Oasis of Order. | |[[File:P4 Save File Oasis of Order.png|100px]] | ||
|[[Oasis of Order]] | |[[Oasis of Order]] | ||
| | |{{icon|Winged Pikmin|v=P4 HUD}} 10<br>{{icon|White Pikmin|v=P4 HUD}} 20<br>{{icon|Candypop Bud|v=P4 purple}} 1 | ||
|160 [[File:Dandori bronze P4 icon.png|35px]] | |160 [[File:Dandori bronze P4 icon.png|35px]] | ||
|190 [[File:Dandori silver P4 icon.png|35px]] | |190 [[File:Dandori silver P4 icon.png|35px]] | ||
| Line 168: | Line 167: | ||
== Get help == | == Get help == | ||
If the player fails to earn a bronze medal on a challenge, [[Dingo]] will offer to complete the challenge for them if he has already been | If the player fails to earn a bronze medal on a challenge, [[Dingo]] will offer to complete the challenge for them if he has already been talked to beforehand. If the player selects "Get Help" from the following menu, he will proceed to do so (shown with a blank screen, text boxes, and random sound effects), and the victory cutscene will play like normal as if the player had completed it themselves. | ||
== Overtime == | == Overtime == | ||
| Line 179: | Line 178: | ||
** [[Soulful Musician Series|Musical instruments]]. | ** [[Soulful Musician Series|Musical instruments]]. | ||
** Aquatic items, such as [[Bedtime Series|sponges]] and [[Rubber Cutie Series|rubber ducks]]. | ** Aquatic items, such as [[Bedtime Series|sponges]] and [[Rubber Cutie Series|rubber ducks]]. | ||
== Gallery == | |||
<gallery> | |||
CrowdedKitchenStress.jpg|The menu showing the treasures and time left in [[Trial of the Sage Leaf]]. | |||
</gallery> | |||
== Names in other languages == | == Names in other languages == | ||
{{needs translation|Chinese|Dutch|French|Korean}} | |||
{{foreignname | {{foreignname | ||
|Jap=ダンドリチャレンジ | |Jap = ダンドリチャレンジ | ||
|JapR=Dandori Charenji | |JapR = Dandori Charenji | ||
|JapM=Dandori Challenge | |JapM = Dandori Challenge | ||
|ChiTrad= | |ChiTrad = 當多慮挑戰 | ||
|ChiTradR= | |ChiTradR = | ||
|ChiTradM= | |ChiTradM = | ||
|ChiSimp= | |ChiSimp = 当多虑挑战 | ||
|ChiSimpR= | |ChiSimpR = | ||
|ChiSimpM= | |ChiSimpM = | ||
|Dut= | |Dut = Dandori-test | ||
|DutM= | |DutM = | ||
|FraA=Défi Dandori | |FraA = Défi Dandori | ||
|FraAM=Dandori challenge | |FraAM = Dandori challenge | ||
|Ger=Dandori-Herausforderung | |FrAN = | ||
|GerM=Dandori challenge | |FraE = Défis Dandori | ||
|Ita=Sfida Dandori | |FraEM = Dandori challenges | ||
|ItaM=Dandori Challenge | |FraEN = | ||
|Kor= | |Ger = Dandori-Herausforderung | ||
|KorR= | |GerM = Dandori challenge | ||
|KorM= | |GerN = | ||
| | |Ita = Sfida Dandori | ||
| | |ItaM = Dandori Challenge | ||
| | |ItaN = | ||
| | |Kor = 계획력 챌린지 | ||
|KorR = | |||
|KorM = | |||
|Por = Desafio Dandori | |||
|PorM = Dandori challenge | |||
|Spa = Desafío Dandori | |||
|SpaM = Dandori challenge | |||
|SpaN = | |||
|notes = y | |||
}} | }} | ||
| Line 213: | Line 226: | ||
* [[Mission Mode]] | * [[Mission Mode]] | ||
{{game modes}} | |||
[[Category:Game modes]] | [[Category:Game modes]] | ||
Latest revision as of 13:15, November 23, 2024
Dandori Challenges (ダンドリチャレンジ?, lit.: "Dandori Challenge") are special caves in Pikmin 4. While accessed from the areas in Story Mode, they function more like an alternative game mode, similar to the Challenge Mode from Pikmin 2 and Mission Mode from Pikmin 3. These challenges are directed by leaflings, and completing a Dandori Challenge allows the player to rescue that very same leafling castaway. Pikmin from outside the challenge cannot be taken inside, and the player will instead receive some Pikmin from the leafling directing the challenge. Once completed, a challenge cave is closed so that the leafling does not enter again, but the challenge can be replayed from the Rescue Command Post once Jin is saved.
Unlike Dandori Battles, completing Dandori Challenges is not required to progress the game's main story.
Gameplay[edit]
Dandori Challenges are treasure-collecting missions, where the player is given a time limit to find and collect all objects around a special sublevel. These objects include treasures and enemies, which must all be carried back to the S.S. Beagle in order to gain points noted with a symbol resembling the letter D: ![]() . Points are measured using the weight of everything collected, so that, for example, a Bulborb is worth 10 points while a pile of gold nuggets is worth as many points as its number of fragments. If everything is collected in time, each remaining second adds one bonus point. The player can earn medals based on their performance. Only a bronze is required to complete the challenge and bring back the leafling, which usually involves collecting only a handful of the treasures and enemies, but silver, gold, and platinum medals can also be earned, the latter being obtained by collecting everything. Because the goal is to collect treasures and enemy carcasses, the stage ends when there is nothing left to collect. If an enemy was killed while frozen by Ice Pikmin, no corpse will be left, meaning the player loses out on some points. The point requirement for a platinum medal matches that of delivering everything to the S.S. Beagle, so while this can make the player miss a platinum medal at first, it is still possible to make up the difference with the time bonus when the stage ends. Each stage is ranked with a "Dandori Level" of 1 to 5, indicating the level of difficulty.
. Points are measured using the weight of everything collected, so that, for example, a Bulborb is worth 10 points while a pile of gold nuggets is worth as many points as its number of fragments. If everything is collected in time, each remaining second adds one bonus point. The player can earn medals based on their performance. Only a bronze is required to complete the challenge and bring back the leafling, which usually involves collecting only a handful of the treasures and enemies, but silver, gold, and platinum medals can also be earned, the latter being obtained by collecting everything. Because the goal is to collect treasures and enemy carcasses, the stage ends when there is nothing left to collect. If an enemy was killed while frozen by Ice Pikmin, no corpse will be left, meaning the player loses out on some points. The point requirement for a platinum medal matches that of delivering everything to the S.S. Beagle, so while this can make the player miss a platinum medal at first, it is still possible to make up the difference with the time bonus when the stage ends. Each stage is ranked with a "Dandori Level" of 1 to 5, indicating the level of difficulty.
As described by the challenge-giver, the treasures are fake, and anything collected is not kept after the challenge. The same applies to piles of raw material, which can only be used to build structures within the challenge. Likewise, the Pikmin given to the player inside the challenge belong to that person and cannot be taken out. Throughout the challenge, the leafling in charge will stand in one spot in the sublevel and watch the player as they work. While they are reachable, they cannot be interacted with. If the challenge is passed, the leafling will be overwhelmed by the player's dandori skill, get dizzy from all the work, and faint shortly after awarding the player 30 pieces of raw material, allowing it to be rescued. If the player fails the challenge, the leafling will give them 10 pieces of material as a reward for participating the first 5 times, and 1 piece of material thereafter.
List of stages[edit]
| Image | Name | Available Pikmin | Requirements | Dandori level | Time limit | |||
|---|---|---|---|---|---|---|---|---|

|
Dandori Day Care | 90 |
100 |
120 |
140 |
1 | 5:00 | |

|
Hotshock Canyon | 100 |
130 |
140 |
160 |
2 | 7:00 | |

|
Rockaway Cellars | 160 |
190 |
220 |
240 |
2 | 7:00 | |

|
Test Tubs | 110 |
130 |
150 |
170 |
3 | 6:00 | |

|
Ice-Cross Course | 100 |
120 |
150 |
170 |
3 | 6:00 | |

|
Hefty Haulway | 200 |
250 |
300 |
350 |
3 | 7:00 | |

|
Aerial Incinerator | 220 |
250 |
280 |
310 |
4 | 7:00 | |

|
Strategic Freezeway | 130 |
140 |
160 |
170 |
4 | 7:00 | |

|
Planning Pools | 160 |
190 |
210 |
230 |
4 | 7:00 | |

|
Toggle Training | 170 |
190 |
220 |
240 |
4 | 7:00 | |

|
Cliff-Hanger's Hold | 180 |
210 |
240 |
260 |
5 | 7:00 | |

|
Oasis of Order | 160 |
190 |
220 |
250 |
5 | 6:00 | |
Additionally, there is a special Dandori Challenge cave called the Trial of the Sage Leaf, which functions differently and is listed separately in-game.
Locations[edit]
While Dandori Challenge caves are found in specific locations in areas, each of the 12 challenges is not assigned to a specific location – instead, the stages are encountered in a specific order, so that the first challenge the player enters will always be Dandori Day Care, the second will be Hotshock Canyon, etc. The stage assigned to a specific challenge cave is set when the cave is entered, so the player can walk up to and open multiple challenge caves and they will all be the same stage as long as one is not entered. Once a challenge cave is entered, that challenge will be set, even if the player exits the cave without completing the challenge. The Trial of the Sage Leaf does not follow these rules and is always found in a specific location in the Rescue Command Post.
Below is a list of every Dandori Challenge cave entrance available and how to access them, listed in the order of their slot on the details screen of the area selection menu. Each slot will fill in accordingly with the name of the Dandori Challenge played via the respective cave entrance.
- Sun-Speckled Terrace
- Near the 3rd base, Meandering Slope, a cave is surrounded by a pool of water. 20 Ice Pikmin are needed to freeze the water surrounding it, and Oatchi must jump onto the high ledge.
- Blossoming Arcadia
- After building the climbing wall near the 3rd base, Misshapen Pond, the cave can be found in the raised area.
- A bridge near the 2nd base, Sunwashed Plateau, must be built to reach an area with a reinforced wall that must be destroyed with 3 bomb rocks, and the cave is located on the other side.
- Serene Shores
- After clearing Engulfed Castle, the player will emerge from a different entrance located in an elevated area of the level only accessible in this manner until a nearby paper bag is pushed. The entrance to the Dandori Challenge is in a nearby alcove.
- Underwater in the large pool near the 2nd base, Water's Edge. A submerged dirt wall blocks the entrance to this area, though Oatchi can swim over it at high tide.
- Hero's Hideaway
- At the top of a stepladder which requires manipulating the nearby fans around the kitchen island to reach. Oatchi and the leader must split up to press the buttons accordingly, though no Pikmin are required.
- Giant's Hearth
- At the top of the fire pit, on the side that's only accessible by using a fire starter to reach the protruding bricks that allow Oatchi to jump all the way to the top.
- Past a sprinkler on the plateau near the 1st base, Line of Logs.
- Near the entrance to the Dream Home; can be accessed either by pulling down a clipboard to bridge the gap above or by turning off a sprinkler below and using a fire starter to reach the alcove.
- Primordial Thicket
- On a plateau in the center of the area, a long bridge must first be built near the 3rd base, The Maple Bridge.
- Near the 2nd base, Autumnal Gully, across a pool of mud that is shallow and easily crossed.
- By the mud pool with the Beckoning Mannequin. White Pikmin must be tossed up a ledge to destroy 3 poison geysers and move a cardboard box that becomes a bridge from a nearby ledge to access the cave.
Get help[edit]
If the player fails to earn a bronze medal on a challenge, Dingo will offer to complete the challenge for them if he has already been talked to beforehand. If the player selects "Get Help" from the following menu, he will proceed to do so (shown with a blank screen, text boxes, and random sound effects), and the victory cutscene will play like normal as if the player had completed it themselves.
Overtime[edit]
When replaying a stage through the Rescue Command Post, the player can choose to work overtime to complete the challenge past the time limit if they failed to earn a platinum medal by collecting everything. The cost of doing so is that these results do not get reflected in the game's records. This is similar to the after hours feature in Pikmin 3 Deluxe.
Trivia[edit]
- Treasure in each Dandori Challenge are thematically consistent. Themes include:
- Snacks, such as baked pastries and sweets.
- Fruit and vegetables.
- Musical instruments.
- Aquatic items, such as sponges and rubber ducks.
Gallery[edit]
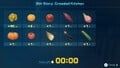
The menu showing the treasures and time left in Trial of the Sage Leaf.

Names in other languages[edit]
|
The following article or section needs help from someone who can translate Chinese/Dutch/French/Korean text. |
| Language | Name | Meaning | Notes |
|---|---|---|---|
| ダンドリチャレンジ? Dandori Charenji |
Dandori Challenge | ||
(traditional) |
當多慮挑戰 | ||
(simplified) |
当多虑挑战 | ||
| Dandori-test | |||
| Défi Dandori | Dandori challenge | ||
| Défis Dandori | Dandori challenges | ||
| Dandori-Herausforderung | Dandori challenge | ||
| Sfida Dandori | Dandori Challenge | ||
| 계획력 챌린지 | |||
| Desafio Dandori | Dandori challenge | ||
| Desafío Dandori | Dandori challenge |