User:KawaiiKiwii/Testing: Difference between revisions
Jump to navigation
Jump to search
KawaiiKiwii (talk | contribs) No edit summary Tag: Reverted |
KawaiiKiwii (talk | contribs) No edit summary Tag: Reverted |
||
| Line 4: | Line 4: | ||
===Layout A=== | ===Layout A=== | ||
[[File:Stagnant sea.png|thumb|400px|Layout A.]] | [[File:Stagnant sea.png|thumb|400px|Layout A.]] | ||
This layout gives the player Red Pikmin to start with, and Blue Pikmin can be found. | This layout gives the player Red Pikmin to start with, and Blue Pikmin can be found. | ||
'''Enemies''': | |||
{{columns|2| | {{columns|2| | ||
*{{icon|Bulborb|y|v=P3}} × 2 | |||
*{{icon|Dwarf Bulborb|y|v=P3}} × 4 | *{{icon|Dwarf Bulborb|y|v=P3}} × 4 | ||
*{{icon|Orange Bulborb|y|v=P3}} × 1 | *{{icon|Orange Bulborb|y|v=P3}} × 1 | ||
*{{icon|Skitter Leaf|y|v=P3}} × 3 | *{{icon|Skitter Leaf|y|v=P3}} × 3 | ||
*{{icon|Swooping Snitchbug|y|v=P3}} × 1 | *{{icon|Swooping Snitchbug|y|v=P3}} × 1 | ||
| Line 16: | Line 18: | ||
*{{icon|Yellow Wollywog|y|v=P3}} × 2 | *{{icon|Yellow Wollywog|y|v=P3}} × 2 | ||
}} | }} | ||
'''Fruits''': | |||
{{columns|2| | {{columns|2| | ||
*{{icon|Citrus Lump|y|v=FF}} × 1 | *{{icon|Citrus Lump|y|v=FF}} × 1 | ||
| Line 27: | Line 27: | ||
*{{icon|Insect Condo|y|v=FF}} × 1 | *{{icon|Insect Condo|y|v=FF}} × 1 | ||
}} | }} | ||
'''Marbles''': | |||
*{{icon|Crystallized Clairvoyance}} [[Crystallized Clairvoyance|Blue Marble]] × 1 | |||
*{{icon|Crystallized Telepathy}} [[Crystallized Telepathy|Red Marble]] × 1 | *{{icon|Crystallized Telepathy}} [[Crystallized Telepathy|Red Marble]] × 1 | ||
*{{icon|Crystallized Telekinesis}} [[Crystallized Telekinesis|Yellow Marble]] × 2 | *{{icon|Crystallized Telekinesis}} [[Crystallized Telekinesis|Yellow Marble]] × 2 | ||
'''Obstacles''': | |||
*{{icon|Dirt wall|y}} × 2 | *{{icon|Dirt wall|y}} × 2 | ||
*{{icon|Bridge|v=P3}} [[Bridge|Red bridge]] × 2 | *{{icon|Bridge|v=P3}} [[Bridge|Red bridge]] × 2 | ||
*{{icon|Fragment}} [[Fragment|Red bridge fragment]] × 40 (4 groups of 10) | *{{icon|Fragment}} [[Fragment|Red bridge fragment]] × 40 (4 groups of 10) | ||
'''Plants and fungi''': | |||
*{{icon|Pellet Posy}} [[Pellet Posy|1-Pellet Posy]] × 16 | |||
*{{icon|Pellet Posy}} [[Pellet Posy|5-Pellet Posy]] × 2 | |||
'''Other objects''': | |||
*{{icon|Egg|y}} × 8 | *{{icon|Egg|y}} × 8 | ||
===Layout B=== | ===Layout B=== | ||
[[File:Map 05 stagnant sea b.jpg|thumb|400px|Layout B.]] | [[File:Map 05 stagnant sea b.jpg|thumb|400px|Layout B.]] | ||
This layout gives the player Blue Pikmin to start with, and Rock Pikmin can be found. | This layout gives the player Blue Pikmin to start with, and Rock Pikmin can be found. | ||
'''Enemies''': | |||
{{columns|2| | {{columns|2| | ||
*{{icon|Desiccated Skitter Leaf|y}} × 4 | *{{icon|Desiccated Skitter Leaf|y}} × 4 | ||
| Line 53: | Line 62: | ||
*{{icon|Yellow Wollywog|y|v=P3}} × 1 | *{{icon|Yellow Wollywog|y|v=P3}} × 1 | ||
}} | }} | ||
'''Fruits''': | |||
{{columns|2| | {{columns|2| | ||
*{{icon|Face Wrinkler|y}} × 1 | *{{icon|Face Wrinkler|y}} × 1 | ||
| Line 62: | Line 70: | ||
*{{icon|Zest Bomb|y}} × 1 | *{{icon|Zest Bomb|y}} × 1 | ||
}} | }} | ||
'''Marbles''': | |||
*{{icon|Crystallized Telepathy}} [[Crystallized Telepathy|Red Marble]] × 1 | *{{icon|Crystallized Telepathy}} [[Crystallized Telepathy|Red Marble]] × 1 | ||
*{{icon|Crystallized Clairvoyance}} [[Crystallized Clairvoyance|Blue Marble]] × 1 | *{{icon|Crystallized Clairvoyance}} [[Crystallized Clairvoyance|Blue Marble]] × 1 | ||
*{{icon|Crystallized Telekinesis}} [[Crystallized Telekinesis|Yellow Marble]] × 2 | *{{icon|Crystallized Telekinesis}} [[Crystallized Telekinesis|Yellow Marble]] × 2 | ||
'''Obstacles''': | |||
*{{icon|Dirt wall|y}} × 2 | |||
*{{icon|Crystal nodule|y}} × 6 | *{{icon|Crystal nodule|y}} × 6 | ||
*{{icon|Large crystal|y}} × 4 | *{{icon|Large crystal|y}} × 4 | ||
*{{icon|Bridge|v=P3}} [[Bridge|Red bridge]] × 2 | *{{icon|Bridge|v=P3}} [[Bridge|Red bridge]] × 2 | ||
*{{icon|Fragment}} [[Fragment|Red bridge fragment]] × 40 (4 groups of 10) | *{{icon|Fragment}} [[Fragment|Red bridge fragment]] × 40 (4 groups of 10) | ||
'''Plants and fungi''': | |||
*{{icon|Pellet Posy}} [[Pellet Posy|1-Pellet Posy]] × 22 | |||
===Layout C=== | ===Layout C=== | ||
[[File:Map 06 stagnant sea c.jpg|thumb|400px|Layout C.]] | [[File:Map 06 stagnant sea c.jpg|thumb|400px|Layout C.]] | ||
This layout gives the player Blue Pikmin to start with, but no other Pikmin can be found. | This layout gives the player Blue Pikmin to start with, but no other Pikmin can be found. | ||
'''Enemies''': | |||
{{columns|2| | {{columns|2| | ||
*{{icon|Bulborb|y|v=P3}} × 3 | |||
*{{icon|Dwarf Bulborb|y|v=P3}} × 4 | *{{icon|Dwarf Bulborb|y|v=P3}} × 4 | ||
*{{icon|Hermit Crawmad|y|v=P3}} × 2 | *{{icon|Hermit Crawmad|y|v=P3}} × 2 | ||
*{{icon|Medusal Slurker|y}} × 1 | *{{icon|Medusal Slurker|y}} × 1 | ||
*{{icon|Skeeterskate|y}} × 2 | *{{icon|Skeeterskate|y}} × 2 | ||
*{{icon|Wogpole|y|v=P3}} × 9 | *{{icon|Wogpole|y|v=P3}} × 9 | ||
*{{icon|Yellow Wollywog|y|v=P3}} × 2 | *{{icon|Yellow Wollywog|y|v=P3}} × 2 | ||
}} | }} | ||
'''Fruits''': | |||
{{columns|2| | {{columns|2| | ||
*{{icon|Citrus Lump|y|v=FF}} × 1 | *{{icon|Citrus Lump|y|v=FF}} × 1 | ||
| Line 97: | Line 111: | ||
*{{icon|Zest Bomb|y}} × 1 | *{{icon|Zest Bomb|y}} × 1 | ||
}} | }} | ||
'''Marbles''': | |||
*{{icon|Crystallized Telepathy}} [[Crystallized Telepathy|Red Marble]] × 1 | *{{icon|Crystallized Telepathy}} [[Crystallized Telepathy|Red Marble]] × 1 | ||
*{{icon|Crystallized Clairvoyance}} [[Crystallized Clairvoyance|Blue Marble]] × 1 | *{{icon|Crystallized Clairvoyance}} [[Crystallized Clairvoyance|Blue Marble]] × 1 | ||
*{{icon|Crystallized Telekinesis}} [[Crystallized Telekinesis|Yellow Marble]] × 2 | *{{icon|Crystallized Telekinesis}} [[Crystallized Telekinesis|Yellow Marble]] × 2 | ||
'''Obstacles''': | |||
*{{icon|Bridge|v=P3}} [[Bridge|Red bridge]] × 2 | *{{icon|Bridge|v=P3}} [[Bridge|Red bridge]] × 2 | ||
'''Plants and fungi''': | |||
*{{icon|Pellet Posy}} [[Pellet Posy|1-Pellet Posy]] × 16 | |||
'''Other objects''': | |||
*{{icon|Egg|y}} × 4 | *{{icon|Egg|y}} × 4 | ||
Revision as of 19:27, April 16, 2023
Layouts
The variation unlock order, as explained here, is C, B, A.
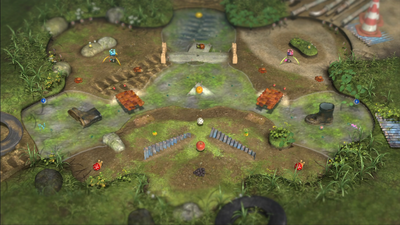
Layout A
This layout gives the player Red Pikmin to start with, and Blue Pikmin can be found.
Enemies:
 Bulborb × 2
 Dwarf Bulborb × 4
 Orange Bulborb × 1
 Skitter Leaf × 3
 Swooping Snitchbug × 1
 Whiptongue Bulborb × 1
 Wogpole × 16
 Yellow Wollywog × 2
Fruits:
 Citrus Lump × 1
 Dusk Pustules × 1
 Face Wrinkler × 1
 Golden Sunseed × 1
 Insect Condo × 1
Marbles:
 Blue Marble × 1
 Red Marble × 1
 Yellow Marble × 2
Obstacles:
 Dirt wall × 2
 Red bridge × 2
 Red bridge fragment × 40 (4 groups of 10)
Plants and fungi:
 1-Pellet Posy × 16
 5-Pellet Posy × 2
Other objects:
 Egg × 8
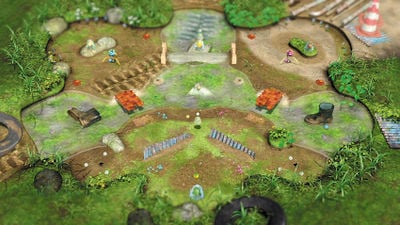
Layout B
This layout gives the player Blue Pikmin to start with, and Rock Pikmin can be found.
Enemies:
 Desiccated Skitter Leaf × 4
 Female Sheargrub × 10
 Hermit Crawmad × 2
 Medusal Slurker × 2
 Skeeterskate × 2
 Skutterchuck × 2
 Water Dumple × 4
 Wogpole × 4
 Yellow Wollywog × 1
Fruits:
 Face Wrinkler × 1
 Golden Sunseed × 1
 Sunseed Berry × 1
 Zest Bomb × 1
Marbles:
 Red Marble × 1
 Blue Marble × 1
 Yellow Marble × 2
Obstacles:
 Dirt wall × 2
 Crystal nodule × 6
 Large crystal × 4
 Red bridge × 2
 Red bridge fragment × 40 (4 groups of 10)
Plants and fungi:
 1-Pellet Posy × 22
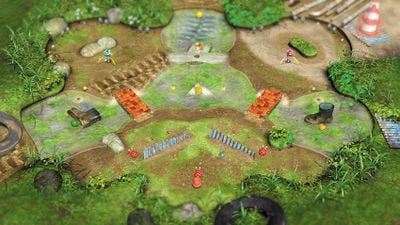
Layout C
This layout gives the player Blue Pikmin to start with, but no other Pikmin can be found.
Enemies:
 Bulborb × 3
 Dwarf Bulborb × 4
 Hermit Crawmad × 2
 Medusal Slurker × 1
 Skeeterskate × 2
 Wogpole × 9
 Yellow Wollywog × 2
Fruits:
 Citrus Lump × 1
 Face Wrinkler × 1
 Insect Condo × 1
 Portable Sunset × 1
 Velvety Dreamdrop × 1
 Zest Bomb × 1
Marbles:
 Red Marble × 1
 Blue Marble × 1
 Yellow Marble × 2
Obstacles:
 Red bridge × 2
Plants and fungi:
 1-Pellet Posy × 16
Other objects:
 Egg × 4


