
Sandbox to hold my W.I.P. edits for certain articles.
Names in other languages
Unused names in other languages
Names found through the game's files.
Dusty Mushroom
| Language | Name | Meaning | Notes |
|---|---|---|---|
| ホコリタケ? Hokori take |
Dust mushroom | ||
| Champoussière | |||
| Staubpilz | |||
| Prataiolo | |||
| Hongo polvoriento |
Electrode (Pikmin 3)
| Language | Name | Meaning | Notes |
|---|---|---|---|
| 電極? Denkyoku |
Electrode | ||
| Électrode | |||
| Elektroden | |||
| Elettrodo | |||
| Electrodo |
Stubborn Rocks
| Language | Name | Meaning | Notes |
|---|---|---|---|
| ゆるぎない石垣? Yurugi nai ishigaki |
Unshakable stone wall | ||
| Mur obstiné | |||
| Geröllbarriere | |||
| Parete cocciuta | |||
| Muro terco |
Air geyser
| Language | Name | Meaning | Notes |
|---|---|---|---|
| 間欠風? Kanketsufū |
Wind geyser | ||
(traditional) |
間歇風 | ||
(simplified) |
间歇风 | ||
| Luchtgeiser | |||
| geyser d'air | |||
| Luft-Geysir | |||
| Geyser d'aria | |||
| 간헐풍 | |||
| gêiser de vento | |||
| géiser de aire |
Fire geyser (Pikmin 4)
| Language | Name | Meaning | Notes |
|---|---|---|---|
| 間欠炎? Kanketsuen |
Fire geyser | ||
(traditional) |
間歇焰 | ||
(simplified) |
间歇焰 | ||
| Vuurgeiser | |||
| geyser de feu | |||
| Schock-Geysir | |||
| Geyser di fuoco | |||
| 간헐염 | |||
| gêiser de fogo | |||
| géiser de fuego |
Electrode (Pikmin 4; currently known as electricity generator)
| Language | Name | Meaning | Notes |
|---|---|---|---|
| 電極? Denkyoku |
Electrode | ||
(traditional) |
電極 | ||
(simplified) |
电极 | ||
| Elektrode | |||
| électrode | |||
| Feuer-Geysir | |||
| Elettrodo | |||
| 전극 | |||
| gêiser elétrico | |||
| electrodo |
Ice geyser (Pikmin 4; currently known as ice vent)
| Language | Name | Meaning | Notes |
|---|---|---|---|
| 冷却口? Reikyakuguchi |
Cooling hole | ||
(traditional) |
冷卻口 | ||
(simplified) |
冷却口 | ||
| IJsgeiser | |||
| geyser de glace | |||
| Eis-Geysir | |||
| Geyser di ghiaccio | |||
| 냉각구 | |||
| gêiser de gelo | |||
| géiser de hielo |
Geyser (Pikmin 4; currently known as water spout)
| Language | Name | Meaning | Notes |
|---|---|---|---|
| 噴水? Funsui |
Water fountain | ||
(traditional) |
噴泉 | ||
(simplified) |
喷泉 | ||
| Watergeiser | |||
| geyser | |||
| Geysir | |||
| Geyser | |||
| 분수 | |||
| gêiser de água | |||
| géiser de agua |
Gaseous spring (Pikmin 4; currently known as poison emitter)
| Language | Name | Meaning | Notes |
|---|---|---|---|
| ガス泉? Gasu izumi |
Gas spring | ||
(traditional) |
毒氣噴泉 | ||
(simplified) |
毒气喷泉 | ||
| Gifgeiser | |||
| vapeurs toxiques | |||
| Gas-Geysir | |||
| Fonte tossica | |||
| 가스 온천 | |||
| gêiser tóxico | |||
| fumarola tóxica |
Bubble spout (Pikmin 4; currently known as bubble blower)
| Language | Name | Meaning | Notes |
|---|---|---|---|
| アワ穴? Awa ana |
Bubble hole | ||
(traditional) |
泡泡洞穴 | ||
(simplified) |
泡泡洞穴 | ||
| Bubbelgeiser | |||
| source de bulles | |||
| Blasen-Geysir | |||
| Sparabolle | |||
| 거품 구멍 | |||
| gêiser de bolhas | |||
| borbotón |
Bumbershroom (Pikmin 4; currently known as potted mushroom)
| Language | Name | Meaning | Notes |
|---|---|---|---|
| オオカサタケ? | |||
(traditional) |
大傘菇 | ||
(simplified) |
大伞菇 | ||
| Uitvouwzwam | |||
| champiombrelle | |||
| Schirmkäppchen | |||
| Fungombrello | |||
| 거대우산버섯 | |||
| sombrumelo | |||
| champaraguas |
Strategy guide names
Names taken from strategy guides.
Bloominous Stemple (Hey! Pikmin)
| Language | Name | Meaning |
|---|---|---|
| ヒカリワタゲ? Hikari Watage |
Light Fluff |
Bouncy Mushroom (Hey! Pikmin)
| Language | Name | Meaning |
|---|---|---|
| ジャンプキノコ? Janpukinoko |
Jumping mushroom |
Cobblestone block
| Language | Name | Meaning |
|---|---|---|
| 鉄くずブロック? Tetsu-kuzu burokku |
Scrap iron block |
Crystal?
| Language | Name | Meaning |
|---|---|---|
| 水晶? Suishō |
Crystal |
Dirt block
| Language | Name | Meaning |
|---|---|---|
| 壊せるブロック? Kowaseru burokku |
Breakable block |
Electric Gate (Hey! Pikmin)
| Language | Name | Meaning |
|---|---|---|
| 電気の壁? Denki no kabe |
Electric wall |
Electric glowcap
| Language | Name | Meaning |
|---|---|---|
| パルスタケ? Parusutake |
Pulse bamboo |
Elevator Platform (Hey! Pikmin)
| Language | Name | Meaning |
|---|---|---|
| 天秤? Tenbin |
Balance |
Electrode (Hey! Pikmin))
| Language | Name | Meaning |
|---|---|---|
| デンキュウバラ? Denkyū bara |
Light bulb rose |
Flames
| Language | Name | Meaning |
|---|---|---|
| 炎? Honō |
Flame |
Fragments
| Language | Name | Meaning |
|---|---|---|
| ガレキ? Gareki |
Rubble |
Geyser (Hey! Pikmin)
| Language | Name | Meaning |
|---|---|---|
| 間欠泉? Kanketsusen |
Geyser |
Iron block
| Language | Name | Meaning |
|---|---|---|
| 移動ブロック? Idō burokku |
Moving block |
Hydroe bramble
| Language | Name | Meaning |
|---|---|---|
| 触手? Shokushu |
Tentacle |
Liftable rock
| Language | Name | Meaning |
|---|---|---|
| 持ち上げ岩? Mochiage iwa |
Lifting rock |
Liftable rock lift?
| Language | Name | Meaning |
|---|---|---|
| ぶら下がりツタ? Burasagari tsuta |
Hanging ivy |
Leaf platform
| Language | Name | Meaning |
|---|---|---|
| パタパタ草? Patapata kusa |
Flapping grass |
Seeding Dandelion (Hey! Pikmin)
| Language | Name | Meaning |
|---|---|---|
| 錦? Nishiki |
Brocade |
Sparklium flower
| Language | Name | Meaning |
|---|---|---|
| キラの花? Kira no hana |
Kira flower |
| Language | Name | Meaning |
|---|---|---|
| キラの花(大)? Kira no hana (ō) |
Kira flower (large) |
Spiked pine cone
| Language | Name | Meaning |
|---|---|---|
| トゲボックリ? Togebokkuri? |
Cornus spiny dogwood |
Trowel
| Language | Name | Meaning |
|---|---|---|
| スコップ? Sukoppu |
Scoop |
Water sac
| Language | Name | Meaning |
|---|---|---|
| スケナスビ? Suke nasu bi |
Millimeter eggplant |
Wooden stake
| Language | Name | Meaning |
|---|---|---|
| クイ? |
Unknown
| Language | Name | Meaning |
|---|---|---|
| スパークタンポポ? Supākutanpopo |
Spark dandelion |
Pikmin 4 Cave Types
The 10 different cave types in Pikmin 4, taken from the folder names in Carrot4/Terrain/Cave/Type, with a few caves that use said themes.
Aquarium - Used in Planning Pools
Blocks - Used in Trial Run, Battle in a Box, and Final Battle
Brick - Used in Crackling Cauldron
Common - Unknown
Concrete - Used in Subzero Sauna
Garden - Used in Aquiferous Summit
Last - Used in sublevel 20 of Cavern for a King
Metal - Used in Below-Grade Discotheque
Sand - Used in Dandori Castle, Leafy Showdown, and Hot Sandy Duel
Soil - Used in Hectic Hollows, Engulfed Castle?
P1S Ship Part Icons
Testing P1S ship part icons in place of the current unofficial icons.
| |||
|---|---|---|---|

| |||
| This ship part is required for the S.S. Dolphin to escape the planet. | |||
| Weight | 20 | ||
| Max. carriers | 40 Pikmin | ||
| Location | The Impact Site | ||
Treasure Series Gallery
Tests for new ways of showing treasure series in Pikmin 2.
List
Nintendo Switch
Nintendo GameCube/Wii North America
Nintendo Switch
Nintendo GameCube/Wii North America


Nintendo GameCube/Wii Europe
Nintendo GameCube/Wii Japan
Single Noun Edits
The following W.I.P.s of a few enemy articles with minor edits, the biggest of which includes using single nouns throughout.
Albino Dwarf Bulborb
The Albino Dwarf Bulborb (コチャッピーモドキ?, lit.: "Pseudo Small Chappy") is a small nocturnal enemy that only appears in Pikmin 4. This enemy resembles the Dwarf Bulborb in appearance, but has a white to red ombré back instead of a spotted one, similar to the Bulborb Larva, and additionally have slightly larger snouts compared to most Dwarf Bulborbs. These differences largely stem from both its very young age, being the first molt of a Bulborb Larva, and because it is a true member of the grub-dog family rather than a breadbug mimic.
Despite being their young, adult Bulborbs are known to cannibalize Albino Dwarf Bulborbs. In order to avoid this, they are only active at night and in caverns, where the poor visibility allows them to evade predation. The Albino Dwarf Bulborb is noticeably tougher than the Dwarf Bulborb, requiring two direct Pikmin throws to the back to dispatch.
Anode Beetle
The Anode Beetle (エレキムシ?, lit.: "Electric Bug") is a small enemy found in Pikmin 2 and Pikmin 4. This creature is blissfully unaware of Pikmin, and if found alone, is harmless; but if there is a partner nearby, an electrical barrier can be produced between the two, subjecting any nearby Pikmin to electrocution. As such, it is commonly found in groups of 2 or more.
Swarming will not harm it, as it has a protective shell, similar to the Flint Beetles. To damage it, one must throw a Pikmin on top of it to flip it over, then proceed to swarm it. Purple Pikmin can cause them to flip over even if not directly hit.
Arachnode
The Arachnode (マリグモ?, lit.: "Temari Spider") is a spider-like enemy in Pikmin 3 and Pikmin 4. While dormant on its web, the Arachnode resembles a cocoon, with a black and yellow striped and sphere-shaped body. This shape and coloring comes from the eight legs wrapped tightly around its body; its actual body is comprised of small black orbs with yellow circles instead of stripes. Once a Pikmin or leader gets caught in an Arachnode's web, it will uncurl its legs after a while, and wander up to its prey, consuming them quickly once it has reached them. It may also wander around the web freely in order to avoid Pikmin that are being thrown at it. The web will collapse once the Arachnode is defeated.
Pikmin caught in the web can be saved by whistling at them. This is important, especially with a small squad, as Pikmin shaken off by the Arachnode will usually get stuck in the web. Winged Pikmin carrying objects will get stuck in webs that are along their route, making webs the primary obstacle for these types of Pikmin.
Arctic Cannon Larva
The Arctic Cannon Larva (ユキフタクチ?, lit.: "Snow Two-Mouth") is an enemy in Pikmin 3 and Pikmin 4. It is bright green, with a lavender underbelly, and are accustomed to cold conditions. They are the larval form of the Arctic Cannon Beetle.
Unlike their rock-spitting relatives, the Arctic Cannon Larva launches giant snowballs. While mostly equivalent to boulders in functionality, snowballs are incapable of killing Pikmin, instead simply picking them up and carrying them along until they crash into something (even other snowballs); Winged Pikmin won't even be picked up by the projectiles, only knocked back. Leaders will be picked up as well, which also traps them until the snowball is destroyed. As a result, the creature is annoying at best, and is only a threat if the Pikmin it rolls away end up next to some other enemy or hazard without the player noticing, but can be killed with relative ease by any Pikmin type.
Bulborb
The Bulborb (チャッピー?, lit.: "Chappy"), known as the Spotty Bulborb in Pikmin and the Red Bulborb (アカチャッピー?, lit.: "Red Chappy") in Pikmin 2, is a common enemy found throughout the Pikmin series. The Bulborb is one of the most prominent enemies in the franchise and appear in all 4 numbered Pikmin games. It also has apperances in Hey! Pikmin, Pikmin Adventure, Pikmin Short Movies, has several pieces of merchandise based on it, and are the focus of the first game's North American boxart. The Bulborb is the most commonly encountered member of the particularly extensive and diverse Grub-dog family.
The Bulborb has pointed snouts, eyes on stalks, and a red back with white spots. It only has two sharp fangs on either side of its mouth. It is a largely nocturnal creature and spends much of its time sleeping, only waking up when detecting potential prey, or during the night. It is often found sleeping near Dwarf Bulborbs, which are actually members of the Breadbug family.
Yellow Wollyhop
The Yellow Wollyhop (イモガエル?, lit.: "Potato Frog"; known as the Yellow Wollywog depending on the game and region) is a frog-like enemy found in the Pikmin games. It is a large, round, yellow creature with large eyes and beady pupils, and short front legs with larger hind legs. Its skin is tinted green towards the top of its head, with green spots along the sides. It can usually be found in or around large, open-air bodies of water, but also in moist, rainy areas.
It is known to leap into the air, floating temporarily, and dropping, with the intent of landing on and crushing any Pikmin below, a behavior which is most readily explained as an attempt to drive predators away from developing eggs. According to Olimar's notes, these are Wolpole eggs, revealing that the Yellow Wollyhop and the Wolpole are the same exact species.
It is the only mature species of amphituber in both Pikmin 3 and Hey! Pikmin. In these games, they also have a reasoning for it's floating ability: it's throat inflates, presumably allowing it to float in the air temporarily. In Hey! Pikmin, it seems to have slightly increased in size and move slightly faster.
Pikmin Adventure Enemy List
The following lists the appearance of enemies in each level in Pikmin Adventure.
Enemies found in Bulborb Forest
Red Bulborb x9
Creepy Beeb x17
Yellow Bulborb x1
Enemies found in Boss of the Beebs
Red Bulborb x18
Creepy Beeb x14
Yellow Bulborb x1
King Beeb x3
Enemies found in Five Seconds to Takeoff
Creepy Beeb x28
Red Bulborb x1
Enemies found in Overthrow the Bulblord
Bulblord x1
Enemies found in Cannon Smash
Creepy Beeb x15
Yellow Bulborb x8
Red Bulborb x9
Telescoping Pumphog x8
Enemies found in King Beeb is Back
Red Bulborb x15
Yellow Bulborb x14
Telescoping Pumphog x7
Creepy Beeb x30
King Beeb x1
Enemies found in Through the Darkness
King Beeb x15
Telescoping Pumphog
Red Bulborb x7
Yellow Bulborb x5
Enemies found in Swamp Master
Large-mouth Wollywog x1
Enemies found in Lord of a Barren Land
Blowhog x5
invincible Telescoping Pumphog x8
Bombardier Beeb x5
King Beeb x4
Red Bulborb x10
Yellow Bulborb x4
Bilious Bulborb x1
Enemies found in Burst the Giant Balloon
Bombardier Beeb x9
Red Bulborb x7
Yellow Bulborb x5
Telescoping Pumphog x3
King Beeb x4
Blowhog x7
Pikmin Adventure Boss Edits
The following W.I.P.s are edits of the Pikmin Adventure boss pages based on the rewritten enemies above.
Greater Bladed Beeb

The Greater Bladed Beeb (キザミワラジ?, lit.: "Cutting Woodlouse"; known as the Greater Bladed Baub in the European version of Pikmin Adventure) is the fourth and final boss of the standard challenges in Pikmin Adventure. It is a large, glossy, purple praying mantis-like creature with blades on its arms. It is the only boss in Pikmin Adventure to be treated like a normal enemy in the advanced stages.
Monita's Notes
![]() US version: “This alien insect is slow to wake but quick to anger. The adrenaline rush causes it to speed up and turn red with fury.”
US version: “This alien insect is slow to wake but quick to anger. The adrenaline rush causes it to speed up and turn red with fury.”
![]() European version: “This alien insect is slow to wake but quick to anger. The adrenaline rush causes it to speed up and turn a furious red.”
European version: “This alien insect is slow to wake but quick to anger. The adrenaline rush causes it to speed up and turn a furious red.”
Attacks
Once the Greater Bladed Beeb notices the player, it will crawl about the stage, widely swinging its blades. It has three different attacks: one attack with one blade two consecutive times, a seecond attack using both blades and dashes forward shaking off Pikmin, and a third attack where it spins in a circle, which also shakes off Pikmin. Once one of its weak points is broken, it will roar very loudly and turn red, starting the second phase. Now it will use its strike attack and double blade attacks 3 times consecutively.
Strategy
|
The following article or section contains guides. |
Both the head and abdomen are the Greater Bladed Beeb's weak points, but attacking them is made difficult by the boss's reflexes and ability to quickly turn around. Therefore, this boss is best fought in multiplayer. It can be dazed temporarily with a rock, unlike most bosses. Bombs will not stun it, though it will deal a sizable amount of damage. It will occasionally strike, but miss, and its blades will remain stuck in the ground. This is a great time to attack, as well as throw a rock at it, as it will stun it even further.

Once the second phase of the battle is initiated, it becomes harder to attack. Wait until it misses with its blade spin attack and use the short moment of time to attack it's backside or the back of its head. A wise strategy is to run around it while at a close distance. If executed correctly, it will not harm the player. Wait until it is finished attacking to attack it in the short window of time in between attacks.
Another slightly more risky strategy is when it comes to slice up, walk straight into it. The Bladed Beeb only hits where the player is at a certain time, and by moving closer, the blades will not harm you. This is risky, since it could very easily get you while coming in. Another wise strategy for the Olimar player is to utilize the Whip Seed or Knuckle Seed. By staying far away from it, the GamePad user can easily pelt it from a safe distance. This works even better in multiplayer, where the Pikmin can distract the Beeb while the GamePad user pelts it from afar.
In Cage of Terror, you must fight 3 smaller Elemental Bladed Beebs with lower health. The same strategies apply here, but the Beebs now have a shorter attack range and less health, making it an easier fight.
Names in other languages
| Language | Name | Meaning | Notes |
|---|---|---|---|
| キザミワラジ? | |||
| Vlijmscherpe Baub | |||
| Grand Brok Faucheur | |||
| Klingenkugelkäfer | |||
| Ultrapidolino fochista | |||
| Baub Encrustado | |||
| Boloide cortante | |||
| Большой лезволап |
Gallery
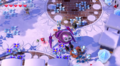
The Greater Bladed Beeb stuck in the ground.
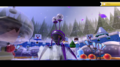
Fighting the Greater Bladed Beeb during its second phase.
The Greater Bladed Beeb is defeated.
The statue of the Greater Bladed Beeb.
When the statue of the Greater Bladed Beeb is interacted with a second time, it tries to attack.

When the statue of the Greater Bladed Beeb is interacted with a third time, it pretends to be defeated.


Trivia
- The bottom half of its spherical head seems to resemble a microphone or speaker. This may explain how it makes its deafening roar, despite having no mouth.
- The Greater Bladed Beeb has a lot of characteristics that other bosses don't possess. Its the only boss seen multiple times in some levels, be seen in both the main and advanced stages, and be treated as a normal enemy.
- The Greater Bladed Beeb is referred to as the "Bladed Beeb" during its introductory cutscene.
Grand Bulblord

The Grand Bulblord (ショーグンチャッピー?, lit.: "General Chappy") is the first boss in the extra challenges of Pikmin Adventure. It is a variant of the Bulblord found in the standard challenges. It has a similar color scheme to the Emperor Bulblax from the main series games and the Green Bulborb also seen in Pikmin Adventure.
Behavior
The Grand Bulblord's attacks are very similar to those of the Bulblord, only faster.
Strategy
|
The following article or section contains guides. |
The Grand Bulblord has the same strategy as the original Bulblord, but the Grand Bulblord has more health, does not react when the weak points on its back are destroyed, and is faster during its second phase.
What you must do is remove all of its weak points from its back. If you are low leveled, it is recommend to go for the smaller ones first, as they break easily and give you lots of nectar for you to level up with. In the last challenge of the attraction, Goodbye Pikmin, which is a boss rush, a few Creepy Beebs and a Bulborb will spawn in. Getting rid of these first will provide a decent amount of nectar.
Once the Grand Bulblord's back weakpoints have been destroyed, its sclera will turn black, and the rings around it's pupils red with rage. The joints on its legs open up into weakpoints, providing the next objective. Begin targeting only one of the legs so that when it breaks, the Grand Bulblord will fall over onto its back, revealing its major weak spot on its underbelly. Once it starts falling over, call your Pikmin and teammates and begin throwing them on top so that everyone can help out. Like the Bulblord, it is possible to get a stamp by attacking and breaking its eyes, which act similar to its weakpoints.
When the final weak point breaks, the Grand Bulblord's head begins to spin ferociously, slowing down gradually until the entire body explodes.
Destroying both of the Grand Bulblord's eyes will reward the player with a stamp, the Eyes of the Bulblord.
Naming
- See also: Grub-dog family#Naming.
Names in other languages
| Language | Name | Meaning | Notes |
|---|---|---|---|
| ショーグンチャッピー? Shōgun Chappī |
General Chappy | ||
| Bezeten Bulblord | |||
| Général Bulblord | |||
| Königspunktkäfer | |||
| Gran Bosscoleto | Big Boss-Bulborb | ||
| Baub Encrustado | |||
| Gran bulbo feroz | |||
| Главный клубнекороль |
Gallery
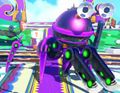
The Grand Bulblord enrages during its transition cutscene.

Translucent Wollywog

The Translucent Wollywog (オオグチカスミガエル?, lit.: "Big-mouthed Haze Frog"; known as Translucent Wollyhop in the European version) is the second boss to be fought in the extra challenges of Pikmin Adventure. It is almost the same exact boss as the Large-Mouth Wollywog from the 16 standard challenges. The only differences between the two are that the Translucent Wollywog is see-through compared to the Large-Mouth Wollywog which is yellow, and that it shoots its tongue out three times in a row instead of just one time.
Strategy
The strategy used for the Large-Mouth Wollywog also applies here. When it shoots out its tongue, attack it while it is still out, and it will hit itself in the head and be dazed for a bit. It will become dazed on its own, but it will take a while. Use this interval of time to attack the weak point on its tongue, which should break in no time. Once it breaks, the Translucent Wollywog will move back into the center of the pond. Its cheeks are now open as weak points, proceed to throw Pikmin at them, dodging any tongue attacks. After the player breaks both cheeks, its back becomes the final weak point. At this time, it is best to locate a rock, and throw it at the Translucent Wollywog. Chances are that it will be stunned for a decent amount of time, so get behind the Wollywog and throw Pikmin at its back until it breaks, finishing the fight.
Names in other languages
| Language | Name | Meaning | Notes |
|---|---|---|---|
| オオグチカスミガエル? | |||
| Doorzichtige Wollyhop | |||
| Wog Translucide | |||
| Durchsichtiger Orcalog | |||
| Ranuca idropica traslucida | |||
| Batrassalto Translúcido | |||
| Sapo gigante translúcido | |||
| Прозрачный вопапрыг |
Trivia
- Interestingly, the Translucent Wollywog is classified under the wollywog family, not the amphituber family, in both the American and Japanese versions of the game. This is not the case in the European version.
Monochromatic Pinchipede

|
This article or section needs to be cleaned up, either its format or general style. |
The Monochromatic Pinchipede (シロクロハサミムカデ?, lit.: "Monochrome Scissors Centipede") is the third boss fought during Pikmin Adventure's extra challenges. Like other members of the Pinchipede family, it is a long centipede-like insect with huge serrated pincers. It looks very similar to the Emperor Pinchipede, only here, it is colored white and has higher speed and health. It looks blue in the first battle it is fought, due to the ambient lighting; during the Boss Rush, it has an orange tint, for the same reasons.
Strategy
|
The following article or section contains guides. |
The Monochromatic Pinchipede is fought more-or-less the same way as one would fight the Emperor Pinchipede. The only difference is that the fight requires more care to be taken overall: The Monochromatic Pinchipede has more health compared to it's predecessor, and is generally faster overall.
Begin by targeting the smaller segments of its body. Ironically, these smaller segments have significantly more health than the larger ones, presumably because the larger weak points double as spinning spike tops that circle the arena.
Once the smaller portions are removed, quickly remove the larger, more threatening, weak points, which should be easier due to their smaller health pool. After all of the portions are destroyed, the larger spinning sections will stop, and retract back to their original place on the Monochromatic Pinchipede.

The Monochromatic Pinchipede will now pull itself backward and charge up an attack, which reveals its last weak point located on its head. Use this opportunity to dish out as much damage as possible. It will flip over to its black side and rampage across the arena, trying to corner you and crush you with its gaping mandibles. After a few seconds, it will start to slow down, indicating it will start to charge up its attack again.
Once this weak point reaches a quarter of its health, all segments will fling away from the Monochrome Pinchipede and spin around the stage. Care must be taken during this phase. Avoid the spinning platforms, and wait for the Pinchipede to charge into you. Dodge its attack and begin throwing Pikmin onto its back. These Pikmin will stay on there forever, as the Pinchipede now has no way to shake them off. At this point, you can wait out the battle by avoiding it's attacks while the Pikmin whittle it down, or try to add more Pikmin to the attack to kill it faster. Be careful, though, because the Monochromatic Pinchipede will now constantly chomp it's mandibles during this phase.
Eventually, the last weak spot will reach 0 HP, and the Monochromatic Pinchipede will die.
Names in other languages
|
To do: Find the Russian name due to it not being easily extractable. |
| Language | Name | Meaning | Notes |
|---|---|---|---|
| シロクロハサミムカデ? | |||
| Zwart-witte Pinchipede | |||
| Mille-Klak Bicolore | |||
| Schwarzweißkaufüßler | |||
| Centiciompo monocromatico | |||
| Centopinça Monocromática | |||
| Ciempiédulo bicolor |
Gallery
Greater Studded Beeb

The Greater Studded Beeb (アバレワラジ?, lit.: "Raging Woodlouse"; known as Greater Studded Baub in the European version) is the boss of the nineteenth level (The Tyrant Arrives in the European version) and the final boss of the Nintendo Land attraction Pikmin Adventure. It shares the same basic shape with the Bladed Beeb, only it has Spike Balls for hands instead of blades, and starts off with yellow lights instead of green.
Strategy
The strategy for killing this beast is basically exactly the same as the Bladed Beeb. Just be wary that the Greater Studded Beeb has significantly more vitality, and is better at blocking attacks from the Knuckle Seed with its Spike Balls.

The first thing that must be completed to defeat this foe is breaking one of its weak points. Once one of them breaks, it will roar in rage and the yellow lights will turn red, speeding up its attacks and adding consecutive strikes to its attacks.
Keeping your distance using Knuckle Seed or Whip Seed is one good strategy, and dashing to either direction when he prepares his double arm smash attack is wise if you want to keep you power-up.
Another quick but sometimes dangerous technique is getting up close and personal with the mantis-monster. If you stay right up against the Greater Studded Beeb and pummel it with your Knuckle Seed power-up, it wont be able to strike you with its attacks most of the time, excluding its spin attack, in which case you want to jump away.
Once defeated, its eyes will widen, and it will collapse on the floor. Your Miis will pose, and the Greater Studded Beeb's body will proceed to explode into tons of Nintendo Land Coins.
Names in other languages
| Language | Name | Meaning | Notes |
|---|---|---|---|
| アバレワラジ? | |||
| Pletterbaub Grand | |||
| Brok Piquant | |||
| Killerkugelkäfer | |||
| Ultrapidolino borchiato | |||
| Baub Encrustado | |||
| Boloide tachonado | |||
| Большой шиполап |
- ^ YouTube video demonstrating the requirement of 85 Pikmin for the Safe (at 05:08)