Loading screen: Difference between revisions
m (Added P1S Impact Site Loading Screen.jpg) |
(Added the Purple and White Pikmin Bingo Battle tips alongside making some tips consistent with their in game counterparts.) |
||
| Line 313: | Line 313: | ||
|- | |- | ||
| [[File:Yellow Pikmin P3 icon.png|24px|24px]] | | [[File:Yellow Pikmin P3 icon.png|24px|24px]] | ||
| colspan="2" | | | colspan="2" | ~Yellow Pikmin~<br> | ||
The fastest diggers of all the Pikmin! | The fastest diggers of all the Pikmin! | ||
|- | |- | ||
| [[File:Rock Pikmin P3 icon.png|24px|24px]] | | [[File:Rock Pikmin P3 icon.png|24px|24px]] | ||
| colspan="2" | | | colspan="2" | ~Rock Pikmin~<br> | ||
Throw and land a direct hit for tremendous damage! | Throw and land a direct hit for tremendous damage! | ||
|- | |- | ||
| [[File:Blue Pikmin P3 icon.png|24px|24px]] | | [[File:Blue Pikmin P3 icon.png|24px|24px]] | ||
| colspan="2" | | | colspan="2" | ~Blue Pikmin~<br> | ||
Happy to go into the water! | Happy to go into the water! | ||
|- | |||
| [[File:White Pikmin P3 icon.png|24px|24px]] | |||
| colspan="2" | - White Pikmin -<br> | |||
Light-footed and poisonous! | |||
|- | |||
| [[File:Purple Pikmin P3 icon.png|24px|24px]] | |||
| colspan="2" | - Purple Pikmin -<br> | |||
Slow-footed, but 10 times as powerful! | |||
|- | |- | ||
| [[File:Reinforced Wall Tip P3 icon.png|24px|24px]] | | [[File:Reinforced Wall Tip P3 icon.png|24px|24px]] | ||
| colspan="2" | | | colspan="2" | ~Reinforced Wall~<br> | ||
Destroy it with Bomb Rocks! | Destroy it with Bomb Rocks! | ||
|- | |- | ||
| [[File:Bamboo Gate Tip P3 icon.png|24px|24px]] | | [[File:Bamboo Gate Tip P3 icon.png|24px|24px]] | ||
| colspan="2" | | | colspan="2" | ~Bamboo Gate~<br> | ||
Lift it up with Winged Pikmin! | Lift it up with Winged Pikmin! | ||
|- | |- | ||
| [[File:Crystal Wall Tip P3 icon.png|24px|24px]] | | [[File:Crystal Wall Tip P3 icon.png|24px|24px]] | ||
| colspan="2" | | | colspan="2" | ~Crystal Wall~<br> | ||
Destroy it with Rock Pikmin! | Destroy it with Rock Pikmin! | ||
|- | |- | ||
Revision as of 19:21, March 8, 2024

|
This article or section needs to be cleaned up, either its format or general style. |
The Pikmin games display a loading screen while they are loading content to show to the player. This happens in many places, such as when the game starts up or when an area is being loaded.
Loading screens
Pikmin
In Pikmin, there is only one loading screen, which takes place before an area is entered; this is where the area is loaded. The screen is purely black apart from the name of the area in orange at the center. When the area is done loading, the screen automatically fades away, and the landing cutscene begins.
Pikmin 2
The game's startup has its own loading screen, showing the Nintendo logo (the color varies depending on the version), with several Pikmin of one type or various types dropping down on or popping up from it. After a second, the Pikmin jump back down behind the logo, or a Purple Pikmin suddenly drops on the logo, knocking the others away.
Pikmin 2 uses a very similar area loading screen to Pikmin for loading the main areas, but the name is yellow, its highlights have small glares, and a rippling effect of some text graphic occurs behind the name. When loading a cave's sublevel in story mode, the name in white will appear to fall and bounce one letter at a time into a rippling, dripping liquid over a black screen (although the effect only covers so much text; not all letters in the Subterranean Complex produce this effect). Below that is the name of the sublevel. The same screen occurs while loading a Challenge Mode level, except instead of the liquid effect there is a cloud of red and orange squares that slowly pulsate behind the text.
Before loading a 2-Player Battle stage, the game shows a different loading screen. The stage's name appears at the top, with a fire effect applied behind it. Just under it, the text "Loading..." appears aligned to the right. The second half of the screen has a large box of information. The top of the box lists the two marble-related win conditions, and under that, there is a random advisory for the game mode. This screen only disappears when either player presses ![]() /
/ ![]() , or automatically 10 seconds after the game is done loading.
, or automatically 10 seconds after the game is done loading.
Interestingly, in most cases, the rippled text that appears behind an area's name is not the name itself but something different. On the Valley of Repose, the rippled text is indeed "Valley of Repose", but on the Today's Report screen, which also has a fiery-ripple effect, the same "Valley of Repose" text is what appears behind "Today's Report". On the Awakening Wood, the text is 今日の成績? (lit.: "Today's Results"), and on the Perplexing Pool and Wistful Wild, it is "Challenge Cave", in a slightly different font from the norm.
Pikmin 3

When loading an area in Pikmin 3, a familiar black screen with the area's name in yellow appears, with a subtle reflection and rippling behind it. At the bottom, there is a randomly-picked gameplay tip, preceded by a relevant icon. This tip may get swapped out for another tip if the game takes longer to load. The same screen appears in Bingo Battle, and in Mission Mode, the screen is the same, except it also writes down the type of mission under the level's name. Besides the area loading screens, the game also shows a screen with a static image of a few Pikmin in a green environment when loading the whole game. A loading icon will also appear with a silhouetted Red Pikmin running along a loading wheel. After this screen comes the title screen.
Pikmin 4
|
The following article or section is in need of assistance from someone who plays Pikmin 4. |
When loading an area or cave in Pikmin 4, the loading screen is mostly black, with the name of the location being loaded in the center in yellow text with a subtle glow of red behind it. Below the area or cave name is the current progress, with statistics for Rescues, Treasures, and Onions. In the bottom-left corner, there will be a tip that will be related to the area or cave you are currently entering. In the bottom-right corner, there is a simple animation of a Red Pikmin silhouette walking. In update 1.0.2, a progress bar was added underneath the Pikmin that will show the current progress of the loading screen.
Pikmin Bloom
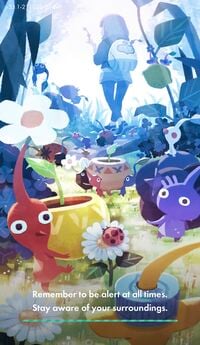
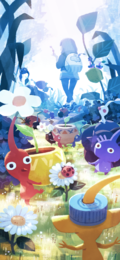
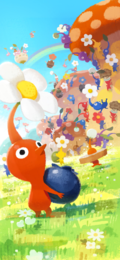
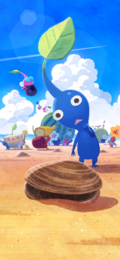
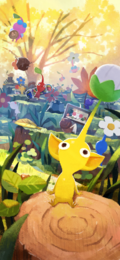
When Pikmin Bloom is opened, a loading screen will appear. The background artwork has changed between versions of the app, but always contains Pikmin carrying seedlings and/or fruit. A bar across the bottom will fill up with green and dark green stripes, and will advance to the main menu when full. Above the bar there is a reminder for the player to be alert and aware of their surroundings. Update 41.0 added loading screen tips about the game that appear a few seconds after the safety reminder, changing every few seconds. Tapping the screen will also change the tip.
Tip
Starting in Pikmin 2, some game modes' loading screens show a randomly picked tip.
2-Player Battle
Tips for the 2-Player Battle mode in Pikmin 2.
- “You can't carry your own marble.”
- “Pikmin lost to opposing Pikmin will become seeds.”
- “Roulette creatures vanish when you defeat them.”
- “Use your sprays wisely to turn the tide of battle!”
- “You can't pluck, throw or spray while engaging enemy Pikmin.”
- “Get a cherry for one roulette spin. You can store up to four.”
While technically, it is true that there can be up to four roulette wheel spins in queue, this can lead to players believing they can only have four powers in queue, when they can actually have five (the four queued spins plus the current power on standby).
Story Mode
Tips in Pikmin 3's story mode. They only appear on day 3 and later, and also appear when the player suffers a Game Over.
Mission Mode
| Icon | US | Europe |
|---|---|---|
| Red Pikmin are fierce warriors that are immune to fire! | Red Pikmin are impervious to fire and pack the biggest wallop! | |
| Blue Pikmin don't mind getting wet. In fact, they love it! | Blue Pikmin love water! Being submerged is all part of a day's work! | |
| Yellow Pikmin love electricity! They can also reach high spots and dig quickly! | ||
| Winged Pikmin are delicate, but they put up a fight against flying enemies! | ||
| Rock Pikmin are tough and can cause some serious damage if they land on a target! | Rock Pikmin are super solid! Landing a direct hit can inflict serious damage! | |
| White Pikmin may be weak, but they're fast and poisonous! | ||
| Purple Pikmin are slow, but they're as strong as 10 Pikmin! | ||
| File:SpicySprayIcon.png | The red nectar is Ultra-Spicy Nectar! Spray it on your squad with |
The red nectar is Ultra-Spicy Nectar! Spray it on your squad with |
| Drinking yellow nectar makes the Pikmin's flowers bloom! | ||
| Throw Pikmin into a Candypop Bud to turn them into sprouts that are the same color as the flower! | Throw Pikmin into a Candypop Bud to turn them into sprouts of the same colour! | |
| A pellet is packed with nutrients. When retrieved by Pikmin matching its color, it will produce many sprouts. | A pellet is packed with nutrients. When retrieved by Pikmin matching its colour, it will produce a lot of sprouts. | |
| Nuggets are beautiful gems that sparkle softly! One of these gives you | ||
| Golden Sunseeds are packed with Piktamin U! One of these gives you | ||
| Golden Grenades are packed with Piktamin U! One of these gives you | ||
| Move the pointer over a piece of fruit to see how many |
Move the pointer over a piece of fruit to see how many | |
| Move the pointer over a creature to see how many | ||
| Earn a bronze medal here to unlock the next mission! | Earn a bronze medal in this course to unlock the next stage! | |
| Defeat all enemies or collect all of the treasure to earn a platinum medal! | Complete the mission to earn a platinum medal! | |
| Defeating a boss in Story mode unlocks it as an opponent in Mission mode! | ||
| A bronze medal makes you a lieutenant! | ||
| A silver medal makes you a captain! | ||
| A gold medal makes you a general! | ||
| A platinum medal makes you royalty! | ||
To note is that whenever there are two icons in one box, it means that the initial icon was changed to the second icon from Pikmin 3 to Pikmin 3 Deluxe.
Bingo Battle
Pikmin 4
|
The following article or section is in need of assistance from someone who plays Pikmin 4. |
Tips in Pikmin 4's story mode. They start appearing after entering the Burrow of Beginnings.
| Tip Title | Tip Text |
|---|---|
| Tips | Information about exploration and related topics will be shown here. Put that knowledge to good use in your rescue work! |
| Rush | Press |
| Rescue Command Post | Don't worry about time at the Rescue Command Post. Walk around, talk to folks, and make sure you're prepared before you go explore. |
| Missions | The pinned mission objective will be displayed on the screen. You can tidy up the screen by unpinning the mission. |
| Oatchi's Pup Drive and Skills | Rescuing castaways increases Oatchi's Pup Drive. The more you build up his Pup Drive, the more new skills you can teach him. |
| Where Are the Castaways? | Castaways hide inside caves to avoid the dangers of nighttime on the surface. That's where you'll find them, waiting to be rescued. |
| Things to Do at the Rescue Command Post | If you want to visit someone while at the Rescue Command Post, select them via their ID badge to go directly to them. |
| Visiting the Lab | Russ, the Rescue Corps scientist, can make you all kinds of helpful gear and items in exchange for raw materials. |
| Visiting the Lab | Whenever a new item is developed in the Lab, a single prototype will be available so you can give it a free test run. |
| Equipping and Unequipping Gear | You can equip and unequip gear from yourself and Oatchi using the Tablet's Gear and Skills app. |
| Piklopedia | Whenever you encounter a new creature for the first time, it will be registered in the Piklopedia. |
| Side Missions | Talk to everyone you've rescued. They might have requests you can fulfill for them in exchange for various rewards. |
| Things to Do at the Rescue Command Post | You can replay cleared Dandori Battles and Dandori Challenges as many times as you'd like at the Rescue Command Post. |
| Side Missions | Complete side missions to get raw materials as well as some special items as rewards. |
| Co-op Mode | P2 can toss small stones at creatures when they use the Pebble Pitcher, allowing two players to explore side by side. |
| Co-op Mode | Pitch more than pebbles! As you earn more Co-op Points, you'll receive items to assist other players and help master your Dandori skills. |
| The Art of Dandori | Dandori is the art of organizing your tasks strategically and working efficiently to execute your plans. Try to practice it in everyday life! |
| Missions | To review your current objectives, open Missions with |
| Missions (Single Joy-Con mode) | Press |
| Your Tablet | Open the Tablet with |
| Options Menu | By pressing ["Option"] to open Options, you can access useful info, like more detailed instructions in the Gameplay Guide. |
| Assigning Shortcuts | Assign shortcuts under Shortcut Settings in ["Option"]Options, then press |
| Motion Controls | Tilt the controller while holding |
| Motion Controls (Single Joy-Con Mode) | Tilt the controller while holding |
| Switching to Manual Target Lock | When Auto Target Lock is activated, fix the cursor on a target with |
| Take a Look Around | If you use |
| Ground View | Tilt |
| Look Straight Ahead | Press |
| Resetting Your Viewpoint | Press |
| Quick Actions | Open ["Option"]Options, then select Settings and set the Actions Control Type to Quick to easily choose an action with |
| Camera Direction | If you want to change the way you look around, open ["Option"]Options and select Settings to adjust the camera controls from Normal or Inverted. |
| Raw Materials | Raw materials don't just come from walls and dirt mounds. You can get them from creatures and nectar eggs too. |
| Raw Materials | You can dig up raw material from the same dirt mounds every day and use them to build structures or get gadgets from the Lab. |
| Rewinding Time | If a lot of your Pikmin have perished, don't panic. You can always use Rewind Time to turn back the clock. |
| Transporting Tips | If sunset arrives while something is in transport, you can always pick it up from that same spot the next day. |
| Transporting Tips | If something is left abandoned in transport for three days, it will return to its original position. |
| Nectar | Nectar found on the surface won't disappear until nighttime, even if you enter a cave. |
| Mitite | When you defeat a Mitite, there's a chance it will drop ultra-spicy nectar! |
| Battle Tips | If you're in a hiding spot, you won't be found by nearby creatures. Don't hesitate to hide yourself in a thicket in a pinch. |
| Transporting Tips | When you enter a cave, unfinished surface tasks will be canceled. Make sure all transporting is complete before going inside. |
| About Creatures | If you damage a creature, it will recover by the next day or when you leave the area by entering or exiting a cave. |
| Cave Exploration | When you exit a cave, only a sixth of the time you spent underground will have passed on the surface. |
| Cave Exploration | Once the countdown to sunset begins, you won't be able to enter any more caves until the following day. |
| Cave Exploration | Pikmin sprouts won't follow you of their own accord. Make sure to pluck them before going to the next sublevel. |
| About Treasures | Whenever you complete a treasure series, you'll receive additional sparklium. |
| Moving Your Base | If you move your base, the S.S. Beagle will bring Oatchi, along with any Rescue Officers and Pikmin that were waiting near the previous base. |
| Battle Tips | If you defeat a creature while it's frozen, nectar and ultra-spicy nectar will come flying out. |
| Burgeoning Spiderwort | The Burgeoning Spiderwort bears fruit multiple times a day. You can store up ultra-spicy nectar using just a few Pikmin to gather it. |
| Battle Tips | When a creature has its back to you, take the opportunity to charge. |
| Where Are the Pikmin? | After they have finished transporting raw materials, Pikmin will wait beneath the S.S. Beagle. |
| Where Are the Pikmin? | Pikmin that have finished building a structure will wait at the building site. |
| Idler's Alert | Sound this alert to summon idle Pikmin to your location. |
| Plucking Whistle | At the sound of this whistle, all the Pikmin sprouts will leap out of the ground at once. |
| Night Expeditions | When you discover a base while exploring an area during the day, it will become a base for night expeditions in that area. |
| Radar Map | You can choose whether the direction on the Radar Map remains fixed or rotates to match the camera angle. |
| Radar Map | Place the cursor over a cave on the Radar Map to learn useful information, like your current progress or if Pikmin are inside. |
| Radar Map | A discovered cave or completed task will be marked with |
| Radar Map | Zoom in and out on the Radar Map with |
| Radar Map | You can use the Radar Map to search for stray Pikmin. |
| Go Here | Choose a location you want to go to, and select Go Here to walk or ride automatically to that destination. |
| Survey Drone | Drop a pin somewhere that catches your interest, and a pillar of light will appear there. Use the pillar as a landmark when you explore. |
| Survey Drone | Pins dropped on the surface will remain in place until you remove them. Pins dropped in caves will disappear when you leave the sublevel. |
| Survey Drone | When scouting an area with a Survey Drone, you can do things like pause and unpause the game, as well as turn the display on and off. |
| Dandori Tips | Put your Dandori talents to good use and divide your Pikmin between many different tasks at once to use time most effectively. |
| Dandori Tips | Any Dandori master knows they must adjust their tasks based on the Pikmin available. Practice by allocating your squad in different ways! |
| Pikmin Ecology | Seeds produced by the Onion upon absorbing defeated creatures will be the same color as the Pikmin type that did most of the transporting. |
| Pikmin Ecology | The quantity of Pikmin without an Onion can be increased if an Onion of the same color is absorbed. |
| Pikmin Ecology | On the surface, you can withdraw up to three types of Pikmin at the same time. |
| Pikmin Ecology | There's a limit to how many Pikmin you can withdraw on the surface. Have your Onion absorb flarlic to increase that limit. |
| Pikmin Ecology | If all Pikmin are lost, the Onion will release a single seed. Seeds will not be produced for Pikmin without an Onion. |
| Ice Pikmin | Chilly Ice Pikmin can freeze any body of water. |
| Ice Pikmin | The larger the body of water, the more Ice Pikmin you will need to freeze it. |
| Ice Pikmin | If you use the whistle to summon Ice Pikmin that are freezing a body of water, all ice on the surface of the water will soon melt. |
| Purple Pikmin | If you throw Purple Pikmin directly at a creature, you can do considerable damage. |
| Purple Pikmin | The shock waves created when Purple Pikmin land on the ground can do significant damage to creatures. |
| Rush | If you spot treasure on high ground that can't be reached by throwing Pikmin, try using Oatchi's Rush to make it fall. |
| Pikmin Ecology | If you have Oatchi transport prey on the surface, a seed for the type of Pikmin you have the least of that have an Onion will be produced. |
| Command | If you Command Oatchi to Pick Up a Scent, he'll try to sniff out whatever it is you need to find. |
| Command | If the number of Pikmin without an Onion starts to dwindle, have Oatchi search for that Pikmin type's scent. |
| Things Oatchi Can't Do | Unfortunately, Oatchi can't climb up a climbing wall or climbing ropes. |
| Pluck | If you teach Oatchi the Pluck skill, he'll pluck Pikmin sprouts for you. |
| Jump | You can clear small ledges with Oatchi's Jump. |
| Doggy-Paddle | If you teach Oatchi the Doggy-Paddle skill, he can carry Pikmin on his back across bodies of water. |
| A Legendary Skill | Once all other skills have been mastered, you can finally learn...the legendary skill. |
| Co-op Mode | P2 can reset the Pebble Pitcher to center screen by pressing |
| Co-op Mode | You can earn Co-op Points not just by defeating and collecting creatures but also by doing things like breaking down dirt walls. |
| Co-op Mode | Continuously fire pebbles by holding down |
| Co-op Mode (Single Joy-Con mode) | Continuously fire pebbles by holding down |
| Co-op Mode | Hit something that's being transported with a pebble to increase the speed of transport. |
Night Expeditions
Tips for the Night Expeditons in Pikmin 4.
| Tip Title | Tip Text |
|---|---|
| Night Expeditions | If you defeat all the creatures or protect a Lumiknoll until morning, you can harvest the glow sap you need to cure leaflings. |
| Night Expeditions | The light from Lumiknolls and Tricknolls attracts creatures at night. |
| Night Expeditions | Tricknolls are linked to Lumiknolls by underground stems. If glow pellets are transported to either one, the Lumiknoll will produce Glow Pikmin. |
| Night Expeditions | The farther you stray from a Lumiknoll, the harder it will be to protect it. Don't get too distracted while collecting glow pellets. |
| Night Expeditions | Only one glow sap can be collected from each Lumiknoll. |
| Night Expeditions | Build structures during the day to make night expeditions easier. |
| Night Expeditions | There's no need to move your base during night expeditions. |
| Night Expeditions | Creatures are more active at night. Keep an eye on your night radar display to see if they head in the direction of a Lumiknoll. |
| Bulborb Larva | Numerous Bulborb Larvae will emerge from a nest at the same time, so if you find one, be sure to destroy it right away. |
| Smoky Progg | Break a Smoky Progg's nectar egg to prevent it from hatching |
| Smoky Progg | Pikmin will perish in an instant if they touch its body-enveloping Gloom. Don't hesitate! Try hitting it head-on with a Glowmob. |
| Night Expeditions | You'll want to defeat Baldy Long Legs quickly. Try blasting it with a Glowmob from directly beneath its head. |
| Smoky Progg | You can jump to avoid the Gloom that spews from its mouth. |
| Night Expeditions | Don't hesitate to make use of Glow Seeds and items. |
| Glow Pikmin | You'll only get one Glow Pikmin for every three glow pellets, so be sure to transport lots of glow pellets. |
| Glow Pikmin | Creatures caught in a Glowmob will be rendered temporarily immobile by the brightness. |
| Glow Pikmin | Even if they're not hit directly by a Glowmob, nearby creatures can still be affected by it. |
| Glow Pikmin | The more Glow Pikmin you have in your squad, the longer creatures will be immobilized by your Glowmobs. |
| Night Expeditions | Glow Pikmin are strong against fire, water, electricity, ice, and poison— but watch out, because they can still be squished and eaten. |
| Glow Pikmin | The bodies of creatures won't be left behind if you defeat them during night expeditions. Large creatures will transform into glow pellets. |
| Glow Pikmin | When Glow Pikmin finish their current task, they'll return to your squad. |
| Glow Pikmin | Over time, Glow Pikmin will grow leaves, buds, and then flowers. Their flowers won't fall even if they're shaken off by creatures. |
| Glow Pikmin | Even if your Glow Pikmin perish, they won't be included in the number of lost Pikmin. |
| Glow Pikmin | For every five Glow Pikmin that propagate during night expeditions, you will get one Glow Seed to take back with you. |
Caves
Tips for standard Standard Caves in Pikmin 4
| Tip Title | Tip Text |
|---|---|
| Investigating Caves | Don't worry about gathering Pikmin before moving to the next sublevel. Even Pikmin that are currently outside your squad will follow you. |
| Investigating Caves | While exploring caves, it's possible to have more than three types of Pikmin in your squad. |
| Investigating Caves | If you leave a cave before you're done exploring, you can always go back and resume your exploration from any unlocked sublevel. |
| Investigating Caves | Inside caves, creatures will be collected by the S.S. Beagle. You'll get some sparklium in return. |
| Candypop Buds | Try throwing Pikmin into Candypop Buds. The buds will release seeds of the same color as their flower. |
| Treasure Gauge | Its alerts get stronger as you move closer to treasure and castaways. When there's nothing left to detect, the gauge automatically turns off. |
| Cave Exploration | Once you explore a cave 100 percent, creatures will reappear when you return. |
| Cave Exploration | If the number of Pikmin on a sublevel reaches 100, wild Pikmin will disappear, and you won't be able to use Glow Seeds. |
| Glow Pikmin | You can use Glow Seeds in caves to create Glow Pikmin, but you can't take them out of the cave with you. |
| Numbered Gates | In order to open a numbered gate, you'll need to defeat any creatures protecting it. |
| Pup Tunnels | Only Oatchi can pass through to the other side of pup tunnels. Switch to Oatchi and explore. |
| Rush | You can run against the direction of a moving walkway by using Rush. |
| Treasure Gauge+ | This high-tech device shows you the locations and quantity of remaining treasure. |
Dandori Challenges
Tips for Dandori Challenges in Pikmin 4
| Tip Title | Tip Text |
|---|---|
| Dandori Challenge | The weight of the things you transport converts to points. The higher your total points, the better the medal you can receive. |
| Dandori Challenge | There are four types of medals: bronze, silver, gold, and platinum. You have to transport everything to get a platinum medal. |
| Dandori Challenge Tips | The most skillful Dandori approach to completing many tasks is to start each stage by gathering Pikmin. |
| Dandori Challenge Tips | Show off your Dandori skills by assigning Pikmin to tasks they're good at. |
| Dandori Challenge Tips | In order to make sure Pikmin don't waste precious time idling, gather them using Commands or the Idler's Alert. |
| Dandori Challenge Tips | Use a Survey Drone to check the status of treasure and Pikmin, then develop your Dandori-inspired strategy for upcoming tasks. |
| Dandori Challenge Tips | The more shortcuts you create to speed up transportation, the more you display your Dandori talents. |
| Dandori Challenge Tips | When deciding whether to transport nuggets with small or large groups, take a good look at the conditions first. |
| Dandori Challenge | Don't worry if you're unsuccessful. You can restart Dandori Challenges as many times as you want. |
| Dandori Challenge | When it looks like it will be impossible to clear a challenge, you can have the ranger Dingo help you. |
| Dandori Challenge Tips | Once you've gathered Pikmin, it's a good idea to start making shortcuts right away. |
| Battle Tips | It's hard to aim at the leaf-mimicking Skitter Leaf. Try having your Pikmin charge, or set Oatchi on it. |
| Dandori Challenge Tips | Dirt walls can be quickly destroyed with a charge from a large group of Pikmin or with Oatchi's Rush. |
| Dandori Challenge Tips | It's best to leave the transporting to the Blue Pikmin and the fighting to the Rock Pikmin. |
| Dandori Challenge Tips | You can freeze water to create a shortcut. However, treasure in the water can't be transported while it's frozen over. |
| Dandori Challenge Tips | Have Purple Pikmin transport heavy objects. The key to earning medals is picking up those Crimson Banquets. |
| Dandori Challenge Tips | Winged Pikmin won't be affected by a moving walkway's direction. Use them to transport nuggets. |
| Dandori Challenge Tips | Pikmin can't freeze in rooms where a bonfire altar is burning. Build a clay bridge across the middle to make a considerable shortcut. |
| Dandori Challenge Tips | If you want to move Yellow Pikmin across a body of water, you can have them ride on Oatchi. |
| Dandori Challenge Tips | If a gate is shut, Pikmin will go around the long way. Flipping switches at the right time is key. |
| Dandori Challenge Tips | Splitting into two groups to explore shows good Dandori technique. Place Oatchi on a cliff, and throw Pikmin up to him. |
| Dandori Challenge Tips | Hurry to collect raw materials and get right to building. |
| Dandori Challenge Tips | If your time runs out, you can keep practicing in Overtime, but it won't make a difference to your final score. |
Dandori Battles
Tips for Dandori Battles in Pikmin 4
| Tip Title | Tip Text |
|---|---|
| Dandori Battle | The weight of the things you transport converts to points. Whoever has the highest score at the end wins. |
| Dandori Battle | There are four types of medals: bronze, silver, gold, and platinum. The bigger the difference in score, the better the medal you can obtain. |
| Dandori Battle Tips | The heavier the object, the more points it's worth. Gather more Pikmin and aim for big things. |
| Dandori Battle Tips | Your Pikmin are distinguished from those of your opponent by leaf color. |
| Dandori Battle Tips | You can Rush your opponent's Pikmin to interfere with their transporting. |
| Dandori Battle Tips | You can attach as many Pikmin as you want to the things being transported during a Dandori Battle. |
| Dandori Battle Tips | If you attach more Pikmin to an object than your opponent, you can steal what they're transporting. |
| Dandori Battle Tips | It's OK to attack the opponent's dog and try to gain an advantage. |
| Dandori Battle | If you lose, you can restart the battle as many times as you want. Try searching for your own unique route to victory. |
| Dandori Battle Tips | The glittering Golden Sniffer is worth a lot of points. If you can transport it first, you'll take a large step toward victory. |
| Dandori Battle Tips | Get items from Mystery Capsules. If you use your items well, you'll dominate with your Dandori powers! |
| Dandori Battle Tips | Touch Mystery Capsules to get items! You can have Pikmin transport them for you. |
| Dandori Battle Tips | You can turn things around in one fell swoop with a Sneak Bomb. Don't give up on a battle before it's over. |
| Dandori Battle | If it looks like you can't win, have the ranger Dingo help you. |
| Dandori Battle Tips | Gathering Pikmin is crucial to success. The more you have, the more things you can transport. |
| Dandori Battle Tips | Don't get involved with Bulborbs if you don't have many Pikmin. Wait until your opponent defeats them, then steal them. |
| Dandori Battle Tips | Yellow Pikmin are excellent diggers, but they're not great at fighting. If you don't have very many, have them work together with Oatchi. |
| Dandori Battle Tips | Purposefully ignore some creatures to let them interfere with your opponent's strategy. |
| Dandori Battle Tips | Stacks of straw will burn up when touched by fire starters or fiery creatures. |
| Dandori Battle Tips | If some creatures are difficult to defeat using Winged Pikmin, leave them for Glow Pikmin or Oatchi. |
| Dandori Battle Tips | If you transport Bonus Finds, you'll get extra points. Bonus Finds change over time, so don't pass them up. |
| Dandori Battle | In a Dandori Battle, the Pikmin maximum for each team is 50. Any in excess of that number will wait inside their Onion. |
| Dandori Battles | In Dandori Battles, Onions release Pikmin instead of seeds, so no need to waste time plucking sprouts. |
Olimar's Shipwreck Tale
Tips for Olimar's Shipwreck Tale.
| Tip Title | Tip Text |
|---|---|
| Olimar's Shipwreck Tale | You must gather 30 ship parts within 15 days' time. Olimar's fate rests in the strength of your Dandori practice. |
| Olimar's Shipwreck Tale | As you gather ship parts, the area you can explore will expand. |
| Olimar's Shipwreck Tale | While gathering ship parts, you will also obtain gear and items. |
| Olimar's Shipwreck Tale | Moss will learn skills while you collect ship parts. |
| Olimar's Shipwreck Tale | Falling Bomb Rocks will fall again three days later. |
| Olimar's Shipwreck Tale | During Olimar's Shipwreck Tale, days are shorter than in Story mode. You'll need good Dandori skills to collect all the ship parts. |
| Olimar's Shipwreck Tale | If you get stuck while exploring, try starting from a different area. |
| Olimar's Shipwreck Tale | You can always restart the day or return to a previous one if your explorations aren't going as planned. |
| Olimar's Shipwreck Tale | If you find yourself thinking you should have done something differently, using Rewind and Retry is a valid strategy. |
| Olimar's Shipwreck Tale | Taking a break is a good way to get fresh ideas! Don't be afraid to quit at any time. You can resume playing from that point later on. |
Pikmin Adventure
|
The following article or section is in need of assistance from someone who plays Pikmin Adventure. |
| US | Europe |
|---|---|
| You can move Olimar by touching and holding the stylus on the touch screen. | You can move Olimar by touching and holding the stylus on the touch screen. |
| Press |
Press |
| You can also gather Pikmin as Olimar with |
You can also gather Pikmin as Olimar with |
| If you're trying to master the challenges, ignore the assist blocks and rely on your own abilities. | If you're trying to master a challenge, ignore the Assist Block with an exclamation mark and rely on your own abilities. |
| Remember to take a break from time to time. Press |
Remember to take a break from time to time. Press |
| Pikmin players can hold |
Pikmin players can hold |
| If you want to ignore Olimar's attempt to call you back to him, just shake the Wii Remote. | If you want to ignore Olimar's attempt to call you back to him, just shake the Wii Remote. |
| Flick the touch screen with the stylus to make Olimar jump. This can be handy for avoiding enemy attacks. | ... |
| Pikmin are invincible while being gathered by Olimar. Call Pikmin to quickly put them out of trouble. | ... |
| As Olimar, you'll have to show good leadership. Make sure you choose the right moments to gather your Pikmin. | ... |
| Attacking an opponent will knock candy from them. | ... |
| Native creatures have a tendency to attack the winning side. They might just turn the tide of battle in your favor. | ... |
Pikmin Bloom
The following tips appear on Pikmin Bloom's loading screen, as of version 57.1. The first tip always appears first; after that, tips appear in a random order.
- “Remember to be alert at all times. Stay aware of your surroundings.”
- “Take AR photos when you feed your Pikmin and share them with your friends!”
- “The detector will be recharged with one free use every day if it's empty, so don't forget to use it up!”
- “Feed nectar to your Pikmin every day to raise their friendship level. Great things may happen if you become best friends!”
- “Add your favorite photos and write about your day in the lifelog. Tap the "+" button next to the date to get started.”
- “Long tap to select multiple items in your Pikmin or postcard lists.”
- “Pikmin who have come to deliver postcards will wait up to three days until they are received.”
- “Plant flowers around a big flower to help it bloom.”
- “Big flowers shine bright in the first hour of blooming. Try planting flowers around one and maybe you will find a nice surprise!”
- “Seedlings grow faster while planting flowers. Plant flowers to collect more and more Pikmin!”
- “Get bonus coins while planting flowers.”
- “Set up privacy zones from the settings screen to exclude certain areas where you don't want to plant flowers.”
- “You can delete flowers that you have planted from your lifelog or the settings screen.”
- “Invite your friends to join Pikmin Bloom and get rewards!”
- “Check out the help section from the settings screen if you have any questions.”
- “Use the sorting function in your Pikmin list to find your Pikmin more easily.”
- “Link your Nintendo Account to receive a special seedling! Go to the settings screen or the Mii customization screen.”
- “Want to swap all the Pikmin in your squad at once? Quickly tap the whistle three times, and they will be replaced by standby Pikmin.”
- “Special slots allow seedlings to grow faster than usual. You can buy them at the store.”
- “It seems the items worn by Decor Pikmin are related to the location where their seedling was found. Go to the seedling details screen to find out the details.”
- “Too busy to feed your Pikmin nectar one at a time? Try dragging the nectar icon toward them.”
- “When your Pikmin lose the flowers on their heads, add them to your squad and take them out for a walk. That seems to help them recover their leaves faster.”
- “Check the types of Decor Pikmin you have found so far from the Decor Pikmin badge details screen.”
- “Long tap a Pikmin in the garden to pick them up. You can also use the magnifying glass to observe them.”
- “Try expanding the Pikmin info view to full screen and see what happens when you tap on your Pikmin.”
- “When you want to give nectar to a specific Pikmin, double-tap to zoom in on them.”
- “Give special nectar to your favorite Pikmin to increase their friendship level by one heart!”
- “You can upgrade your storage capacity for Pikmin, seedlings, nectar and petals from the store.”
- “Tap the big map on the home screen to access your lifelog, expeditions, postcards, Pikmin list and more!”
- “Expedition items will disappear if you don't send Pikmin to retrieve them. Items are listed from oldest to newest, so get the ones you want before they are gone.”
- “Winged Pikmin seem to be very fast in expeditions, unless they go with other types of Pikmin.”
- “When tackling mushroom battles, Pikmin of the same color as the mushroom, Decor Pikmin, and Pikmin with flowers seem to be the most powerful.”
- “Clear mushroom battles as fast as you can to get higher ratings and better rewards!”
- “It takes a while for mushrooms to recover after being defeated.”
- “Feed your Pikmin nectar and send them on expeditions and mushrooms to raise their friendship level.”
- “Some big flowers may bloom only during certain seasons. Check the news section to see what flowers are in season this month.”
- “Make friends to send each other postcards and check out each other's steps, Pikmin, and badges.”
- “When you walk through a new place, the white clouds on the map will clear away to reveal the new location. Use the map to see the places you have visited so far.”
Gallery
|
This article or section is in need of more images. Particularly: |
- Game loading screens
- Area loading screens
The loading screen for The Impact Site in Pikmin 1 (Nintendo Switch).
The Story Mode loading screen in Pikmin 3 Deluxe when an objective applies to the area being landed in.
Loading Tropical Forest in Collect Treasure! in Mission Mode.
Loading Thirsty Desert in Battle Enemies! in Mission Mode.
Loading the Armored Mawdad in Defeat Bosses! in Mission Mode.
Loading Corroded Maze in Bingo Battle.
Loading Pikmin Reunion in the Side Stories.
Trivia
- The loading screens for different game modes in Pikmin 2 appear to represent four classical elements: wind, water, fire, and earth.
- Areas have the letters trail off into some smoke billowing in the wind.
- Caves in Story Mode have liquid ripples shown behind the letters, representing water.
- 2-Player Battle stages have the letter look as if they were burning by using an animated flame graphic displayed behind it, representing fire.
- Challenge Mode caves have a cluster of brown, orange, and red squares behind the title, representing earth.
- In the files of Pikmin 3, the "Throw Pikmin into a Candypop Bud to turn them into sprouts that are the same color as the flower!" message is declared twice, for either region.
