Hey! Pikmin logs: Difference between revisions
(Treasure list.) |
(→Names in other languages: Names from kanji version of the script?) |
||
| (37 intermediate revisions by 11 users not shown) | |||
| Line 1: | Line 1: | ||
{{game icons|hp=y}}{{ | {{game icons|hp=y}} | ||
{{page title|''Hey! Pikmin'' logs}} | |||
[[File:H!penemylog.jpg|thumb|Viewing a [[Mockiwi]] in the enemy log.]] | [[File:H!penemylog.jpg|thumb|Viewing a [[Mockiwi]] in the enemy log.]] | ||
{{game help|hp| | {{game help|hp|Document what needs to be done to open each creature's entry. Some need to be defeated, and others need to be touched, but there may be more complex mechanics. Also, document every creature's animation when viewing, specifically when you tap on them.}} | ||
{{hp}} has a '''log''' feature in which [[Captain Olimar]] writes a log about the [[Enemy|creatures]] and [[treasure]]s he encounters in his journey throughout the game. This feature has no name, being referred to only as "Logs" in the likes of the [[ | {{hp}} has a '''log''' feature in which [[Captain Olimar]] writes a log about the [[Enemy|creatures]] and [[treasure]]s he encounters in his journey throughout the game. This feature has no name, being referred to only as "Logs" in the likes of the [[area selection menu]], and is similar to the [[Piklopedia (Pikmin 2)|Piklopedia]] and [[Treasure Hoard]] in {{p2}}. It also allows the player to view 3D models of each entry, but unlike ''Pikmin 2'', the models appear in a void, and cannot be interacted with other than rotating the [[camera]] and triggering a couple of random animations by tapping on them. While viewing an entry, the top screen shows Olimar's log on the subject, while the bottom screen shows the 3D model and buttons to navigate the [[Hey! Pikmin logs menu|menu for the logs]]. | ||
There are four categories in the logs menu: "[[#Pikmin | There are four categories in the logs menu: "[[#Pikmin Log|Pikmin Log]]", "[[#Creature Log|Creature Log]]", "[[#Treasure Log|Treasure Log]]", and "[[#amiibo Log|amiibo Log]]". Although entries are not specifically numbered, each one in a category has its own reserved spot in the list, and if the player has not yet encountered the subject, then a question mark will appear in place of its icon. | ||
This feature becomes available after completing the tutorial level, although the creature and amiibo categories are initially locked, as explained in their own sections in this article. | |||
== Pikmin Log == | |||
[[File:H!ppikminlog.jpg|thumb|Viewing a [[Red Pikmin]] in the Pikmin Log.]] | |||
== Pikmin | |||
[[File:H!ppikminlog.jpg|thumb|Viewing a [[Red Pikmin]] in the Pikmin | |||
The Pikmin | The Pikmin Log contains entry about the different [[Pikmin family|Pikmin types]] in the game, as well as the [[Onion]] and the types of [[pellet]] that can be obtained from [[Secret Spot]]s. This category is represented with the [[Red Pikmin]]'s icon. | ||
{| class="wikitable sortable" | {| class="wikitable sortable" | ||
| Line 42: | Line 41: | ||
{{clear}} | {{clear}} | ||
== Creature | == Creature Log == | ||
The | The Creature Log documents the [[enemies]] found in the journey. This category is initially unavailable, and only becomes available once the player reaches 10,000 [[Sparklium]]. The list is roughly sorted by the order in which the enemies are first introduced, and all [[boss]]es appear at the end. This category is represented with the [[Mockiwi]]'s icon. The European name will be provided below the US name with an EU marker if different from the US name. | ||
{| class="wikitable sortable" | {| class="wikitable sortable" | ||
! # || Icon || Name | ! # || Icon || Name | ||
| Line 76: | Line 74: | ||
| 14 || style="text-align: center;" | {{icon|Widemouthed Anode Beetle||32px}} || [[Widemouthed Anode Beetle]] | | 14 || style="text-align: center;" | {{icon|Widemouthed Anode Beetle||32px}} || [[Widemouthed Anode Beetle]] | ||
|- | |- | ||
| 15 || style="text-align: center;" | {{icon|Young Yellow Wollywog||32px}} || [[Young Yellow Wollywog]] | | 15 || style="text-align: center;" | {{icon|Young Yellow Wollywog||32px}} || [[Young Yellow Wollywog]] {{US}}<br>Young Yellow Wollyhop {{EU}} | ||
|- | |- | ||
| 16 || style="text-align: center;" | {{icon|Crystalline Crushblat||32px}} || [[Crystalline Crushblat]] | | 16 || style="text-align: center;" | {{icon|Crystalline Crushblat||32px}} || [[Crystalline Crushblat]] | ||
| Line 84: | Line 82: | ||
| 18 || style="text-align: center;" | {{icon|Crammed Wraith||32px}} || [[Crammed Wraith]] | | 18 || style="text-align: center;" | {{icon|Crammed Wraith||32px}} || [[Crammed Wraith]] | ||
|- | |- | ||
| 19 || style="text-align: center;" | {{icon|||32px}} || [[]] | | 19 || style="text-align: center;" | {{icon|Seedbagger||32px}} || [[Seedbagger]] | ||
|- | |- | ||
| 20 || style="text-align: center;" | {{icon|Skutterchuck||32px}} || [[Skutterchuck]] | | 20 || style="text-align: center;" | {{icon|Skutterchuck||32px|v=HP}} || [[Skutterchuck]] | ||
|- | |- | ||
| 21 || style="text-align: center;" | {{icon|Grabbit||32px}} || [[Grabbit]] | | 21 || style="text-align: center;" | {{icon|Grabbit||32px}} || [[Grabbit]] | ||
| Line 110: | Line 108: | ||
| 31 || style="text-align: center;" | {{icon|Flying Spotted Jellyfloat||32px}} || [[Flying Spotted Jellyfloat]] | | 31 || style="text-align: center;" | {{icon|Flying Spotted Jellyfloat||32px}} || [[Flying Spotted Jellyfloat]] | ||
|- | |- | ||
| 32 || style="text-align: center;" | {{icon|Yellow Wollywog||32px|v=HP}} || [[Yellow Wollywog]] | | 32 || style="text-align: center;" | {{icon|Yellow Wollywog||32px|v=HP}} || [[Yellow Wollywog]] {{US}}<br>Yellow Wollyhop {{EU}} | ||
|- | |- | ||
| 33 || style="text-align: center;" | {{icon|Fireflap Bulborb||32px}} || [[Fireflap Bulborb]] | | 33 || style="text-align: center;" | {{icon|Fireflap Bulborb||32px}} || [[Fireflap Bulborb]] | ||
| Line 122: | Line 120: | ||
| 37 || style="text-align: center;" | {{icon|Firesnout Beetle||32px}} || [[Firesnout Beetle]] | | 37 || style="text-align: center;" | {{icon|Firesnout Beetle||32px}} || [[Firesnout Beetle]] | ||
|- | |- | ||
| 38 || style="text-align: center;" | {{icon|Fiery Young Yellow Wollywog||32px}} || [[Fiery Young Yellow Wollywog]] | | 38 || style="text-align: center;" | {{icon|Fiery Young Yellow Wollywog||32px}} || [[Fiery Young Yellow Wollywog]] {{US}}<br>Fiery Young Yellow Wollyhop {{EU}} | ||
|- | |- | ||
| 39 || style="text-align: center;" | {{icon|Clicking Slurker||32px}} || [[Clicking Slurker]] | | 39 || style="text-align: center;" | {{icon|Clicking Slurker||32px}} || [[Clicking Slurker]] | ||
| Line 128: | Line 126: | ||
| 40 || style="text-align: center;" | {{icon|Stuffed Bellbloom||32px}} || [[Stuffed Bellbloom]] | | 40 || style="text-align: center;" | {{icon|Stuffed Bellbloom||32px}} || [[Stuffed Bellbloom]] | ||
|- | |- | ||
| 41 || style="text-align: center;" | {{icon|||32px}} || [[]] | | 41 || style="text-align: center;" | {{icon|Puffy Blubbug||32px}} || [[Puffy Blubbug]] | ||
|- | |- | ||
| 42 || style="text-align: center;" | {{icon|Blubbug||32px}} || [[Blubbug]] | | 42 || style="text-align: center;" | {{icon|Blubbug||32px}} || [[Blubbug]] | ||
| Line 136: | Line 134: | ||
| 44 || style="text-align: center;" | {{icon|Stony Flint Beetle||32px}} || [[Stony Flint Beetle]] | | 44 || style="text-align: center;" | {{icon|Stony Flint Beetle||32px}} || [[Stony Flint Beetle]] | ||
|- | |- | ||
| 45 || style="text-align: center;" | {{icon|||32px}} || [[]] | | 45 || style="text-align: center;" | {{icon|Adult Centipare||32px}} || [[Adult Centipare]] | ||
|- | |- | ||
| 46 || style="text-align: center;" | {{icon|||32px}} || [[]] | | 46 || style="text-align: center;" | {{icon|Muggonfly||32px}} || [[Muggonfly]] | ||
|- | |- | ||
| 47 || style="text-align: center;" | {{icon|||32px}} || [[]] | | 47 || style="text-align: center;" | {{icon|Swooping Snitchbug||32px|v=HP}} || [[Swooping Snitchbug]] | ||
|- | |- | ||
| 48 || style="text-align: center;" | {{icon|Bulborb||32px|v=HP}} || [[ | | 48 || style="text-align: center;" | {{icon|Bulborb||32px|v=HP}} || [[Bulborb]] | ||
|- | |- | ||
| 49 || style="text-align: center;" | {{icon|Long Water Dumple||32px}} || [[Long Water Dumple]] | | 49 || style="text-align: center;" | {{icon|Long Water Dumple||32px}} || [[Long Water Dumple]] | ||
| Line 165: | Line 163: | ||
{{clear}} | {{clear}} | ||
== Treasure | |||
The | == Treasure Log == | ||
The Treasure Log contains entry about all of the non-[[amiibo]] treasures collected. A treasure is only logged after it is recovered and the player reaches the goal in the [[area]] it is in. These treasures are sorted by the order in which they appear, following this priority: Sector > Area > HUD icon, and the areas are sorted in the order: A > B > C > D > E > X. The final treasures in this category are the ones that appear on the [[Pikmin Park]]. This category is represented with the [[Loop of Beginnings]]'s icon. The European name will be provided below the US name with an EU marker if different from the US name. | |||
{| class="wikitable sortable" | {| class="wikitable sortable" | ||
| Line 177: | Line 176: | ||
| 3 || style="text-align: center;" | {{icon|Song Sewer||32px}} || [[Song Sewer]] | | 3 || style="text-align: center;" | {{icon|Song Sewer||32px}} || [[Song Sewer]] | ||
|- | |- | ||
| 4 || style="text-align: center;" | {{icon|Consolation Prize||32px}} || [[Consolation Prize]] | | 4 || style="text-align: center;" | {{icon|Consolation Prize||32px}} || [[Consolation Prize]] {{US}}<br>Blues Eradicator {{EU}} | ||
|- | |- | ||
| 5 || style="text-align: center;" | {{icon|Ultra-Sealed Aquarium||32px}} || [[Ultra-Sealed Aquarium]] | | 5 || style="text-align: center;" | {{icon|Ultra-Sealed Aquarium||32px}} || [[Ultra-Sealed Aquarium]] | ||
| Line 185: | Line 184: | ||
| 7 || style="text-align: center;" | {{icon|Unassuming Lighthouse||32px}} || [[Unassuming Lighthouse]] | | 7 || style="text-align: center;" | {{icon|Unassuming Lighthouse||32px}} || [[Unassuming Lighthouse]] | ||
|- | |- | ||
| 8 || style="text-align: center;" | {{icon|Quantum Traveler||32px}} || [[Quantum Traveler]] | | 8 || style="text-align: center;" | {{icon|Quantum Traveler||32px}} || [[Quantum Traveler]] {{US}}<br>Quantum Traveller {{EU}} | ||
|- | |- | ||
| 9 || style="text-align: center;" | {{icon|Constitution Gate||32px}} || [[Constitution Gate]] | | 9 || style="text-align: center;" | {{icon|Constitution Gate||32px}} || [[Constitution Gate]] {{US}}<br>Attractive Gate {{EU}} | ||
|- | |- | ||
| 10 || style="text-align: center;" | {{icon|Stopped Doomsday Clock||32px}} || [[Stopped Doomsday Clock]] | | 10 || style="text-align: center;" | {{icon|Stopped Doomsday Clock||32px}} || [[Stopped Doomsday Clock]] | ||
| Line 209: | Line 208: | ||
| 19 || style="text-align: center;" | {{icon|Berserker Brush||32px}} || [[Berserker Brush]] | | 19 || style="text-align: center;" | {{icon|Berserker Brush||32px}} || [[Berserker Brush]] | ||
|- | |- | ||
| 20 || style="text-align: center;" | {{icon|Attitude Adjuster||32px}} || [[Attitude Adjuster]] | | 20 || style="text-align: center;" | {{icon|Attitude Adjuster||32px}} || [[Attitude Adjuster]] {{US}}<br>Rift Ripper {{EU}} | ||
|- | |- | ||
| 21 || style="text-align: center;" | {{icon|Unstrung Racket||32px}} || [[Unstrung Racket]] | | 21 || style="text-align: center;" | {{icon|Unstrung Racket||32px}} || [[Unstrung Racket]] | ||
| Line 215: | Line 214: | ||
| 22 || style="text-align: center;" | {{icon|Work-Life Imbalancer||32px}} || [[Work-Life Imbalancer]] | | 22 || style="text-align: center;" | {{icon|Work-Life Imbalancer||32px}} || [[Work-Life Imbalancer]] | ||
|- | |- | ||
| 23 || style="text-align: center;" | {{icon|Evidence Pulverizer||32px}} || [[Evidence Pulverizer]] | | 23 || style="text-align: center;" | {{icon|Evidence Pulverizer||32px}} || [[Evidence Pulverizer]] {{US}}<br>Evidence Pulveriser {{EU}} | ||
|- | |- | ||
| 24 || style="text-align: center;" | {{icon|Handy Hand||32px}} || [[Handy Hand]] | | 24 || style="text-align: center;" | {{icon|Handy Hand||32px}} || [[Handy Hand]] | ||
| Line 233: | Line 232: | ||
| 31 || style="text-align: center;" | {{icon|Giant Rodent Skull||32px}} || [[Giant Rodent Skull]] | | 31 || style="text-align: center;" | {{icon|Giant Rodent Skull||32px}} || [[Giant Rodent Skull]] | ||
|- | |- | ||
| 32 || style="text-align: center;" | {{icon|Grown-Up Dynamo||32px}} || [[Grown-Up Dynamo]] | | 32 || style="text-align: center;" | {{icon|Grown-Up Dynamo||32px}} || [[Grown-Up Dynamo]] {{US}}<br>Grown-Up Cell {{EU}} | ||
|- | |- | ||
| 33 || style="text-align: center;" | {{icon|Attention-Getting Logo||32px}} || [[Attention-Getting Logo]] | | 33 || style="text-align: center;" | {{icon|Attention-Getting Logo||32px}} || [[Attention-Getting Logo]] | ||
| Line 263: | Line 262: | ||
| 46 || style="text-align: center;" | {{icon|Private Castle||32px}} || [[Private Castle]] | | 46 || style="text-align: center;" | {{icon|Private Castle||32px}} || [[Private Castle]] | ||
|- | |- | ||
| 47 || style="text-align: center;" | {{icon|Un-Damaging Javelin||32px}} || [[Un-Damaging Javelin]] | | 47 || style="text-align: center;" | {{icon|Un-Damaging Javelin||32px}} || [[Un-Damaging Javelin]] {{US}}<br>Lefty-Loosey Lance {{EU}} | ||
|- | |- | ||
| 48 || style="text-align: center;" | {{icon|Lopsided Barbell||32px}} || [[Lopsided Barbell]] | | 48 || style="text-align: center;" | {{icon|Lopsided Barbell||32px}} || [[Lopsided Barbell]] | ||
| Line 269: | Line 268: | ||
| 49 || style="text-align: center;" | {{icon|Whisper Broadcaster||32px}} || [[Whisper Broadcaster]] | | 49 || style="text-align: center;" | {{icon|Whisper Broadcaster||32px}} || [[Whisper Broadcaster]] | ||
|- | |- | ||
| 50 || style="text-align: center;" | {{icon|Metamorphocistern||32px}} || [[Metamorphocistern]] | | 50 || style="text-align: center;" | {{icon|Metamorphocistern||32px}} || [[Metamorphocistern]] {{US}}<br>Metamorphosis Tank {{EU}} | ||
|- | |- | ||
| 51 || style="text-align: center;" | {{icon|Life-Form Prototype||32px}} || [[Life-Form Prototype]] | | 51 || style="text-align: center;" | {{icon|Life-Form Prototype||32px}} || [[Life-Form Prototype]] {{US}}<br>Life Form Prototype {{EU}} | ||
|- | |- | ||
| 52 || style="text-align: center;" | {{icon|Almighty Ruiner||32px}} || [[Almighty Ruiner]] | | 52 || style="text-align: center;" | {{icon|Almighty Ruiner||32px}} || [[Almighty Ruiner]] | ||
| Line 293: | Line 292: | ||
| 61 || style="text-align: center;" | {{icon|Zappy Safe||32px}} || [[Zappy Safe]] | | 61 || style="text-align: center;" | {{icon|Zappy Safe||32px}} || [[Zappy Safe]] | ||
|- | |- | ||
| 62 || style="text-align: center;" | {{icon|Sloshy Nostalgia||32px}} || [[Sloshy Nostalgia]] | | 62 || style="text-align: center;" | {{icon|Sloshy Nostalgia||32px}} || [[Sloshy Nostalgia]] {{US}}<br>Concentrated Nostalgia {{EU}} | ||
|- | |- | ||
| 63 || style="text-align: center;" | {{icon|Ominous Vault||32px}} || [[Ominous Vault]] | | 63 || style="text-align: center;" | {{icon|Ominous Vault||32px}} || [[Ominous Vault]] | ||
|- | |- | ||
| 64 || style="text-align: center;" | {{icon|Slimmerized Cell||32px}} || [[Slimmerized Cell]] | | 64 || style="text-align: center;" | {{icon|Slimmerized Cell||32px}} || [[Slimmerized Cell]] {{US}}<br>Slimmerised Cell {{EU}} | ||
|- | |- | ||
| 65 || style="text-align: center;" | {{icon|Probable Teapot||32px}} || [[Probable Teapot]] | | 65 || style="text-align: center;" | {{icon|Probable Teapot||32px}} || [[Probable Teapot]] | ||
| Line 303: | Line 302: | ||
| 66 || style="text-align: center;" | {{icon|King's Sanctum||32px}} || [[King's Sanctum]] | | 66 || style="text-align: center;" | {{icon|King's Sanctum||32px}} || [[King's Sanctum]] | ||
|- | |- | ||
| 67 || style="text-align: center;" | {{icon|Personal Odor Shield||32px}} || [[Personal Odor Shield]] | | 67 || style="text-align: center;" | {{icon|Personal Odor Shield||32px}} || [[Personal Odor Shield]] {{US}}<br>Personal Odour Shield {{EU}} | ||
|- | |- | ||
| 68 || style="text-align: center;" | {{icon|Nostalgic Buckler||32px}} || [[Nostalgic Buckler]] | | 68 || style="text-align: center;" | {{icon|Nostalgic Buckler||32px}} || [[Nostalgic Buckler]] | ||
| Line 309: | Line 308: | ||
| 69 || style="text-align: center;" | {{icon|Menacing Crusher||32px}} || [[Menacing Crusher]] | | 69 || style="text-align: center;" | {{icon|Menacing Crusher||32px}} || [[Menacing Crusher]] | ||
|- | |- | ||
| 70 || style="text-align: center;" | {{icon| | | 70 || style="text-align: center;" | {{icon|Altitudinal Unlimiter||32px}} || [[Altitudinal Unlimiter]] | ||
|- | |- | ||
| 71 || style="text-align: center;" | {{icon|Alien Ceremony||32px}} || [[Alien Ceremony]] | | 71 || style="text-align: center;" | {{icon|Alien Ceremony||32px}} || [[Alien Ceremony]] | ||
| Line 349: | Line 348: | ||
| 89 || style="text-align: center;" | {{icon|Scoreless Dartboard||32px}} || [[Scoreless Dartboard]] | | 89 || style="text-align: center;" | {{icon|Scoreless Dartboard||32px}} || [[Scoreless Dartboard]] | ||
|- | |- | ||
| 90 || style="text-align: center;" | {{icon|Scallop Spring||32px}} || [[Scallop Spring]] | | 90 || style="text-align: center;" | {{icon|Scallop Spring||32px}} || [[Scallop Spring]] | ||
|- | |- | ||
| 91 || style="text-align: center;" | {{icon|Stoic Head||32px}} || [[Stoic Head]] | | 91 || style="text-align: center;" | {{icon|Stoic Head||32px}} || [[Stoic Head]] | ||
| Line 361: | Line 360: | ||
| 95 || style="text-align: center;" | {{icon|Fond-o-Sphere||32px}} || [[Fond-o-Sphere]] | | 95 || style="text-align: center;" | {{icon|Fond-o-Sphere||32px}} || [[Fond-o-Sphere]] | ||
|- | |- | ||
| 96 || style="text-align: center;" | {{icon|Humor Implant||32px}} || [[Humor Implant]] | | 96 || style="text-align: center;" | {{icon|Humor Implant||32px}} || [[Humor Implant]] {{US}}<br>Humour Implant {{EU}} | ||
|- | |- | ||
| 97 || style="text-align: center;" | {{icon|Herbivore Molars||32px}} || [[Herbivore Molars]] | | 97 || style="text-align: center;" | {{icon|Herbivore Molars||32px}} || [[Herbivore Molars]] | ||
| Line 411: | Line 410: | ||
| 120 || style="text-align: center;" | {{icon|Distortion Chamber||32px}} || [[Distortion Chamber]] | | 120 || style="text-align: center;" | {{icon|Distortion Chamber||32px}} || [[Distortion Chamber]] | ||
|- | |- | ||
| 121 || style="text-align: center;" | {{icon|Single's Seesaw||32px}} || [[Single's Seesaw]] | | 121 || style="text-align: center;" | {{icon|Single's Seesaw||32px}} || [[Single's Seesaw]] {{US}}<br>Single's See-Saw {{EU}} | ||
|- | |- | ||
| 122 || style="text-align: center;" | {{icon|Starship Bones||32px}} || [[Starship Bones]] | | 122 || style="text-align: center;" | {{icon|Starship Bones||32px}} || [[Starship Bones]] | ||
| Line 417: | Line 416: | ||
| 123 || style="text-align: center;" | {{icon|Sunset Engine||32px}} || [[Sunset Engine]] | | 123 || style="text-align: center;" | {{icon|Sunset Engine||32px}} || [[Sunset Engine]] | ||
|- | |- | ||
| 124 || style="text-align: center;" | {{icon| | | 124 || style="text-align: center;" | {{icon|Apotheosis of Balance||32px}} || [[Apotheosis of Balance]] | ||
|- | |- | ||
| 125 || style="text-align: center;" | {{icon|Ornamental Cycle||32px}} || [[Ornamental Cycle]] | | 125 || style="text-align: center;" | {{icon|Ornamental Cycle||32px}} || [[Ornamental Cycle]] | ||
| Line 423: | Line 422: | ||
{{clear}} | {{clear}} | ||
== amiibo | |||
The amiibo | == amiibo Log == | ||
The amiibo Log is the same as the Treasure Log, but only contains [[amiibo]] statue treasures. Until the player obtains their first amiibo, this category is closed off, and its button shows a question mark instead. This category is represented with the [[Colossus in Suspenders]]'s icon. The European name will be provided below the US name with an EU marker if different from the US name. | |||
{| class="wikitable sortable" | {| class="wikitable sortable" | ||
! # || Icon || Name | ! # || Icon || Name | ||
|- | |- | ||
| 1 || style="text-align: center;" | {{icon|||32px}} || [[]] | | 1 || style="text-align: center;" | {{icon|Spellbound Friends||32px}} || [[Spellbound Friends]] | ||
|- | |- | ||
| 2 || style="text-align: center;" | {{icon|||32px}} || [[]] | | 2 || style="text-align: center;" | {{icon|Oversized Replica||32px}} || [[Oversized Replica]] | ||
|- | |- | ||
| 3 || style="text-align: center;" | {{icon|||32px}} || [[]] | | 3 || style="text-align: center;" | {{icon|Colossus in Suspenders||32px}} || [[Colossus in Suspenders]] {{US}}<br>Dungareed Colossus {{EU}} | ||
|- | |- | ||
| 4 || style="text-align: center;" | {{icon|||32px}} || [[]] | | 4 || style="text-align: center;" | {{icon|Priceless Artifact||32px}} || [[Priceless Artifact]] {{US}}<br>Priceless Artefact {{EU}} | ||
|- | |- | ||
| 5 || style="text-align: center;" | {{icon|||32px}} || [[]] | | 5 || style="text-align: center;" | {{icon|Great Man||32px}} || [[Great Man]] | ||
|- | |- | ||
| 6 || style="text-align: center;" | {{icon|||32px}} || [[]] | | 6 || style="text-align: center;" | {{icon|Unsung Hero||32px}} || [[Unsung Hero]] | ||
|- | |- | ||
| 7 || style="text-align: center;" | {{icon|||32px}} || [[]] | | 7 || style="text-align: center;" | {{icon|Memento of Love||32px}} || [[Memento of Love]] | ||
|- | |- | ||
| 8 || style="text-align: center;" | {{icon|||32px}} || [[]] | | 8 || style="text-align: center;" | {{icon|Incomprehensible Life-Form||32px}} || [[Incomprehensible Life-Form]] {{US}}<br>Incomprehensible Life Form {{EU}} | ||
|- | |- | ||
| 9 || style="text-align: center;" | {{icon|||32px}} || [[]] | | 9 || style="text-align: center;" | {{icon|Fashion Mystery||32px}} || [[Fashion Mystery]] | ||
|- | |- | ||
| 10 || style="text-align: center;" | {{icon|||32px}} || [[]] | | 10 || style="text-align: center;" | {{icon|Fearsome Boss||32px}} || [[Fearsome Boss]] | ||
|- | |- | ||
| 11 || style="text-align: center;" | {{icon|||32px}} || [[]] | | 11 || style="text-align: center;" | {{icon|Gaudy Goon||32px}} || [[Gaudy Goon]] | ||
|- | |- | ||
| 12 || style="text-align: center;" | {{icon|||32px}} || [[]] | | 12 || style="text-align: center;" | {{icon|Powerful Pencil-Pusher||32px}} || [[Powerful Pencil-Pusher]] | ||
|- | |- | ||
| 13 || style="text-align: center;" | {{icon|||32px}} || [[]] | | 13 || style="text-align: center;" | {{icon|Barrel of Laughs||32px}} || [[Barrel of Laughs]] | ||
|- | |- | ||
| 14 || style="text-align: center;" | {{icon|||32px}} || [[]] | | 14 || style="text-align: center;" | {{icon|Anatomical Enigma||32px}} || [[Anatomical Enigma]] | ||
|- | |- | ||
| 15 || style="text-align: center;" | {{icon|||32px}} || [[]] | | 15 || style="text-align: center;" | {{icon|My Princess||32px}} || [[My Princess]] | ||
|- | |- | ||
| 16 || style="text-align: center;" | {{icon|||32px}} || [[]] | | 16 || style="text-align: center;" | {{icon|Insensitive Lout||32px}} || [[Insensitive Lout]] | ||
|- | |- | ||
| 17 || style="text-align: center;" | {{icon|||32px}} || [[]] | | 17 || style="text-align: center;" | {{icon|Fanged Marshmallow||32px}} || [[Fanged Marshmallow]] | ||
|- | |- | ||
| 18 || style="text-align: center;" | {{icon|||32px}} || [[]] | | 18 || style="text-align: center;" | {{icon|Business Pet||32px}} || [[Business Pet]] | ||
|- | |- | ||
| 19 || style="text-align: center;" | {{icon|||32px}} || [[]] | | 19 || style="text-align: center;" | {{icon|Imaginary Friend||32px}} || [[Imaginary Friend]] | ||
|- | |- | ||
| 20 || style="text-align: center;" | {{icon|||32px}} || [[]] | | 20 || style="text-align: center;" | {{icon|Seated Strummer||32px}} || [[Seated Strummer]] | ||
|- | |- | ||
| 21 || style="text-align: center;" | {{icon|||32px}} || [[]] | | 21 || style="text-align: center;" | {{icon|Uncomfortable Swaddler||32px}} || [[Uncomfortable Swaddler]] | ||
|- | |- | ||
| 22 || style="text-align: center;" | {{icon|||32px}} || [[]] | | 22 || style="text-align: center;" | {{icon|Uniformed Crew||32px}} || [[Uniformed Crew]] | ||
|- | |- | ||
| 23 || style="text-align: center;" | {{icon|||32px}} || [[]] | | 23 || style="text-align: center;" | {{icon|Apron Model||32px}} || [[Apron Model]] | ||
|- | |- | ||
| 24 || style="text-align: center;" | {{icon|||32px}} || [[]] | | 24 || style="text-align: center;" | {{icon|Rosy-Outlooked Trotter||32px}} || [[Rosy-Outlooked Trotter]] | ||
|- | |- | ||
| 25 || style="text-align: center;" | {{icon|||32px}} || [[]] | | 25 || style="text-align: center;" | {{icon|Hair-Trigger Furball||32px}} || [[Hair-Trigger Furball]] | ||
|- | |- | ||
| 26 || style="text-align: center;" | {{icon|||32px}} || [[]] | | 26 || style="text-align: center;" | {{icon|Solemnity Party Chairman||32px}} || [[Solemnity Party Chairman]] | ||
|- | |- | ||
| 27 || style="text-align: center;" | {{icon|||32px}} || [[]] | | 27 || style="text-align: center;" | {{icon|Unblinking Guilt Reflector||32px}} || [[Unblinking Guilt Reflector]] | ||
|- | |- | ||
| 28 || style="text-align: center;" | {{icon|||32px}} || [[]] | | 28 || style="text-align: center;" | {{icon|Subterranean Menace||32px}} || [[Subterranean Menace]] | ||
|- | |- | ||
| 29 || style="text-align: center;" | {{icon|||32px}} || [[]] | | 29 || style="text-align: center;" | {{icon|Argyle Collector||32px}} || [[Argyle Collector]] | ||
|- | |- | ||
| 30 || style="text-align: center;" | {{icon|||32px}} || [[]] | | 30 || style="text-align: center;" | {{icon|Midnight Dreamer||32px}} || [[Midnight Dreamer]] | ||
|- | |- | ||
| 31 || style="text-align: center;" | {{icon|||32px}} || [[]] | | 31 || style="text-align: center;" | {{icon|Inadequacy Wellspring||32px}} || [[Inadequacy Wellspring]] | ||
|- | |- | ||
| 32 || style="text-align: center;" | {{icon|||32px}} || [[]] | | 32 || style="text-align: center;" | {{icon|Embarrassment Target||32px}} || [[Embarrassment Target]] | ||
|- | |- | ||
| 33 || style="text-align: center;" | {{icon|||32px}} || [[]] | | 33 || style="text-align: center;" | {{icon|Painted Alien||32px}} || [[Painted Alien]] | ||
|- | |- | ||
| 34 || style="text-align: center;" | {{icon|Exhausted Soldier||32px}} || [[Exhausted Soldier]] | | 34 || style="text-align: center;" | {{icon|Exhausted Soldier||32px}} || [[Exhausted Soldier]] | ||
|- | |- | ||
| 35 || style="text-align: center;" | {{icon|||32px}} || [[]] | | 35 || style="text-align: center;" | {{icon|Electric-Lime Hairdo||32px}} || [[Electric-Lime Hairdo]] {{US}}<br>Electric Lime Hairdo {{EU}} | ||
|- | |- | ||
| 36 || style="text-align: center;" | {{icon|||32px}} || [[]] | | 36 || style="text-align: center;" | {{icon|Squirting Squirt||32px}} || [[Squirting Squirt]] | ||
|- | |- | ||
| 37 || style="text-align: center;" | {{icon|||32px}} || [[]] | | 37 || style="text-align: center;" | {{icon|Devious Drencher||32px}} || [[Devious Drencher]] | ||
|- | |- | ||
| 38 || style="text-align: center;" | {{icon|||32px}} || [[]] | | 38 || style="text-align: center;" | {{icon|Chartreuse Arrow||32px}} || [[Chartreuse Arrow]] | ||
|- | |- | ||
| 39 || style="text-align: center;" | {{icon|||32px}} || [[]] | | 39 || style="text-align: center;" | {{icon|Uplifting Arrow||32px}} || [[Uplifting Arrow]] | ||
|- | |- | ||
| 40 || style="text-align: center;" | {{icon|||32px}} || [[]] | | 40 || style="text-align: center;" | {{icon|Sparkling Ingenue||32px}} || [[Sparkling Ingenue]] | ||
|- | |- | ||
| 41 || style="text-align: center;" | {{icon|||32px}} || [[]] | | 41 || style="text-align: center;" | {{icon|Chilled-Out Cucumbress||32px}} || [[Chilled-Out Cucumbress]] | ||
|} | |} | ||
{{clear}} | {{clear}} | ||
== Gallery == | |||
<gallery> | |||
Hey! Pikmin logs fresh.jpg|The logs at the very start of the game. | |||
</gallery> | |||
== Trivia == | |||
*The [[Smile Detector]] features 3 Red Pikmin taking a picture, something that can only be seen by rotating the treasure in the logs. | |||
==Names in other languages== | |||
{| class="wikitable" | |||
! [[File:Flag of Japan.svg|21px|link=]] Japanese || English || [[File:Flag of the Netherlands.svg|21px|link=]] Dutch || [[File:Flag of France.svg|21px|link=]] French || [[File:Flag of Germany.svg|21px|link=]] German || [[File:Flag of Italy.svg|21px|link=]] Italian || [[File:Flag of South Korea.svg|21px|link=]] Korean || [[File:Flag of Spain.svg|21px|link=]] Spanish | |||
|- | |||
| {{j|図鑑|Zukan}} || Logs || Album || Journal || Album || Diario || {{tt|도감|dogam}} || Diario | |||
|- | |||
| {{j|ピクミン図鑑|Pikumin Zukan}} || Pikmin Log || Pikmin || Pikmin || Pikmin-Album || Pikmin || || Pikmin | |||
|- | |||
| {{j|原生生物図鑑|Gensei Seibutsu Zukan}} || Creature Log || Inheemse wezens || Créatures || Kreaturen-Album || Creature || || Criaturas nativas [[File:Flag of Mexico.svg|21px|link=Region|Latin America]]<br>Criaturas autóctonas [[File:Flag of Spain.svg|21px|link=Region|Spain]] | |||
|- | |||
| {{j|お宝図鑑|Otakara Zukan}} || Treasure Log || Schatten || Trésores || Schatz-Album || Tesori || || Tesoros | |||
|- | |||
| {{j|amiibo図鑑|Amiibo Zukan}} || amiibo || amiibo || amiibo || amiibo-Album || amiibo || || amiibo | |||
|} | |||
== See also == | == See also == | ||
* [[Olimar's voyage log]] | * [[Olimar's voyage log]] | ||
* [[Piklopedia]] | * [[Piklopedia (Pikmin 2)|Piklopedia (''Pikmin 2'')]] | ||
* [[Piklopedia (Pikmin 3 Deluxe)|Piklopedia (''Pikmin 3 Deluxe'')]] | |||
* [[Piklopedia (Pikmin 4)|Piklopedia (''Pikmin 4'')]] | |||
* [[Treasure Hoard]] | * [[Treasure Hoard]] | ||
* [[Treasure Catalog]] | |||
* [[Pikmin 3 voyage log|''Pikmin 3'' voyage log]] | * [[Pikmin 3 voyage log|''Pikmin 3'' voyage log]] | ||
* [[Pikmin 4 voyage log|''Pikmin 4'' voyage log]] | |||
* [[Hey! Pikmin logs menu|''Hey! Pikmin'' logs menu]] | |||
Latest revision as of 11:02, July 13, 2024

|
The following article or section is in need of assistance from someone who plays Hey! Pikmin. |
Hey! Pikmin has a log feature in which Captain Olimar writes a log about the creatures and treasures he encounters in his journey throughout the game. This feature has no name, being referred to only as "Logs" in the likes of the area selection menu, and is similar to the Piklopedia and Treasure Hoard in Pikmin 2. It also allows the player to view 3D models of each entry, but unlike Pikmin 2, the models appear in a void, and cannot be interacted with other than rotating the camera and triggering a couple of random animations by tapping on them. While viewing an entry, the top screen shows Olimar's log on the subject, while the bottom screen shows the 3D model and buttons to navigate the menu for the logs.
There are four categories in the logs menu: "Pikmin Log", "Creature Log", "Treasure Log", and "amiibo Log". Although entries are not specifically numbered, each one in a category has its own reserved spot in the list, and if the player has not yet encountered the subject, then a question mark will appear in place of its icon.
This feature becomes available after completing the tutorial level, although the creature and amiibo categories are initially locked, as explained in their own sections in this article.
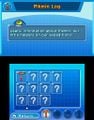
Pikmin Log[edit]

The Pikmin Log contains entry about the different Pikmin types in the game, as well as the Onion and the types of pellet that can be obtained from Secret Spots. This category is represented with the Red Pikmin's icon.
| # | Icon | Name |
|---|---|---|
| 1 | Red Pikmin | |
| 2 | Yellow Pikmin | |
| 3 | Blue Pikmin | |
| 4 | Rock Pikmin | |
| 5 | Winged Pikmin | |
| 6 | Onion | |
| 7 | Red pellet | |
| 8 | Yellow pellet | |
| 9 | Blue pellet | |
| 10 | Rock pellet | |
| 11 | Winged pellet |
Creature Log[edit]
The Creature Log documents the enemies found in the journey. This category is initially unavailable, and only becomes available once the player reaches 10,000 Sparklium. The list is roughly sorted by the order in which the enemies are first introduced, and all bosses appear at the end. This category is represented with the Mockiwi's icon. The European name will be provided below the US name with an EU marker if different from the US name.
Treasure Log[edit]
The Treasure Log contains entry about all of the non-amiibo treasures collected. A treasure is only logged after it is recovered and the player reaches the goal in the area it is in. These treasures are sorted by the order in which they appear, following this priority: Sector > Area > HUD icon, and the areas are sorted in the order: A > B > C > D > E > X. The final treasures in this category are the ones that appear on the Pikmin Park. This category is represented with the Loop of Beginnings's icon. The European name will be provided below the US name with an EU marker if different from the US name.
amiibo Log[edit]
The amiibo Log is the same as the Treasure Log, but only contains amiibo statue treasures. Until the player obtains their first amiibo, this category is closed off, and its button shows a question mark instead. This category is represented with the Colossus in Suspenders's icon. The European name will be provided below the US name with an EU marker if different from the US name.
| # | Icon | Name |
|---|---|---|
| 1 | Spellbound Friends | |
| 2 | Oversized Replica | |
| 3 | Colossus in Suspenders Dungareed Colossus | |
| 4 | Priceless Artifact Priceless Artefact | |
| 5 | Great Man | |
| 6 | Unsung Hero | |
| 7 | Memento of Love | |
| 8 | Incomprehensible Life-Form Incomprehensible Life Form | |
| 9 | Fashion Mystery | |
| 10 | Fearsome Boss | |
| 11 | Gaudy Goon | |
| 12 | Powerful Pencil-Pusher | |
| 13 | Barrel of Laughs | |
| 14 | Anatomical Enigma | |
| 15 | My Princess | |
| 16 | Insensitive Lout | |
| 17 | Fanged Marshmallow | |
| 18 | Business Pet | |
| 19 | Imaginary Friend | |
| 20 | Seated Strummer | |
| 21 | Uncomfortable Swaddler | |
| 22 | Uniformed Crew | |
| 23 | Apron Model | |
| 24 | Rosy-Outlooked Trotter | |
| 25 | Hair-Trigger Furball | |
| 26 | Solemnity Party Chairman | |
| 27 | Unblinking Guilt Reflector | |
| 28 | Subterranean Menace | |
| 29 | Argyle Collector | |
| 30 | Midnight Dreamer | |
| 31 | Inadequacy Wellspring | |
| 32 | Embarrassment Target | |
| 33 | Painted Alien | |
| 34 | Exhausted Soldier | |
| 35 | Electric-Lime Hairdo Electric Lime Hairdo | |
| 36 | Squirting Squirt | |
| 37 | Devious Drencher | |
| 38 | Chartreuse Arrow | |
| 39 | Uplifting Arrow | |
| 40 | Sparkling Ingenue | |
| 41 | Chilled-Out Cucumbress |
Gallery[edit]
The logs at the very start of the game.

Trivia[edit]
- The Smile Detector features 3 Red Pikmin taking a picture, something that can only be seen by rotating the treasure in the logs.
Names in other languages[edit]
| English | |||||||
|---|---|---|---|---|---|---|---|
| 図鑑? | Logs | Album | Journal | Album | Diario | 도감 | Diario |
| ピクミン図鑑? | Pikmin Log | Pikmin | Pikmin | Pikmin-Album | Pikmin | Pikmin | |
| 原生生物図鑑? | Creature Log | Inheemse wezens | Créatures | Kreaturen-Album | Creature | Criaturas nativas Criaturas autóctonas | |
| お宝図鑑? | Treasure Log | Schatten | Trésores | Schatz-Album | Tesori | Tesoros | |
| amiibo図鑑? | amiibo | amiibo | amiibo | amiibo-Album | amiibo | amiibo |