
The following is a collection of images related to the first Pikmin game and the New Play Control! remake.
Subcategories
This category has the following 11 subcategories, out of 11 total.
P
- Pikmin 1 artwork (185 F)
- Pikmin 1 Challenge Mode images (34 F)
- Pikmin 1 IGN prerelease images (38 F)
- Pikmin 1 log pictures (33 F)
- Pikmin 1 prerelease images (37 F)
- Pikmin 1 unused images (8 F)
T
- The Distant Spring images (94 F)
- The Final Trial images (31 F)
- The Forest Navel images (106 F)
- The Forest of Hope images (97 F)
- The Impact Site images (66 F)
Media in category "Pikmin 1 images"
The following 200 files are in this category, out of 1,076 total.
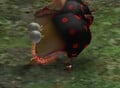
(previous page) (next page) P1 Beady Long Legs death.jpg 1,280 × 720; 231 KB
 P1 Beady Long Legs idle.jpg 1,280 × 720; 198 KB
 P1 Beady Long Legs near death.jpg 1,280 × 720; 218 KB
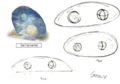
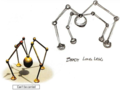 P1 Beady Long Legs Sketch.png 597 × 465; 193 KB
 P1 Beta Screenshot EGM 2.png 1,280 × 981; 2.36 MB
 P1 Beta Screenshot EGM 3.png 555 × 425; 468 KB
 P1 Beta Screenshot EGM 4.png 448 × 342; 296 KB
 P1 Beta Screenshot EGM.png 2,711 × 2,061; 9.9 MB
 P1 Beta Yellow Intro Cutscene.jpg 340 × 280; 18 KB
 P1 Bowsprit Collected.png 640 × 480; 607 KB
 P1 Bowsprit Cutscene.png 640 × 480; 609 KB
 P1 Bowsprit Location.png 640 × 480; 314 KB
 P1 Breadbug corpse.jpg 322 × 372; 37 KB
 P1 Breadbug flipped.jpg 253 × 229; 24 KB
 P1 Breadbug Nest.png 640 × 480; 434 KB
 P1 Breadbug pulling.jpg 1,280 × 720; 225 KB
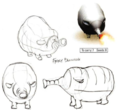
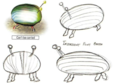
 P1 Breadbug Sketch.png 653 × 455; 274 KB
 P1 Breadbug tugofwar.jpg 363 × 341; 34 KB
 P1 Burrowing Snagret death.jpg 1,280 × 720; 372 KB
 P1 Burrowing Snagret eating.jpg 1,280 × 720; 322 KB
 P1 Burrowing Snagret emerged.jpg 1,280 × 720; 341 KB
 P1 Burrowing Snagret Sketch.png 607 × 443; 166 KB
 P1 Challenge Mode Distant Spring Landing Site.jpg 1,235 × 720; 251 KB
 P1 Challenge Mode Distant Spring Sandy Corner.jpg 1,235 × 720; 206 KB
 P1 Challenge Mode Final Trial Beady Long Legs.jpg 1,235 × 720; 209 KB
 P1 Challenge Mode Final Trial Burrowing Snagret.jpg 1,235 × 720; 210 KB
 P1 Challenge Mode Final Trial Landing Site.jpg 1,235 × 720; 253 KB
 P1 Challenge Mode Final Trial Plateaus.jpg 1,235 × 720; 245 KB
 P1 Challenge Mode Forest Navel Glowcap Pellets.jpg 1,235 × 719; 186 KB
 P1 Challenge Mode Forest Navel Landing Site.jpg 1,235 × 720; 244 KB
 P1 Challenge Mode Forest Navel Pearly Clamclamp.jpg 1,235 × 720; 151 KB
 P1 Challenge Mode Forest Navel Small Lake.jpg 1,235 × 720; 239 KB
 P1 Challenge Mode Forest of Hope Dwarf Bulbears.jpg 1,235 × 720; 302 KB
 P1 Challenge Mode Forest of Hope Landing Site.jpg 1,235 × 720; 278 KB
 P1 Challenge Mode Impact Site 5 Pellets.jpg 1,235 × 720; 288 KB
 P1 Challenge Mode Impact Site Beach.jpg 1,235 × 720; 197 KB
 P1 Challenge Mode Impact Site Landing Site.jpg 1,235 × 720; 245 KB
 P1 Challenge Mode Impact Site Plucking Pikmin.jpg 1,235 × 720; 290 KB
 P1 Challenge Mode Menu.jpg 640 × 480; 191 KB
 P1 Challenge Mode Menu.png 640 × 480; 238 KB
 P1 Chronos Reactor Cutscene.png 640 × 480; 569 KB
 P1 Chronos Reactor Location.png 640 × 480; 456 KB
 P1 CM 01 The Impact Site Landing.png 640 × 480; 536 KB
 P1 CM 02 The Forest of Hope Landing.png 640 × 480; 592 KB
 P1 CM 03 The Forest Navel Landing.png 640 × 480; 458 KB
 P1 CM 04 The Distant Spring Landing.png 640 × 480; 513 KB
 P1 CM 05 The Final Trial Landing.png 640 × 480; 558 KB
 P1 Dandelion.png 267 × 232; 122 KB
 P1 Distant Spring Bones.png 640 × 480; 372 KB
 P1 Dwarf Bulbear closeup.jpg 1,280 × 720; 233 KB
 P1 Dwarf Bulbear corpse.jpg 296 × 314; 24 KB
 P1 Dwarf Bulbear eating.jpg 319 × 234; 18 KB
 P1 Dwarf Bulbear idle.jpg 1,280 × 720; 286 KB
 P1 Dwarf Bulborb corpse.jpg 288 × 274; 24 KB
 P1 Dwarf Bulborb eating.jpg 1,280 × 720; 194 KB
 P1 Dwarf Bulborb idle.jpg 265 × 283; 16 KB
 P1 Emperor Bulblax Sketch.png 604 × 472; 229 KB
 P1 enemy spirit textures.png 129 × 64; 10 KB
 P1 Eternal Fuel Dynamo Location.png 640 × 480; 357 KB
 P1 EU and US Loading screen.jpg 571 × 348; 12 KB
 P1 extinction restore.jpg 640 × 468; 168 KB
 P1 Extraordinary Bolt Location.png 640 × 480; 282 KB
 P1 Fastest Completion Screenshot.jpg 640 × 480; 91 KB
 P1 Female Sheargrub corpse.jpg 200 × 162; 9 KB
 P1 Female Sheargrub idle.jpg 1,280 × 720; 207 KB
 P1 Female Sheargrub Sketch.png 527 × 299; 84 KB
 P1 Ferns 1.png 374 × 463; 373 KB
 P1 Fiery Blowhog corpse.jpg 402 × 389; 31 KB
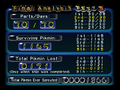 P1 Final Analysis Menu.png 640 × 480; 210 KB
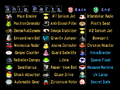 P1 Final Analysis Ship Parts.png 640 × 480; 177 KB
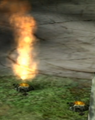 P1 Fire Geyser Screenshot.png 224 × 282; 138 KB
 P1 Firey Blowhog Sketch.png 578 × 528; 212 KB
 P1 Flint Beetle Sketch.png 593 × 410; 231 KB
 P1 Geiger Counter and Pellets.jpg 359 × 437; 49 KB
 P1 Geiger Counter Collected.png 640 × 480; 538 KB
 P1 Geiger Counter Cutscene.png 640 × 480; 538 KB
 P1 Geiger Counter Location.png 640 × 480; 455 KB
 P1 Gluon Drive Collected.png 640 × 480; 584 KB
 P1 Gluon Drive Cutscene.png 640 × 480; 604 KB
 P1 Gluon Drive Location.jpg 437 × 259; 18 KB
 P1 Gluon Drive Location.png 640 × 480; 215 KB
 P1 Goolix attack.jpg 1,280 × 720; 257 KB
 P1 Goolix corpse.jpg 1,280 × 720; 257 KB
 P1 Goolix idle.jpg 1,280 × 720; 244 KB
 P1 Goolix Sketch.png 171 × 101; 6 KB
 P1 Goolix Sketch2.png 635 × 447; 200 KB
 P1 Gravity Jumper Artwork.jpg 601 × 547; 82 KB
 P1 Gravity Jumper Carried.png 640 × 480; 416 KB
 P1 Gravity Jumper Collected.png 640 × 480; 375 KB
 P1 Gravity Jumper Location.png 640 × 480; 358 KB
 P1 Guard Satellite Collected.png 640 × 480; 378 KB
 P1 Guard Satellite Cutscene.png 640 × 480; 388 KB
 P1 Guard Satellite Drop.png 640 × 480; 337 KB
 P1 Guard Satellite Screenshot.jpg 1,153 × 714; 156 KB
 P1 Honeywisp Artwork.png 491 × 732; 157 KB
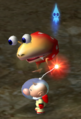
 P1 Honeywisp drop nectar.jpg 1,280 × 720; 277 KB
 P1 Honeywisp idle.jpg 1,280 × 720; 304 KB
 P1 Honeywisp Sketch.png 647 × 441; 220 KB
 P1 HUD Blue Bud Pikmin.png 59 × 59; 3 KB
 P1 HUD Blue Flower Pikmin.png 59 × 59; 3 KB
 P1 HUD Blue Leaf Pikmin.png 59 × 59; 3 KB
 P1 HUD No Pikmin.png 60 × 59; 3 KB
 P1 HUD Olimar.png 57 × 59; 5 KB
 P1 HUD Red Bud Pikmin.png 59 × 59; 3 KB
 P1 HUD Red Flower Pikmin.png 59 × 59; 3 KB
 P1 HUD Red Leaf Pikmin.png 59 × 59; 3 KB
 P1 HUD Yellow Bud Bomb-Rock.png 59 × 59; 4 KB
 P1 HUD Yellow Bud Pikmin.png 59 × 59; 3 KB
 P1 HUD Yellow Flower Bomb-Rock.png 59 × 59; 5 KB
 P1 HUD Yellow Flower Pikmin.png 59 × 59; 4 KB
 P1 HUD Yellow Leaf Bomb-Rock.png 59 × 59; 4 KB
 P1 HUD Yellow Leaf Pikmin.png 59 × 59; 3 KB
 P1 Impact Site Map.jpg 640 × 480; 44 KB
 P1 Inactive Geyser.jpg 131 × 108; 5 KB
 P1 Interstellar Radio Collected.png 640 × 480; 597 KB
 P1 Interstellar Radio Cutscene.png 640 × 480; 595 KB
 P1 Interstellar Radio Location.png 640 × 480; 221 KB
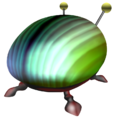 P1 Iridescent Flint Beetle Artwork.png 733 × 762; 292 KB
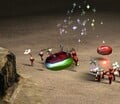
 P1 Iridescent Flint Beetle attacked.jpg 438 × 355; 37 KB
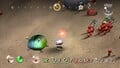
 P1 Iridescent Flint Beetle flipped.jpg 429 × 371; 46 KB
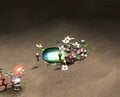
 P1 Iridescent Flint Beetle idle.jpg 1,280 × 720; 212 KB
 P1 JP Loading screen.jpg 1,029 × 701; 27 KB
 P1 Libra Collected.png 640 × 480; 369 KB
 P1 Libra Cutscene.png 640 × 480; 366 KB
 P1 Libra Location.png 640 × 480; 235 KB
 P1 Ligularia Clivorum.png 364 × 245; 220 KB
 P1 Log Picture (1).png 290 × 165; 17 KB
 P1 Log Picture (2).png 100 × 130; 2 KB
 P1 Log Picture (3).png 165 × 95; 6 KB
 P1 Log Picture (4).png 165 × 125; 8 KB
 P1 Log Picture (5).png 200 × 115; 10 KB
 P1 Log Picture (6).png 215 × 210; 9 KB
 P1 Log Picture (7).png 210 × 135; 8 KB
 P1 Log Picture (8).png 205 × 110; 7 KB
 P1 Log Picture (9).png 210 × 125; 10 KB
 P1 Log Picture (10).png 225 × 120; 10 KB
 P1 Log Picture (11).png 205 × 135; 9 KB
 P1 Log Picture (12).png 210 × 125; 10 KB
 P1 Log Picture (13).png 150 × 125; 8 KB
 P1 Log Picture (14).png 145 × 215; 11 KB
 P1 Log Picture (15).png 215 × 140; 11 KB
 P1 Log Picture (16).png 210 × 120; 9 KB
 P1 Log Picture (17).png 215 × 115; 12 KB
 P1 Log Picture (18).png 200 × 120; 8 KB
 P1 Log Picture (19).png 190 × 125; 8 KB
 P1 Log Picture (20).png 205 × 125; 8 KB
 P1 Log Picture (21).png 180 × 125; 10 KB
 P1 Log Picture (22).png 205 × 125; 8 KB
 P1 Log Picture (23).png 195 × 125; 7 KB
 P1 Log Picture (24).png 210 × 80; 7 KB
 P1 Log Picture (25).png 205 × 120; 11 KB
 P1 Log Picture (26).png 190 × 115; 7 KB
 P1 Log Picture (28).png 200 × 115; 10 KB
 P1 Log Picture (29).png 205 × 130; 7 KB
 P1 Log Picture (30).png 215 × 120; 18 KB
 P1 Log Picture (31).png 180 × 125; 9 KB
 P1 Log Picture (32).png 215 × 90; 9 KB
 P1 Log Picture (33).png 125 × 150; 10 KB
 P1 Male Sheargrub corpse.jpg 256 × 194; 11 KB
 P1 Male Sheargrub idle.jpg 1,280 × 720; 220 KB
 P1 Male Sheargrub Sketch.png 417 × 207; 75 KB
 P1 Mamuta attack Olimar.jpg 1,280 × 720; 253 KB
 P1 Mamuta attack.jpg 497 × 441; 70 KB
 P1 Mamuta backside.jpg 457 × 341; 36 KB
 P1 Mamuta corpse.jpg 358 × 338; 32 KB
 P1 Mamuta frontside.jpg 410 × 362; 39 KB
 P1 Mamuta jump.jpg 1,280 × 720; 283 KB
 P1 Mamuta Sketch.png 627 × 514; 292 KB
 P1 Massage Machine Location.png 640 × 480; 348 KB
 P1 N1 Ionium Jet Collected.png 640 × 480; 373 KB
 P1 N1 Ionium Jet Cutscene.png 640 × 480; 406 KB
 P1 N1 Ionium Jet Location.png 640 × 480; 353 KB
 P1 N2 Ionium Jet Cutscene.png 640 × 480; 557 KB
 P1 N2 Ionium Jet Location.png 640 × 480; 429 KB
 P1 Nice to Meet You alt artwork.png 1,038 × 1,074; 628 KB
 P1 Nice to Meet You art.png 1,707 × 1,152; 2.23 MB
 P1 Nintendo of Europe wallpaper 2.jpg 1,024 × 768; 178 KB
 P1 Nintendo of Europe wallpaper.jpg 1,024 × 768; 120 KB
 P1 Nova Blaster Collected.png 640 × 480; 617 KB
 P1 Nova Blaster Location.png 640 × 480; 457 KB
 P1 Number 2 Ionium Jet Screenshot.jpg 716 × 333; 40 KB
 P1 Omega Stabilizer Collected.png 640 × 480; 378 KB
 P1 Omega Stabilizer Cutscene.png 640 × 480; 393 KB
 P1 Omega Stabilizer Location.png 640 × 480; 266 KB
 P1 Pearly Clamclamp attacked.jpg 347 × 363; 30 KB
 P1 Pearly Clamclamp corpse.jpg 1,280 × 720; 238 KB
 P1 Pearly Clamclamp eating.jpg 292 × 284; 21 KB
 P1 Pearly Clamclamp idle.jpg 375 × 373; 32 KB
 P1 Pearly Clamclamp pearl.jpg 337 × 330; 23 KB
 P1 Pearly Clamclamp ship part.jpg 337 × 400; 42 KB
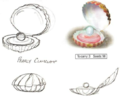 P1 Pearly Clamclamp Sketch.png 543 × 441; 181 KB
 P1 Pikmin spirit.png 193 × 284; 121 KB
 P1 Pilot's Seat Location.png 640 × 480; 323 KB
 P1 Positron Generator Collected.png 640 × 480; 575 KB
 P1 Positron Generator Dropped.png 640 × 480; 301 KB
 P1 Positron Generator Location.png 640 × 480; 385 KB
 P1 Prerelease Bulborb.png 640 × 540; 444 KB
 P1 Puffstool corpse.jpg 437 × 232; 21 KB
 P1 Puffstool flipped.jpg 1,280 × 720; 176 KB
 P1 Puffstool idle.jpg 1,280 × 720; 188 KB


.png)
.png)
.png)
.png)
.png)
.png)
.png)
.png)
.png)
.png)
.png)
.png)
.png)
.png)
.png)
.png)
.png)
.png)
.png)
.png)
.png)
.png)
.png)
.png)
.png)
.png)
.png)
.png)
.png)
.png)
.png)


.png)