Help:Editing: Difference between revisions
(New sections on templates and categories. (The Dodge Whistle infobox was taken from the Upgrade page.)) |
(Redirects and signatures.) |
||
| Line 1: | Line 1: | ||
This page is a reference and a tutorial for basic Mediawiki syntax, which is the code used on this wiki to produce formatted articles from plain text. More advanced techniques can be found [[Help:Editing/Advanced techniques|here]]. If there is something that you cannot find in either of these places, but want explained, ask [[Help talk:Editing|here]]. | |||
This page is a reference and a tutorial for Mediawiki | |||
== Text == | == Text == | ||
| Line 134: | Line 133: | ||
|[[Ship part#List]] is a section of the [[ship part]] article. See [[#Sections|here]] for more information about sections. | |[[Ship part#List]] is a section of the [[ship part]] article. See [[#Sections|here]] for more information about sections. | ||
|} | |} | ||
A table of contents is automatically generated when there are more than 4 sections in an article. | |||
== Images == | == Images == | ||
To make an image appear on | To make an image appear on an article, link to the page containing the image, which will start with <code>File:</code> and end with the image's file format. | ||
{|class="wikitable" | {|class="wikitable" | ||
!Code!!Result | !Code!!Result | ||
| Line 208: | Line 209: | ||
|} | |} | ||
Some templates are more complex, featuring many arguments | Arguments can have names, which means that instead of just separating the arguments by vertical bars, each argument contains a name and a value connected by an equals sign. | ||
Some templates are more complex, featuring many arguments. An example of this is {{tem|infobox upgrade}}, which is used to show basic information about [[upgrade]]s. These include which games the upgrade appears in, an image of the upgrade, the areas it appears in, and the upgrade's weight. To make large templates like this easier to work with, it's recommended to place each argument on its own line. For the [[Dodge Whistle]], the template would look like this: | |||
{|class="wikitable" | {|class="wikitable" | ||
!Code!!Result | !Code!!Result | ||
| Line 236: | Line 239: | ||
|} | |} | ||
Template pages will have information on what the template does and how to use it, so check each template's for more information | Template pages will have information on what the template does and how to use it, so check each template's page for more information. | ||
== Categories == | == Categories == | ||
| Line 247: | Line 250: | ||
|} | |} | ||
== | == Other == | ||
To | Redirect pages are special pages that automatically go to another page when someone searches them or clicks on a link to them. They're useful when an article has multiple things it could be called. To create a redirect page, start it with <code><nowiki>#REDIRECT</nowiki></code> and then link to the article. An example of this is [[Olimar]], which contains <code><nowiki>#REDIRECT [[Captain Olimar]]</nowiki>.</code> | ||
Tables are useful ways of displaying information in an article, but the syntax can be complicated. Go to [[Help:Tables]] for information on tables. | |||
In talk pages, you can end your post with a signature, which contains your username and the date and time of your post. To sign your posts, put 4 tildes (<code><nowiki>~~~~</nowiki></code>) at the end of the post. (3 tildes will produce just the username, and 5 tildes will produce just the time and date.) It's possible to customize your signature in your preferences page. Below is an example of a custom signature. | |||
{|class="wikitable" | |||
To sign | !Code!!Result | ||
|- | |||
<nowiki>~~~~</nowiki> | |<pre><nowiki>~~~~</nowiki></pre> | ||
|— [[User:Botanist|'''Botanist''']]<sub>[[User talk:Botanist|''(talk)'']]</sub> 18:30, April 15, 2021 (EDT) | |||
|} | |||
There are many more features to MediaWiki syntax than this; go to [[Help:Editing/Advanced techniques]] for more advanced editing techniques. | |||
==Pikipedia standards== | ==Pikipedia standards== | ||
Revision as of 17:30, April 15, 2021
This page is a reference and a tutorial for basic Mediawiki syntax, which is the code used on this wiki to produce formatted articles from plain text. More advanced techniques can be found here. If there is something that you cannot find in either of these places, but want explained, ask here.
Text
Text entered into the editor will appear in the article as standard text.
To separate paragraphs, there must be an empty line between them.
| Code | Result |
|---|---|
This is some text. This is a new paragraph. |
This is some text.
This is a new paragraph. |
Links
To link to another page, surround a piece of text with 2 square brackets. This will create a link to the article within the square brackets.
| Code | Result |
|---|---|
A [[Bulborb]] is found in the [[Garden of Hope]]. |
A Bulborb is found in the Garden of Hope. |
To change the text displayed in the link, place a vertical bar between the link text and the displayed text.
| Code | Result |
|---|---|
Caves are [[Randomization|randomly generated]] by arranging [[Cave unit|rooms]]. |
Caves are randomly generated by arranging rooms. |
Note that the capitalization of article titles in links must be correct for the link to work (except for the first letter in the title, which can have any capitalization).
Formatting
To make text italic or bold, surround it with 2 or 3 apostrophes.
| Code | Result |
|---|---|
''This text is italic.'' '''This text is bold.''' '''''This text is italic and bold.''''' |
This text is italic.
This text is bold. This text is italic and bold. |
To make a bulleted list, put an asterisk at the start of each line. Using multiple asterisks will indent the list.
| Code | Result |
|---|---|
Enemies: *Grub-dog family **Bulborb **Orange Bulborb *Breadbug family **Dwarf Bulborb **Dwarf Orange Bulborb |
Enemies:
|
A numbered list is similar, but with # symbols instead.
| Code | Result |
|---|---|
Areas: #The Impact Site #The Forest of Hope #The Forest Navel #The Distant Spring #The Final Trial |
Areas:
|
A paragraph of text can be indented by starting it with a colon. Using multiple colons will indent it further. This is commonly used in talk pages to indicate a reply.
| Code | Result |
|---|---|
This is a paragraph. :This is a reply to that paragraph. ::This is another reply. |
This is a paragraph.
|
Sections
Articles are divided into sections, and there can be multiple levels of sections. To make a paragraph of text into a section heading, surround it with 2 or more equals signs.
| Code | Result |
|---|---|
== Main heading == Paragraph. === Subheading === Paragraph. ==== Minor heading ==== Paragraph. |
Main headingParagraph. SubheadingParagraph. Minor headingParagraph. |
It is possible to link to sections of an article by placing a # sign between the article name and the section name. Omitting the article name will link to another section of the current article.
| Code | Result |
|---|---|
[[Ship part#List]] is a section of the [[ship part]] article. See [[#Sections|here]] for more information about sections. |
Ship part#List is a section of the ship part article. See here for more information about sections. |
A table of contents is automatically generated when there are more than 4 sections in an article.
Images
To make an image appear on an article, link to the page containing the image, which will start with File: and end with the image's file format.
| Code | Result |
|---|---|
[[File:SSBB Olimar.jpg]] |

|
This produces an image with no frame and at its original resolution, which is generally not a good thing. To fix these things, put |thumb after the file name, which will turn it into a thumbnail.
| Code | Result |
|---|---|
[[File:SSBB Olimar.jpg|thumb]] |
It is possible to add a caption to images by putting text after another vertical bar.
| Code | Result |
|---|---|
[[File:SSBB Olimar.jpg|thumb|Olimar in ''Super Smash Bros. Brawl''.]] |
Finally, it is possible to change the size of images and their position on the page with additional pieces of text before the caption. 250px will make the image 250 pixels wide (this number can be changed, and the default size is 200 pixels wide), and left will place the image on the left of the screen (center and right also work, and right is the default position).
| Code | Result |
|---|---|
[[File:SSBB Olimar.jpg|thumb|left|250px|Olimar in ''Super Smash Bros. Brawl''.]] |
An alternative way to show images is in a gallery. Galleries display images at small sizes in a grid. To make one, surround a section with <gallery> and </gallery>, and place each file name (without the File: prefix) on a new line. Image captions can be placed after a vertical bar.
| Code | Result |
|---|---|
<gallery> PuffyBlowhog.png|The Puffy Blowhog in ''Pikmin 2''. Puffy Blowhog P3 side view.jpg|The Puffy Blowhog in ''Pikmin 3''. </gallery> |
Templates
Templates are special pages starting with "Template:" that can be included on other pages. This allows similar pieces of MediaWiki code to appear in multiple articles, making consistency between pages easier, among other benefits.
To make a template appear in another page, surround its name (without the "Template:" prefix) with 2 curly brackets.
As an example, to indicate that an article or a section of an article is a stub (meaning it needs expansion), you can write {{stub}}.
| Code | Result | ||
|---|---|---|---|
{{stub}}
|
|
Many templates have arguments, which are additional pieces of information that influence the template. Arguments are separated by vertical bars.
An example of this is the {{date}} template, which is used to display dates in a standardized format. It can have 3 arguments, which in order represent the day, month, and the year.
| Code | Result |
|---|---|
{{date|14|September|2010}}
|
September 14th, 2010 |
''Pikmin 3 Deluxe'' released on {{date|30|October|2020}}.
|
Pikmin 3 Deluxe released on October 30th, 2020. |
Arguments can have names, which means that instead of just separating the arguments by vertical bars, each argument contains a name and a value connected by an equals sign.
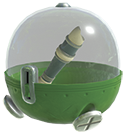
Some templates are more complex, featuring many arguments. An example of this is {{infobox upgrade}}, which is used to show basic information about upgrades. These include which games the upgrade appears in, an image of the upgrade, the areas it appears in, and the upgrade's weight. To make large templates like this easier to work with, it's recommended to place each argument on its own line. For the Dodge Whistle, the template would look like this:
| Code | Result | ||||||||||||
|---|---|---|---|---|---|---|---|---|---|---|---|---|---|
{{infobox upgrade
|p3           = y
|name         = Dodge Whistle
|icon         = Dodge Whistle icon.png
|image        = DodgeWhistleArt.png
|caption      = The Dodge Whistle's capsule.
|area         = [[Distant Tundra]]
|weight       = 10
|max_carriers = 20
|function     = Allows leaders and Pikmin to dodge
}}
|
| ||||||||||||
Template pages will have information on what the template does and how to use it, so check each template's page for more information.
Categories
Pages can be included in categories, which allow related pages to be grouped together. Examples of categories are Category:Bosses, Category:Menus, and Category:2-Player Battle images. To include an article, image, category, or any other page inside a category, link to that category anywhere in the page (but preferably at the bottom). The link will not appear, and instead the article will be added to the category. A list of categories a page is in can be found at the bottom of the page.
| Code | Result |
|---|---|
[[Category:Help]] |
Other
Redirect pages are special pages that automatically go to another page when someone searches them or clicks on a link to them. They're useful when an article has multiple things it could be called. To create a redirect page, start it with #REDIRECT and then link to the article. An example of this is Olimar, which contains #REDIRECT [[Captain Olimar]].
Tables are useful ways of displaying information in an article, but the syntax can be complicated. Go to Help:Tables for information on tables.
In talk pages, you can end your post with a signature, which contains your username and the date and time of your post. To sign your posts, put 4 tildes (~~~~) at the end of the post. (3 tildes will produce just the username, and 5 tildes will produce just the time and date.) It's possible to customize your signature in your preferences page. Below is an example of a custom signature.
| Code | Result |
|---|---|
~~~~ |
— Botanist(talk) 18:30, April 15, 2021 (EDT) |
There are many more features to MediaWiki syntax than this; go to Help:Editing/Advanced techniques for more advanced editing techniques.
Pikipedia standards
- Main article: Pikipedia:Policies and guidelines.
- If an article is seriously lacking in vital information, call it a stub by putting {{stub}} at the top of the page.
- Articles that contain a fair amount of content but have layout problems, are badly written or have any other serious problem should be added to the "Clean it up" category by adding {{clean}} to the top of the page.
- Articles that qualify for deletion can be submitted for it by adding {{delete|reason goes here}} to the page. Reasons an article would need to be deleted can be found at Pikipedia:Pages for deletion.
- Images that are screenshots must contain the text {{screenshot}} to add a copyright notice and categorize them. For other image tags and general file information, see Help:Files.


