The Impact Site: Difference between revisions
m (→Gallery: add {{image}}) |
No edit summary |
||
| Line 1: | Line 1: | ||
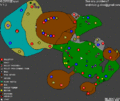
[[File:Impact_Site.jpg|thumb|264px|A complete map of the area, including [[ship parts]] and [[Piklopedia|enemies]].]] | |||
'''The Impact Site''' is where [[Captain Olimar]] first lands after his [[S.S. Dolphin|ship]] crashes on the [[Pikmin Planet]] in ''[[Pikmin (game)|Pikmin]]'', and so the first day is spent there. The area is near the edge of the vast forest on the area select map, not far from [[The Forest of Hope]]. The Impact Site is the location of the discovery of the [[Red Onion]] with its associated [[Red Pikmin]]. This area and [[The Final Trial]] would make up the [[Areas|area]] [[Wistful Wild]] in ''[[Pikmin 2]]''. | |||
|parts | |||
| | |||
| | |||
| | |||
{{listen|filename=Impact Site.ogg|title=Impact Site Music}} | |||
==General | |||
[[File:Pikmin 3 Day One - Crash landing|thumb|center|335 px|Pikmin 3 | Day One - Crash landing]] | |||
==General Layout== | |||
[[Image:Pikmatt8.jpg|thumb|220px|The watery area of the level.]] | [[Image:Pikmatt8.jpg|thumb|220px|The watery area of the level.]] | ||
The level consists of a small pool of water, not accessible on | The level consists of a small pool of water, not accessible on Day 1, a number of tree stumps, and a few relatively small grassy clearings. It contains only two ship parts, one of which is collected on the first day in the tutorial-like beginning of the game. After day 1, the amount of [[Pellet Posy|Pellet Posies]] increases, and some enemies appear: the large amounts of pellets from then on make this area arguably the best place for boosting Pikmin population. It is also the only location of the [[Goolix]], one of the game's hidden bosses, which can only be found on odd-numbered days after day 8, on the large tree stump near the water. Located on the same tree stump day 8 and all other subsequent even-numbered days, a [[Mamuta]] will be shown. | ||
The [[ | The [[Bomb Rock]]s in this area are found inside the box that the Pikmin have to push on the first day, in order to get the Main Engine. | ||
This area contains three 20-pellets, one for each Pikmin. The red pellet is located behind of the stone gate, next to the lake. The yellow one is located in a tree stump that only [[Yellow Pikmin]] can reach, in the arena where the Goolix is fought. The blue one is in an island next to the Pearly Clamclamp that is holding the Positron Generator. Besides those, there are several pellet posies and three 10-pellets, again, one for each color, and all of them near the landing site. In order for Olimar to get them, he must order his Pikmin to build the stick that leads them there, and break a geyser hidden in the tall grass so he can get up there. Also, each of the Pearly Clamclamps that Olimar defeats gives Olimar a pearl, that is worth fifty Pikmin each. Olimar must then get all of these pellets, the pearls and the Positron Generator. The timing must also be short. If Olimar doesn't mind not fighting the optional boss, he must go there on an even numbered day, as the Mamuta can be ignored, it only attacks after the Pikmin attack, and doesn't kill Pikmin. If Olimar has extra time, he can always defeat it afterwards, but plucking the planted Pikmin can consume a long time, resulting in leaving several Pikmin behind. Olimar can also save time in any area when having one hundred Pikmin out even if they are idle so Olimar doesn't need to pluck more Pikmin. | |||
A note about the Impact Site: The pellet posies, clams, and flint beetles will always reset themselves past Day 2. The highest amount of Pikmin one could raise in the Impact Site in one day is 301 (Unless one were to hit the Flint Beetles more than eight times, hitting each nine times would produce 307, hitting each one twelve times would produce 322, but this is highly unlikely). | |||
==Enemies== | ==Enemies== | ||
==Challenge Mode | *[[Pellet Posy|Pellet Posies]] x24 | ||
*[[Iridescent Flint Beetle]]s x3 (After day 1) | |||
*[[Pearly Clamclamp]]s x3 | |||
*[[Mamuta]] x1 (on Day 8 and other even numbered days past it) | |||
*[[Goolix]] x1 (on Day 9 and other odd numbered days past it) | |||
==Challenge Mode Enemies== | |||
*[[Pellet Posy|Pellet Posies]] | |||
*[[Breadbug]] | *[[Breadbug]] | ||
*[[Iridescent Flint Beetle]] | *[[Iridescent Flint Beetle]]s | ||
==Gallery== | ==Gallery== | ||
<gallery widths="120"> | <gallery widths="120"> | ||
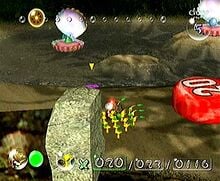
File:PIK ImpactSite.jpg|The landing zone of the Impact Site. | |||
File:The Impact Site.jpg|Captain Olimar discovers Red Pikmin (demo image).File:Pikminlast11.jpg|The Impact Site in [[Challenge Mode (Pikmin)|Challenge Mode]] (Japanese version). | |||
File:The Impact Site Challenge.gif|A map of The Impact Site in Challenge Mode. | |||
File:Impact_Site.png|A map of the Impact Site. | |||
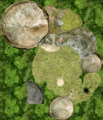
File:IS texture.png|The radar pattern for The Impact Site. | File:IS texture.png|The radar pattern for The Impact Site. | ||
File:IS_overview.png|An overview of The Impact Site, sans the beach. | |||
</gallery> | </gallery> | ||
==Rocket Parts== | |||
*[[Main Engine]] (day 1 only) | |||
*[[Positron Generator]] (Blue and Yellow Pikmin needed) | |||
==Trivia== | ==Trivia== | ||
*Strangely, [[Bulborb]]s are seen during the end of day cutscene, while no Bulborbs are present in the actual area. | |||
*In<span style="font-style: italic;"> </span>''Pikmin 2'', The Impact Site was combined with The [[Final Trial]] to make [[Wistful Wild]]. | |||
*In the Wii version, the white gate leading to the pool with the clamclamps can be broken down on Day 1 by throwing Pikmin onto the ledge as far as you can and getting onto the stump. You can then guide the Pikmin over to the gate and break it down. | |||
*The best possible score in Challenge Mode is 278. | |||
*The Impact Site is one of two areas with an optional boss. | |||
{{Areas|e0ffe0|005500|005500|000|fff}} | {{Areas|e0ffe0|005500|005500|000|fff}} | ||
[[Category:Pikmin 1]] | |||
[[Category:Challenge Mode levels]] | |||
[[Category:Ship parts]] | |||
[[Category:Wistful Wild]] | |||
[[Category:Mandatory Ship Parts]] | |||
Revision as of 08:48, July 29, 2013
The Impact Site is where Captain Olimar first lands after his ship crashes on the Pikmin Planet in Pikmin, and so the first day is spent there. The area is near the edge of the vast forest on the area select map, not far from The Forest of Hope. The Impact Site is the location of the discovery of the Red Onion with its associated Red Pikmin. This area and The Final Trial would make up the area Wistful Wild in Pikmin 2.
General Layout
The level consists of a small pool of water, not accessible on Day 1, a number of tree stumps, and a few relatively small grassy clearings. It contains only two ship parts, one of which is collected on the first day in the tutorial-like beginning of the game. After day 1, the amount of Pellet Posies increases, and some enemies appear: the large amounts of pellets from then on make this area arguably the best place for boosting Pikmin population. It is also the only location of the Goolix, one of the game's hidden bosses, which can only be found on odd-numbered days after day 8, on the large tree stump near the water. Located on the same tree stump day 8 and all other subsequent even-numbered days, a Mamuta will be shown.
The Bomb Rocks in this area are found inside the box that the Pikmin have to push on the first day, in order to get the Main Engine.
This area contains three 20-pellets, one for each Pikmin. The red pellet is located behind of the stone gate, next to the lake. The yellow one is located in a tree stump that only Yellow Pikmin can reach, in the arena where the Goolix is fought. The blue one is in an island next to the Pearly Clamclamp that is holding the Positron Generator. Besides those, there are several pellet posies and three 10-pellets, again, one for each color, and all of them near the landing site. In order for Olimar to get them, he must order his Pikmin to build the stick that leads them there, and break a geyser hidden in the tall grass so he can get up there. Also, each of the Pearly Clamclamps that Olimar defeats gives Olimar a pearl, that is worth fifty Pikmin each. Olimar must then get all of these pellets, the pearls and the Positron Generator. The timing must also be short. If Olimar doesn't mind not fighting the optional boss, he must go there on an even numbered day, as the Mamuta can be ignored, it only attacks after the Pikmin attack, and doesn't kill Pikmin. If Olimar has extra time, he can always defeat it afterwards, but plucking the planted Pikmin can consume a long time, resulting in leaving several Pikmin behind. Olimar can also save time in any area when having one hundred Pikmin out even if they are idle so Olimar doesn't need to pluck more Pikmin.
A note about the Impact Site: The pellet posies, clams, and flint beetles will always reset themselves past Day 2. The highest amount of Pikmin one could raise in the Impact Site in one day is 301 (Unless one were to hit the Flint Beetles more than eight times, hitting each nine times would produce 307, hitting each one twelve times would produce 322, but this is highly unlikely).
Enemies
- Pellet Posies x24
- Iridescent Flint Beetles x3 (After day 1)
- Mamuta x1 (on Day 8 and other even numbered days past it)
- Goolix x1 (on Day 9 and other odd numbered days past it)
Challenge Mode Enemies
Gallery
- PIK ImpactSite.jpg
The landing zone of the Impact Site.
The Impact Site in Challenge Mode (Japanese version).
Rocket Parts
- Main Engine (day 1 only)
- Positron Generator (Blue and Yellow Pikmin needed)
Trivia
- Strangely, Bulborbs are seen during the end of day cutscene, while no Bulborbs are present in the actual area.
- In Pikmin 2, The Impact Site was combined with The Final Trial to make Wistful Wild.
- In the Wii version, the white gate leading to the pool with the clamclamps can be broken down on Day 1 by throwing Pikmin onto the ledge as far as you can and getting onto the stump. You can then guide the Pikmin over to the gate and break it down.
- The best possible score in Challenge Mode is 278.
- The Impact Site is one of two areas with an optional boss.


