Hint: Difference between revisions
(Added Distant Tundra hints to the list.) |
(The conditions and locations read like sentences, and in some cases, they are. So I figured I ended all of them with periods.) |
||
| Line 31: | Line 31: | ||
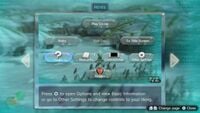
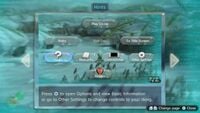
{{transcript|Press {{button|switch|+}} to open Options and view Basic Information or go to Other Settings to change controls to your liking.}} | {{transcript|Press {{button|switch|+}} to open Options and view Basic Information or go to Other Settings to change controls to your liking.}} | ||
| [[Distant Tundra]] || Opened automatically at the start of the game || N/A | | [[Distant Tundra]] || Opened automatically at the start of the game. || N/A | ||
|- | |- | ||
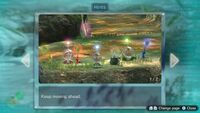
| || [[#Default hints|Keep moving ahead]] || Distant Tundra || Close first hint || Initially: The can with the [[Yellow Pikmin]] | | || [[#Default hints|Keep moving ahead]] || Distant Tundra || Close first hint. || Initially: The can with the [[Yellow Pikmin]]. | ||
After the throwing tutorial: Vehemoth Phosbat arena (Note: The arrows point past the trigger point for the cutscene that ends the Distant Tundra section of day 1, so it is not possible to see where the arrows point to.) | After the throwing tutorial: Vehemoth Phosbat arena. (Note: The arrows point past the trigger point for the cutscene that ends the Distant Tundra section of day 1, so it is not possible to see where the arrows point to.) | ||
|- | |- | ||
| [[File:Hint TW1 P1.jpg|200px]] | | [[File:Hint TW1 P1.jpg|200px]] | ||
| {{transcript|Keep going. You may just encounter a rather curious creature...}} | | {{transcript|Keep going. You may just encounter a rather curious creature...}} | ||
| [[Tropical Wilds]] || Start [[Alph]]'s section of day 1 || Initially: The first [[Red Pikmin]] Alph sees | | [[Tropical Wilds]] || Start [[Alph]]'s section of day 1. || Initially: The first [[Red Pikmin]] Alph sees. | ||
After the Red Pikmin runs away: The Red Pikmin in front of the Onion | After the Red Pikmin runs away: The Red Pikmin in front of the Onion. | ||
|- | |- | ||
| [[File:Hint TW2 P1.jpg|200px]] | | [[File:Hint TW2 P1.jpg|200px]] | ||
| {{transcript|If you don't see a way forward, look for pieces to make a bridge.}} | | {{transcript|If you don't see a way forward, look for pieces to make a bridge.}} | ||
| Tropical Wilds || Rescue the Red [[Onion]] || Initially: The 2 fragment piles, in either order | | Tropical Wilds || Rescue the Red [[Onion]]. || Initially: The 2 fragment piles, in either order. | ||
After picking up all fragments: None | After picking up all fragments: None. | ||
|- | |- | ||
| || [[#Default hints|Keep moving ahead]] || Tropical Wilds || Complete the brown bridge || The [[KopPad]] | | || [[#Default hints|Keep moving ahead]] || Tropical Wilds || Complete the brown bridge. || The [[KopPad]]. | ||
|- | |- | ||
| [[File:Hint TW3 P1.jpg|200px]] | | [[File:Hint TW3 P1.jpg|200px]] | ||
| Line 57: | Line 57: | ||
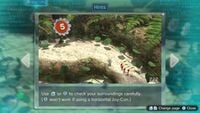
{{transcript|Use {{button|switch|zl}} or {{button|switch|rstick}} to check your surroundings carefully. ({{button|switch|rstick}} won't work if using a horizontal Joy-Con.)}} | {{transcript|Use {{button|switch|zl}} or {{button|switch|rstick}} to check your surroundings carefully. ({{button|switch|rstick}} won't work if using a horizontal Joy-Con.)}} | ||
| Tropical Wilds || Collect the KopPad || None | | Tropical Wilds || Collect the KopPad. || None. | ||
|- | |- | ||
| [[File:Hint TW4 P1.jpg|200px]] | | [[File:Hint TW4 P1.jpg|200px]] | ||
| {{transcript|Use the power of Pikmin to push the box out of the way. Many Pikmin make light work!}} | | {{transcript|Use the power of Pikmin to push the box out of the way. Many Pikmin make light work!}} | ||
| Tropical Wilds || Have at least 20 Pikmin in the field || The [[cardboard box]] | | Tropical Wilds || Have at least 20 Pikmin in the field. || The [[cardboard box]]. | ||
|- | |- | ||
| || [[#Default hints|Keep moving ahead]] || Tropical Wilds || Push the cardboard box || The western exit of the cave (Note: It is not possible to see if the arrows initially stop at the [[dirt wall]] before pointing to the exit of the cave.) | | || [[#Default hints|Keep moving ahead]] || Tropical Wilds || Push the cardboard box. || The western exit of the cave. (Note: It is not possible to see if the arrows initially stop at the [[dirt wall]] before pointing to the exit of the cave.) | ||
|- | |- | ||
| [[File:Hint GH1 P1.jpg|200px]] | | [[File:Hint GH1 P1.jpg|200px]] | ||
| {{transcript|Take the Pikmin out of the Onion.}} | | {{transcript|Take the Pikmin out of the Onion.}} | ||
| [[Garden of Hope]] || Land in the Garden of Hope on day 2 || The Red Onion | | [[Garden of Hope]] || Land in the Garden of Hope on day 2. || The Red Onion. | ||
|- | |- | ||
| [[File:Hint GH2 P1.jpg|200px]] | | [[File:Hint GH2 P1.jpg|200px]] | ||
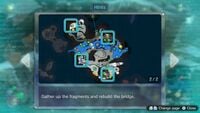
| {{transcript|Gather up the fragments and rebuild the bridge.}} | | {{transcript|Gather up the fragments and rebuild the bridge.}} | ||
| Garden of Hope || Take at least 1 Pikmin out of the Onion || The 2 brown fragment piles in either order | | Garden of Hope || Take at least 1 Pikmin out of the Onion. || The 2 brown fragment piles in either order. | ||
|- | |- | ||
| || [[#Default hints|Keep moving ahead]] || Garden of Hope || Complete the brown [[bridge]] || Initially: None | | || [[#Default hints|Keep moving ahead]] || Garden of Hope || Complete the brown [[bridge]]. || Initially: None. | ||
After seeing [[Brittany]]: The Rock Onion | After seeing [[Brittany]]: The Rock Onion. | ||
|- | |- | ||
| [[File:Hint GH3 P1.jpg|200px]] | | [[File:Hint GH3 P1.jpg|200px]] | ||
| {{transcript|Charge won't reach the flying creatures. Lock on with {{button|switch|zr}} and throw Pikmin with {{button|switch|a}} to defeat them. Look closely now—they seem to have captured something.}} | | {{transcript|Charge won't reach the flying creatures. Lock on with {{button|switch|zr}} and throw Pikmin with {{button|switch|a}} to defeat them. Look closely now—they seem to have captured something.}} | ||
| Garden of Hope || Seen the [[Medusal Slurker]] || None | | Garden of Hope || Seen the [[Medusal Slurker]]. || None. | ||
|- | |- | ||
| [[File:Hint GH4 P1.jpg|200px]] | | [[File:Hint GH4 P1.jpg|200px]] | ||
| Line 87: | Line 87: | ||
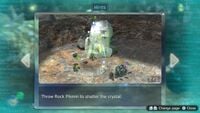
{{transcript|Throw Rock Pikmin to shatter the crystal.}} | {{transcript|Throw Rock Pikmin to shatter the crystal.}} | ||
| Garden of Hope || Unlock [[Rock Pikmin]] || None | | Garden of Hope || Unlock [[Rock Pikmin]]. || None. | ||
|- | |- | ||
| [[File:Hint GH5 P1.jpg|200px]] | | [[File:Hint GH5 P1.jpg|200px]] | ||
| Line 95: | Line 95: | ||
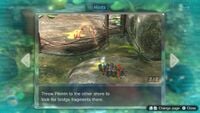
{{transcript|Throw Pikmin to the other shore to look for bridge fragments there.}} | {{transcript|Throw Pikmin to the other shore to look for bridge fragments there.}} | ||
| Garden of Hope || Rescue [[Brittany]] || The 2 blue fragment piles, in either order | | Garden of Hope || Rescue [[Brittany]]. || The 2 blue fragment piles, in either order. | ||
|- | |- | ||
| || [[#Default hints|Keep moving ahead]] || Garden of Hope || Complete the blue bridge || The Armored Mawdad arena | | || [[#Default hints|Keep moving ahead]] || Garden of Hope || Complete the blue bridge. || The Armored Mawdad arena. | ||
|- | |- | ||
| [[File:Hint GH6 P1.jpg|200px]] | | [[File:Hint GH6 P1.jpg|200px]] | ||
| {{transcript|Use Rock Pikmin to break the exoskeleton, then strike with all your might!}} | | {{transcript|Use Rock Pikmin to break the exoskeleton, then strike with all your might!}} | ||
| Garden of Hope || Begin the [[Armored Mawdad]] boss fight || None | | Garden of Hope || Begin the [[Armored Mawdad]] boss fight. || None. | ||
|- | |- | ||
| [[File:Hint GH7 P1.jpg|200px]] | | [[File:Hint GH7 P1.jpg|200px]] | ||
| {{transcript|Haul the strange item over to the S.S. Drake.}} | | {{transcript|Haul the strange item over to the S.S. Drake.}} | ||
| Garden of Hope || Defeat the Armored Mawdad || None | | Garden of Hope || Defeat the Armored Mawdad. || None. | ||
|- | |- | ||
| || [[#Default hints|End day]] || Garden of Hope || Collect the [[Data Glutton]] || None | | || [[#Default hints|End day]] || Garden of Hope || Collect the [[Data Glutton]]. || None. | ||
|- | |- | ||
| || [[#Default hints|Keep moving ahead]] || [[Distant Tundra]] || First landing in the Distant Tundra || None | | || [[#Default hints|Keep moving ahead]] || [[Distant Tundra]] || First landing in the Distant Tundra. || None. | ||
|- | |- | ||
| [[File:Hint DT2 P1.jpg|200px]] | | [[File:Hint DT2 P1.jpg|200px]] | ||
| {{transcript|Try throwing Yellow Pikmin at the electrical cables.}} | | {{transcript|Try throwing Yellow Pikmin at the electrical cables.}} | ||
| Distant Tundra || See Yellow Pikmin || None | | Distant Tundra || See Yellow Pikmin. || None. | ||
|- | |- | ||
| [[File:Hint DT3 P1.jpg|200px]] | | [[File:Hint DT3 P1.jpg|200px]] | ||
| {{transcript|Get more Yellow Pikmin by harvesting pellets.}} | | {{transcript|Get more Yellow Pikmin by harvesting pellets.}} | ||
| Distant Tundra || Activate the light in the Yellow Onion cave || None | | Distant Tundra || Activate the light in the Yellow Onion cave. || None. | ||
|- | |- | ||
| [[File:Hint DT4 P1.jpg|200px]] | | [[File:Hint DT4 P1.jpg|200px]] | ||
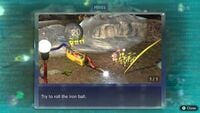
| {{transcript|Try to roll the iron ball.}} | | {{transcript|Try to roll the iron ball.}} | ||
| Distant Tundra || Have at least 20 Pikmin in the field || The iron ball in the cave | | Distant Tundra || Have at least 20 Pikmin in the field. || The iron ball in the cave. | ||
|- | |- | ||
| || [[#Default hints|Keep moving ahead]] || Distant Tundra || Push the iron ball in the cave || The door to the outside | | || [[#Default hints|Keep moving ahead]] || Distant Tundra || Push the iron ball in the cave. || The door to the outside. | ||
|- | |- | ||
| [[File:Hint DT5 P1.jpg|200px]] | | [[File:Hint DT5 P1.jpg|200px]] | ||
| Line 131: | Line 131: | ||
{{transcript|Gather up the fragments and rebuild the bridge.}} | {{transcript|Gather up the fragments and rebuild the bridge.}} | ||
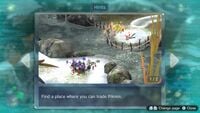
| Distant Tundra || Leave Brittany's cave || Initially: The place for throwing Pikmin across the river | | Distant Tundra || Leave Brittany's cave. || Initially: The place for throwing Pikmin across the river. | ||
After reaching with either leader: Alph and Brittany have different associated locations. Alph has the 2 blue fragment piles in either order; Brittany has the 2 orange fragment pies in either order. | After reaching with either leader: Alph and Brittany have different associated locations. Alph has the 2 blue fragment piles in either order; Brittany has the 2 orange fragment pies in either order. | ||
| Line 141: | Line 141: | ||
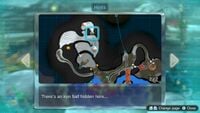
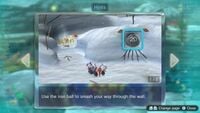
{{transcript|There's an iron ball hidden here...}} | {{transcript|There's an iron ball hidden here...}} | ||
| Distant Tundra || Complete the double bridge || Behind the iron ball outside | | Distant Tundra || Complete the double bridge. || Behind the iron ball outside. | ||
|- | |- | ||
| || [[#Default hints|Keep moving ahead]] || Distant Tundra || Push the iron ball outside || Initially: The cave where the Vehemoth Phosbat is first seen | | || [[#Default hints|Keep moving ahead]] || Distant Tundra || Push the iron ball outside. || Initially: The cave where the Vehemoth Phosbat is first seen. | ||
After reaching the cave: None | After reaching the cave: None. | ||
|- | |- | ||
| [[File:Hint DT7 P1.jpg|200px]] | | [[File:Hint DT7 P1.jpg|200px]] | ||
| Line 153: | Line 153: | ||
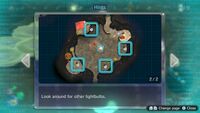
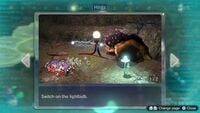
{{transcript|Look around for other lightbulbs.}} | {{transcript|Look around for other lightbulbs.}} | ||
| Distant Tundra || Activate the lightbulb that reveals the [[Vehemoth Phosbat]] || The 4 [[electrode]]s in the Vehemoth Phosbat arena, in any order | | Distant Tundra || Activate the lightbulb that reveals the [[Vehemoth Phosbat]]. || The 4 [[electrode]]s in the Vehemoth Phosbat arena, in any order. | ||
|- | |- | ||
| [[File:Hint DT8 P1.jpg|200px]] | | [[File:Hint DT8 P1.jpg|200px]] | ||
| Line 161: | Line 161: | ||
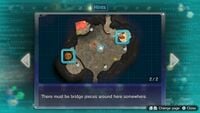
{{transcript|There must be bridge pieces around here somewhere.}} | {{transcript|There must be bridge pieces around here somewhere.}} | ||
| Distant Tundra || The Vehemoth Phosbat does its [[Phosbat Pod]] activation cutscene || The 2 [[fragment]] piles in the Vehemoth Phosbat arena, in either order | | Distant Tundra || The Vehemoth Phosbat does its [[Phosbat Pod]] activation cutscene. || The 2 [[fragment]] piles in the Vehemoth Phosbat arena, in either order. | ||
|- | |- | ||
| [[File:Hint DT9 P1.jpg|200px]] | | [[File:Hint DT9 P1.jpg|200px]] | ||
| {{transcript|Throw Pikmin when it stops to use its vacuum attack or when it's motionless on the wall.}} | | {{transcript|Throw Pikmin when it stops to use its vacuum attack or when it's motionless on the wall.}} | ||
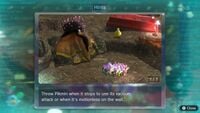
| Distant Tundra || Activated the big lightbulb in the Vehemoth Phosbat arena || None | | Distant Tundra || Activated the big lightbulb in the Vehemoth Phosbat arena. || None. | ||
|- | |- | ||
| || [[#Default hints|End day]] || Distant Tundra || Defeat the Vehemoth Phosbat || None | | || [[#Default hints|End day]] || Distant Tundra || Defeat the Vehemoth Phosbat. || None. | ||
|} | |} | ||
Revision as of 14:25, June 22, 2021
- For hints on loading screens, see Loading#Tip.
Hints are a game mechanic in Pikmin 3 Deluxe that give advice on what to do in the game. Their purpose is to assist players who are not sure what to do to advance the game's story. Hints consist of some text, some images, and in most cases, arrows on the ground pointing towards the next destination.
Mechanics
Hints are designed to guide the player towards advancing through the story. Some are about where to go next, some are about how to defeat bosses, and some are about other things. Many hints have associated locations in an area that they refer to. Due to Pikmin 3's structure, there is generally a linear progression of hints. Only one hint can be active at a time. Each new hint will appear in response to some threshold being reached, and will disappear when some other threshold has been reached. Hints may also have multiple stages to them, requiring multiple tasks to be done before they disappear, and the location they point to can change in response to these tasks. If no hint directly relevant to the player's location in the story is available, the hint will be a default "Keep moving ahead" hint, and may or may not have an associated location. If the player is in an area where the story for that area has already been completed, the default hint is instead about ending the day.
The way hints are shown depends on a setting in the pause menu, called "Hint Display". If it is on (which is the default setting), a bubble with the text "Hints" will appear in the HUD, and if it is off, this bubble will not appear. In both cases, a Hint bubble will be present in the pause menu. If Hint Display is on, pressing ![]() will show the current hint. Selecting the bubble in the pause menu will also show the current hint. If a new hint is available, the bubble will sparkle, and an exclamation mark icon will appear over the HUD bubble, indicating a new hint is available. Once the new hint has been viewed, the bubbles will no longer sparkle until a new hint is available.
will show the current hint. Selecting the bubble in the pause menu will also show the current hint. If a new hint is available, the bubble will sparkle, and an exclamation mark icon will appear over the HUD bubble, indicating a new hint is available. Once the new hint has been viewed, the bubbles will no longer sparkle until a new hint is available.
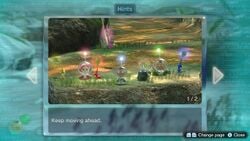
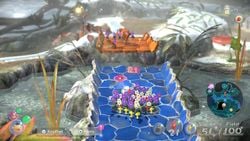
When a hint is shown, the game is paused and a special hint window takes up most of the screen. It contains an image, which may be a screenshot or a map, and some text below. There may be multiple pages in a hint, and if there are, these can be advanced to the right with ![]() ,
, ![]() , or right on
, or right on ![]() , and to the left with
, and to the left with ![]() ,
, ![]() , or left on
, or left on ![]() . (The face buttons or the stick can be held to quickly advance through pages in a loop, but the same does not happen for
. (The face buttons or the stick can be held to quickly advance through pages in a loop, but the same does not happen for ![]() or
or ![]() .)
.) ![]() can be pressed to close the hint window and return to gameplay (or the pause menu, if the hint was opened from there).
can be pressed to close the hint window and return to gameplay (or the pause menu, if the hint was opened from there).
Arrows
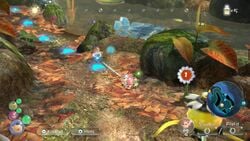
If Hint Display is on, hints will not only consist of pages of information, but in arrows on the ground. These large blue arrows will point towards that hint's associated location, forming a path in front of the player using the same waypoint system as Go Here!. Since not all hints have an associated location, not all hints have arrows. The arrows will only appear near the active leader, and up to 5 arrows can be on the ground at a time. Arrows are 3D objects and can clip into the ground and illuminate their surroundings. They do not appear on the radar or the KopPad camera view. After appearing, arrows will not stop pointing towards their destination until their completion condition is fulfilled, though they will briefly disappear after the KopPad or Onion menu is closed (except the camera app on the KopPad). Arrows can be made to disappear by turning Hint Display off; after turning it back on the arrows will not reappear unless the hint is opened again.
When a hint has multiple associated locations in a set order (such as fragment piles), arrows will initially point towards the first of these locations. When a location has been visited and a task done there (such as picking up all the fragments), the arrows will disappear. If the player opens the hint page again, the arrows will reappear and point to the next location. (Note that the bubble will not sparkle in this situation, so the game will not let the player know that new arrows are available.) If for some reason the condition for an earlier hint is broken (such as calling Pikmin off fragments from an earlier pile), the arrows will point to the earlier location again until its condition is met again.
List
|
The following article or section is in need of assistance from someone who plays Pikmin 3 Deluxe. |
| Image | Text | Area | Trigger condition | Associated location(s) |
|---|---|---|---|---|
|
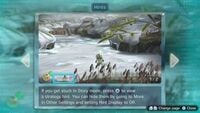
“If you get stuck in Story mode, press “Press |
Distant Tundra | Opened automatically at the start of the game. | N/A |
| Keep moving ahead | Distant Tundra | Close first hint. | Initially: The can with the Yellow Pikmin.
After the throwing tutorial: Vehemoth Phosbat arena. (Note: The arrows point past the trigger point for the cutscene that ends the Distant Tundra section of day 1, so it is not possible to see where the arrows point to.) | |
|
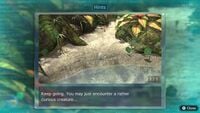
“Keep going. You may just encounter a rather curious creature...” | Tropical Wilds | Start Alph's section of day 1. | Initially: The first Red Pikmin Alph sees.
After the Red Pikmin runs away: The Red Pikmin in front of the Onion. |
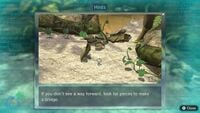
|
“If you don't see a way forward, look for pieces to make a bridge.” | Tropical Wilds | Rescue the Red Onion. | Initially: The 2 fragment piles, in either order.
After picking up all fragments: None. |
| Keep moving ahead | Tropical Wilds | Complete the brown bridge. | The KopPad. | |
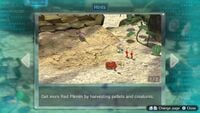
|
“Get more Red Pikmin by harvesting pellets and creatures.”
“Use |
Tropical Wilds | Collect the KopPad. | None. |
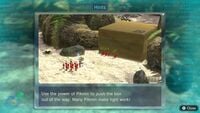
|
“Use the power of Pikmin to push the box out of the way. Many Pikmin make light work!” | Tropical Wilds | Have at least 20 Pikmin in the field. | The cardboard box. |
| Keep moving ahead | Tropical Wilds | Push the cardboard box. | The western exit of the cave. (Note: It is not possible to see if the arrows initially stop at the dirt wall before pointing to the exit of the cave.) | |
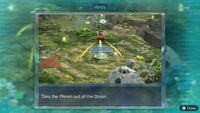
|
“Take the Pikmin out of the Onion.” | Garden of Hope | Land in the Garden of Hope on day 2. | The Red Onion. |
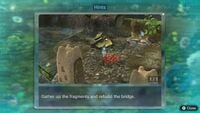
|
“Gather up the fragments and rebuild the bridge.” | Garden of Hope | Take at least 1 Pikmin out of the Onion. | The 2 brown fragment piles in either order. |
| Keep moving ahead | Garden of Hope | Complete the brown bridge. | Initially: None.
After seeing Brittany: The Rock Onion. | |
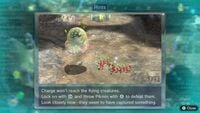
|
“Charge won't reach the flying creatures. Lock on with |
Garden of Hope | Seen the Medusal Slurker. | None. |
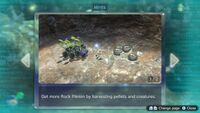
|
“Get more Rock Pikmin by harvesting pellets and creatures.”
“Throw Rock Pikmin to shatter the crystal.” |
Garden of Hope | Unlock Rock Pikmin. | None. |
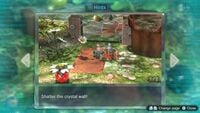
|
“Shatter the crystal wall!”
“Throw Pikmin to the other shore to look for bridge fragments there.” |
Garden of Hope | Rescue Brittany. | The 2 blue fragment piles, in either order. |
| Keep moving ahead | Garden of Hope | Complete the blue bridge. | The Armored Mawdad arena. | |
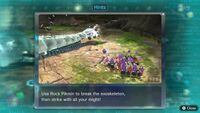
|
“Use Rock Pikmin to break the exoskeleton, then strike with all your might!” | Garden of Hope | Begin the Armored Mawdad boss fight. | None. |
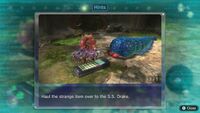
|
“Haul the strange item over to the S.S. Drake.” | Garden of Hope | Defeat the Armored Mawdad. | None. |
| End day | Garden of Hope | Collect the Data Glutton. | None. | |
| Keep moving ahead | Distant Tundra | First landing in the Distant Tundra. | None. | |
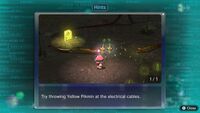
|
“Try throwing Yellow Pikmin at the electrical cables.” | Distant Tundra | See Yellow Pikmin. | None. |
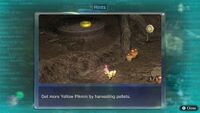
|
“Get more Yellow Pikmin by harvesting pellets.” | Distant Tundra | Activate the light in the Yellow Onion cave. | None. |
|
“Try to roll the iron ball.” | Distant Tundra | Have at least 20 Pikmin in the field. | The iron ball in the cave. |
| Keep moving ahead | Distant Tundra | Push the iron ball in the cave. | The door to the outside. | |
|
“Find a place where you can trade Pikmin.”
“Gather up the fragments and rebuild the bridge.” |
Distant Tundra | Leave Brittany's cave. | Initially: The place for throwing Pikmin across the river.
After reaching with either leader: Alph and Brittany have different associated locations. Alph has the 2 blue fragment piles in either order; Brittany has the 2 orange fragment pies in either order. |
|
“Use the iron ball to smash your way through the wall.”
“There's an iron ball hidden here...” |
Distant Tundra | Complete the double bridge. | Behind the iron ball outside. |
| Keep moving ahead | Distant Tundra | Push the iron ball outside. | Initially: The cave where the Vehemoth Phosbat is first seen.
After reaching the cave: None. | |
|
“Switch on the lightbulb.”
“Look around for other lightbulbs.” |
Distant Tundra | Activate the lightbulb that reveals the Vehemoth Phosbat. | The 4 electrodes in the Vehemoth Phosbat arena, in any order. |
|
“Build a bridge so you can light up the whole cave.”
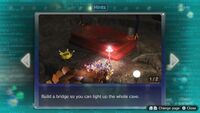
“There must be bridge pieces around here somewhere.” |
Distant Tundra | The Vehemoth Phosbat does its Phosbat Pod activation cutscene. | The 2 fragment piles in the Vehemoth Phosbat arena, in either order. |
|
“Throw Pikmin when it stops to use its vacuum attack or when it's motionless on the wall.” | Distant Tundra | Activated the big lightbulb in the Vehemoth Phosbat arena. | None. |
| End day | Distant Tundra | Defeat the Vehemoth Phosbat. | None. |
Default hints
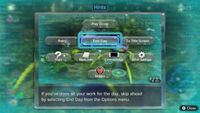
These hints appear many times throughout the story, so to simplify the list above, their images and text are listed below, along with the abbreviation used in the main list to represent the hint.
