Radar: Difference between revisions
m (→In Hey! Pikmin: grammar) |
m (→Go Here!: starting with implies there are more games after which there aren't) |
||
| Line 51: | Line 51: | ||
==Go Here!== | ==Go Here!== | ||
In ''Pikmin 3'', players have the ability to tell leaders (and their army of [[Pikmin family|Pikmin]]) to go to a specific spot on the map automatically, so that they may do something else with a different leader. In order to use the Go Here! functionality, the player must first collect the [[Data File]] located on the other side of the [[crystal wall]] at the [[Garden of Hope]]'s landing site. | |||
===Choosing a destination=== | ===Choosing a destination=== | ||
Revision as of 22:55, April 19, 2018
|
The following article or section is in need of assistance from someone who plays Hey! Pikmin. |
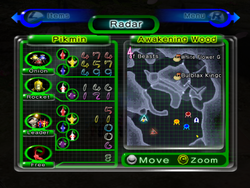
The radar is a mechanic present in all Pikmin games. It can be unlocked in Pikmin by collecting the Whimsical Radar, is available from the start in Pikmin 2, and is unlocked when the KopPad is found in Pikmin 3. This tool allows the player to view the area's layout, as well as the location of several important objects, such as the Pikmin, the Onion(s), and collectible objects.
The buttons needed to access the radar, pan it and zoom it vary from game to game:
| Game | Open | Pan | Zoom |
|---|---|---|---|
| Pikmin | |||
| Pikmin 2 | |||
| New Play Control! Pikmin and Pikmin 2 | |||
| Hey! Pikmin | can't pan | can't zoom |
In the first two games and their remakes, the screen that contains the radar also enumerates how many Pikmin are with the current leader, of each type, how many Pikmin there are in the Onions, of each type, and how many Pikmin are roaming through the area, of all types. In addition, the screen also shows the total number of ship parts obtained, in Pikmin.
The radar is disabled during Challenge Mode, but not Mission Mode, and is completely disabled from any 2-player game mode.
Appearance
In the first two games, the radar shows a monochromatic representation of the area's terrain, only really highlighting the walls and water. Some icons point out the location of ship parts, treasures, Onions, and a few other things. In Pikmin 3, it provides a map of the area, stylized so that water, terrain, structures, and boundary walls are high-contrast and easy to distinguish. It has a static level of zoom, and by default, the map is centered on the active leader.
In Pikmin 3
The radar in Pikmin 3 received a massive upgrade compared to the radar in previous games of the series. It is the default app on the KopPad, and if Off-TV Play is off, the map will follow the current leader as they move.
Touching the GamePad in this state will pause gameplay, if it is not already paused. With Off-TV Play disabled, the camera on the TV screen will also move upwards and point down in a birds-eye view. The player can drag their finger or stylus on the touchscreen in order to pan around; the TV screen camera will also pan accordingly. Effectively, this feature allows the player to view all around the area from a birds-eye view, either with the stylized KopPad map, or from the actual in-game camera.
The map is not fully rendered from the get-go. A fog of war effect makes it so that the map only renders places visited by the leaders. The TV screen's camera will not show unexplored sections. Once a zone of the map is rendered, it stays that way forever, even if the player returns to a previous day after saving; this can be reset by restarting from day 1. Uncharted areas merely show the background of the KopPad – a blue and cyan grid. This method of charting is not divided in cells or predefined zones, but is rather quite smooth, with nearly each pixel of the map having an individual "charted" or "uncharted" state. The map is automatically charted as the gameplay takes place, and approximately one camera-width of content can be revealed from any one position.
Two buttons exist on the top left and top right corners of the map app. The icon on the top-left allows the player to toggle the map orientation between always having the north point up (an "N" icon with a triangle pointing upwards), or the same orientation as the camera (a compass icon). Changing this will also change the TV screen's overhead camera. The button on the top-right shows Alph's silhouette, and is used to toggle the gameplay pause. If the icon is stopped, the gameplay is paused, but if the icon shows a walking animation, the gameplay continues taking place while the player is examining the map. In this mode, all of the map app's functionalities continue to work as normal, but switching apps will forcefully pause the gameplay. It should be noted that the top-right button does not work with Off-TV Play enabled.
When sunset is approaching, the top of the map app will periodically switch between the message "Pikmin in Danger", and the current amount of Pikmin of each type that will be left behind during the sunset, unless they're gathered in time.
If Off-TV Play is on and the player has the screen showing the KopPad, attempting to disable Off-TV Play with ![]() will merely show a message saying that it is impossible to switch. Several bits of decorative Koppaite text can also be found next to icons and buttons.
will merely show a message saying that it is impossible to switch. Several bits of decorative Koppaite text can also be found next to icons and buttons.
In Hey! Pikmin
In Hey! Pikmin, the radar is not present at the beginning of the game but is rewarded to the player once 2,000 Sparklium has been collected. The radar can be toggled by pressing ![]() /
/![]() and does initially only show the explored part of the current area. Once an area is completed, the entire map for that area is revealed.
and does initially only show the explored part of the current area. Once an area is completed, the entire map for that area is revealed.
Boss areas do not have the radar function.
Go Here!
In Pikmin 3, players have the ability to tell leaders (and their army of Pikmin) to go to a specific spot on the map automatically, so that they may do something else with a different leader. In order to use the Go Here! functionality, the player must first collect the Data File located on the other side of the crystal wall at the Garden of Hope's landing site.
Choosing a destination
With the gameplay paused, a ![]() appears on the center of the map app. When the map is panned, the pyramid stays on the center, and hence, follows the panning. As the shape moves, a set of arrows originating from the current leader mark a trail from the leader's icon on the map to the spot the pointer is at. After a small delay, a button with the leader's icon and the words "Go Here!" will appear in a non-obstructive location of the screen. Tapping this button will make the leader take the path shown towards the target location. There are scenarios in which it is not possible to use the Go Here! command, as detailed below.
appears on the center of the map app. When the map is panned, the pyramid stays on the center, and hence, follows the panning. As the shape moves, a set of arrows originating from the current leader mark a trail from the leader's icon on the map to the spot the pointer is at. After a small delay, a button with the leader's icon and the words "Go Here!" will appear in a non-obstructive location of the screen. Tapping this button will make the leader take the path shown towards the target location. There are scenarios in which it is not possible to use the Go Here! command, as detailed below.
Path algorithm
The planned path is always the shortest one required in order to reach the destination. This path-finding system also takes into account insurmountable obstacles and water, disallowing the travel if the player tries to enter a body of water with non-Blue or non-Winged Pikmin in their party. Hazards and enemies are ignored when deciding the path, but uncharted terrain is considered and not allowed. If the player places the destination point in an uncharted or invalid location (like a body of water, as stated above), the pyramid marker will turn pink, and the "Go Here!" button will be grayed out. If the path to a certain location is blocked off by an uncleared obstacle or any other feature that can't be overcome, the shown path will still trace to the point of the obstacle, where it then displays a pink ❌ sign, and the rest of the path with pink arrows, meaning the leader can only reach the point marked by the ❌ sign. To note is that the Go Here! feature will not work while the leader is plucking, dodging, spraying, in pain from being hurt, lying down on the ground (for instance, from getting zapped), captured by an enemy, or on top of a lily pad.
Leader movement
If the leader reaches their destination successfully, a dialog message will appear on-screen with their icon, and a message stating that they reached their target spot. If not, they'll explain why the path didn't work. They'll also give up if they get stuck on something for a few seconds, like a wall or enemy carcass. If the leader is damaged during their walk, they will cancel their task altogether.
The player can use leaders under the Go Here! function, but most action inputs will not work, and the leaders will continue moving by themselves. The exception is the whistle button, which will make the current leader stop in their place and cancel the Go Here! walk, and the ability to use the KopPad, most notably, the camera feature. A small bubble appears near the leader's head notifying the player that it is possible to cancel.
Leaders under the Go Here! function move at a speed slower than manual running, and the exact speed depends on what Pikmin are on their group. In order to make sure no Pikmin lags behind, the leaders walk at the same pace as the slowest Pikmin in the group (given that leaf Pikmin are at the slowest maturity, and that Purple Pikmin are slower than other Pikmin types). However, they have a maximum speed cap that stops them from going faster than what a player-controlled leader would run. This speed controlling mechanic has the pro of allowing any Pikmin to follow the leader without fear of lagging behind, but also the con of being slower than if the player were to take the leader there on their own. If a leader's destination ends in a buried Pikmin, they will automatically begin plucking just after saying the arrival message.
Legend
The radar can show the following icons:
| Meaning | Pikmin icon | Pikmin 2 icon | Pikmin 3 icon | Description |
|---|---|---|---|---|
| Leader | File:LeaderIcons.png | Position and facing direction of each leader. In Pikmin 2, red represents Olimar, and blue, the other leader. In Pikmin 3, tapping a different leader's bubble will switch to that leader without unpausing the gameplay. | ||
| Collectible | N/A | 
|
Shows the location of a ship part or fruit, even if inside an enemy. The Pikmin 3 icon shows a yellow star if the object hasn't been seen yet, and the fruit's icon otherwise. | |
| Pikmin | The location of the regular Pikmin. | |||
| Burrowed Pikmin | (Same as regular Pikmin) | The location of buried Pikmin, of any type. | ||
| Bulbmin | N/A | N/A | The location of Bulbmin. | |
| Onions | 
|
Position of each Onion. | ||
| Ship | Location of the main ship: the S.S. Dolphin, Hocotate ship, or S.S. Drake | |||
| Research Pod / SPERO | N/A | Location of the treasure-collecting floating vessel. | ||
| Cave entrance / sublevel hole | N/A | N/A | Hole used to enter a cave or the next sublevel in a cave. | |
| Completed cave entrance | N/A | N/A | If a cave has no more treasure left to collect, it will be represented with this icon. | |
| Exit geyser | N/A | N/A | Location of a cave's exit geyser. | |
| North | The icon used to represent which direction is north. It stays permanently on the top-left corner of the map, regardless of panning. | |||
| Section entrance/exit | N/A | N/A | Entrance or exit point between sections, pointing to the exit. When a leader enters one of these areas, a quick fade takes place, and they are placed on the new section of the map. Clicking on one of these icons will center the map on the matching exit icon. | |
| Signal | N/A | N/A | The location of the current signal. This icon also emits large circular yellow waves from time to time. |
Besides those, the radar also illustrates the following:
- Water, with stripes that alternate between dark and light, in the first two games, or blue color in Pikmin 3.
- Obstacles, in Pikmin 3, with an icon for each. Some of these icons have more than one version that signify how much more of the obstacle is left to clear.
- The leaders' footsteps in the past few seconds, in Pikmin 3.
In Pikmin 3, multi-part fruits also have different icons, and grapes have icons that represent different levels of individual grape collection. Upon collecting 10 different types of fruit, the Fruit Finder will be unlocked. Fruits will be then shown on the KopPad whether the area has been discovered yet or not.
Map textures
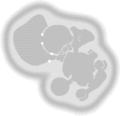
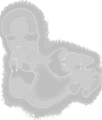
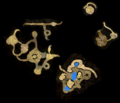
These are the textures used by the games to represent the areas on the radar.
In the first two games, the following images are cropped for convenience. They have a naturally low resolution, and, in-game, they are applied a purple tint. In all textures up corresponds to the North, except for The Final Trial one, in which the opposite is true.
For Pikmin 3, each "room" has its own texture, and on the following images, the textures were aligned by hand, and when justified, cropped (with a fade-in effect).
Pikmin
Pikmin 2
|
To do: Add all radar map textures of cave sublevels that never change. |
Pikmin 3
Oddities
Pikmin 2 manual
|
To do: Get info for the Japanese instruction manuals. |
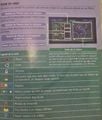
The instruction manuals for Pikmin 2 and New Play Control! Pikmin 2 have a section explaining how the radar works, and in most versions, a legend of its symbols. The legend for the dots that represent the Pikmin is different between all types of manual, and all of them have some quirks to point out.
The GameCube North American version lists the five main Pikmin colors but bizarrely, a sixth color as well: a soft pink color. It is unknown what this color is meant to represent. The GameCube European version only lists the five main Pikmin types. The US version of New Play Control! remake's instruction manual doesn't have a legend, and only has a shorter overview of how the radar works. It does however have a list of the radar dot colors some pages ahead, in the section describing the differences between Pikmin types. Finally, the European New Play Control! Pikmin 2 manual brings back the legend of symbols, and includes an explanation of the dark green color used to represent buried Pikmin sprouts.
All instruction manuals use a very dark purple for the Purple Pikmin, which is different from the light magenta seen in-game.
Pikmin 3 radar
The radar in Pikmin 3 has a number of peculiarities and mistakes to it.
With Off-TV Play disabled, if the map app's orientation is set to be the same as the camera's angle, there is a desynchronization between the angle shown on the KopPad and the TV screen's angle, on certain places. This can make it quite difficult to pan while looking at the TV screen. The following locations are affected, and the angles provided here are estimates:
- The cave with the Velvety Dreamdrop on the Tropical Wilds has a 45° difference.
- The Calcified Crushblat's arena has a 100° difference.
- Charlie's landing site on the Distant Tundra has a 90° difference.
- The log leading up to the Vehemoth Phosbat arena has a 15° difference.
- The first section of the Vehemoth Phosbat's arena has a 100° difference.
- The actual arena itself has a 45° difference.
- The Shaggy Long Legs' arena on the Distant Tundra has a 15° difference.
- The top of the Formidable Oak, still on the outside, has a 45° difference.
- Inside the Formidable Oak, the corridor area has a 45° difference, and the large section after has a 90° difference; the dark pond area is unaffected.
Other oddities exist with the TV screen:
- By sliding the map on top of the Scornet Maestro's arena, toggling between the arena and the pathway leading up to it, and looking at the TV screen, one can notice that the "railing" on the pathway is considerably more simplistic and less detailed if the camera is focusing on the arena – notably, it's lacking the red leaves.
- If the player has a saved game that includes a day after the Scornet Maestro has been defeated, and then returns to a day where they have not yet visited the arena, the camera will reveal the boss high up in the center of the arena, in a T-pose. This is because the model is being used as a placeholder for the cutscene that triggers once the player goes to the top of the tree.
- In a day after the Quaggled Mireclops's defeat, if the player starts the day and pans the radar to the boss's corpse, they might be able to see pellets of other colors on the TV screen.
