The Ship Restored: Difference between revisions
1337Walrus (talk | contribs) (music links) |
|||
| (39 intermediate revisions by 19 users not shown) | |||
| Line 2: | Line 2: | ||
|day = 10 | |day = 10 | ||
|title = The Ship Restored | |title = The Ship Restored | ||
|screenshot = | |screenshot = P3D The Ship Restored Carrying Parts.jpg | ||
|map = The Ship Restored Map.jpg | |map = The Ship Restored Map.jpg | ||
|size = 250px | |size = 250px | ||
| Line 27: | Line 27: | ||
|platinum = 2000 | |platinum = 2000 | ||
|time = 13:00 | |time = 13:00 | ||
|music = [[Music in Pikmin 3#Olimar's Comeback (days 9-10)|''Olimar's Comeback (days 9-10)'']] [[Music in Pikmin 3#Golden arachnorb battle|''Golden arachnorb battle'']] | |music = [[Music in Pikmin 3#Olimar's Comeback (days 9-10)|''Olimar's Comeback (days 9-10)'']]<br>[[Music in Pikmin 3#Golden arachnorb battle|''Golden arachnorb battle'']] | ||
}} | }} | ||
{{ | {{spoiler|the ending of [[Olimar's Comeback]]}} | ||
'''The Ship Restored''' is the tenth and final day in [[Olimar's Comeback]]. It takes place in the [[Formidable Oak]], and has a unique objective | '''The Ship Restored''' is the tenth and final day in [[Olimar's Comeback]]. It takes place in the [[Formidable Oak]], and has a unique objective: to collect multiple [[ship part]]s. | ||
== Plot == | == Plot == | ||
[[Olimar]] detects the remaining [[ship part]]s right outside the [[Formidable Oak]], although he also detects hostile life. This acts as the final day of Olimar and [[Louie]]'s fourth trip back to PNF-404. | [[Olimar]] detects the remaining [[ship part]]s right outside the [[Formidable Oak]], although he also detects hostile life. This acts as the final day of Olimar and [[Louie]]'s fourth trip back to PNF-404. | ||
After obtaining the parts, the [[Hocotate ship]] is complete and ready to be piloted once more. Despite its location in the [[Garden of Hope]], and Olimar and Louie being in Formidable Oak, the ship is shown to take off in the [[Tropical Wilds]]. Their take off is noticeable from the other [[area]]s in the game and observed by the [[Pikmin]]. Whether they make it to [[Hocotate]] is not confirmed, but considering the events of {{hp}}, it's likely they did. | |||
== Description == | == Description == | ||
The player starts at the top of the structure where [[Olimar]] is found sleeping in [[Story Mode]]. There are four [[ | [[File:P3D Golden Shaggy Long Legs Hairless.jpg|thumb|250px|Fighting the golden Shaggy Long Legs.]] | ||
The player starts at the top of the structure where [[Olimar]] is found sleeping in [[Story Mode]]. There are four Rock [[Candypop Bud]]s, allowing the player to obtain [[Rock Pikmin]]. The path inside the Oak is blocked off, meaning the player can only proceed down from the outside. The [[S.S. Drake]]'s landing site contains four different enemies, each emphasizing the four major [[hazard]]s in ''Pikmin 3'': [[fire]], [[water]], [[electricity]], and [[crystal]]. Within the [[Plasm Wraith]] arena, there are now a [[Baldy Long Legs]] and a [[Shaggy Long Legs]] (now with larger feet), both colored gold. Unique battle music is played when they are encountered, making this a sort of final [[boss]]. Both need to be defeated (along with the [[Calcified Crushblat]]) in order to complete the mission. | |||
{{clear}} | |||
== Objects == | == Objects == | ||
===Ship parts=== | |||
{{columns|2| | |||
* {{icon|Analog Computer|y|v=P3D}} ({{pokos|700|y}}) | |||
* {{icon|Nova Blaster|y|v=P3D}} ({{pokos|800|y}}) | |||
* {{icon|Repair-Type Bolt|y|v=P3D}} ({{pokos|500|y}}) | |||
}} | |||
===Enemies=== | |||
{{columns|2| | {{columns|2| | ||
* {{icon|Bearded Amprat|y}} × 1 | * {{icon|Bearded Amprat|y}} × 1 | ||
| Line 45: | Line 57: | ||
* {{icon|Shaggy Long Legs|y}} × 1 | * {{icon|Shaggy Long Legs|y}} × 1 | ||
* {{icon|Pyroclasmic Slooch|y}} × 1 | * {{icon|Pyroclasmic Slooch|y}} × 1 | ||
* {{icon|Watery Blowhog|v=P3 | * {{icon|Watery Blowhog|y|v=P3}} × 1 | ||
* {{icon|Baldy Long Legs|y}} × 1 | * {{icon|Baldy Long Legs|y}} × 1 | ||
}} | }} | ||
The Baldy Long Legs in this stage is golden, an exclusive to this stage. Likewise, the Shaggy Long Legs is also gold colored and has wider feet. | |||
== Guide == | == Guide == | ||
{{guide}} | {{guide}} | ||
{{see more|Shaggy Long Legs#Strategy|Baldy Long Legs#Strategy}} | {{see more|Shaggy Long Legs#Strategy|Baldy Long Legs#Strategy}} | ||
Before continuing forward, it's wise to make as many [[Rock Pikmin]] as possible using the [[ | Before continuing forward, it's wise to make as many [[Rock Pikmin]] as possible using the Rock [[Candypop Bud]]s. They are necessary to defeat the [[Calcified Crushblat]], as well as immune to the [[crushing]] caused by the Arachnorb's feet. Since [[Yellow Pikmin]] are handy for taking them on as well, it's a good idea to only convert [[Red]] and [[Blue]] Pikmin. For efficiency, leave a leader at the [[SPERO]] to pick up any Pikmin returning, as this level will not require more than one. | ||
Reaching the S.S. Drake's landing site, there are four enemies of various [[hazards]] in close proximity. While only the Crushblat has a ship part, it may be hard to attack it without alerting the other enemies. Try to defeat each one with their respective Pikmin type separately without catching the attention of the other enemies. Efficiently, you could [[charge]] each Pikmin group at once, though with the [[Watery Blowhog]]'s stream and the [[Pyroclasmic Slooch]]'s fire trail this can be quite risky. The Calcified Crushblat can also harm other enemies with its jump, so using it to kill the other enemies is a safe alternative, though very slow. Once defeated, have Pikmin carry back the ship part alone (preferably Blue Pikmin, as they are the least useful for the upcoming battle) and continue down to the arena. | Reaching the S.S. Drake's landing site, there are four enemies of various [[hazards]] in close proximity. While only the Crushblat has a ship part, it may be hard to attack it without alerting the other enemies. Try to defeat each one with their respective Pikmin type separately without catching the attention of the other enemies. Efficiently, you could [[charge]] each Pikmin group at once, though with the [[Watery Blowhog]]'s stream and the [[Pyroclasmic Slooch]]'s fire trail this can be quite risky. The Calcified Crushblat can also harm other enemies with its jump, so using it to kill the other enemies is a safe alternative, though very slow. Once defeated, have Pikmin carry back the ship part alone (preferably Blue Pikmin, as they are the least useful for the upcoming battle) and continue down to the arena. | ||
| Line 69: | Line 75: | ||
== Quotes == | == Quotes == | ||
=== Briefing === | === Briefing === | ||
{{transcript|Learn to micromanage! When it comes to the creatures here, send the right Pikmin to do the right job. We've trained you well to handle anything! OK, so we didn't train you, but you should be ready for surprises by now anyway.}} | {{transcript|Learn to micromanage! When it comes to the creatures here, send the right Pikmin to do the right job. We've trained you well to handle anything! OK, so we didn't train you, but you should be ready for surprises by now anyway.|block=y}} | ||
=== | === Outline === | ||
{{transcript|Mission Log, Day 10: I found a point where all the signals from {{color|parts|orange}} seem to converge. If I can recover them all, our ship will be fully restored. The downside is that I'm picking up a worrying number of readings from hostile life-forms. I don't think I'll be retrieving those parts without a fight. But what's worth fighting for if not the chance to see one's loved ones again? Hocotate, here I come!}} | {{transcript|Mission Log, Day 10: I found a point where all the signals from {{color|parts|orange}} seem to converge. If I can recover them all, our ship will be fully restored. The downside is that I'm picking up a worrying number of readings from hostile life-forms. I don't think I'll be retrieving those parts without a fight. But what's worth fighting for if not the chance to see one's loved ones again? Hocotate, here I come!|block=y}} | ||
=== Loading screen tip === | === Loading screen tip === | ||
| Line 84: | Line 90: | ||
|- | |- | ||
| Moving towards the geyser | | Moving towards the geyser | ||
| {{icon|Olimar|v=neutral}}{{transcript|If we can find the remaining parts... | | {{icon|Olimar|v=neutral}}{{transcript|If we can find the remaining parts...}} | ||
| {{icon|Louie|v=neutral}}{{transcript|Still need... more parts. | | {{icon|Louie|v=neutral}}{{transcript|Still need... more parts.}} | ||
|- | |- | ||
| Approaching the enemies in the second screen | | Approaching the enemies in the second screen | ||
| {{icon|Olimar|v=sad}}{{transcript|Where do I begin? | | {{icon|Olimar|v=sad}}{{transcript|Where do I begin?}} | ||
| {{icon|Louie|v=sad}}{{transcript|Where to start...? | | {{icon|Louie|v=sad}}{{transcript|Where to start...?}} | ||
|- | |- | ||
| Approaching the ship part dropped by the Calcified Crushblat | | Approaching the ship part dropped by the Calcified Crushblat | ||
| {{icon|Olimar|v=neutral}}{{transcript|The part's all sticky. I hope it's not broken... | | {{icon|Olimar|v=neutral}}{{transcript|The part's all sticky. I hope it's not broken...}} | ||
| {{icon|Louie|v=neutral}}{{transcript|I don't want to touch it now. It's so... slimy. | | {{icon|Louie|v=neutral}}{{transcript|I don't want to touch it now. It's so... slimy.}} | ||
|- | |- | ||
| Entering the arena | | Entering the arena | ||
| {{icon|Olimar|v=neutral}}{{transcript|Getting closer! | | {{icon|Olimar|v=neutral}}{{transcript|Getting closer!}} | ||
| {{icon|Louie|v=neutral}}{{transcript|I smell something... | | {{icon|Louie|v=neutral}}{{transcript|I smell something...}} | ||
|- | |- | ||
| Defeating the golden Shaggy Long Legs | | Defeating the golden Shaggy Long Legs | ||
|{{icon|Olimar|v=sad}}{{transcript|That was tough... All right. We're so close to getting our ship back! | |{{icon|Olimar|v=sad}}{{transcript|That was tough... All right. We're so close to getting our ship back!}} | ||
|{{icon|Louie|v=neutral}}{{transcript|My belly's grumbling. | |{{icon|Louie|v=neutral}}{{transcript|My belly's grumbling.}} | ||
|} | |} | ||
=== | === Assignment Report === | ||
[[File:P3D Olimar's Comeback Ending.jpg|thumb|200px|The Hocotate ship blasting off.]] | |||
{{transcript|}} | There is no end report for the mission, as it leads directly into the ending cutscene for Olimar's Comeback. | ||
{{transcript|[Fade in to Olimar and Louie facing the camera during the evening at the Tropical Wilds.] | |||
Thanks to Louie and the Pikmin (mostly the Pikmin), | |||
[They both slowly look upward at something.] | |||
our ship is in working order again. | |||
[Cut to behind Olimar and Louie, revealing that they are looking at the fully repaired Hocotate Ship.] | |||
It's been a long road... I'm looking forward to getting home again. | |||
[Cut to a moment later, where they're both in the ship. Louie is visible in the lower cockpit as the engine starts. Some Pikmin run up to the ship to watch it take off while some others watch from a distance. The ship slowly lifts off.] | |||
[A few different cuts show Pikmin watching the ship leave the planet from the different areas of Pikmin 3.] | |||
[Cut to the Hocotate Ship flying away from PNF-404. Olimar looks behind him one last time and nods before finally entering warp speed.]|block=y}} | |||
== Gallery == | == Gallery == | ||
<gallery> | <gallery> | ||
P3D The Ship Restored Start.jpg|The landing site. | |||
P3D The Ship Restored Enemies.jpg|The area with 4 enemies. | |||
SideStory RepairTypeBolt.jpg|The [[Repair-Type Bolt]] after defeating the 4 enemies. | |||
P3D The Ship Restored Carrying Parts.jpg|Carrying the ship parts back to the landing site. | |||
P3D Golden Baldy Long Legs.jpg|The golden Baldy Long Legs. | |||
P3D Golden Baldy Long Legs Battle.jpg|Fighting the golden Baldy Long Legs. | |||
P3D Golden Baldy Long Legs Defeated.jpg|Defeating the golden Baldy Long Legs. | |||
P3D Golden Shaggy Long Legs.jpg|The golden Shaggy Long Legs. | |||
P3D Golden Shaggy Long Legs Battle.jpg|Fighting the golden Shaggy Long Legs. | |||
P3D Golden Shaggy Long Legs Hairless.jpg|The golden Shaggy Long Legs after losing its hair. | |||
P3D Golden Shaggy Long Legs Defeated.jpg|Defeating the golden Shaggy Long Legs. | |||
SideStories AnalogComputer.jpg|The [[Analog Computer]] after defeating the golden Baldy Long Legs. | |||
SideStories Nova Blaster.jpg|The [[Nova Blaster]] after defeating the golden Shaggy Long Legs. | |||
</gallery> | </gallery> | ||
== Trivia == | |||
*This mission is the only level, in both Side Stories and [[Mission Mode]], to not have bronze, silver, or gold medal requirements; scores will either get a platinum medal, or no medal at all. | |||
*Even though the [[Nova Blaster]] is not a mandatory ship part in {{p1}}, it is still required in this mission. | |||
== Names in other languages == | == Names in other languages == | ||
{{ | {{Needs translation|Chinese|Korean}} | ||
{{foreignname | {{foreignname | ||
|Jap | |Jap = ついに復活? ドルフィン初号機 | ||
|JapR = | |JapR = Tsui ni Fukkatsu? Dorufin Shogōki | ||
|JapM = | |JapM = Finally revived? The Dolphin 1 | ||
| | |ChiTrad = 終於復活?多露芬初號機 | ||
| | |ChiTradR = | ||
|Fra | |ChiTradM = | ||
|FraM = | |ChiSimp = 终于复活?多露芬初号机 | ||
|Ger | |ChiSimpR = | ||
|GerM = | |ChiSimpM = | ||
|Ita | |Fra = Le vaisseau réparé | ||
|ItaM = | |FraM = The ship repaired | ||
|Spa | |FraN = | ||
|SpaM = | |Ger = Das reparierte Schiff | ||
|GerM = The repaired ship | |||
|GerN = | |||
|Ita = Il ritorno del prototipo | |||
|ItaM = The prototype's return | |||
|ItaN = The Hocototate ship is known as "''Prototipo della Dolphin''" ("Dolphin prototype") in the Italian translation of ''Pikmin 3 Deluxe''. | |||
|Kor = 드디어 부활? 돌핀 초호기 | |||
|KorR = | |||
|KorM = | |||
|Spa = La nave restaurada | |||
|SpaM = The ship restored | |||
|notes = y | |||
}} | }} | ||
== See also == | == See also == | ||
* [[Another Part Found]] | * [[Another Part Found]] | ||
{{DEFAULTSORT:Ship Restored, The}} | |||
{{Side Stories}} | {{Side Stories}} | ||
Latest revision as of 07:58, November 19, 2024
| Day 10: The Ship Restored | |||||||||
|---|---|---|---|---|---|---|---|---|---|
| Side Story | Olimar's Comeback | ||||||||
| Objective | Collect parts! | ||||||||
| Area | Formidable Oak | ||||||||
| Starting Pikmin | |||||||||
| |||||||||
| Requirements | |||||||||
| |||||||||
| Time limit | 13:00 | ||||||||
| Music | Olimar's Comeback (days 9-10) Golden arachnorb battle | ||||||||
The Ship Restored is the tenth and final day in Olimar's Comeback. It takes place in the Formidable Oak, and has a unique objective: to collect multiple ship parts.
Plot[edit]
Olimar detects the remaining ship parts right outside the Formidable Oak, although he also detects hostile life. This acts as the final day of Olimar and Louie's fourth trip back to PNF-404.
After obtaining the parts, the Hocotate ship is complete and ready to be piloted once more. Despite its location in the Garden of Hope, and Olimar and Louie being in Formidable Oak, the ship is shown to take off in the Tropical Wilds. Their take off is noticeable from the other areas in the game and observed by the Pikmin. Whether they make it to Hocotate is not confirmed, but considering the events of Hey! Pikmin, it's likely they did.
Description[edit]
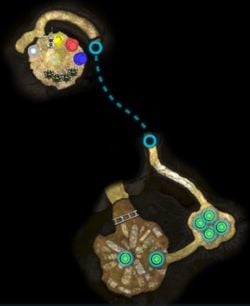
The player starts at the top of the structure where Olimar is found sleeping in Story Mode. There are four Rock Candypop Buds, allowing the player to obtain Rock Pikmin. The path inside the Oak is blocked off, meaning the player can only proceed down from the outside. The S.S. Drake's landing site contains four different enemies, each emphasizing the four major hazards in Pikmin 3: fire, water, electricity, and crystal. Within the Plasm Wraith arena, there are now a Baldy Long Legs and a Shaggy Long Legs (now with larger feet), both colored gold. Unique battle music is played when they are encountered, making this a sort of final boss. Both need to be defeated (along with the Calcified Crushblat) in order to complete the mission.
Objects[edit]
Ship parts[edit]
 Analog Computer (
 × 700)
 Nova Blaster (
 × 800)
 Repair-Type Bolt (
 × 500)
Enemies[edit]
 Bearded Amprat × 1
 Calcified Crushblat × 1
 Shaggy Long Legs × 1
 Pyroclasmic Slooch × 1
 Watery Blowhog × 1
 Baldy Long Legs × 1
The Baldy Long Legs in this stage is golden, an exclusive to this stage. Likewise, the Shaggy Long Legs is also gold colored and has wider feet.
Guide[edit]
|
The following article or section contains guides. |
- See more: Shaggy Long Legs#Strategy and Baldy Long Legs#Strategy.
Before continuing forward, it's wise to make as many Rock Pikmin as possible using the Rock Candypop Buds. They are necessary to defeat the Calcified Crushblat, as well as immune to the crushing caused by the Arachnorb's feet. Since Yellow Pikmin are handy for taking them on as well, it's a good idea to only convert Red and Blue Pikmin. For efficiency, leave a leader at the SPERO to pick up any Pikmin returning, as this level will not require more than one.
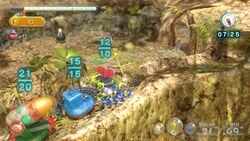
Reaching the S.S. Drake's landing site, there are four enemies of various hazards in close proximity. While only the Crushblat has a ship part, it may be hard to attack it without alerting the other enemies. Try to defeat each one with their respective Pikmin type separately without catching the attention of the other enemies. Efficiently, you could charge each Pikmin group at once, though with the Watery Blowhog's stream and the Pyroclasmic Slooch's fire trail this can be quite risky. The Calcified Crushblat can also harm other enemies with its jump, so using it to kill the other enemies is a safe alternative, though very slow. Once defeated, have Pikmin carry back the ship part alone (preferably Blue Pikmin, as they are the least useful for the upcoming battle) and continue down to the arena.
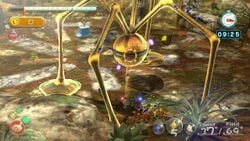
Right in front of the entrance, a Baldy Long Legs will drop from the sky. It is most effective to attack by throwing Yellows directly onto its abdomen while charging all other types (especially Rock Pikmin) at the legs to climb up. If it shakes Pikmin off, call them back before they are stomped on. It is advised to keep you and your Pikmin as close to the entrance as possible, since moving too far to the other side of the arena will spawn a Shaggy Long Legs, and fighting both at once is fairly risky. Once the Baldy Long Legs is defeated, have your Pikmin once again carry the ship part on their own. If needed, switch to the leader at base and have them pick up the Pikmin and use Go Here! to bring them to the arena.
Continue into the arena and a Shaggy Long Legs will spawn, this one with bigger feet than ones encountered in Story Mode. This makes charging the legs with non-Rock Pikmin much more risky, as the range of getting crushed is nearly doubled. As this is a Shaggy Long Legs, however, attacking the abdomen does nothing until the hair is removed. The safest option is to charge only Rock Pikmin until the hair is plucked off of each hair, before using Yellow Pikmin. A faster option is to continue the pattern of charging the legs with all Pikmin, but being wary of which legs are about to move, as each leg moves in a clockwise pattern. Prioritize plucking the hair from all legs instead of just one. Once it has been exposed, follow the same strategy as before. Carry the ship part back to base once it's defeated with all remaining Pikmin, as there is nothing left to do.
Quotes[edit]
Briefing[edit]
Outline[edit]
Loading screen tip[edit]
![]() “Defeat the wild creatures and take back the parts.”
“Defeat the wild creatures and take back the parts.”
During gameplay[edit]
In some situations during gameplay, Olimar or Louie will leave a comment.
Assignment Report[edit]
There is no end report for the mission, as it leads directly into the ending cutscene for Olimar's Comeback.
“[Fade in to Olimar and Louie facing the camera during the evening at the Tropical Wilds.]
Thanks to Louie and the Pikmin (mostly the Pikmin),
[They both slowly look upward at something.]
our ship is in working order again.
[Cut to behind Olimar and Louie, revealing that they are looking at the fully repaired Hocotate Ship.]
It's been a long road... I'm looking forward to getting home again.
[Cut to a moment later, where they're both in the ship. Louie is visible in the lower cockpit as the engine starts. Some Pikmin run up to the ship to watch it take off while some others watch from a distance. The ship slowly lifts off.]
[A few different cuts show Pikmin watching the ship leave the planet from the different areas of Pikmin 3.]
[Cut to the Hocotate Ship flying away from PNF-404. Olimar looks behind him one last time and nods before finally entering warp speed.]”Gallery[edit]
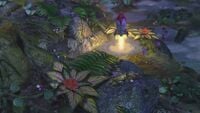
The Repair-Type Bolt after defeating the 4 enemies.
The Analog Computer after defeating the golden Baldy Long Legs.
The Nova Blaster after defeating the golden Shaggy Long Legs.
Trivia[edit]
- This mission is the only level, in both Side Stories and Mission Mode, to not have bronze, silver, or gold medal requirements; scores will either get a platinum medal, or no medal at all.
- Even though the Nova Blaster is not a mandatory ship part in Pikmin, it is still required in this mission.
Names in other languages[edit]
|
The following article or section needs help from someone who can translate Chinese/Korean text. |
| Language | Name | Meaning | Notes |
|---|---|---|---|
| ついに復活? ドルフィン初号機? Tsui ni Fukkatsu? Dorufin Shogōki |
Finally revived? The Dolphin 1 | ||
(traditional) |
終於復活?多露芬初號機 | ||
(simplified) |
终于复活?多露芬初号机 | ||
| Le vaisseau réparé | The ship repaired | ||
| Das reparierte Schiff | The repaired ship | ||
| Il ritorno del prototipo | The prototype's return | The Hocototate ship is known as "Prototipo della Dolphin" ("Dolphin prototype") in the Italian translation of Pikmin 3 Deluxe. | |
| 드디어 부활? 돌핀 초호기 | |||
| La nave restaurada | The ship restored |
See also[edit]
| Side Story days | ||
|---|---|---|
| Olimar's Assignment | Flower Garden • Inside Forest • River • Tundra | |
| Olimar's Comeback | Pikmin Reunion • Creature Hunting • Land, Sea, and Sky • First Part Found • Team Monster Hunt • Channel Gone Dry • Looking for Louie • Big Fruit Carnival • Another Part Found • The Ship Restored | |


