Distant Tundra: Difference between revisions
m (Text replacement - "== {{stub}}" to "== {{stub|section=y}}") |
Chazmatron (talk | contribs) m (→Enemies: wog -> wol) |
||
| (26 intermediate revisions by 16 users not shown) | |||
| Line 1: | Line 1: | ||
{{game icons|p3=y}} | {{game icons|p3=y}} | ||
{{infobox area | {{infobox area | ||
|screenshot = P3D Landing Site Distant Tundra.jpg | |screenshot = P3D Landing Site Distant Tundra.jpg | ||
|map = Distant Tundra map P3D.png | |map = Distant Tundra map P3D.png | ||
|fruits = 16 | |fruits = 16 | ||
|pikmin_discovered = [[Yellow Pikmin]] | |pikmin_discovered = [[Yellow Pikmin]] | ||
|requirements = Collect the [[Data Glutton]] | |requirements = Collect the [[Data Glutton]] | ||
| Line 11: | Line 9: | ||
}} | }} | ||
The '''Distant Tundra''' ({{j|迷いの雪原|Mayoi no Setsugen| | The '''Distant Tundra''' ({{j|迷いの雪原|Mayoi no Setsugen|Lost Snowfield}}) is an [[area]] in {{p3}}. It is set in a snowy region, with patches of exposed dirt, a river running through the middle, and several underground caves. [[Yellow Pikmin]] are discovered in this area, and it is where [[Captain Charlie]] first lands. The [[Vehemoth Phosbat]] serves as the [[boss]] of the area. The 16 [[fruit]]s in the area give a total of 22 cups of juice (11 on [[Difficulty|Ultra-Spicy difficulty]]). | ||
==Plot== | ==Plot== | ||
[[File:P3D Distant Tundra Bridge Building.jpg|thumb | [[File:P3D Distant Tundra Bridge Building.jpg|thumb|250px|Building the bridges to reunite Alph and Brittany.]] | ||
After the [[S.S. Drake]] crashes in the prologue, the focus goes to [[Captain Charlie]], who landed in this area. The player takes control of him for a while as he discovers [[Yellow Pikmin]], but this section of the game stops when he walks through a cave, as an unknown creature – later revealed to be the [[Vehemoth Phosbat]] – ambushes him. | After the [[S.S. Drake]] crashes in the prologue, the focus goes to [[Captain Charlie]], who landed in this area. The player takes control of him for a while as he discovers [[Yellow Pikmin]], but this section of the game stops when he walks through a cave, as an unknown creature – later revealed to be the [[Vehemoth Phosbat]] – ambushes him. | ||
| Line 29: | Line 27: | ||
;Main segment: | ;Main segment: | ||
[[File:P3D Prerelease Ice Slide.jpg|thumb | [[File:P3D Prerelease Ice Slide.jpg|thumb|200px|Alph and some Pikmin riding down the icy slide in the northwest.]] | ||
The southern half of the main segment is where the landing site is. The site is circular with an exit to the south, and a eastern ramp leading to the river's shoreline. From the south exit, there is a perpendicular path that splits in two when going east: one end dips down and leads to the shore, the other has a bridge that leads to higher ground, where the [[Dodge Whistle]] can be reached with a nearby [[Bouncy Mushroom]]. | The southern half of the main segment is where the landing site is. The site is circular with an exit to the south, and a eastern ramp leading to the river's shoreline. From the south exit, there is a perpendicular path that splits in two when going east: one end dips down and leads to the shore, the other has a bridge that leads to higher ground, where the [[Dodge Whistle]] can be reached with a nearby [[Bouncy Mushroom]]. | ||
| Line 93: | Line 91: | ||
*{{icon|Pyroclasmic Slooch|y}} × 5 (2 past the crystal wall, 3 inside a cave) | *{{icon|Pyroclasmic Slooch|y}} × 5 (2 past the crystal wall, 3 inside a cave) | ||
*{{icon|Shaggy Long Legs|y}} – '''Mini-boss''' × 1 | *{{icon|Shaggy Long Legs|y}} – '''Mini-boss''' × 1 | ||
*{{icon|Skeeterskate|y}} × | *{{icon|Skeeterskate|y}} × 4 | ||
*{{icon|Spotty Bulbear|v=P3|y}} × 1 | *{{icon|Spotty Bulbear|v=P3|y}} × 1 | ||
*{{icon|Swooping Snitchbug|v=P3|y}} × 3 | *{{icon|Swooping Snitchbug|v=P3|y}} × 3 | ||
| Line 99: | Line 97: | ||
*{{icon|Water Dumple|v=P3|y}} × 4 | *{{icon|Water Dumple|v=P3|y}} × 4 | ||
*{{icon|Whiptongue Bulborb|y}} × 1 | *{{icon|Whiptongue Bulborb|y}} × 1 | ||
*{{icon| | *{{icon|Wolpole|v=P3|y}} × 5 | ||
}} | }} | ||
===Obstacles=== | ===Obstacles=== | ||
{{columns|2| | {{columns|2| | ||
*{{icon|Small crystal|y}} × 8 | *{{icon|Small crystal|y}} × 8 | ||
*{{icon|Large crystal|y}} × 6 | *{{icon|Large crystal|y}} × 6 | ||
*{{icon|Bamboo gate|y}} × | *{{icon|Bamboo gate|y}} × 2 | ||
*{{icon|Electric gate|v=P3|y}} × 2 | *{{icon|Electric gate|v=P3|y}} × 2 | ||
*{{icon|Dirt wall|y}} × 3 | *{{icon|Dirt wall|y}} × 3 | ||
*{{icon|Crystal wall|y}} × 2 | *{{icon|Crystal wall|y}} × 1 | ||
*{{icon|Fire geyser|y}} × 4 | |||
*{{icon|Kingcap|y}} × 2 | |||
*{{icon|Spotcap|y}} × 38 | |||
*{{icon|Tunnel|y}} × 2 | |||
}} | |||
===Tools=== | |||
{{columns|2| | |||
*{{icon|Bloominous Stemple|y}} × 12 | |||
*{{icon|Bouncy Mushroom|y}} × 5 | |||
*{{icon|Bridge|v=P3|y}} (Red) {{icon|fragment}} × 50 (Piles of 20 and 30) | *{{icon|Bridge|v=P3|y}} (Red) {{icon|fragment}} × 50 (Piles of 20 and 30) | ||
*{{icon|Bridge|v=P3|y}} (Blue) {{icon|fragment}} × 50 (Piles of 20 and 30) | *{{icon|Bridge|v=P3|y}} (Blue) {{icon|fragment}} × 50 (Piles of 20 and 30) | ||
*{{icon|Bridge|v=P3|y}} (Red) {{icon|fragment}} × 50 (Two piles of 25) | *{{icon|Bridge|v=P3|y}} (Red) {{icon|fragment}} × 50 (Two piles of 25) | ||
*{{icon| | *{{icon|Climbing stick|y}} × 3 | ||
*{{icon|Electrode|y}} × 8 | |||
*{{icon|Flukeweed|y}} × 2 | |||
*{{icon|Geyser|y}} × 5 | |||
*{{icon|Hay|y}} × 30 (1 pile) | *{{icon|Hay|y}} × 30 (1 pile) | ||
}} | |||
===Vegetation and mycobiota=== | |||
{{columns|2| | |||
*{{icon|Burgeoning Spiderwort|v=P3|y}} × 2 (1 after the bridge parts on the pot have been used and 1 on the second day of visiting) | |||
*{{icon|Candypop Bud|v=P3 red|y}} (Red) × 2 | |||
*{{icon|Candypop Bud|v=P3 yellow|y}} (Yellow) × 5 | |||
*{{icon|Common Glowcap|v=P3|y}} (blue) × 18 | |||
*{{icon|Common Glowcap|v=P3|y}} (red) × 11 | |||
*{{icon|Pellet Posy|v=P3|y}} × 14 | |||
}} | }} | ||
===Other=== | ===Other=== | ||
*{{icon|Anti-Electrifier|y}} | *{{icon|Anti-Electrifier|y}} | ||
*{{icon|Dodge Whistle|y}} | *{{icon|Dodge Whistle|y}} | ||
* | *{{icon|Yellow Onion|v=P3|y}} | ||
==Data files== | ==Data files== | ||
| Line 247: | Line 250: | ||
Phosbat Cave.jpg|A high view of the Phosbat cave from the electric box. | Phosbat Cave.jpg|A high view of the Phosbat cave from the electric box. | ||
</gallery> | </gallery> | ||
{{see more|Category:Distant Tundra images|t1=Distant Tundra images category}} | {{see more|Category:Distant Tundra images|t1=Distant Tundra images category}} | ||
| Line 256: | Line 258: | ||
*This is the only area in ''Pikmin 3'' where rain never falls. However, it sometimes snows in this area, also making it the only area where snow can fall. | *This is the only area in ''Pikmin 3'' where rain never falls. However, it sometimes snows in this area, also making it the only area where snow can fall. | ||
*The Cupid's Grenade near the sculpture of the President was originally going to be on top of it. | *The Cupid's Grenade near the sculpture of the President was originally going to be on top of it. | ||
*By opening the [[radar]] map at the start of a day, it is possible to observe the Phosbats in the entrance room of the Vehemoth Phosbat's cave immediately dying to the lightbulb, if it is activated. In ''Pikmin 3'', the [[Off-TV Play|TV screen]]'s overhead view must be used. In ''Pikmin 3 Deluxe'', the green enemy dots on the map can be seen turning gray and eventually vanishing. | |||
{{clear}} | {{clear}} | ||
| Line 263: | Line 265: | ||
|Jap=迷いの雪原 | |Jap=迷いの雪原 | ||
|JapR=Mayoi no Setsugen | |JapR=Mayoi no Setsugen | ||
|JapM | |JapM=Lost Snowfield | ||
|Chi=迷途雪原 | |||
|ChiR=Mítú xuěyuán | |||
|ChiM=Lost Snowfield | |||
| | |||
| | |||
| | |||
|Fra=Toundra perdue | |Fra=Toundra perdue | ||
|FraM=Lost tundra | |FraM=Lost tundra | ||
|Ger=Eisöde der Verwirrung | |Ger=Eisöde der Verwirrung | ||
|GerM=Ice-Desert of Confusion | |GerM=Ice-Desert of Confusion;<br>A play on "Eis" (ice) and "Einöde" (desert) | ||
|Ita=Tundra gelo | |Ita=Tundra gelo | ||
|ItaM=Ice | |ItaM=Ice tundra | ||
|Kor=헤매는 설원 | |Kor=헤매는 설원 | ||
|KorR=hemaeneun seol-won | |KorR=hemaeneun seol-won | ||
|KorM= | |KorM=Wandering Snowfield | ||
|Spa=Páramo Blanco | |Spa=Páramo Blanco | ||
|SpaM=White Tundra | |SpaM=White Tundra | ||
|Cze=Dálná tundra | |||
|CzeM=Distant tundra | |||
|CzeN=Name taken from Nintendo's official website. | |||
|Pol=Odległą Tundra | |||
|PolM=Distant Tundra | |||
|PolN=Name taken from Nintendo's official website. | |||
|notes=y | |||
}} | }} | ||
| Line 289: | Line 295: | ||
*[[Distant Tundra Remix]] | *[[Distant Tundra Remix]] | ||
{{featured|{{date|1|February|2022}}|{{date|2|April|2022}}}} | |||
{{Distant Tundra}} | {{Distant Tundra}} | ||
{{P3 areas|ffeecc|772200|772200}} | {{P3 areas|ffeecc|772200|772200}} | ||
[[Category:Distant Tundra| ]] | [[Category:Distant Tundra| ]] | ||
Revision as of 11:03, December 12, 2024
| Distant Tundra | |
|---|---|
| Fruits | 16 |
| Pikmin discovered | Yellow Pikmin |
| Requirements | Collect the Data Glutton |
| Music | Distant Tundra |
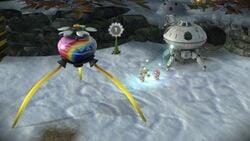
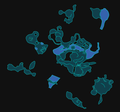
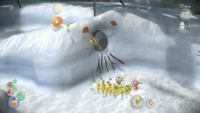
The Distant Tundra (迷いの雪原?, lit.: "Lost Snowfield") is an area in Pikmin 3. It is set in a snowy region, with patches of exposed dirt, a river running through the middle, and several underground caves. Yellow Pikmin are discovered in this area, and it is where Captain Charlie first lands. The Vehemoth Phosbat serves as the boss of the area. The 16 fruits in the area give a total of 22 cups of juice (11 on Ultra-Spicy difficulty).
Plot
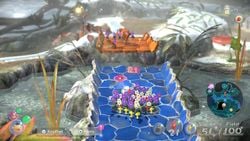
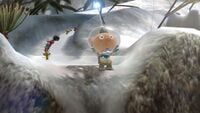
After the S.S. Drake crashes in the prologue, the focus goes to Captain Charlie, who landed in this area. The player takes control of him for a while as he discovers Yellow Pikmin, but this section of the game stops when he walks through a cave, as an unknown creature – later revealed to be the Vehemoth Phosbat – ambushes him.
Later on in the story, after Alph and Brittany reunite and collect the Data Glutton, they head to the Distant Tundra for the first time. Unfortunately, the S.S. Drake flies too low to the ground and hits a rock, accidentally ejecting Brittany into the cave below. In this cave, she discovers the Yellow Pikmin and their Onion. Upon using the new Yellow Pikmin to open an entry to the outside, she discovers that she and Alph are separated by a river, which must be overcome by two bridges, which each leader must help each other build. Until the player reunites the two leaders, Brittany will not be able to return to the Drake at the end of the day and will go unfed until reunited.
Eventually, the two explorers make it to the area in which Charlie had crash landed. Any obstacles that Charlie destroyed on the first day will stay destroyed, letting the leaders know that someone has been there before. They make it into the cave in which he was captured, light it up, and the Vehemoth Phosbat retreats. They begin to fight the boss, and upon defeating it, rescue Charlie, unlocking him as a playable leader.
Overview
The Distant Tundra is a large wintery landscape, with most of the terrain covered in snow and ice. Its structure is quite complex, mostly due to the assortment of walls, ramps, twists and turns in the terrain. Regardless, most parts are quite open. In addition, there is a large amount of water throughout the stage. Because of the cold climate, many enemies that cannot be found in other areas are found here, such as the Bearded Amprat and the Arctic Cannon Larva.
Segments
The main segment of the area is quite big, and is split in two due to the river that crosses the middle. The following is a list of all segments in the area:
- Main segment
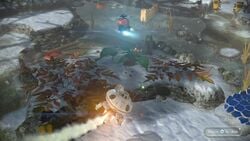
The southern half of the main segment is where the landing site is. The site is circular with an exit to the south, and a eastern ramp leading to the river's shoreline. From the south exit, there is a perpendicular path that splits in two when going east: one end dips down and leads to the shore, the other has a bridge that leads to higher ground, where the Dodge Whistle can be reached with a nearby Bouncy Mushroom.
On the aforementioned path split, when taking the dipping path, it's possible to go under the bridge on the other path, and enter a room with Pyroclasmic Slooches. This room is surrounded by high walls from other parts of the stage. To the east, there is a bit of terrain near the Dodge Whistle. Leaders and Pikmin can be thrown to the portion at the south of the room, which has a chain of Bouncy Mushrooms that in turn provide access to the western ledge. That ledge has a pathway that shrinks further down to the west until the Zest Bomb – the purpose is to make it harder to dodge the Arctic Cannon Larva's snowballs.
The center of the southern half of the area is a bit open, and leads to the river's shore on the west. This shore has a protrusion that points to a similar, smaller protrusion on the other side; this allows the leaders to swap Pikmin. From the center, there are two ways to reach the eastern portion: through a one-way slide in the middle or a curving long path to the north. This semi-open zone has a vase in the middle and a ledge to a slide that takes one back to the southern half of the area; a leader must be thrown by another to get here. A bit more to the east is a ledge with a Face Wrinkler.
The northwestern corner of the main segment's southern half consists of three high steps. The first is crossed with a geyser, and the second can be overcome with another geyser or by taking the eastern path. Up at the top, there is an inlet of land at the north, with a tunnel blocked by an iron ball facing the south; one leader must throw another in order to get here. To the northwest of the topmost high step is a slide that goes all the way to the bottom.
To note is that the river cannot be crossed from one half of the segment to the other right away, given that there are two underwater gates in the river itself blocking access.
- Charlie's Crash Site
This segment starts at a dead end, and is mostly linear, with slight zigzagging. Midway through, it splits into two, with the northern exit leading to the Spotty Bulbear cave, but blocked off by a crystal, and the eastern path leading to the large wooden bridge.
- Large bridge
This large, wooden bridge provides a path between Charlie's crash site and the cave segment that leads into the Vehemoth Phosbat's den. The camera in this segment faces to the side, and the only movement possible is two-dimensional.
- Vehemoth Phosbat arena access
This cave segment is mostly linear, but has a gap that can only be overcome with Bloominous Stemples. The exit on the other side leads to the boss' arena.
- Vehemoth Phosbat arena
The arena is quite large and open. Electrodes are scattered about the southeastern wall. To the southwest is a slightly raised ledge that also has an electrode. To the northeast is a small cliff and an incline, and to the northwest is a large battery on a raised platform, accessible with a bridge. There is an exit that leads into a path on the main area near the Dodge Whistle.
- Yellow Pikmin cave
This is where Brittany crash lands on the first day on this area. The main portion of the cave is roughly circular and is where the Yellow Pikmin are first found. To the west is a small room with two halves of a Disguised Delicacy inside a crystal, and to the east is an incline that leads further down. On this level, there is an exit, blocked off by stone bricks. A slide on the top level also leads here, and the iron ball on top of it is needed to clear the blockade. Finally, at the start, there is also a path to the Shaggy Long Legs's arena, but a leader can only get here if tossed by another.
- Spotty Bulbear cave
This cave is made up of two sections. The starting one has exits leading to the northwest of the main area and to the branch on Charlie's crash site. There are Pyroclasmic Slooches, water puddles and fire geysers, as well as a small gap that can be covered with open Bloominous Stemples.
A bamboo gate blocks the second portion. This dark room has a roaming Spotty Bulbear and an Astringent Clump.
- Shaggy Long Legs's arena
The main entrance is through the Yellow Pikmin cave, but it is possible to access this segment through the east end of the river, underwater, although a bamboo gate needs to be lifted. This arena only has two parts: one bit of solid terrain, and one lake; the boss walks back and forth between the two.
Objects
Fruits
 Astringent Clump × 1
 Citrus Lump × 2
 Cupid's Grenade × 2 (Buried)
 Face Wrinkler × 1
 Dawn Pustules × 20
 Dapper Blob × 1
 Disguised Delicacy × 1
 Dusk Pustules × 20
 Heroine's Tear × 1
 Portable Sunset × 1
 Stellar Extrusion × 1
 Sunseed Berry × 1
 Velvety Dreamdrop × 1
 Zest Bomb × 1
Enemies
 Arctic Cannon Larva × 4
 Bearded Amprat × 4
 Desiccated Skitter Leaf × 3
 Dwarf Bulbear × 10
 Fiery Blowhog × 3
 Joustmite × 4
 Phosbat × 10 (There are 10 by default, but more will be created as long as there are Phosbat Pods active)
 Pyroclasmic Slooch × 5 (2 past the crystal wall, 3 inside a cave)
 Shaggy Long Legs – Mini-boss × 1
 Skeeterskate × 4
 Spotty Bulbear × 1
 Swooping Snitchbug × 3
 Vehemoth Phosbat – Boss × 1
 Water Dumple × 4
 Whiptongue Bulborb × 1
 Wolpole × 5
Obstacles
 Small crystal × 8
 Large crystal × 6
 Bamboo gate × 2
 Electric gate × 2
 Dirt wall × 3
 Crystal wall × 1
 Fire geyser × 4
 Kingcap × 2
 Spotcap × 38
 Tunnel × 2
Tools
 Bloominous Stemple × 12
 Bouncy Mushroom × 5
 Bridge (Red)
  × 50 (Piles of 20 and 30)
 Bridge (Blue)
  × 50 (Piles of 20 and 30)
 Bridge (Red)
  × 50 (Two piles of 25)
 Climbing stick × 3
 Electrode × 8
 Flukeweed × 2
 Geyser × 5
 Hay × 30 (1 pile)
Vegetation and mycobiota
 Burgeoning Spiderwort × 2 (1 after the bridge parts on the pot have been used and 1 on the second day of visiting)
 Candypop Bud (Red) × 2
 Candypop Bud (Yellow) × 5
 Common Glowcap (blue) × 18
 Common Glowcap (red) × 11
 Pellet Posy × 14
Other
Data files
- Main article: Data file.
- Pikmin Behavior / Pikminology
- Controls
- Charging! / Charge!; Pikmin 3 only
- Throwing Leaders; Pikmin 3 Deluxe only
- Escaping; Pikmin 3 Deluxe only
- Indigenous Life
- Area Hints
- Olimar's Log
- Journal Entry #5 / Olimar's diary #5
- Secret File
- Olimar's Log Vol. 2
Hidden murals
- Main article: Hidden mural.
|
Warning: the following text contains major spoilers about the hidden murals in the area.
|
|---|
|
Quotes
|
This section is a stub. You can help Pikipedia by expanding it. |
Changes in Pikmin 3 Deluxe
Like most areas, Distant Tundra has received some notable changes in Pikmin 3 Deluxe:
- The ground texture underneath the Onion is shifted.
- Around the landing site, snow is removed in the shape of a path that leads from the Onion to the throwing point on the lake.
- Snow is added to the area with the Bearded Amprat west of the landing site.
- Snow is added to the corridor behind the electric gate south of the landing site.
- Snow is added around the base of the small ice slide east of the landing site.
- Snow is added to the plateau next to the paper bag southeast of the landing site.
- Snow thickness is increased in the corridor with the Joustmites southeast of the landing site.
- Snow thickness is increased in the plateau with the Bearded Amprats south of the landing site.
- An icy trail connects the exit of the cave where the Yellow Onion is found to the throwing point on the lake.
- Snow is removed from the area near the exit of the Yellow Onion cave.
- Snow is moved around in the area with the Swooping Snitchbug west of the cave exit.
- Snow is removed or reduced in the area around the Burgeoning Spiderwort east of the cave exit.
- There are added screws in the ground in several places: 1 on each side of the throwing point on the lake, 1 in the Yellow Onion cave on a ledge, and 1 in the Vehemoth Phosbat room on a ledge.
- Some data files have been added, removed, or moved elsewhere.
Guide
|
The following article or section contains guides. |
Basic guide
Upon first landing in the Distant Tundra, Brittany will fall out of the ship and into a cave. This cave is where Yellow Pikmin are discovered. 3 Pikmin are planted in the ground next to the dormant Onion; pluck them and throw them at the electrode to unlock the Onion. To leave the cave, at least 20 Yellow Pikmin must be grown to push down an iron ball. There are five 1-pellets and two 5-pellets in the cave, and no enemies present, so this can be done easily; it is recommended to grow all 25 Pikmin possible.
Upon leaving the cave, the proper part of the day will start. Alph and Brittany are on opposite sides of a large river, and a double bridge must be built to connect them. Brittany will not be able to board the ship until the bridge is built. Both leaders have access to 2 piles of fragments, and all these fragments must be carried to the double bridge to build it. Due to the placement of obstacles, leaders cannot cross the river, but Pikmin can, at a dedicated throwing point northwest of the landing site. You'll need to visit this spot with both leaders to exchange Pikmin.
On Alph's side of the river, there are 2 piles of blue bridge fragments. To access the first, destroy the electric gate next to the landing site with the new Yellow Pikmin, then walk through it, defeat the Fiery Blowhog, walk to the right, and collect the pile of 30 fragments. The second pile is at a lower level. To access it, either destroy the crystal next to the electric gate and drop down, or open up the tunnel southeast of the landing site. Destroy the crystal wall underneath a natural bridge, and you'll find an arena-like area. Defeat the Pyroclasmic Slooches, and collect the pile of 20 fragments. To note is that if you haven't opened the tunnel, the Pikmin will walk past 2 Joustmites and a Bearded Amprat; it is recommended to defeat those enemies first.
On Brittany's side of the river, there are 2 piles of orange bridge fragments. To access the first, go east from the site where you first exit the cave. Destroy the crystal with Rock Pikmin, and ride the Bouncy Mushroom to the site of the 20 bridge fragments. Before the Pikmin start carrying them, destroy another crystal next to where you land; if this crystal is not destroyed, the Pikmin will take a dangerous past past 2 Joustmites. The second pile is the most time-consuming pile to get. Destroy the electric gate to the west of the cave exit, and go through it. Destroy the crystals blocking the geysers and ride them upwards with a large squad. You will arrive at a Whiptongue Bulborb. Defeat it, and behind it you'll find the other pile of 30 bridge fragments.
After completing the bridge, send both leaders to the site of Brittany's second pile. If you walk east from there (and defeat the Arctic Cannon Larva), you'll find a ledge with a buried Cupid's Grenade. Throw a leader and 20 Pikmin up the ledge. Switch to that leader and use the 20 Pikmin to push down an iron ball. This will open up a path to a cave. Go through this cave, avoiding the fire hazards. Walk out the other side, and destroy the crystal in front of you. You've just arrived at Charlie's crash site. Turn left and walk across the bridge, and you'll arrive in another cave. Throw 10 Yellow Pikmin at the electrode to cause Bloominous Stemples to bloom, allowing you to walk to the other side of the room.
In the next room, you'll find the boss of the area, the Vehemoth Phosbat. See Vehemoth Phosbat#Strategy to see how to defeat it. After defeating the boss, you'll unlock Captain Charlie, thereby completing the story segment of the Distant Tundra. To carry the boss and its fruit back to the base, go to the exit opposite the one you entered, and push down a paper bag to form a ramp to access the main part of the area.
Speed completion
This guide should help you complete the area's story section in 1 day. Start by growing all 25 Yellow Pikmin, and then leave the cave. Then, get Brittany to defeat the Swooping Snitchbug, put 10 Yellow Pikmin on the nearby electric gate, and throw the rest to the other side. Get Alph to take lots of Rock Pikmin and Red Pikmin out of the Onion, and go to the throwing point via the tunnel. Throw at least 20 Pikmin to Brittany's side, then go back with the Yellow Pikmin, and start destroying the electric gate and the other tunnel near the landing site. Brittany should take the Red Pikmin and Rock Pikmin and go straight to the pile of fragments on the pot, carrying those after destroying the large crystal first. Meanwhile, Alph should destroy the crystal wall and collect the 20 fragments with Red Pikmin to avoid waiting for the fire to clear. When Brittany's Pikmin are back, send her back to the electric gate. Meanwhile, Alph should use the geyser to go up to the higher level, and use the remaining Pikmin with the Yellow Pikmin (who should have finished destroying the gate) to carry the other pile of fragments. Brittany should then use the geysers to reach the Whiptongue Bulborb, defeat it, and then carry the last fragment pile. Alph should walk to the bridge as the last pile is being carried, so he can cross the bridge as soon as it is done.
Send Alph to where Brittany is, and throw 20 Pikmin up the ledge next to the iron ball. Throw a leader up the ledge and push down the iron ball, and then walk into the cave. Ignore everything in it and exit out the other side, then turn left after destroying the large crystal. Enter the next cave and activate the electrode. Walk over the Bloominous Stemples to the Vehemoth Phosbat arena. Defeat the boss using a quick method, such as the one at Vehemoth Phosbat#Strategy. After that, you're done, as the Distant Tundra is the only area to not involve carrying an item from the boss to the landing site. You can end the day immediately, though if you want to return to the area later, exit the cave back to the main segment of the area and push down the paper bag first.
In other game modes
These Mission Mode and Side Story stages take place within the Distant Tundra:
- Mission Mode
- Side Stories
Gallery
An overview of an area containing many Spotcaps and a 5 Pellet Posy.
A Whiptongue Bulborb in a early version of the Distant Tundra (this Whiptongue Bulborb was moved to the top of the sloped area in the final version).
- See more: Distant Tundra images category.
Trivia
- Part of this level's music is a remix of the music from the Valley of Repose.
- This area's continental shape is based on eastern and southeastern Asia.
- This is the only area in Pikmin 3 where rain never falls. However, it sometimes snows in this area, also making it the only area where snow can fall.
- The Cupid's Grenade near the sculpture of the President was originally going to be on top of it.
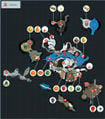
- By opening the radar map at the start of a day, it is possible to observe the Phosbats in the entrance room of the Vehemoth Phosbat's cave immediately dying to the lightbulb, if it is activated. In Pikmin 3, the TV screen's overhead view must be used. In Pikmin 3 Deluxe, the green enemy dots on the map can be seen turning gray and eventually vanishing.
Names in other languages
| Language | Name | Meaning | Notes |
|---|---|---|---|
| 迷いの雪原? Mayoi no Setsugen |
Lost Snowfield | ||
| 迷途雪原 Mítú xuěyuán |
Lost Snowfield | ||
| Toundra perdue | Lost tundra | ||
| Eisöde der Verwirrung | Ice-Desert of Confusion; A play on "Eis" (ice) and "Einöde" (desert) |
||
| Tundra gelo | Ice tundra | ||
| 헤매는 설원 hemaeneun seol-won |
Wandering Snowfield | ||
| Páramo Blanco | White Tundra | ||
| Dálná tundra | Distant tundra | Name taken from Nintendo's official website. | |
| Odległą Tundra | Distant Tundra | Name taken from Nintendo's official website. |
See also
| Pikmin 3 areas |
|---|
 Click an area on the image Tropical Wilds • Garden of Hope • Distant Tundra • Twilight River • Formidable Oak |
