Lights in the Darkness: Difference between revisions
No edit summary |
|||
| (5 intermediate revisions by 5 users not shown) | |||
| Line 9: | Line 9: | ||
|area_letter = B | |area_letter = B | ||
|treasures = 3 | |treasures = 3 | ||
|obstacles = | |obstacles = {{buried}} {{Bloominous Stemple}} {{dirt block}} [[Minor obstacles#Solid dirt block|solid dirt block]] | ||
|hazards = | |hazards = {{electricity}} | ||
|pikmin = [[Yellow Pikmin]] | |pikmin = [[Yellow Pikmin]] | ||
|requirements = Complete [[Scorched Earth]] via normal exit | |requirements = Complete [[Scorched Earth]] via normal exit | ||
|next = [[Terror Trench]] | |next = [[Terror Trench]] | ||
|music = | |music = ''[[Music in Hey! Pikmin#Underground area|Underground area]]''<br>''[[Music in Hey! Pikmin#Underground area - back side|Underground area - back side]]'' | ||
}} | }} | ||
'''Lights in the Darkness''' ({{j| | '''Lights in the Darkness''' ({{j|光さす洞くつ|Hikari Sasu Dōkutsu|Cave of Shining Light}}) is the second main [[area]] in the [[Sweltering Parchlands]]. It takes place inside a dark cave with [[Bloominous Stemple]]s and [[Electripede]]s, among other creatures. The main gimmick of the area lies in the large main room, which is completely dark, initially. There are some [[dirt block]]s on the ceiling, which, if broken, will let sunlight in and light up several Bloominous Stemples across different levels, providing access to different parts of the area. | ||
== Description == | == Description == | ||
The area takes place in a cave, and is filled with [[Bloominous Stemple]]s. In order to make progress in the area, the player must find a way to light the many Bloominous Stemples that are on the path. Olimar can use [[Electripede]]s, which are creatures that produce light when they are touched by a [[Pikmin family|Pikmin]]. In this area, the player can find the [[Withdrawn Arm of Loneliness]], which is buried in the ground, the [[Instant Planetarium]], above a [[Sparklium flower]], and the [[Unbelievable Spinner]]. After that, the player can reach the end of the area, which is after a long corridor made of Bloominous Stemples and Electripedes. | |||
The area takes place in a cave, and is filled with [[Bloominous Stemple]]s. In order to make progress in the area, the player must find a way to light the many Bloominous Stemples that are on the path. Olimar can use [[Electripede]]s, which are creatures that produce light when they are touched by a [[Pikmin family|Pikmin]]. In this area, the player can find the [[Withdrawn Arm of Loneliness]], which is buried in the ground | |||
== Cutscenes == | == Cutscenes == | ||
| Line 59: | Line 56: | ||
* {{icon|Electripede|y}} × 15 | * {{icon|Electripede|y}} × 15 | ||
* {{icon|Grabbit|y}} × 4 | * {{icon|Grabbit|y}} × 4 | ||
* {{icon|Male Sheargrub|y}} × 3 | * {{icon|Male Sheargrub|y|v=HP}} × 3 | ||
=== Obstacles === | === Obstacles === | ||
* {{icon|Bloominous Stemple|y}} | * {{icon|Bloominous Stemple|y}} | ||
* {{icon|Buried | * {{icon|Buried|y}} [[treasure]] | ||
* {{icon|Dirt block|y}} | * {{icon|Dirt block|y}} | ||
| Line 87: | Line 84: | ||
==Names in other languages== | ==Names in other languages== | ||
{{foreignname | {{foreignname | ||
|Jap= | |Jap=光さす洞くつ | ||
|JapR=Hikari | |JapR=Hikari Sasu Dōkutsu | ||
|JapM= | |JapM=Cave of Shining Light | ||
|Dut=Licht in de duisternis | |Dut=Licht in de duisternis | ||
|DutM=Light in the darkness | |DutM=Light in the darkness | ||
Latest revision as of 17:02, December 6, 2024
| Lights in the Darkness Sector 6 – Area B | |
|---|---|

| |
| Treasures | 3 |
| Pikmin available | Yellow Pikmin |
| Requirements | Complete Scorched Earth via normal exit |
| Next area | Terror Trench |
| Music | Underground area Underground area - back side |
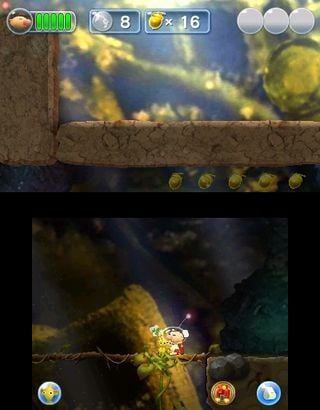
Lights in the Darkness (光さす洞くつ?, lit.: "Cave of Shining Light") is the second main area in the Sweltering Parchlands. It takes place inside a dark cave with Bloominous Stemples and Electripedes, among other creatures. The main gimmick of the area lies in the large main room, which is completely dark, initially. There are some dirt blocks on the ceiling, which, if broken, will let sunlight in and light up several Bloominous Stemples across different levels, providing access to different parts of the area.
Description[edit]
The area takes place in a cave, and is filled with Bloominous Stemples. In order to make progress in the area, the player must find a way to light the many Bloominous Stemples that are on the path. Olimar can use Electripedes, which are creatures that produce light when they are touched by a Pikmin. In this area, the player can find the Withdrawn Arm of Loneliness, which is buried in the ground, the Instant Planetarium, above a Sparklium flower, and the Unbelievable Spinner. After that, the player can reach the end of the area, which is after a long corridor made of Bloominous Stemples and Electripedes.
Cutscenes[edit]
Pikmin locations[edit]
|
The following article or section is in need of assistance from someone who plays Hey! Pikmin. |
| Spot | Location | Pikmin | Requirements | Notes |
|---|---|---|---|---|
Objects[edit]
Treasures[edit]
Enemies[edit]
 Electripede × 15
 Grabbit × 4
 Male Sheargrub × 3
Obstacles[edit]
Others[edit]
 Sparklium Seed × 75
 Sparklium flower × 3
 Heart × 3
Guide[edit]
|
The following article or section contains guides. |
|
The following article or section is in need of assistance from someone who plays Hey! Pikmin. |
Gallery[edit]
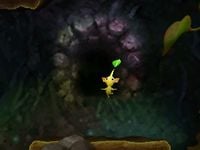
The first Electripedes.
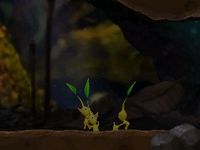
Location of the Withdrawn Arm of Loneliness.
Location of the Instant Planetarium.
Location of the Unbelievable Spinner.
Names in other languages[edit]
| Language | Name | Meaning |
|---|---|---|
| 光さす洞くつ? Hikari Sasu Dōkutsu |
Cave of Shining Light | |
| Licht in de duisternis | Light in the darkness | |
| Lumière sous terre | Bright underground | |
| Lichter in der Dunkelheit | Lights in the Darkness | |
| Oscurità splendente | Bright darkness | |
| Destellos en la oscuridad | Sparkle in the darkness | |
| Destellos en la Oscuridad | Sparkle in the Darkness |
| Sector 6: Sweltering Parchlands | |
|---|---|
| Normal areas | 6-A: Scorched Earth • 6-B: Lights in the Darkness • 6-C: Terror Trench • 6-D: Barriers of Flame • 6-E: Blazing Winds |
| Extra areas | 6-X: Sizzling Precipice • Secret Spot 21 • Secret Spot 22 • Secret Spot 23 • Secret Spot 24 • Sparklium Springs |


