Foaming Lake: Difference between revisions
(Diarrea) |
(kanji name) |
||
| (41 intermediate revisions by 22 users not shown) | |||
| Line 1: | Line 1: | ||
'''''' | {{game icons|hp=y}} | ||
{{infobox area | |||
|screenshot = | |||
|map = | |||
|image = HP Foaming Lake First Large Lake.png | |||
|size = 320px | |||
|caption = | |||
|sector = 2 | |||
|area_letter = A | |||
|treasures = 3 | |||
|obstacles = {{icon|dirt block}} {{water body}} | |||
|hazards = {{water}} | |||
|pikmin = [[Blue Pikmin]] | |||
|pikmin_discovered = [[Blue Pikmin]] | |||
|requirements = Complete [[The Shadow in the Brush]] | |||
|next = [[Serene Stream]] | |||
|music = ''[[Music in Hey! Pikmin#Verdant Waterfront area|Verdant Waterfront area]]'' <br> ''[[Music in Hey! Pikmin#Verdant Waterfront area - back side|Verdant Waterfront area - back side]]'' | |||
}} | |||
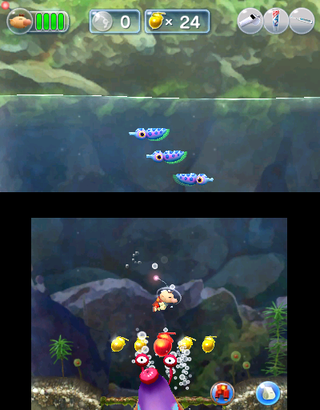
'''Foaming Lake''' ({{j|あぶくの湖|Abuku no Mizuumi|Foam Lake}}) is the first main [[area]] in the [[Verdant Waterfront]]. It is almost entirely underwater in a lake, and is the first area in {{hp}} with [[water]] and [[Blue Pikmin]]. There are many underwater creatures throughout the level, such as [[Eye-Stalker Bulbeel]]s which are actually found most frequently here. It is also more spread out than most underwater levels, giving the player and enemies a lot of room to swim in. | |||
== Description == | |||
This area takes place in a big lake, and serves as an introduction for aquatic environments to the player. Right at the start, the player has to dive into water, in a small puddle. After this, the player dives again in the water, but this time, [[Olimar]] meets some aquatic creatures, such as [[Puckering Blinnow]]s and [[Eye-Stalker Bulbeel]]s. He also encounters some [[Blue Pikmin]], who make their first appearance in the game. After a long travel through a path infested with the two harmful creatures previously mentioned, the player can get access of the first treasure, the [[Giga Whistle]]. The protagonist just has to be careful to not be attacked by the Eye-Stalker Bulbeel, hidden near the entrance of the small path to the treasure. Near it, the player just has to climb some [[vine]]s to access the second treasure, the [[Rocket Polish]]. Some time after this, the player will come across some [[dirt block]]s blocking the way to a door, in addition to a [[Large Splurchin]]. On the other side, the player has to swim quickly in a long doorway, because the protagonist is followed by a big Large Splurchin. This long doorway leads to another door. On the other side, Olimar will face three Eye-Stalker Bulbeels and some Puckering Blinnows. This army of creatures protects the last treasure, the [[Berserker Brush]]. The end of the level isn't very far away from it. | |||
== Cutscenes == | |||
{| class="wikitable" | |||
! Cutscene || Screenshot || Trigger || Description | |||
|- | |||
! Puckering Blinnow attack | |||
| [[File:Foaming Lake Puckering Blinnow cutscene.jpg|200px]] | |||
| The player advances a bit beyond the first [[Eye-Stalker Bulbeel]]. | |||
| Four Blue Pikmin appear swimming away from a [[Puckering Blinnow]] – they even swim in a loop to try to lose the enemy. They eventually swim into an underwater bush, and the creature loses track of them. A second or two pass, one of the Pikmin pokes its head out, and then goes back in. | |||
|- | |||
! Diving Pikmin | |||
| [[File:Foaming Lake diving cutscene.jpg|200px]] | |||
| The player goes destroys the dirt blocks and advances forward when the path goes up and splits left and right. | |||
| Four Blue Pikmin pop out of a bush. One by one, they head for the ledge and dive into the water. The first does a double backflip, the second does a double frontflip, and the other two go for a simple cannonball. | |||
|} | |||
== Pikmin locations == | |||
{| class = "wikitable sortable" | |||
|- | |||
! Spot || Location || Pikmin || Requirements || Notes | |||
|- | |||
| In an underwater bush || Right after the first [[Eye-Stalker Bulbeel]] || 4 Blue Pikmin || Have less than 4 Pikmin || | |||
|- | |||
| In a bush || Behind two dirt blocks || 4 Blue Pikmin || Have less than 8 Pikmin || First group of 4 automatically joins the main group after the diving Pikmin cutscene. | |||
|- | |||
| In a twig || On a piece of land close to the two dirt blocks || 4 Blue Pikmin || Have less than 4 Pikmin || | |||
|- | |||
| In an underwater bush || Right after the fifth Eye-Stalker Bulbeel || 4 Blue Pikmin || || | |||
|- | |||
| Behind a rock || On a piece of land near the loose Pikmin || 4 Blue Pikmin || Have less than 4 Pikmin || | |||
|- | |||
| Out in the open || At the end of the patch after the fifth Eye-Stalker Bulbeel || 4 Blue Pikmin || || | |||
|- | |||
| In an underwater bush || Below the [[doorway]] after the [[Large Splurchin]] room || 4 Blue Pikmin || Have less than 8 Pikmin after first time || | |||
|- | |||
|} | |||
== Objects == | |||
=== Treasures === | |||
* {{icon|Giga Whistle|y}} | |||
* {{icon|Rocket Polish|y}} | |||
* {{icon|Berserker Brush|y}} | |||
=== Enemies === | |||
* {{icon|Puckering Blinnow|y|v=HP}} × 30 | |||
* {{icon|Eye-Stalker Bulbeel|y}} × 8 | |||
* {{icon|Large Splurchin|y}} × 2 | |||
=== Obstacles === | |||
* {{icon|Dirt block|y}} × 18 | |||
* {{icon|Water body|y}} × 4 | |||
=== Plants === | |||
*{{icon|Vine|y}} × 2 | |||
=== Others === | |||
* {{icon|Sparklium Seed}} Yellow [[Sparklium Seed]] × 149 | |||
* {{icon|Sparklium Seed|v=red}} Red [[Sparklium Seed]] × 11 | |||
* {{icon|Sparklium flower|y}} × 1 (large) | |||
* {{icon|Heart|y}} × 5 (small) | |||
== Guide == | |||
{{guide}} | |||
From the start of the area head to the right until encountering the first large underwater area. Continue swimming to the right until the first underwater bush to whistle the four [[Blue Pikmin]] hiding in it. After whistling the Pikmin continue forward while avoiding the [[Puckering Blinnow]]s and [[Eye-Stalker Bulbeel]]s until the [[dirt block]] blocking the path forward. After breaking the dirt block continue forward while avoiding more Puckering Blinnows until the first intersection. head to the left area by breaking two dirt blocks in order to find four more Blue Pikmin. From here head to the right until the next Eye-Stalker Bulbeel. Swim down to the lower corridor to find the [[Giga Whistle]]. After collecting the treasure head to the right until encountering the two [[vine]]s. climb up the first set in order to reach the second set of vines using the [[jetpack]] to reach the [[Rocket Polish]]. After collecting the treasure head back underwater and whistle four more Blue Pikmin in a nearby underwater bush. After collecting them head to the right until encountering a large amount of dirt blocks with four Blue Pikmin playing above it. Start breaking the blocks while avoiding a nearby [[Large Splurchin]] in order to uncover a [[doorway]] leading to another underwater area. | |||
Upon entering the room head up to the [[Sparklium Seed]]s and head to the right while being chased by another Large Splurchin. At the end of the corridor is a doorway leading to the next part of the area. From here whistle the last group of four Blue Pikmin near the doorway and head to the right. In between two Eye-Stalker Bulbeels and a few Puckering Blinnow lays the [[Berserker Brush]]. After colelcting the treasure continue heading to the right while avoiding one last Puckering Blinnow before the end of the area. | |||
{{clear}} | |||
== Gallery == | |||
<gallery> | |||
HP Foaming Lake Start.png|The starting location. | |||
HP Giga Whistle Location.png|The location of the [[Giga Whistle]]. | |||
HP Rocket Polish Location.png|The location of the [[Rocket Polish]]. | |||
HP Foaming Lake Wild Blue Pikmin.png|The loose Pikmin playing around. | |||
HP Foaming Lake Large Splurchin Room.png|The tunnel with seeds and a [[Large Splurchin]]. | |||
HP Foaming Lake Secret Large Sparklium Flower Room.png|Secret path with a large [[Sparklium flower]]. | |||
HP Berserker Brush Location.png|Location of the [[Berserker Brush]]. | |||
</gallery> | |||
==Names in other languages== | |||
{{foreignname | |||
|Jap=あぶくの湖 | |||
|JapR=Abuku no Mizuumi | |||
|JapM=Foam Lake | |||
|Dut=Bruisermeer | |||
|DutM=Bruiser lake | |||
|Fra=Lagon bubulles | |||
|FraM=Bubble lagoon | |||
|Ger=Der Blubberblasensee | |||
|GerM=The Bubble Blowing Lake | |||
|Ita=Lago effervescente | |||
|ItaM=Sparkling lake | |||
|SpaA=Lago efervescente | |||
|SpaAM=Sparkling lake | |||
|SpaE=Lago Efervescente | |||
|SpaEM=Sparkling Lake | |||
}} | |||
{{Verdant Waterfront}} | |||
Latest revision as of 17:34, December 5, 2024
| Foaming Lake Sector 2 – Area A | |
|---|---|

| |
| Treasures | 3 |
| Pikmin available | Blue Pikmin |
| Pikmin discovered | Blue Pikmin |
| Requirements | Complete The Shadow in the Brush |
| Next area | Serene Stream |
| Music | Verdant Waterfront area Verdant Waterfront area - back side |
Foaming Lake (あぶくの湖?, lit.: "Foam Lake") is the first main area in the Verdant Waterfront. It is almost entirely underwater in a lake, and is the first area in Hey! Pikmin with water and Blue Pikmin. There are many underwater creatures throughout the level, such as Eye-Stalker Bulbeels which are actually found most frequently here. It is also more spread out than most underwater levels, giving the player and enemies a lot of room to swim in.
Description[edit]
This area takes place in a big lake, and serves as an introduction for aquatic environments to the player. Right at the start, the player has to dive into water, in a small puddle. After this, the player dives again in the water, but this time, Olimar meets some aquatic creatures, such as Puckering Blinnows and Eye-Stalker Bulbeels. He also encounters some Blue Pikmin, who make their first appearance in the game. After a long travel through a path infested with the two harmful creatures previously mentioned, the player can get access of the first treasure, the Giga Whistle. The protagonist just has to be careful to not be attacked by the Eye-Stalker Bulbeel, hidden near the entrance of the small path to the treasure. Near it, the player just has to climb some vines to access the second treasure, the Rocket Polish. Some time after this, the player will come across some dirt blocks blocking the way to a door, in addition to a Large Splurchin. On the other side, the player has to swim quickly in a long doorway, because the protagonist is followed by a big Large Splurchin. This long doorway leads to another door. On the other side, Olimar will face three Eye-Stalker Bulbeels and some Puckering Blinnows. This army of creatures protects the last treasure, the Berserker Brush. The end of the level isn't very far away from it.
Cutscenes[edit]
| Cutscene | Screenshot | Trigger | Description |
|---|---|---|---|
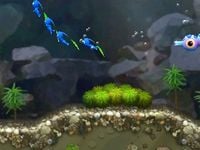
| Puckering Blinnow attack | 
|
The player advances a bit beyond the first Eye-Stalker Bulbeel. | Four Blue Pikmin appear swimming away from a Puckering Blinnow – they even swim in a loop to try to lose the enemy. They eventually swim into an underwater bush, and the creature loses track of them. A second or two pass, one of the Pikmin pokes its head out, and then goes back in. |
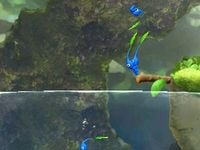
| Diving Pikmin | 
|
The player goes destroys the dirt blocks and advances forward when the path goes up and splits left and right. | Four Blue Pikmin pop out of a bush. One by one, they head for the ledge and dive into the water. The first does a double backflip, the second does a double frontflip, and the other two go for a simple cannonball. |
Pikmin locations[edit]
| Spot | Location | Pikmin | Requirements | Notes |
|---|---|---|---|---|
| In an underwater bush | Right after the first Eye-Stalker Bulbeel | 4 Blue Pikmin | Have less than 4 Pikmin | |
| In a bush | Behind two dirt blocks | 4 Blue Pikmin | Have less than 8 Pikmin | First group of 4 automatically joins the main group after the diving Pikmin cutscene. |
| In a twig | On a piece of land close to the two dirt blocks | 4 Blue Pikmin | Have less than 4 Pikmin | |
| In an underwater bush | Right after the fifth Eye-Stalker Bulbeel | 4 Blue Pikmin | ||
| Behind a rock | On a piece of land near the loose Pikmin | 4 Blue Pikmin | Have less than 4 Pikmin | |
| Out in the open | At the end of the patch after the fifth Eye-Stalker Bulbeel | 4 Blue Pikmin | ||
| In an underwater bush | Below the doorway after the Large Splurchin room | 4 Blue Pikmin | Have less than 8 Pikmin after first time |
Objects[edit]
Treasures[edit]
Enemies[edit]
 Puckering Blinnow × 30
 Eye-Stalker Bulbeel × 8
 Large Splurchin × 2
Obstacles[edit]
 Dirt block × 18
 Water body × 4
Plants[edit]
 Vine × 2
Others[edit]
 Yellow Sparklium Seed × 149
 Red Sparklium Seed × 11
 Sparklium flower × 1 (large)
 Heart × 5 (small)
Guide[edit]
|
The following article or section contains guides. |
From the start of the area head to the right until encountering the first large underwater area. Continue swimming to the right until the first underwater bush to whistle the four Blue Pikmin hiding in it. After whistling the Pikmin continue forward while avoiding the Puckering Blinnows and Eye-Stalker Bulbeels until the dirt block blocking the path forward. After breaking the dirt block continue forward while avoiding more Puckering Blinnows until the first intersection. head to the left area by breaking two dirt blocks in order to find four more Blue Pikmin. From here head to the right until the next Eye-Stalker Bulbeel. Swim down to the lower corridor to find the Giga Whistle. After collecting the treasure head to the right until encountering the two vines. climb up the first set in order to reach the second set of vines using the jetpack to reach the Rocket Polish. After collecting the treasure head back underwater and whistle four more Blue Pikmin in a nearby underwater bush. After collecting them head to the right until encountering a large amount of dirt blocks with four Blue Pikmin playing above it. Start breaking the blocks while avoiding a nearby Large Splurchin in order to uncover a doorway leading to another underwater area.
Upon entering the room head up to the Sparklium Seeds and head to the right while being chased by another Large Splurchin. At the end of the corridor is a doorway leading to the next part of the area. From here whistle the last group of four Blue Pikmin near the doorway and head to the right. In between two Eye-Stalker Bulbeels and a few Puckering Blinnow lays the Berserker Brush. After colelcting the treasure continue heading to the right while avoiding one last Puckering Blinnow before the end of the area.
Gallery[edit]
The location of the Giga Whistle.
The location of the Rocket Polish.
The tunnel with seeds and a Large Splurchin.
Secret path with a large Sparklium flower.
Location of the Berserker Brush.
Names in other languages[edit]
| Language | Name | Meaning |
|---|---|---|
| あぶくの湖? Abuku no Mizuumi |
Foam Lake | |
| Bruisermeer | Bruiser lake | |
| Lagon bubulles | Bubble lagoon | |
| Der Blubberblasensee | The Bubble Blowing Lake | |
| Lago effervescente | Sparkling lake | |
| Lago efervescente | Sparkling lake | |
| Lago Efervescente | Sparkling Lake |
| hideSector 2: Verdant Waterfront | |
|---|---|
| Normal areas | 2-A: Foaming Lake • 2-B: Serene Stream • 2-C: Glowing Bloom Pond • 2-D: The Shallow End • 2-E: The Keeper of the Lake |
| Extra areas | 2-X: Treacherous Currents • Secret Spot 5 • Secret Spot 6 • Secret Spot 7 • Secret Spot 8 • Sparklium Springs |


