User:Twins1105/Sandbox: Difference between revisions

From Pikipedia, the Pikmin wiki
Jump to navigation Jump to search
(→‎Pikmin Adventure Boss Edits: Updated the Translucent Wollywog's strategy and trivia sections to match recent edits.)
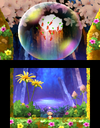
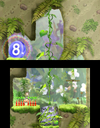
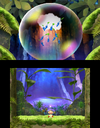
(→‎Pikmin Adventure enemy list: Burst the Giant Balloon)
Tags: Mobile edit Advanced mobile edit
 
(120 intermediate revisions by 3 users not shown)
Line 1: Line 1:
Sandbox to hold my W.I.P. edits for certain articles.
= ''Pikmin'' =
Stuff relating to {{p1}}


= '''P1S Ship Part Icons'''=
Testing P1S ship part icons in place of the current unofficial icons.
Using the ship part icons from {{p1s}} in place of the current unofficial icons.


{{Infobox ship part
== Location map ==
|image      = Main Engine.jpg
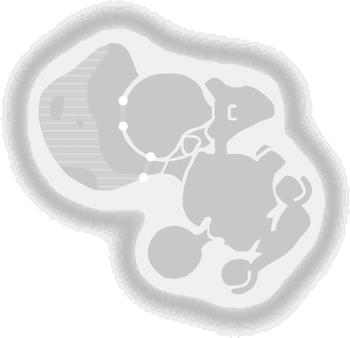
{{location map | width = 350 | height = 338 | image = The Impact Site P1S map.png | bg = #111 | caption = The location of the Main Engine in [[The Impact Site]]. | icons =
|size      = 250x250px
|icon      = Main Engine P1S icon.png
|pikmin1    = y
|mandatory  = y
|weight    = 20
|max_pikmin = {{tt|40|Cannot be seen in-game under normal circumstances, since only a maximum of 25 Pikmin can normally be obtained before collecting this part.}}
|location  = The Impact Site
}}
{{clear}}
 
{{location map | width = 350 | height = 338 | image = The Impact Site P1S map.png | bg = #111 | caption = Location of the Main Engine. | icons =
{{map icon | Main Engine P1S | 259 | 110}}
}}
}}


== Table ==
{| class="wikitable sortable"
! class="unsortable" | Icon
Line 269: Line 262:
| No
| No
|}
|}
{{clear}}


= '''Single Noun Edits''' =
= ''Pikmin 2'' =
The following W.I.P.s of a few enemy articles with minor edits, the biggest of which includes using single nouns throughout.
Stuff relating to {{p2}}
== Albino Dwarf Bulborb ==
The '''Albino Dwarf Bulborb''' ({{j|コチャッピーモドキ|Ko Chappī Modoki|Pseudo Small Chappy}}) is a small nocturnal [[Enemy|enemy]] that only appears in {{p4}}. This enemy resembles the [[Dwarf Bulborb]] in appearance, but has a white to red ombré back instead of a spotted one, similar to the [[Bulborb Larva]], and additionally have slightly larger snouts compared to most Dwarf Bulborbs. These differences largely stem from both its very young age, being the first molt of a Bulborb Larva, and because it is a true member of the [[grub-dog family]] rather than a [[Breadbug family|breadbug]] mimic.


Despite being their young, adult [[Bulborbs]] are known to cannibalize Albino Dwarf Bulborbs. In order to avoid this, they are only active [[night expedition|at night]] and in [[cave]]rns, where the poor visibility allows them to evade predation. The Albino Dwarf Bulborb is noticeably tougher than the Dwarf Bulborb, requiring two direct Pikmin throws to the back to dispatch.
= '''Treasure Series Gallery''' =
Tests for new ways of showing treasure series in {{p2}}.


== Anode Beetle ==
== List ==
The '''Anode Beetle''' ({{j|エレキムシ|Ereki Mushi|Electric Bug}}) is a small [[enemy]] found in {{P2}} and {{P4}}. This creature is blissfully unaware of [[Pikmin family|Pikmin]], and if found alone, is harmless; but if there is a partner nearby, an electrical barrier can be produced between the two, subjecting any nearby Pikmin to electrocution. As such, it is commonly found in groups of 2 or more.


[[Swarming]] will not harm it, as it has a protective shell, similar to the [[Iridescent Flint Beetle|Flint Beetles]]. To damage it, one must throw a Pikmin on top of it to flip it over, then proceed to swarm it. [[Purple Pikmin]] can cause them to flip over even if not directly hit.
=== Nintendo Switch ===
* {{icon|Drone Supplies|v=P2S|y}}
* {{icon|Patience Tester|v=P2S|y}}
* {{icon|Endless Repository|v=P2S|y}}
* {{icon|Fruit Guard|v=P2S|y}}
* {{icon|Nutrient Silo|v=P2S|y}}
* {{icon|Stringent Container|v=P2S|y}}


== Arachnode ==
=== North America GameCube/Wii ===
The '''Arachnode''' ({{j|マリグモ|Mari Gumo|{{w|Temari (toy)|Temari}} Spider}}) is a spider-like [[enemy]] in {{p3}} and {{p4}}. While dormant on its web, the Arachnode resembles a cocoon, with a black and yellow striped and sphere-shaped body. This shape and coloring comes from the eight legs wrapped tightly around its body; its actual body is comprised of small black orbs with yellow circles instead of stripes. Once a [[Pikmin family|Pikmin]] or [[leader]] gets caught in an Arachnode's web, it will uncurl its legs after a while, and wander up to its prey, consuming them quickly once it has reached them. It may also wander around the web freely in order to avoid Pikmin that are being thrown at it. The web will collapse once the Arachnode is defeated.
* {{icon|Drone Supplies|v=US|y}}
* {{icon|Patience Tester|y}}
* {{icon|Endless Repository|v=US|y}}
* {{icon|Fruit Guard|y}}
* {{icon|Nutrient Silo|y}}
* {{icon|Stringent Container|v=US|y}}


Pikmin caught in the web can be saved by whistling at them. This is important, especially with a small squad, as Pikmin shaken off by the Arachnode will usually get stuck in the web. [[Winged Pikmin]] carrying objects will get stuck in webs that are along their route, making webs the primary [[obstacle]] for these types of Pikmin.
=== Nintendo Switch ===
<gallery>
Drone Supplies P2S_icon.png|link=Drone Supplies|[[Drone Supplies]]
Patience Tester P2S icon.png|link=Patience Tester|[[Patience Tester]]
Endless Repository P2S icon.png|link=Endless Repository|[[Endless Repository]]
Fruit_Guard_P2S_icon.png|link=Fruit Guard|[[Fruit Guard]]
Nutrient_Silo_P2S_icon.png|link=Nutrient Silo|[[Nutrient Silo]]
Stringent_Container_P2S_icon.png|link=Stringent Container|[[Stringent Container]]
</gallery>


== Arctic Cannon Larva ==
=== North America GameCube/Wii ===
The '''Arctic Cannon Larva''' ({{j|ユキフタクチ|Yuki Futa Kuchi|Snow Two-Mouth}}) is an [[enemy]] in {{p3}} and {{p4}}. It is bright green, with a lavender underbelly, and are accustomed to cold conditions. They are the larval form of the [[Arctic Cannon Beetle]].
<gallery>
Thumb dronesupplies.jpg|link=Drone Supplies|[[Drone Supplies]]
Patience Tester 2.png|link=Patience Tester|[[Patience Tester]]
Thumb_endlessrepository.jpg|link=Endless Repository|[[Endless Repository]]
Fruit-guard-artwork.jpg|link=Fruit Guard|[[Fruit Guard]]
Thumb nutrientsilo.jpg|link=Nutrient Silo|[[Nutrient Silo]]
stringentcontainer.jpg|link=Stringent Container|[[Stringent Container]]
</gallery>


Unlike their rock-spitting relatives, the Arctic Cannon Larva launches giant snowballs. While mostly equivalent to boulders in functionality, snowballs are incapable of killing Pikmin, instead simply picking them up and carrying them along until they crash into something (even other snowballs); [[Winged Pikmin]] won't even be picked up by the projectiles, only knocked back. Leaders will be picked up as well, which also traps them until the snowball is destroyed. As a result, the creature is annoying at best, and is only a threat if the Pikmin it rolls away end up next to some other enemy or [[hazard]] without the player noticing, but can be killed with relative ease by any Pikmin type.
=== Europe GameCube/Wii ===
<gallery>
Container of Knowledge.png|link=Container of Knowledge|[[Container of Knowledge]]
Container of Sea Bounty.png|link=Container of Sea Bounty||[[Container of Sea Bounty]]
Patience Tester 2.png|link=Patience Tester|[[Patience Tester]]
Thumb_endlessrepository.jpg|link=Perfect Container|[[Perfect Container]]
stringentcontainer.jpg|link=Survival Container|[[Survival Container]]
Endless Repository EU.png|link=Endless Repository|[[Endless Repository]]
Open Architecture.png|link=Open Architecture|[[Open Architecture]]
166Permanent Container.png|link=Permanent Container|[[Permanent Container]]
Empty space container.png|link=Empty Space Container|[[Empty Space Container]]
Stringent Container EU.png|link=Stringent Container|[[Stringent Container]]
Open Archive.png|link=Open Archive|[[Open Archive]]
Thumb nutrientsilo.jpg|link=Nutrient Silo|[[Nutrient Silo]]
Plentiful Tank.png|link=Plentiful Tank|[[Plentiful Tank]]
Drone Supplies EU.png|link=Drone Supplies|[[Drone Supplies]]
</gallery>


== Bulborb ==
=== Japan GameCube/Wii ===
The '''Bulborb''' ({{j|チャッピー|Chappī|Chappy}}), known as the '''Spotty Bulborb''' in {{p1}} and the '''Red Bulborb''' ({{j|アカチャッピー|Aka Chappī|Red Chappy}}) in {{p2}}, is a common [[enemy]] found throughout the {{Ps}}. The Bulborb is one of the most prominent enemies in the franchise and appear in all 4 numbered ''Pikmin'' games. It also has apperances in {{hp}}, {{pa}}, {{psm}}, has several pieces of [[merchandise]] based on it, and are the focus of the first game's North American boxart. The Bulborb is the most commonly encountered member of the particularly extensive and diverse [[Grub-dog family]].
<gallery>
Endless Repository EU.png|link=Endless Repository|[[Endless Repository]]
Open Architecture.png|link=Open Architecture|[[Open Architecture]]
166Permanent Container.png|link=Permanent Container|[[Permanent Container]]
Empty space container.png|link=Empty Space Container|[[Empty Space Container]]
Stringent Container EU.png|link=Stringent Container|[[Stringent Container]]
Open Archive.png|link=Open Archive|[[Open Archive]]
</gallery>
{{clear}}


The Bulborb has pointed snouts, eyes on stalks, and a red back with white spots. It only has two sharp fangs on either side of its mouth. It is a largely nocturnal creature and spends much of its time sleeping, only waking up when detecting potential prey, or [[Night expedition|during the night.]] It is often found sleeping near [[Dwarf Bulborb]]s, which are actually members of the [[Breadbug family]].
= ''Pikmin Adventure'' =
Stuff relating to {{pa}}


== Yellow Wollyhop ==
= '''''Pikmin Adventure'' area infobox''' =
An area infobox for the challenges in ''Pikmin Adventure''.


The '''Yellow Wollyhop''' ({{j|イモガエル|Imo Gaeru|Potato Frog}}; known as the '''Yellow Wollywog''' [[#Naming|depending on the game and region]]) is a frog-like [[Enemy|enemy]] found in the [[Pikmin series|''Pikmin'' games]]. It is a large, round, yellow creature with large eyes and beady pupils, and short front legs with larger hind legs. Its skin is tinted green towards the top of its head, with green spots along the sides. It can usually be found in or around large, open-air bodies of [[water]], but also in moist, [[rain]]y areas.
{| class="infobox"
! colspan="2" class="infoboxTitle" | ''Bulborb Forest''{{#if:{{{sector|}}}|<br>[[Sector {{{sector}}}]] &ndash; Area {{{area_letter}}}}}
|-
| colspan="2" style="text-align: center;" | {{#if:{{{screenshot|}}}|<div class="switchable">
<div class="switch" data-switchable-title="Screenshot">
[[File:{{{screenshot}}}|{{{size|10px}}}]]
</div>
<div class="switch" data-switchable-title="Map">
[[File:{{{map}}}|{{{size|10px}}}]]
</div>
</div> | [[File:Pikipedia Base Image.jpg|File:Pikipedia Base Image.jpg|{{{size|150px}}}]]}}
|-
! Challenge type
{{!}} Standard
|-
! Master Rank time
{{!}} 2:10
|-
! Area style
{{!}} Spring
|-
! Next area
{{!}} ''Boss of the Beebs''
|-
! Music
| ''[[Music in Pikmin Adventure#Spring area|Spring area]]''
|-
|}
{{clear}}


It is known to leap into the air, floating temporarily, and dropping, with the intent of landing on and [[crushing]] any [[Pikmin Family|Pikmin]] below, a behavior which is most readily explained as an attempt to drive predators away from developing eggs. According to [[Olimar]]'s notes, these are [[Wolpole]] eggs, revealing that the Yellow Wollyhop and the Wolpole are the same exact species.
== '''''Pikmin Adventure'' controls''' ==
Controls for ''[[Nintendo Land]]'' and {{pa}} based on [[User:PopitTart/Controls]].


It is the only mature species of [[Amphituber family|amphituber]] in both ''[[Pikmin 3]]'' and ''[[Hey! Pikmin]]''. In these games, they also have a reasoning for it's floating ability: it's throat inflates, presumably allowing it to float in the air temporarily. In ''Hey! Pikmin'', it seems to have slightly increased in size and move slightly faster.
==''Pikmin Adventure''==
''Nintendo Land'' allows two controller types in the ''Pikmin Adventure'' attraction; The Wii U GamePad for the first and the sideways Wii Remote for the other players.


= '''Pikmin Adventure Enemy List''' =
=== ''Nintendo Land'' plaza ===
The following lists the appearance of enemies in each level in ''Pikmin Adventure.
{| class = "wikitable" style="width: 80%"
! Action
! style="width:12%" | GamePad controls
! Notes
|-
| Move
| align="center"|{{button|wiiu|lstick|size=x24px}}
| Supports analog movement.
|-
| Rotate camera
| align="center"|{{button|wiiu|rstick|wiiu|shake|size=x24px}}
| The right stick can only be used to turn the camera left and right. The GamePad can be used to look up and down alongside correcting the camera if the GamePad is rotated.
|-
| Swap to menu/plaza
| align="center"|{{button|wiiu|y|size=x24px}}
| Toggles between the menu and the plaza.
|-
| Jump
| align="center"|{{button|wiiu|zr|size=x24px}}
| Three consecutive jumps cause the Mii to jump higher each time. Jumps can cause interactions with [[Pikmin Adventure prizes|statues]].
|-
| First person perspective
| align="center"|{{button|wiiu|zl|size=x24px}}<br>held
|
|}


'''Enemies found in ''Bulborb Forest'''''
==== ''Pikmin Adventure'' GamePad controls ====
{{clear}}
In ''Pikmin Adventure'', the GamePed player does the majority of the important actions by pressing on the touchscreen.
Red Bulborb x9
{{clear}}
Creepy Beeb x17
{{clear}}
Yellow Bulborb x1
{{clear}}


'''Enemies found in ''Boss of the Beebs'''''
{| class = "wikitable" style="width: 80%"
{{clear}}
! Action
Red Bulborb x18
! style="width:12%" | GamePad
{{clear}}
! Notes
Creepy Beeb x14
|-
{{clear}}
| Move
Yellow Bulborb x1
| align="center"|{{button|wiiu|lstick|wiiu|rstick|wiiu|stylus|size=x24px}}<br>held
{{clear}}
| Doesn't support analog movement.
King Beeb x3
|-
{{clear}}
| [[Whistle]]
| align="center"|{{button|wiiu|zl|wiiu|zr|size=x24px}}<br>tapped or held
|
|-
| [[Punch]]/[[throw]] Pikmin
| align="center"|{{button|wiiu|stylus|size=x24px}}<br>tap
|
|-
| Change next Pikmin type
| align="center"|{{button|wiiu|l|wiiu|r|wiiu|stylus|size=x24px}}<br>tap icon
| Only available in advanced challenges.
|-
| [[Dodge]]
| align="center"|{{button|wiiu|stylus|size=x24px}}<br>swipe
| Cannot be done if a Mii Pikmin player is being carried
|-
| [[Pause]]/resume
| align="center"|{{button|wiiu|+|size=x24px}}
|
|-
| Skip [[cutscene]]
| align="center"|{{button|wiiu|-|size=x24px}}
|
|-
|}


'''Enemies found in ''Five Seconds to Takeoff'''''
==== ''Pikmin Adventure'' Wii Remote controls ====
{{clear}}
In ''Pikmin Adventure'', the Wii Remote player needs to hold the controller sideways to play properly.
Creepy Beeb x28
{{clear}}
Red Bulborb x1
{{clear}}


'''Enemies found in ''Overthrow the Bulblord'''''
{| class = "wikitable" style="width: 80%"
{{clear}}
! Action
Bulblord x1
! style="width:12%" | Wii Remote
! Notes
|-
| Move
| align="center"|{{button|wii|pad|size=x24px}}
| Doesn't support analog movement.
|-
| Jump
| align="center"|{{button|wii|2|size=x24px}}
|
|-
| Attack
| align="center"|{{button|wii|1|size=x24px}}
| Attack changes depending on the currently worn [[Pikmin Adventure#Power-ups|power-up]].
|-
| Double attack
| align="center"|{{button|wii|1}} twice
| Can only be done after reaching level 5 or higher. Attack changes depending on the currently worn [[Pikmin Adventure#Power-ups|power-up]].
|-
| Triple attack
| align="center"|{{button|wii|1}} thrice
| Can only be done after reaching level 10 or higher. Attack changes depending on the currently worn [[Pikmin Adventure#Power-ups|power-up]].
|-
| Charged attack
| align="center"|Hold {{button|wii|1}}
| Attack changes depending on the currently worn [[Pikmin Adventure#Power-ups|power-up]].
|-
| Air attack
| align="center"|{{button|wii|1}} in midair
| Attack changes depending on the currently worn [[Pikmin Adventure#Power-ups|power-up]].
|-
| Latched attack
| align="center"|{{button|wii|1}} while latched onto an enemy.
|
|-
|}
{{clear}}
{{clear}}


'''Enemies found in ''Cannon Smash'''''
= '''''Pikmin Adventure'' enemy list''' =
{{clear}}
The following lists the appearance of enemies in each level in ''Pikmin Adventure.
Creepy Beeb x15
{{clear}}
Yellow Bulborb x8
{{clear}}
Red Bulborb x9
{{clear}}
Telescoping Pumphog x8
{{clear}}
'''Enemies found in ''King Beeb is Back'''''
{{clear}}
Red Bulborb x15
{{clear}}
Yellow Bulborb x14
{{clear}}
Telescoping Pumphog x7
{{clear}}
Creepy Beeb x30
{{clear}}
King Beeb x1
{{clear}}


''Enemies found in '''Through the Darkness'''''
== '''Enemies found in ''Bulborb Forest''''' ==
{{clear}}
King Beeb x15
{{clear}}
Telescoping Pumphog
{{clear}}
Red Bulborb x7
{{clear}}
Yellow Bulborb x5
{{clear}}


''Enemies found in '''Swamp Master'''''
[[Pikmin Adventure enemies# Bulborb|Bulborb (red)]] &times; 9
{{clear}}
Large-mouth Wollywog x1
{{clear}}


''Enemies found in '''Lord of a Barren Land'''''
[[Pikmin Adventure enemies#Creepy Beeb|Creepy Beeb]] &times; 18
{{clear}}
Blowhog x5
{{clear}}
invincible Telescoping Pumphog x8
{{clear}}
Bombardier Beeb x5
{{clear}}
King Beeb x4
{{clear}}
Red Bulborb x10
{{clear}}
Yellow Bulborb x4
{{clear}}
Bilious Bulborb x1
{{clear}}


''Enemies found in '''Burst the Giant Balloon'''''
[[Pikmin Adventure enemies#YellowBu lborb|Bulborb (yellow)]] &times; 1
{{clear}}
Bombardier Beeb x9
{{clear}}
Red Bulborb x7
{{clear}}
Yellow Bulborb x5
{{clear}}
Telescoping Pumphog x3
{{clear}}
King Beeb x4
{{clear}}
Blowhog x7
{{clear}}
{{clear}}


= '''Rewrite of ''Pikmin Adventure'' enemies''' =
== '''Enemies found in ''Boss of the Beebs''''' ==
The following W.I.P. is a rewrite of the [[Pikmin Adventure enemies]] page.


== Bulborb ==
[[Pikmin Adventure enemies# Bulborb|Bulborb (red)]] &times; 18
[[File:Bulborb NL.png|thumb|225px|The Bulborb [[Pikmin Adventure prizes|statue]] as seen in the ''Nintendo Land'' Plaza.]]


The '''Bulborb''' ({{j|チャッピー|Chappī|Chappy}}) is the most common Bulborb variant found in ''Pikmin Adventure'', being found in almost every level. It bears a resemblance to the [[Bulborb]] from the [[Pikmin series|main ''Pikmin'' series]], featuring three large white spots on its sides, large stalkless eyes that turn red when attacking, screws connecting the mouth to the main body, two small spots and a hole on its back to expel [[Pikmin Adventure prizes#Bulborb Dropping|Bulborb Droppings]], and lacks any legs connecting the body to the feet. The average Bulborb is slightly bigger than the player, but there are larger Bulborbs that can be found in certain areas.
[[Pikmin Adventure enemies#Creepy Beeb|Creepy Beeb]] &times; 15


=== Behavior ===
[[Pikmin Adventure enemies#YellowBu lborb|Bulborb (yellow)]] &times; 1
The Bulborb can be found either sleeping or being sent into the area by a gashapon capsule before it starts walking towards a player. It has two walking speeds, a slow walk and a slightly faster walk that is replaced by an attack once the Bulborb is close to the players. Alongside this is a small hop that it can do to avoid attacks and quickly get close to players. Once the Bulborb is close enough to a player, it will either charge a dash in a straight line or try to eat a player depending on how far they are to the Bulborb. If the Bublorb is able to catch a player, it will toss them up, eat them, and turn them into a [[Pikmin Adventure prizes#Bulborb Dropping|Bulborb Dropping]], making it impossible for them to be properly whistled at or attack enemies. In this state, the player must be broken out either by Olimar or other Pikmin damaging the Bulborb Dropping or by entering a body of [[water]]. If the Bulborb is defeated while a player is bring eaten, the player will be sent flying out of its mouth.


=== Strategy ===
[[King Beeb]] &times; 3
The only weak spot the Bulborb has is on its back, making it easy to throw Pikmin at or directly attack it. The Bulborb will try to shake off all of the Pikmin that are on its weak spot, causing them to be knocked over for a little bit. There are ways to circumvent the Bulborb's movement and shaking, however, either by waiting for it to slowly walk around, move out of its sight to make it look for a player in sight, or wait for it to start panting. These are the ideal times to attack the Bulborb since it won't be able to shake off the Pikmin on its back until after it starts trying to move.
{{clear}}


=== Monita's notes ===
== '''Enemies found in ''Five Seconds to Takeoff''''' ==
'''[[Region#Regional differences|American English]]''': {{transcript|These grub-dog predators tend to sleep during the day and attack aggressively if woken from a nap. Bulborbs come in a wide variety of colors--now on sale at our gift shop!}}
 
'''[[Region#Regional differences|British English]]''': {{transcript|These Grub-dog predators tend to sleep during the day and attack aggressively if woken. ◆ Bulborbs come in a variety of colours and are now on sale at our souvenir shop.}}
 
=== Gallery ===
<gallery>
PA Bulborb Statue Roar.png|The Bulborb statue roaring after being interacted with.
PA Bulborb attacks.png|Two Bulborbs attacking with a bite and a charge.
Pikmin Adventure Red Bulborb.png|A ''Pikmin Adventure'' render featuring the Bulborb.
</gallery>


=== Names in other languages ===
[[Pikmin Adventure enemies#Creepy Beeb|Creepy Beeb]] &times; 28
{{foreignname
|Jap  = チャッピー
|JapR = Chappī
|JapM = Chappy
|Dut  = Bulborb
|DutM =
|Fra  = Bulborbe
|FraM =
|FraN =
|Ger  = Punktkäfer
|GerM  =
|GerN  =
|Ita = Coleto
|ItaM= Bulborb
|ItaN =
|ItaI = Coleto
|Spa  = Bulbo
|SpaM =
|PorM =
|PorN =
|PorP  = Orbolbo
|PorPM =
|PorPN =
|Rus  = Клубнеголов
|RusR =
|RusM =
|RusN =
|notes = y
}}


[[Pikmin Adventure enemies# Bulborb|Bulborb (red)]] &times; 1
{{clear}}
{{clear}}


== Yellow Bulborb ==
'''Enemies found in ''Overthrow the Bulblord'''''
{{title|Yellow Bulborb}}
[[File:Yellow Bulborb NL.png|thumb|225px|A Yellow Bulborb ready to attack a Blue Pikmin player.]]


The '''Yellow Bulborb''' is a common Bulborb variant found in ''Pikmin Adventure'', and acts as the first mini-boss in the attraction. It is almost identical to the [[Pikmin Adventure enemies#Bulborb|Bulborb]] in appearance, but is colored yellow instead of red or green. Much like the Bulborb, the Yellow Bulborb is typically found slightly larger than players but larger ones are slightly more common to encounter in the challenges.
[[Bulblord]] &times; 1
 
=== Behavior ===
The Yellow Bulborb, unlike other Bulborb variants, does not charge at far away players, instead, it shoots out a projectile to harm the player. On top of this, the Yellow Bulborb will hop around often to dodge attacks and get close to eat players.
 
The Yellow Bulborb can either spew orbs of water that ensnare players, rendering them helpless until they are freed, or a [[Pikmin Adventure prizes#Spike Ball|spike ball]], which will take out a player that gets hit by it. If a player is trapped in a water bubble, they have to be freed by having other Olimar or orher Pikmin attack them, similar to the Bulborb Dropping.
 
=== Strategy ===
Due to being a variant of the Bulborb, it has a very similar method to defeat it. It will not shake off Pikmin when it is panting or when it is shooting projectiles, meaning those are also good times to attack if the players are able to avoid the projectile.
{{clear}}
{{clear}}


== Green Bulborb ==
== '''Enemies found in ''Cannon Smash''''' ==
{{title|Green Bulborb}}
[[File:Green Bulborb PA.png|thumb|225px|A sleeping Green Bulborb.]]


The '''Green Bulborb''' is a semi-common Bulborb variant found in ''Pikmin Adventure''. It is nearly identical to the Bulborb in appearance, except it is green instead of red or yellow. It often appears in groups, requiring players to either take on a small group of them, or in some cases, simply run away from them.
[[Pikmin Adventure enemies#Creepy Beeb|Creepy Beeb]] &times; 12


=== Behavior ===
[[Pikmin Adventure enemies#YellowBu lborb|Bulborb (yellow)]] &times; 6
The Green Bulborb, unlike the other Bulborb variants, can only charge at the players on sight and has no other methods of attack, but it can home in on the player when charging. Once it finishes a charge, it will start panting for a short amount of time.


=== Strategy ===
[[Pikmin Adventure enemies# Bulborb|Bulborb (red)]] &times; 6
Because the Green Bulborb starts panting after charging, it is very easy to attack it when it isn't charging. When the Green Bulborb is charging however, it is advised to run away because the homing charge makies it difficult to attack without getting hit by it. If possible, one should try to lure charging the Green Bulborb into a [[pit]] or a small area to deal with them from a safe area.


===Gallery===
[[Pikmin Adventure enemies#Telescoping Pumphog|Telescoping Pumphog]] &times; 3
<gallery>
File:PA Green Bulborb Group.png|A group of Green Bulborbs getting ready to charge.
</gallery>
{{clear}}
{{clear}}


== Bilious Bulborb ==
'''Enemies found in ''King Beeb is Back'''''
[[File:Bilious Bulborb NL.png|thumb|225px|The Bilious Bulborb [[Pikmin Adventure prizes|statue]] as seen in the ''Nintendo Land'' Plaza.]]
 
The '''Bilious Bulborb''' ({{j|テンテンチャッピー|Tenten Chappī|Dotted Chappy}}) is the rarest non-boss Bulborb variant found in ''Pikmin Adventure'', and is the seventh mini-boss the player fights. Its thinner eyes and orange color scheme resembles that of the [[Orange Bulborb]]. It has smaller spots than the other Bulborb variants, so it is suggested by Monita that it may not be a Bulborb subspecies.
 
=== Behavior ===
The Bilious Bulborb shares most of the attacks that are used by the three standard Bulborb variants. It can shoot out [[Pikmin Adventure prizes#Spike Ball|spike balls]] and water like the Yellow Bulborb, except it shoots out 6 spike balls in different directions. It also charges in a straight line and pants afterwards like the red and green Bulborbs respectively.


=== Strategy ===
[[Pikmin Adventure enemies# Bulborb|Bulborb (red)]] &times; 15
The best way to defeat the Bilious Bulborb is with multiple players. Have the Olimar player run around it so the other Mii Pikmin can get to the weak-points dotting its back. If the arena has rocks or bombs nearby, Olimar or the Pikmin can pick them up to throw them at the Bilious Bulborb. If the rocks hit the creature on a weak-point or directly on its face, it will be stunned for a few seconds. If the bombs land close enough to the Bilious Bulborb, it can deal massive damage to all the weak spots at once. If utilized properly, the rocks and bombs can turn the tide in a losing battle and defeat the Bilious Bulborb.


=== Monita's Notes ===
[[Pikmin Adventure enemies#YellowBu lborb|Bulborb (yellow)]] &times; 14
'''[[Region#Regional differences|American English]]''': {{transcript|The different-sized spots suggest that these may not be a true subspecies of Bulborb at all. Or perhaps they're just normal Bulborbs feeling a little under the weather.}}


'''[[Region#Regional differences|British English]]''': {{transcript|The different-sized spots suggest that these may not be a true subspecies of Bulborb at all. ◆ Or perhaps they're just normal Bulborbs feeling a little under the weather.}}
[[Pikmin Adventure enemies#Telescoping Pumphog|Telescoping Pumphog]] &times; 12


=== Names in other languages ===
[[Pikmin Adventure enemies#Creepy Beeb|Creepy Beeb]] &times; 30
{{foreignname
|Jap  = テンテンチャッピー
|JapR = Tenten Chappī
|JapM = Dotted Chappy
|Dut  = Galkleurige Bulborb
|DutM =
|Fra  = Bulborbe putride
|FraM =
|FraN =
|Ger  = Bleich-Punktkäfer
|GerM  =
|GerN  =
|Ita  = Coleto bilioso
|ItaM  = Bilious Bulborb
|ItaN  =
|ItaI = Coleto
|Spa  = Bulbo bilioso
|SpaM =
|PorP  = Orbolbo Biliar
|PorPM =
|PorPN =
|Rus  = Желчный клубнеголов
|RusR =
|RusM =
|RusN =
|notes = y
}}


[[King Beeb]] &times; 1
{{clear}}
{{clear}}


== Creepy Beeb ==
== ''Enemies found in '''Through the Darkness''''' ==
[[File:PA Creepy Beeb Statue.png|thumb|225px|The Creepy Beeb [[Pikmin Adventure prizes|statue]] as seen in the ''Nintendo Land'' Plaza.]]


The '''Creepy Beeb''' ({{j|ザコワラジ|Zako Waraji|Small Fry Woodlouse}}; known as the '''Worker Baub''' in the European version of ''Pikmin Adventure'') is the most common enemy found in ''Pikmin Adventure''. The standard appearance features a purple orb with four flexible yellow legs with black feet, stalked googly eyes, and a yellow and green antenna coming out of the top of its head. There is also a variant that features blue legs and yellow feet like the [[King Beeb]], with the main design difference being a ring around the yellow tip of the antenna.
[[King Beeb]] &times; 7


=== Behavior ===
[[Pikmin Adventure enemies#Telescoping Pumphog|Telescoping Pumphog]] &times; 1
When it is not attacking players, the Creepy Beeb will walk towards a player even if they are far from its spawning point. The Creepy Beeb attacks by rolling forward a short distance that can take out a player.


=== Strategy ===
[[Pikmin Adventure enemies#Bulborb|Bulborb (red)]] &times; 7
The Creepy Beeb is the easiest enemy to kill in '''Pikmin Adventure''', as it can die in one direct hit and get weighed down by a single Pikmin due to its entire body being a single weak-point. It only rolls forward a little bit, so avoiding its attack is very simple. Some Creepy Beebs take slightly more hits to kill, but are still very simple to get rid of as their attacks are the same as the small ones.


=== Monita's Notes ===
[[Pikmin Adventure enemies#YellowBu lborb|Bulborb (yellow)]] &times; 5
'''[[Region#Regional differences|American English]]''': {{transcript|Creepy Beebs are about the size of Olimar and move in packs. They're usually quite peaceful creatures, but their flexible legs and formidable charge attack help them when they feel threatened.}}
{{clear}}


'''[[Region#Regional differences|British English]]''': {{transcript|Worker Baubs are about the size of Olimar and move in groups. These industrious creatures are usually peaceful, but their flexible legs and formidable charge help them when they feel threatened.}}
== ''Enemies found in '''Swamp Master''''' ==
 
<gallery>
PA Creepy Beeb Statue Charge.png|The Creepy Beeb statue initiating a charge when interacted with.
Creepy Beeb 2.jpg|The Creepy Beeb statue after rolling.
Creepy Beeb NL.png|Four Creepy Beebs.
PA Creepy Beeb Weighed Down.png|Two Creepy Beebs being weighed down by some Pikmin.
PA large Creepy Beebs.png|Four large Creepy Beebs resembling the [[King Beeb]], with a player weighing one down.
 
</gallery>
 
=== Names in other languages ===
{{foreignname
|Jap  = ザコワラジ
|JapR = Zako Waraji
|JapM = Small Fry Woodlouse
|Dut  = Werkbaub
|DutM =
|Fra  = Brok rampant
|FraM =
|FraN =
|Ger  = Krümelkugelkäfer
|GerM  =
|GerN  =
|Ita  = Pidolino operaio
|ItaM  =
|ItaN =
|Spa  = Boloide obrero
|SpaM =
|PorP  = Baub Operário
|PorPM =
|PorPN =
|Rus  = Тапколап-рабочий
|RusR =
|RusM =
|RusN =  
|notes = y
}}


[[Large-mouth Wollywog]] &times; 1
{{clear}}
{{clear}}


== Bombardier Beeb ==
== ''Enemies found in '''Lord of a Barren Land''''' ==
[[File:PA Bombardier Beeb Statue.png|thumb|225px|The Bombardier Beeb [[Pikmin Adventure prizes|statue]] as seen in the ''Nintendo Land'' plaza.]]


The '''Bombardier Beeb''' ({{j|サクレワラジ|Sakure Waraji|Bursting Woodlouse}}; known as the '''Bombardier Baub''' in the European version of ''Pikmin Adventure'') is one of the rarer enemies in ''[[Pikmin Adventure]]''. It is a variant of the Creepy Beeb that explodes after a few seconds of spotting a player. It has a number of common characteristics with the [[Pikmin Adventure Enemies#Creepy Beeb|Creepy Beeb]] including black feet and stalked googly eyes, but it also has a few major design differences as well including rivets on its sides and a fuse in place of an antenna.
[[Pikmin Adventure enemies#Blowhog|Blowhog]] &times; 5


=== Behavior ===
[[Pikmin Adventure enemies#Telescoping Pumphog|Telescoping Pumphog (invincible)]] &times; 9
Upon spotting a player, the Bombradier Beeb will activate the fuse on its head and chase after them. After about 5 seconds, it will stand in place and panic for a second before exploding, causing an explosion that can damage nearby players, enemies, and destructible blocks similar to standard bombs.


=== Strategy ===
[[Pikmin Adventure enemies#Bombardier Beeb|Bombardier Beeb]] &times; 5
It is not recommended to attack the Bombardier Beeb directly because of the short time it takes before exploding compared to the high amount of health it often has. Instead, the Bombardier Beeb can be used to the players' advantage to destroy other enemies and obstacles, but they must be careful to not get caught in the blast radius, or else they will be engulfed and taken out in the explosion.


=== Monita's Notes ===
[[King Beeb]] &times; 4
'''[[Region#Regional differences|American English]]''': {{transcript|This creature is equipped with a fuse and will detonate when approached. Whatever you do, don't go anywhere near it carrying something flammable. Or inflammable, for that matter.}}


'''[[Region#Regional differences|British English]]''': {{transcript|This creature is equipped with a fuse and will detonate when approached. ◆ Whatever you do, don't go anywhere near it carrying something flammable. Or inflammable for that matter.}}
[[Pikmin Adventure enemies#Bulborb|Bulborb (red)]] &times; 10


<gallery>
[[Pikmin Adventure enemies#YellowBu lborb|Bulborb (yellow)]] &times; 5
PA Bombardier Beeb Lit Fuse.png|When the Bombardier Beeb statue is interacted with a second time, it will panic like it will explode.
Bombardier Beeb NL.png|Four Bombardier Beebs ready to blow up.
</gallery>
 
=== Names in other languages ===
{{foreignname
|Jap  = サクレワラジ
|JapR = Sakure Waraji
|JapM = Bursting Woodlouse
|Dut  = Bombaub
|DutM =
|Fra  = Brok à retardement
|FraM =
|FraN =
|Ger  = Knallkugelkäfer
|GerM  =
|GerN  =
|Ita  = Pidolino bombardiere
|ItaM  = Bombing Beeb
|ItaN =
|Spa  = Boloide bomba
|SpaM =
|PorP  = Baub Bomba
|PorPM =
|PorPN =
|Rus  = Тапколап-бомбардир
|RusR =
|RusM =
|RusN =
|notes = y
}}


[[Pikmin Adventure enemies#Bilious Bulborb|Bilious Bulborb]] &times; 1
{{clear}}
{{clear}}


== Blowhog ==
== ''Enemies found in '''Burst the Giant Balloon''''' ==
[[File:PA Blowhog Statue.png|225|thumb|The Blowhog [[Pikmin Adventure prizes|statue]] as seen in the ''Nintendo Land'' Plaza.]]


The '''Blowhog''' ({{j|フーセンドックリ|Fūsen Dokkuri|Balloon Tokkuri}}; known as the '''Puffy Blowhog''' in the European version of ''Pikmin Adventure'') is a rare enemy that appears in [[Pikmin Adventure]]'s later levels. It is a purple orb with a blue snout that is lifted by a propellor and features eyes that are often covered up by its eyelids almost always being nearly closed.
[[Pikmin Adventure enemies#Bombardier Beeb|Bombardier Beeb]] &times; 9


=== Behavior ===
[[Pikmin Adventure enemies#Bulborb|Bulborb (red)]] &times; 8
The Blowhog is usually found hovering still and looking in one direction. Once it sees a player the Blowhog will start to move towards them until it gets close enough to the player and turns its snout into a spike and tries to ram the players head-on in a straight line.


=== Strategy ===
[[Pikmin Adventure enemies#YellowBu lborb|Bulborb (yellow)]] &times; 5
Since the Blowhog's entire body is a weak point similar to the [[Pikmin Adventure enemies#Creepy Beeb|Creepy Beeb]], attacking it is easier then with most enemies. However, it is very mobile, making precision in throwing slightly difficult, and it usually hovers over [[pits]], making it difficult to throw Pikmin at it without losing them. The player can either attack it from afar with a [[Whip Seed]] or try to lure it over solid ground to minimize losses.


=== Monita's Notes ===
[[Pikmin Adventure enemies#Telescoping Pumphog|Telescoping Pumphog]] &times; 3
'''[[Region#Regional differences|American English]]''': {{transcript|This unfriendly beast attacks by shooting needles from its mouth but mellows considerably after the initial assault. Still, a balloon with needles inside of it... That sounds like a dangerous combination!}}


'''[[Region#Regional differences|British English]]''': {{transcript|This unfriendly beast attacks by shooting needles from its mouth but mellows considerably after the initial assault. ◆ Still, a balloon with needles inside it... That sounds like a dangerous combination!}}
[[King Beeb]] &times; 4
 
<gallery>
Blowhog NL.png|A Blowhog in an arena.
Blowhog Spike NL.png|A Blowhog with a spike coming out of its snout.
 
</gallery>
 
=== Names in other languages ===
{{foreignname
|Jap  = フーセンドックリ
|JapR = Fūsen Dokkuri
|JapM = Balloon Tokkuri
|Dut  = Opgeblazen Blowhog
|DutM =
|Fra  = Puffy volant
|FraM =
|FraN =
|Ger  = Ballonerus
|GerM  =
|GerN  =
|Ita  = Moschita vacua
|ItaM  =
|ItaN =
|Spa  = Verraco volador
|SpaM =
|PorP  = Sopro Voador
|PorPM =
|PorPN =
|Rus  = Толстый ветросвин
|RusR =
|RusM =
|RusN =
|notes = y
}}


[[Pikmin Adventure enemies#Blowhog|Blowhog]] &times; 7
{{clear}}
{{clear}}


== Telescoping Pumphog ==
= '''Notes in other languages''' =
[[File:PA Telescoping Pumphog statue.png|thumb|225px|The Telescoping Pumphog [[Pikmin Adventure prizes|statue]] in the ''[[Nintendo Land]]'' plaza.]]


The '''Telescoping Pumphog''' ({{j|ポンプドックリ|Ponpu Dokkuri|Pump Tokkuri}}) is a common enemy found in ''Pikmin Adventure''. Its face bears a resemblance to the [[Fiery Blowhog]], sharing very similar eyes and snout, but is otherwise very different, being a stationary tower that can pump out projectiles.
== Bulborb (Pikmin Adventure) ==
[[File:Bulborb NL.png|thumb|225px|The Bulborb [[Pikmin Adventure prizes|statue]] in the ''Nintendo Land'' Plaza.]]


=== Behavior ===
=== Monita's notes ===
Most Telescoping Pumphogs are completely stationary and are unable to do much of anything other than shoot projectiles while a few others can delve underground and pop back up to shoot projectiles and temporarily avoid damage from players.  
{{switchable|American English|{{transcript|These grub-dog predators tend to sleep during the day and attack aggressively if woken from a nap. Bulborbs come in a wide variety of colors--now on sale at our gift shop!|block=y}}|British English|{{transcript|These Grub-dog predators tend to sleep during the day and attack aggressively if woken. ◆ Bulborbs come in a variety of colours and are now on sale at our souvenir shop.|block=y}}


When it is stationary, the Telescoping Pumphog sits about, facing a set direction. When it notices a player, it will start rising up, revealing its tube-like under-segment which inflates. It will then push down, which fires out a projectile from its snout. This projectile is usually a [[Pikmin Adventure prizes#Spike Ball|spike ball]], but there are a few variants that shoot out bombs and [[water]].
|Japanese|'''Text''': {{transcript|◆和名は「デメマダラ」という イヌムシ科の生物 昼間は眠っていることが多いが 近づくと突進してくる◆ 黄色や緑のカラーバリエーションもあって ピクミン アドベンチャーでは人気No.1 だそうデス|block=y}} '''Translation''': {{transcript|◆ The Japanese name is "Spotted Bug-eye". A creature of the Dog bug family It is often asleep during the day, but when you get close, it rushes. ◆ There are also yellow and green color variations, and it is the most popular No. 1 in Pikmin Adventure.|block=y}}


=== Strategy ===
|Dutch|'''Text''': {{transcript|De Grub-dog-familie van roofdieren slaapt gewoonlijk overdag en is erg agressief. ◆ Bulborbs zijn er ook in gele en groene varianten, en verkrijgbaar in onze souvenirwinkel.|block=y}} '''Translation''': {{transcript|The Grub-dog family of predators usually sleeps during the day and are very aggressive. ◆ Bulborbs also come in yellow and green varieties, and are available in our souvenir shop.|block=y}}
The Telescoping Pumphog's weak-spot is located directly on its head, making it hard to attack when it rises up to charge its attack. However, when it is on the ground, right after attacking, it is extremely vulnerable, so it is advised to attack them then.


It should be noted, however, that some variants of the Telescoping Pumphog do not have a weak-point at all, making it the only enemy in ''Pikmin Adventure'' that is completely invincible. If a player comes across this variant, their only option is to advance to the next part of the level quickly while avoiding the indestructible Pumphog's projectiles.
|French|'''Text''':  {{transcript|Famille : canidés fouisseurs. Le bulborbe passe ses journées à dormir, mais se réveille pour attaquer tous ceux qui s'approchent trop près de lui. ◆ Également disponible en jaune et en vert (offre soumise à conditions).|block=y}} '''Translation''': {{transcript|Family: excavating canids. The Bulborb spends its days sleeping, but wakes up to attack anyone who gets too close to it. ◆ Also available in yellow and green (offer subject to conditions).|block=y}}|showall=y}}


=== Monita's Notes ===
{{switchable|German|'''Text''': {{transcript|Dieser Krabbler schläft am Tag und wird bei Störungen schnell rabiat. ◆ In der Pikmin-Welt wimmelt es
'''[[Region#Regional differences|American English]]''': {{transcript|This creature compresses air in its bellows-shaped body and uses the pressure to shoot water or projectiles. '''I called them Huffy Puffers in my younger days. Oh, the quirks of a single core processor.'''}}
nur so von Punktkäfern, und sie geben auch tolle Plüsch-Souvenirs ab!|block=y}} '''Translation''': {{transcript|This creepy-crawly sleeps during the day and quickly becomes ferocious when disturbed. ◆ The Pikmin world is teeming with Dot Beetles, and they also make great plush souvenirs!|block=y}}


'''[[Region#Regional differences|British English]]''': {{transcript|This creature compresses air in its bellow-shaped body and uses the pressure to shoot water or projectiles. '''I called them Huffy Puffers in my younger days. Oh, the quirks of a single-core processor.'''}}
|Italian|'''Text''': {{transcript|I predatori appartenenti alla famiglia dei Coletidi tendono a dormire di giorno e attaccano se disturbati. ◆ Troverai Coleti di vari colori in vendita nel nostro negozio di souvenir.|block=y}} '''Translation''': {{transcript|Predators belonging to the Coletidae family tend to sleep during the day and attack if disturbed. ◆ You will find Coletis of various colors for sale in our gift shop.|block=y}}


<gallery>
|Russian|'''Text''': {{transcript|Хищники из семейства личинкопсовых в светлое время суток обычно спят. Будучи разбужены, атакуют. ◆ Клубнеголовы могут иметь различный окрас. У нас сейчас как раз распродажа их фигурок!|block=y}} '''Translation''': {{transcript|Predators from the larvae family usually sleep during daylight hours. When awakened, they attack. ◆ Tuberheads can have different colors. We have their figurines on sale right now!|block=y}}
Telescoping Pumphog extend NL.png|The Telescoping Pumphog [[Pikmin Adventure prizes|statue]] extending upward.
PA Telescoping Pumphog Miniboss Cutscene.png|A large Telescoping Pumphog trapped in an enclosed area.
Telescoping Pumphog NL.png|A Telescoping Pumphog.
Stone Pumphog.png|The invulnerable variant of the Telescoping Pumphog in ''Lord of a Barren Land''.
</gallery>


=== Names in other languages ===
|Spanish|'''Text''': {{transcript|Estos depredadores de la familia de los Gusarapérridos suelen dormir de día y atacan con mucha fuerza si se los despierta. ◆ En nuestra tienda de souvenirs encontrarás a la venta bulbos de muchos otros colores.|block=y}} '''Translation''': {{transcript|These predators from the Grudogidae family usually sleep during the day and attack with great force if they are awakened. ◆ In our souvenir store, you will find bulbs for sale in many other colors.|block=y}}
{{foreignname
|Jap  = ポンプドックリ
|JapR = Ponpu Dokkuri
|JapM = Pump Tokkuri
|Dut  = Blaasbalgblowhog
|DutM =
|Fra  = Souffy téléscopique
|FraM =
|FraN =
|Ger  = Pump-Ballonerus
|GerM  =
|GerN  =
|Ita  = Eruptor telescopico
|ItaM  =
|ItaN =
|Spa  = Verraco fuelle
|SpaM =
|PorP  = Sopro Telescópico
|PorPM =
|PorPN =
|Rus  = Телескопический ветросвин
|RusR =
|RusM =
|RusN =
|notes = y
}}


|Portuguese|'''Text''': {{transcript|Estes predadores da família Canilarva passam os dias a dormir e atacam ferozmente se alguém os acordar. ◆ Existem Orbolbos de várias cores e temo-los em saldo na nossa loja de recordações.|block=y}} '''Translation''': {{transcript|These predators of the Canilarva family spend their days sleeping and attack fiercely if anyone wakes them up. ◆ There are Orbolbos of various colors and we have them on sale in our souvenir store.|block=y}}|showall=y}}
{{clear}}
{{clear}}


== Bosses ==
= ''Hey! Pikmin'' =
These are the following bosses in ''Pikmin Adventure'':
Stuff relating to {{hp}}


*[[Bulblord]]
=== Spark dandelion ===
*[[Large-Mouth Wollywog]]
[[File:Space of Silence 3.jpg|thumb|A group of inactive spark dandelions in Space of Silence.]]
*[[Emperor Pinchipede]]
The '''spark dandelion''' is a small tool that lights up when [[Yellow Pikmin]] are thrown at it. When activated, it will hold the Yellow Pikmin in place as it lights up an area around it, allowing for [[Bloominous Stemple]]s to bloom. The spark dandelion will immediately be turned off once the Yellow Pikmin are [[whistle]]d at.
*[[Bladed Beeb|Greater Bladed Beeb]]
*[[Grand Bulblord]]
*[[Translucent Wollywog]]
*[[Monochromatic Pinchipede]]
*[[Greater Studded Beeb]]


== See also ==
The name comes from the [[Publications/Strategy guides#Japan|Japanese ''Hey! Pikmin'' guidebook]], where it was given the name {{j|スパークタンポポ|Supākutanpopo|Spark dandelion|f=tp}}.
*[[Enemy]]
*[[Pikmin Adventure vegetation|''Pikmin Adventure'' vegetation]]
*[[Pikmin Adventure prizes|''Pikmin Adventure'' prizes]]


==== Locations ====
*'''[[Ravaged Rustworks]]'''
**[[Space of Silence]]: The only spark dandelions in the game appear here. They are found in the room containing the [[Silence Breaker]], where they act as electrical tools that the player has to use in order to activate nearby Bloominous Stemples and reach the treasure.
{{clear}}
{{clear}}


= '''Pikmin Adventure Boss Edits''' =
= '''''Hey! Pikmin'' area table''' =
The following W.I.P.s are edits of the ''Pikmin Adventure'' boss pages based on the rewritten enemies above.
A table of ''Hey! Pikmin'' areas based on a previous edit of [[Brilliant Garden]].
{{clear}}


== King Beeb ==
=== Main areas ===
[[File:King_Beeb_NL.png|thumb|300px|The King Beeb during its introduction cutscene.]]
{|class="wikitable" style="text-align:center"
|-
!Code
!Image
!Name
![[List of Hey! Pikmin treasures|Treasures]]
!Available [[Pikmin family|Pikmin]]
|-
|1-A
|[[File:HP First Expedition Start.png|100px]]
|[[First Expedition]]
|
{{icon|Loop of Beginnings|y}}<br>{{icon|Hypno Pendulum|y}}<br>{{icon|Song Sewer|y}}
|
{{icon|Red Pikmin|v=HP|y}}
|-
|1-B
|[[File:HP Cavern of Confusion Wooden Stake.png|100px]]
|[[Cavern of Confusion]]
|
{{icon|Consolation Prize|y}}<br>{{icon|Ultra-Sealed Aquarium|y}}<br>{{icon|Peace Missile|y}}
|
{{icon|Yellow Pikmin|v=HP|y}}
|-
|1-C
|[[File:HP Mushroom Valley Start.png|100px]]
|[[Mushroom Valley]]
|
{{icon|Unassuming Lighthouse|y}}<br>{{icon|Quantum Traveler|y}}<br>{{icon|Constitution Gate|y}}
|
{{icon|Red Pikmin|v=HP|y}}
|-
|1-D
|
[[File:HP Back-and-Forth Road First Moving Block.png|100px]]
|[[Back-and-Forth Road]]
|
{{icon|Stopped Doomsday Clock|y}}<br>{{icon|Smile Detector|y}}<br>{{icon|Independence Monument|y}}
|
{{icon|Red Pikmin|v=HP|y}}<br>{{icon|Yellow Pikmin|v=HP|y}}
|-
|1-E
|[[File:HP The Shadow in the Brush Running Under Bulborb.png|100px]]
|[[The Shadow in the Brush]]
|
{{icon|Flashy Monument|y}}
|
{{icon|Red Pikmin|v=HP|y}}
|-
|1-X
|[[File:HP Cherrystone Pass First Lifting Rock.png|100px]]
|[[Cherrystone Pass]]
|
{{icon|Preservation Door|y}}<br>{{icon|Despair-o-Sphere|y}}<br>{{icon|Revenge Fantasy|y}}
|
{{icon|Red Pikmin|v=HP|y}}
|}


The '''King Beeb''' ({{j|キングザコワラジ|Kingu Zako Waraji|King Small Fry Woodlouse}}; known as the '''Queen Baub''' in the European version of ''[[Pikmin Adventure]]'']]) is the second miniboss encountered in ''Pikmin Adventure'', first seen in both enemy and miniboss form in ''Boss of the Beebs''. It is a large [[Pikmin Adventure Enemies#Creepy Beeb|Creepy Beeb]] that has yellow feet, blue flexible legs, and a blue and yellow antenna resembling the large Creepy Beeb. The primary differences between the King Beeb and the Creepy Beeb is that the Creepy Beeb has flatter, almost googly eyes while the King Beeb has far more spherical eyes like the [[Bladed Beeb|Geater Bladed Beeb]].
=== Special areas ===
{|class="wikitable" style="text-align:center"
|-
!Image
!Name
![[amiibo]] required?
!Reward(s)
|-
|[[File:HP Secret Spot 1.png|100px]]
|[[Secret Spot 1]]
|No
|
[[File:Red 8 Pellet.png|24px|link=Pikmin Park#Adding Pikmin]] [[Pikmin Park#Adding Pikmin|Red pellet]]
|-
|[[File:HP Secret Spot 2.png|100px]]
|[[Secret Spot 2]]
|Yes
|
[[File:Yellow 8 Pellet.png|24px|link=Pikmin Park#Adding Pikmin]] [[Pikmin Park#Adding Pikmin|Yellow pellet]]
|-
|[[File:HP Secret Spot 3.png|100px]]
|[[Secret Spot 3]]
|Yes
|
[[File:Red 8 Pellet.png|24px|link=Pikmin Park#Adding Pikmin]] [[Pikmin Park#Adding Pikmin|Red pellet]]
|-
|[[File:HP Secret Spot 4.png|100px]]
|[[Secret Spot 4]]
|No
|
[[File:Red 8 Pellet.png|24px|link=Pikmin Park#Adding Pikmin]] [[Pikmin Park#Adding Pikmin|Red pellet]]
|-
|[[File:HP Brilliant Garden Sparklium Springs.png|100px]]
|[[Sparklium Springs#Brilliant Garden|Sparklium Springs]]
|No
|
'''Rocks''':<br>'''Yellow''': 161 ({{Sparklium|hp|161}})<br>'''Red''': 84 ({{Sparklium|hp|252}})<br>'''Rainbow''': 7 ({{Sparklium|hp|35}})<br>'''Max collectable Sparklium''': {{Sparklium|hp|448}}
|}


==Behavior==
=== Main areas ===
Upon noticing the player, the King Beeb will slowly wander towards them before flashing yellow and curl up into a ball. It will proceed to roll around the area for an extended amount of time, trying to crush the Olimar and Pikmin players. After a short time, the King Beeb may stop rolling by ending up on its back, unable to move for a little bit.
{|class="wikitable" style="text-align:center"
|-
!Code
!Image
!Name
![[List of Hey! Pikmin treasures|Treasures]]
!Available [[Pikmin family|Pikmin]]
|-
|2-A
|[[File:HP Foaming Lake Wild Blue Pikmin.png|100px]]
|[[Foaming Lake]]
|
{{icon|Giga Whistle|y}}<br>{{icon|Rocket Polish|y}}<br>{{icon|Berserker Brush|y}}
|
{{icon|Blue Pikmin|v=HP|y}}
|-
|2-B
|[[File:HP Serene Stream Mockiwi Chase.png|100px]]
|[[Serene Stream]]
|
{{icon|Attitude Adjuster|y}}<br>{{icon|Unstrung Racket|y}}<br>{{icon|Work-Life Imbalancer|y}}
|
{{icon|Blue Pikmin|v=HP|y}}
|-
|2-C
|[[File:HP Glowing Bloom Pond Main Exit.png|100px]]
|[[Glowing Bloom Pond]]
|
{{icon|Evidence Pulverizer|y}}<br>{{icon|Handy Hand|y}}<br>{{icon|Hairy Serpent Fossil|y}}
|
{{icon|Yellow Pikmin|v=HP|y}}
|-
|2-D
|
[[File:HP The Shallow End Falling Crystal.png|100px]]
|[[The Shallow End]]
|
{{icon|Greed-o-Sphere|y}}<br>{{icon|Twisty Pick|y}}<br>{{icon|Conformity Enhancers|y}}
|
{{icon|Blue Pikmin|v=HP|y}}
|-
|2-E
|[[File:HP The Keeper of the Lake Long Water Dumple Looking.png|100px]]
|[[The Keeper of the Lake]]
|
{{icon|Unexamined Nest|y}}
|
{{icon|Blue Pikmin|v=HP|y}}
|-
|2-X
|[[File:HP Treacherous Currents Red Sparklium Seeds.png|100px]]
|[[Treacherous Currents]]
|
{{icon|Everyday Cell|y}}<br>{{icon|Giant Rodent Skull|y}}
|
{{icon|Blue Pikmin|v=HP|y}}
|}


==Strategy==
=== Special areas ===
The King Beeb rolls around faster and longer than the Creepy Beeb so it is advised that players takes advantage of their ability to jump by flicking the GamePad's screen or press {{button|wii|2}} on their Wiimote in order to avoid being crushed. Some arenas are shaped like an octogon, so running from corner-to-corner while it is rolling around is the best solution to avoid being crushed.
{|class="wikitable" style="text-align:center"
|-
!Image
!Name
![[amiibo]] required?
!Reward(s)
|-
|[[File:HP Secret Spot 5.png|100px]]
|[[Secret Spot 5]]
|Yes
|
[[File:Blue 8 Pellet.png|24px|link=Pikmin Park#Adding Pikmin]] [[Pikmin Park#Adding Pikmin|Blue pellet]]
|-
|[[File:HP Secret Spot 6.png|100px]]
|[[Secret Spot 6]]
|No
|
[[File:Blue 8 Pellet.png|24px|link=Pikmin Park#Adding Pikmin]] [[Pikmin Park#Adding Pikmin|Blue pellet]]
|-
|[[File:HP Secret Spot 7.png|100px]]
|[[Secret Spot 7]]
|Yes
|
[[File:Yellow 8 Pellet.png|24px|link=Pikmin Park#Adding Pikmin]] [[Pikmin Park#Adding Pikmin|Yellow pellet]]
|-
|[[File:HP Secret Spot 8.png|100px]]
|[[Secret Spot 8]]
|No
|
[[File:Blue 8 Pellet.png|24px|link=Pikmin Park#Adding Pikmin]] [[Pikmin Park#Adding Pikmin|Blue pellet]]
|-
|[[File:HP Verdant Waterfront Sparklium Springs.png|100px]]
|[[Sparklium Springs#Verdant Waterfront|Sparklium Springs]]
|No
|
'''Rocks''':<br>'''Yellow''': 155 ({{Sparklium|hp|155}})<br>'''Red''': 41 ({{Sparklium|hp|123}})<br>'''Rainbow''': 62 ({{Sparklium|hp|310}})<br>'''Max collectable Sparklium''': {{Sparklium|hp|588}}
|}


Sometimes, there will be bombs and rocks that can be grabbed. These are good to use against the King Beeb during its rolling attack. While it is possible to stun the King Beeb with a rock throw, there is also a chance that a successful rock throw will not stun it. After rolling the King Beeb will end up laying on its back trying to regain its composure, allowing for the Olimar and Pikmin players to deal tons of damage without much risk of getting hurth themselves.
= ''Pikmin 4'' =
Stuff relating to {{p4}}


==Monita's Notes==
= P4 character page =
{{US|y}}: {{transcript|This royal Beeb of all Beebs curls into a ball and rolls around. You'd think its eyes would get in the way when it rolls, but no, it just pulls them in.}}
W.I.P. P4 character page built off of the character preload page.
 
{{infobox character
{{EU|y}}: {{transcript|This big, bad Baub blasts light, curls into a ball and rolls around. ◆ You'd think its eyes would get in the way when it rolls, but no, it just pulls them in.}}
|image      = P4 ID Badge Dash.png
 
|icon      = P4 Character 2 Face Variation 8.png
==Names in other languages==
|size      = 256px
{{foreignname
|name      = Dash
|Jap  = キングザコワラジ
|gender    = Male
|JapR =  
|age        = Unknown
|JapM =
|eyecolor  = Black
|Dut  = Koninginnebaub
|haircolor = Varies
|DutM =  
|homeplanet = Flukuey
|Fra  = Reine Brok
|related    = None
|FraM =  
|height    = Unknown
|FraN =  
|actor      =  
|Ger = Kugelkäferkönigin
|firstgame = ''Pikmin 4''
|GerM =  
|latestgame = ''Pikmin 4''
|GerN  =  
|Ita  = Regina dei Pidolini
|ItaM =  
|ItaN =
|PorP = Rainha Baub
|PorPM =  
|PorPN =
|Rus  = Тапколап-королева
|RusR =
|RusM =
|RusN =
|Spa  = Boloide reina
|SpaM =
|SpaN =
 
|notes = y
}}
}}


==Gallery==
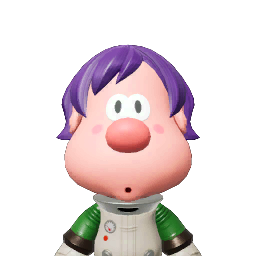
'''Dash''' is a [[leafling]] castaway introduced in {{p4}}. He is always the first leafling from a [[Dandori Battle]] to be cured.
<gallery>
File:PA King Beeb Statue.png|The King Beeb [[Pikmin Adventure prizes|statue]] in the ''[[Nintendo Land]]'' Plaza.
File:PA King Beeb Statue Knocked Down.png|The King Beeb statue knocked down after being interacted with.
File:PikAdv_KingBeeb.jpg|The King Beeb being knocked on its back during a battle.
File:Pikmin adventure 3.png|A King Beeb in a Versus Mode match.
</gallery>


==Trivia==
== Appearance ==
The first two small King Beebs in ''Boss of the Beebs'' are mistakenly referred to as [[Pikmim Adventure enemies#Bombardier Beeb|Bombardier Beebs]] in the [[Prima Games]] ''Nintendo Land'' guide.
By default Dash wears a dull white space suit with green sleeves and white gloves. He has short hair, a round nose, and two large eyes with visible pupils.
{{clear}}


== Bulblord ==
Dash's spacesuit will instead be colored red if the [[Rescue Corps]] selected color is also green. His hair color is dependent on the color of the [[leafling]] that turned out to be him when cured.
[[File:Bulblord NL.png|thumb|300px|The Bulblord during its introduction cutscene.]]


The '''Bulblord''' ({{j|トノサマチャッピー|Tonosama Chappī|Lord Chappy}}) is the first major boss in ''Pikmin Adventure'', appearing in the fourth standard challenge, ''Overthrow the Bulblord''. The Bulblord is an incredibly large [[Bulborb]] that has weak spots and smaller white spots dotted all over its back, stalked eyes that can be destroyed, retractable legs, and a mechanism that allows the head to move independently from the rest of the body.
The [[Pikmin 4 player character|Rescue Officer]] can reproduce Dash's appearance with the following options:
{| class="wikitable"
!colspan="4"|Character creator options
|-
|[[File:P4 skin tone 3.png|64px]] Skin tone 3
|[[File:BodyTypeMedium.png|64px]] Body type 2
|[[File:P4 Character 2 Face Variation 8.png|64px]] Face type 8
|[[File:P4 Character 2 Hair Variation 5.png|64px]] Hair style 5
|}


==Behavior==
== ID badge ==
Once the battle starts, the Bulblord will start walking towards the players, and will do one of three attacks during its first phase. One attack involves the biting of any players near its mouth. Another attack involves the retraction of its legs and weakpoints and rolling from side-to-side across the stage, much like the [[Empress Bulblax]]. The last attack the Bulblord will do during its first phase will be rushing in a straigt line similar to the [[Pikmin Adventure enemies#Red Bulborb|Bulborb]].
{{ID badge
|image = P4 ID Badge Dash.png
|name = Dash
|title = Professional Spelunker
|planet = Flukuey
|line1 = He's known for saying, "You can always find
|line2 = me in the pits!" He'll take the leap into any  
|line3 = cave, no matter how dangerous it is.
}}


During the second phase, the Bulblord will only attack either with its roll or with a combination of the bite and rush attacks that functions similar to the [[Pikmin Adventure enemies#Green Bulborb|Green Bulborb]]'s homing charge.
== Quotes ==
{|class="wikitable sortable"
!Requirement !! Quote
|-
|Talk to Dash for the first time.||
[[File:P4 Character 2 Face Variation 8.png|24px]]
{{Transcript|Wow... I've been drawn to caves for most of my life, but I haven't run into danger like this in a long time.|block=y}}
[[File:P4 Character 2 Face Variation 8.png|24px]]
{{Transcript|My life's quite precious to me... Thanks for helping. After all, I can only poke around in caves if I'm alive, right?|block=y}}
[[File:P4 Character 2 Face Variation 8.png|24px]]
{{Transcript|Oh, I should introduce myself... I'm {{color|Dash|green}}. I've explored all over the universe, thanks to my family's deep pockets.|block=y}}
|-
|Talk to Dash for the second time.||
[[File:P4 Character 2 Face Variation 8.png|24px]]
{{Transcript|The captain warned me that she'd be very angry if I got stranded again, so I can't go explore any caves.|block=y}}
[[File:P4 Character 2 Face Variation 8.png|24px]]
{{Transcript|Oh, hey—I just had the best idea! Starting right now, I'm going to recognize you as my top... well, only... pupil!|block=y}}
[[File:P4 Character 2 Face Variation 8.png|24px]]
{{Transcript|I need you to {{color|explore the caves|darkorange}} around this planet on my behalf. You'll have to make it  {{color|through them all the way to the exits|darkorange}}.|block=y}}
|-
| ||I'd like to start by seeing what kinds of skills you have. Make your way through <span style="color:darkorange">5 caves</span>, and report back.
|-
| ||I can't tell you how disappointed I am not to be able to do this myself, but I've got high hopes for your tenacity.
|-
| ||Be very careful around the creatures here. You can't explore more caves for me if you don't make it safely back to the surface!
|-
| ||Wow! I knew I saw promise in you. I'm a great judge of caving potential. Next, try making your way through <span style="color:darkorange">10 caves</span>.
|-
| ||You, my star pupil, are making great progress to support my life's work!
|-
| ||There may be a lot of danger, but isn't that just part of the thrill of getting to explore caves?!
|-
| ||You keep up an impressive pace when you explore! For your next target, how about... <span style="color:darkorange">15 caves</span>?
|-
| ||Listening to your reports after you explore each cave gets me itching to dive back underground myself.
|-
| ||If you start to feel unsafe, go back to the surface for a while. Knowing when to quit is essential when you explore caves.
|-
| ||You really seem to understand the true "spirit" of caves now! For your final effort, make your way through <span style="color:darkorange">every cave</span>!
|-
| ||It sure does seem like this planet has a remarkable variety in its many caves.
|-
| ||The caves here are full of mystery and adventure, with creatures and treasures that point to a fascinating culture!
|-
| ||It seems I do have excellent judgment. You really are a top-notch pupil, both in name and reality!
|-
| ||In recognition of your great achievements, I'd like to offer this phrase I keep in mind as parting words to you. "<span style="color:darkorange">You can always find me in the pits!</span>" I hope we get a chance to explore some caves together one day.
|-
| ||You seem to be traveling through those caves at a good clip. Drop your latest report on me.
|-
| ||I want to help you discover the "spirit" of caves. You should continue your endeavor to explore even more of them.
|-
| ||What's this?! You've already completed your travels! Whoa! You're miles ahead of what I was expecting.
|-
| ||My title of Cave Researcher feels even more mediocre in the face of your great achievements. You've done amazing work!
|-
| ||I see you've already made your way through several caves. I would expect no less from my star pupil!
|-
| ||Your attitude... the way you take on these caves so enthusiastically... It's like when I first discovered the underground world.
|-
| ||About that "Industrial Maze" matter you reported... That sounded extremely interesting! The caves repeatedly show evidence of intelligent life-forms that evolved in an entirely different way from us. Machinery that keeps working forever, floors that float in the air... It sure does stir the imagination!
|-
| ||When I heard your report about the Secluded Courtyard,  I was moved by the beauty of the silence you described. White sand spread out with a pattern in it. Hard botanical cylinders arranged here and there. There even seems to be significance to how the flat rocks are lined up... These are traces of a civilization we don't know.
|-
| ||Among the many caves you've been to, my sense of aesthetic is most drawn to the Seafloor Resort. The marine-blue water, the expansive sandy beach, the beautiful, strange, and sometimes dangerous aquatic creatures... The constant sound of flowing water must've been peaceful as well.
|-
| ||The building-block clearing like out of a fairy tale, the pastel-colored floor that creates a tranquil and bright mood... Thriving giant mushrooms to jump and play on... It does feel dreamy, like the name Dream Home implies. It shows the playfulness possible when a culture matures... This cave really stokes one's inner adventurer and poet!
|-
| ||The Mud Pit you reported on... a lake of poisonous mucus where spores and mycelia are interwoven. I'm so jealous that you got to explore that cave and get all sticky and mucky hiking through it! After all, the more hardship, the bigger the sense of accomplishment when you make it to the end!
|-
| ||The caves here are full of mystery and adventure, with creatures and treasures that point to a fascinating culture!
|-
|Talk to Dash while playing as Oatchi.||This is embarrassing to admit, but I've been stranded in caves countless times, only to be saved by Rescue Pups like you.
|-
|Talk to Dash while playing as Oatchi.||I live my life bouncing from adventure to adventure, so sadly I can't have a dog.
|-
|Talk to Dash while looking like him.||A few years ago, I was diving in a cave made of a mirror-like substance. Wherever I looked, I saw countless copies of myself. You and I look so much alike, it brought back memories from that eerie experience.
|-
|}


==Strategy==
== Naming ==
{{guide}}
Dash's name may allude to {{w|Dachshund}}s.


It is advised to use a strategy similar to the one used to defeat the [[Pikmin Adventure enemies#Bilious_Bulborb|Bilious Bulborb]], as getting it to turn around in single player is hard; simply have [[Olimar]] run behind it, causing it to turn around to attack them. While still dodging its attacks, get the other Mii Pikmin players to attack its weak points.
=== Names in other languages ===
 
After all of the weakpoints have been destroyed, it will gain 2 new ones on its knees. It is best to use the distracting method to aim at these, as the Bulblord will begin to move much faster once these are exposed. Its main attack is a charging-bite in which it dashes across the whole stage in a single direction.
 
Once both of the weakpoints on thelegs are destroyed, it will helplessly roll onto his back, revealing its final weakpoint on its underbelly. Simply throw all your Pikmin and destroy it, which will cause the Bulblord to roar in agony before exploding into ''Nintendo Land'' Coins, the park's currency. After defeating the Bulblord, it is possible to unlock it as a [[Pikmin Adventure prizes|statue]] in the Plaza.
 
Destroying both of the Bulblord's eyes will not contribute to the fight in any way aside from rewarding the player with a stamp, the ''Eyes of the Bulblord''.
 
==Monita's Notes==
{{US|y}}: {{transcript|With its sharp teeth and devastating roll attack, this is a foe to fear. I highly advise you to take caution if you don't want to get crushed into scrap metal!}}
 
{{EU|y}}: {{transcript|With its sharp teeth and devastating roll attack, this is a foe to fear. ◆ Take Bulblords on one at a time or you'll end up with Pikmin pâté!}}
 
==Naming==
{{see also|Grub-dog family#Naming}}
 
==Names in other languages==
{{foreignname
{{foreignname
|Jap  = トノサマチャッピー
|Jap  = ダックス
|JapR = Tonosama Chappī
|JapR = Dakkusu
|JapM = Lord Chappy
|JapM = From {{j|ダックスフンド|Dakkusuhundo|Dachshund|f=tp}}
|Dut  = Bulblord
|Dut  = Teck
|DutM =  
|DutM = From "teckel" (Dachshund)
|Fra  = Bulblord
|Fra  = Tex
|FraM =  
|FraM = From "Teckel" (Dachshund)
|FraN =
|Ger  = Dack
|Ger  = Oberpunktkäfer
|GerM = From "Dackel" (Dachshund)
|GerM = Chief Bulborb
|Ita  = Dash
|GerN  =
|ItaM = -
|Ita  = Bosscoleto
|Kor = 닥스
|ItaM = Boss-Bulborb
|KorR = Dakseu
|ItaN =
|KorM = From {{tt|닥스훈트|Dakseuhunteu}} (Dachshund)
|Spa = Bulbo feroz
|Spa = Teckel
|SpaM =  
|SpaM = From "Teckel" (Dachshund)
|PorP  = Lordbolbo
|Por  = Salchi
|PorPM =
|PorM = From "cão-salsicha" (sausage dog)
|PorPN =
|Rus = Клубнекороль
|RusR =  
|RusM =  
|RusN =  
|notes = y
}}
}}


==Gallery==
== Gallery ==
{{image}}
<gallery>
<gallery>
PA Bulblord Statue.png|The Bulblord [[Pikmin Adventure prizes|statue]] as seen in the ''Nintendo Land'' Plaza.
PA Bulblord Statue roar.png|The Bulblord statue roaring after being interacted with once.
PA Bulblord Statue retracted.png|The Bulblord statue with its legs retracted after interacting with it two times.
PA Bulblord Statue retracting.png|The Bulblord statue in the middle of getting back on its legs after interacting with it three times.
PA Bulblord Statue alternate roar.png|The Bulblord statue roaring while rotating its head after interacting with it four times.
PA Bulblord Sleeping.png|The Bulblord sleeping at the start of its introductory cutscene in ''Overthrow the Bulblord''.
PA Bulblord Awakening.png|The Bulblord waking up during its introduction cutscene.
PA Bulblord Roar.png|The Bulblord roaring during its introduction cutscene.
NintendoLand PikminAdv.png|The Bulblord boss fight.
PA Bulblord roll attack.png|The Bulblord while it is rolling.
PA Bulblord bite attack.png|The Bulblord biting.
PA Bulblord tired.png|The Bulblord panting, unable to do any attacks.
PA Bulblord stunned.png|The Bulblord while it is stunned, unable to do any attacks.
PA Bulbord Extra Weak Spots.png|The Bulblord revealing extra weak spots during the transition cutscene between phase 1 and 2.
PA Enraged Bulblord.png|The Bulborb getting enraged.
PA Bulblord charging bite attack.png|The Bulblord doing its charging bite attack exclusively in phase 2.
PA Bulblord knocked over.png|The Bulblord while it is knocked over.
PA Bulblord Defeat.png|The Bulblord after being defeated.
</gallery>
</gallery>
{{clear}}


== Large-Mouth Wollywog ==
== See also ==
[[File:Large-Mouth_Wollywog_NL.png|thumb|300px|The Large-Mouth Wollywog sticking out its tounge during its introduction cutscene.]]
{{game help|p4|List links to similar subjects.}}


The '''Large-Mouth Wollywog ''' ({{j|オオグチイモガエル|Oo Guchi Imo Gaeru|Big-mouthed Potato Frog}}; known as the '''Largemouth Wollyhop''' in the European version of ''[[Pikmin Adventure]]'') is the second major boss fought in ''Pikmin Adventure'', being found in the eight challange, ''Swamp Master'' (known as ''Master of the Marsh'' in the European version). It has almost no resemblance to the [[Wollyhop|Wollywog]] aside from its basic shape being somewhat similar, instead featuring large cheecks hiding weak spots, stalked eyes, and a large, gaping mouth with a long tongue that ends with either a weak point or a [[Spike Ball]].
{{characters}}


==Behavior==
== Character creator table ==
Once the battle starts, the Large-Mouth Wollywog will stay put in the pond in the middle of the arena, where it will either go underwater or do its attack. The Large-Mouth Wollywog's attack is different from other [[Amphituber family|Wollywogs]] due to the fact that it attacks by unraveling its spiked tongue out of its large, gaping mouth to damage players. After 3 attacks or if the weakspot is hit, the Large-Mouth Wollywog will be stunned by the tounge hitting its head, unable to attack for a short time while the tounge and the weak spot on it is exposed. Once the weak spot on the tounge has been destroyed, the Large-Mouth Wollywog will proceed to hop up before landing back into the pond it started in, leaving the pond dry and the boss stunned with the weak points on its cheeks exposed. After it recovers, the boss will then start to hop around the arena and unrevel its tounge with a [[Spike Ball]] in place of the broken weak spot. It will repeat this process until it eventually hops back into the pond and it refills with water and hide the weak spots on its cheeks. Once both weak spots on its cheeks are detroyed, the Large-Mouth Wollywog will yell and close the now destroyed weak spots while the pond is being refilled. During phase 2 the Large-Mouth Wollywog will hop out of the pond and around the stage and unraveling its spiked tongue 3 times in a row before it hops back into the water and repeats the process until it is defeated.
A potential replacement for the appearance section for ''Pikmin 4'' castaways.


==Strategy==
Dash uses the following character creator parts that do not change depending on the player's colors.
{{guide}}


As soon as the battle starts, you must be moving constantly to ensure the creature's tongue does not hit you. Staying near the edges of the pond will make it easier to dodge, since the boss has a hard time rotating while in the pond. Once its tongue hits the creature's face on its way back, it will be stunned and the weak spot at the end of the tongue can be attacked without much risk. Once the tongue is destroyed, the Large-Mouth Wollywog will hop and clear the pond of water alongside opening the weak spots on the cheecks. Once it recovers it will start attacking at a much faster pace with a [[Spike Ball]] at the end of the tongue.
{| class="wikitable"
!colspan="4"|Character creator parts
|-
|[[File:P4 skin tone 3.png|64px]]
|[[File:BodyTypeMedium.png|64px]]
|[[File:P4 Character 2 Face Variation 8.png|64px]]
|[[File:P4 Character 2 Hair Variation 5.png|64px]]
|}


Once the weak spots on the cheecks are destroyed, the Large-Mouth Wollywog will enter its second phase, beginning to jump wildly across the stage counterclockwise, and after four hops (two small, two large), it will shoot out its tongue. Stay on the opposite side of the arena during this, and dodge the attacks. Once the Wollywog finishes, quickly chase after where it is going to land and stay near it. Circle it so that you are always behind its back, making it easy to dodge the tongue. When it finishes its attack, shoot an onslaught of Pikmin at the weak spot on its back. Once this weak spot has been destroyed, it will be defeated.
= '''''Pikmin  4'' enemy parameters''' =
Parameters for {{p4}}'s enemies, taken from <code>DT_TekiParameter.uasset</code>, along side what they likely do.


==Monita's Notes==
ActorName - Internal name for the actor
{{US|y}}: {{transcript|The dreaded master of the swamp, this alien creature wields its tongue like a lead-plated yo-yo. It also has the ability to absorb great quantities of water to keep its skin nice and slimy.}}


{{EU|y}}: {{transcript|The dreaded master of the swamp, this alien creature wields its tongue like a lead-plated yo-yo. It also has the ability to absorb great quantities of water to keep its skin nice and slimy.}}
CarryWeightMin - Minimum carry weight


==Names in other languages==
CarryWeightMax - Maximum carry weight
{{foreignname
|Jap  = オオグチイモガエル
|JapR =
|JapM =
|Dut  = Breedgebekte Wollyhop
|DutM =
|Fra  = Wog Sauteur à Grande Gueule
|FraM =
|FraN =
|Ger  = Großmaul-Orcalog
|GerM =
|GerN  =
|Ita  = Ranuca idropica boccamagna
|ItaM =
|ItaN =
|Spa  = Sapo gigante bocazas
|SpaM =
|PorP  = Batrassalto de Boca Larga
|PorPM =
|PorPN =
|Rus  = Большеротый вопапрыг
|RusR =
|RusM =
|RusN =
|notes = y
}}


==Gallery==
CarryWeightMinVs - Minimum carry weight in [[Dandori Battle]]
<gallery>
PA Large-Mouth Wollywog Statue.png|The [[Pikmin Adventure prizes|statue]] of the Large-Mouth Wollywog as seen in the ''[[Nintendo Land]]'' plaza.
PA Large-Mouth Wollywog Statue Knocked Down.png|The Large-Mouth Wollywog statue knocked down after being interacted with once.
PA Large-Mouth Wollywog Statue Recovering.png|The Large-Mouth Wollywog statue recovering from its knockout after being interacted with twice.
PA Large-Mouth Wollywog Statue Roar.png|The Large-Mouth Wollywog statue roaring after being interacted with three times.
</gallery>
{{clear}}
 
==Emperor Pinchipede==
[[File:Emperor Pinchipede NL.png|thumb|300px|The Emperor Pinchipeede during its introductory cutscene.]]
 
The '''Emperor Pinchipede''' ({{j|ダイオウハサミムカデ|Daiō Hasami Mukade|Great King Scissors Centipede}}) is the third major boss encountered in ''[[Pikmin Adventure]]''. It is a centipede like creature with a green side with weak spots and an orange side featuring spikes to take out players. Its seperated appearance and mandibles bears a resemblance to the [[Armored Mawdad]], a creature in ''[[Pikmin 3]]''.
 
==Strategy==
The Emperor Pinchipede's body is divided into 11 segments, 9 of which have their own weakpoints. 4 of these segments are larger than the others, and are linked together by the smaller segments. Its head, which is its 1st segment, is equipped with a large pair of sharp mandibles which will instantly take out anyone in its way. It is impossible to stun it, leaving you without your stun strategy.
 
As the Emperor Pinchipede crawls around the battlefield, its weak points can be openly attacked. However, whenever one of the 4 larger segments is broken off, it will land back into the arena and starts to move around the stage, spinning wildly on its orange side with spikes all over it. It is best advised to take out the smaller segments first so the battlefield will be less cluttered.


[[File:Emperor_Pinchipede_Angry.png|thumb|The Emperor Pinchipede getting enraged (its dangerous sides are colored in orange).]]
CarryWeightMaxVs - Maximum carry weight n Dandori Battle


After all its weak points are destroyed, it will enter its second phase, gaining 1 more on its head segment. However, it will attack by constantly compacting his body segments like an accordion before turning onto its orange side and start shooting itself across the stage. During this process, the weakpoint is also turned over, revealing spikes, making the entire body a dangerous hazard. After it finishes this attack it will immediatly start charging another attack. This time is the ideal time to attack the head.
CarryIncPikmins - Sprouts produced by the [[Onion]]


After its head weakpoint is damaged down to half of its health, the Emperor Pinchipede will seperate from all but one segment and start constantly moving while biting. During this phase all of the other segments will once again turn to their orange sides and start moving independantly. The Emperor Pinchipede will periodically stop moving for a but before continuing to move around the stage, making for a great time to attack it while dodging the other segments.
MaxLife - HP value


==Monita's Notes==
Kira - [[Sparklium]] value?
{{transcript|This beast's segmented body has plenty of weak points, making it easy to target. However, it will hide them when it is upset. Just don't get too close to its snapping jaws.|block=y}}


==Names in other languages==
Poko - [[Dandori]] point value in [[Dandori Challenge]]?
{{foreignname
|Jap  = ダイオウハサミムカデ
|JapR =
|JapM =
|Dut  = Keizerpinchipede
|DutM =
|Fra  = Empereur Mille-Klak Pinceur
|FraM =
|FraN =
|Ger  = Kaiserkaufüßler
|GerM =
|GerN  =
|Ita  = Centiciompo imperatore
|ItaM =
|ItaN =
|Spa  = Ciempiédulo emperador
|SpaM =
|PorP  = Centopinça Imperial
|PorPM =
|PorPN =
|Rus  = Императорская сорокодавка
|RusR =
|RusM =
|RusN =
|notes = y
}}


<gallery>
VsScore - Dandori point value in Dandori Battle?
File:Emperor Pinchipede statue.jpg|The statue of the Emperor Pinchipede.
</gallery>


==Trivia==
BombHit - [[Bomb Rock]] explosions needed to kill the actor?
*The name "Pinchipede" is a combination of "pinch" and "centipede".
{{clear}}


==Greater Bladed Beeb==
BombInsideHit - Bomb Rocks consumed needed to kill the actor?
[[File:Greater_Bladed_Beeb.png|thumb|300px|The Greater Bladed Beeb during its introduction cutscene.]]


The '''Greater Bladed Beeb''' ({{j|キザミワラジ|Kizami Waraji|Cutting Woodlouse}}; known as the '''Greater Bladed Baub''' in the European version of ''Pikmin Adventure'') is the fourth and final boss of the standard challenges in ''[[Pikmin Adventure]]''. It is a large, glossy, purple praying mantis-like creature with blades on its arms. It is the only boss in ''Pikmin Adventure'' to be treated like a normal enemy in the advanced stages.
PoisonHit - [[White Pikmin]] consumed needed to kill actor?


==Monita's Notes==
PurpleDirectHit - Purple Pikmin latching on needed to kill actor?
{{US|y}}: {{transcript|This alien insect is slow to wake but quick to anger. The adrenaline rush causes it to speed up and turn red with fury.}}


{{EU|y}}: {{transcript|This alien insect is slow to wake but quick to anger. The adrenaline rush causes it to speed up and turn a furious red.}}
PressHit - ???


==Attacks==
IceBombHit - [[Ice Blast]] explosions needed to [[freeze]] actor?
Once the Greater Bladed Beeb notices the player, it will crawl about the stage, widely swinging its blades. It has three different attacks: one attack with one blade two consecutive times, a seecond attack using both blades and dashes forward shaking off Pikmin, and a third attack where it spins in a circle, which also shakes off Pikmin. Once one of its weak points is broken, it will roar very loudly and turn red, starting the second phase. Now it will use its strike attack and double blade attacks 3 times consecutively.


==Strategy==
IceBombInsideHit - Ice Blast consumptions needed to freeze actor?
{{guide}}
Both the head and abdomen are the Greater Bladed Beeb's weak points, but attacking them is made difficult by the boss's reflexes and ability to quickly turn around. Therefore, this boss is best fought in multiplayer. It can be dazed temporarily with a [[rock]], unlike most bosses. Bombs will not stun it, though it will deal a sizable amount of damage. It will occasionally strike, but miss, and its blades will remain stuck in the ground. This is a great time to attack, as well as throw a rock at it, as it will stun it even further.


[[File:Bladed Beeb roar NL.png|thumb|The Greater Bladed Beeb after breaking one of its weak points.]]
FreezeHit - [[Ice Pikmin]] damage needed to freeze enemy?
Once the second phase of the battle is initiated, it becomes harder to attack. Wait until it misses with its blade spin attack and use the short moment of time to attack it's backside or the back of its head. A wise strategy is to run around it while at a close distance. If executed correctly, it will not harm the player. Wait until it is finished attacking to attack it in the short window of time in between attacks.


Another slightly more risky strategy is when it comes to slice up, walk straight into it. The Bladed Beeb only hits where the player is at a certain time, and by moving closer, the blades will not harm you. This is risky, since it could very easily get you while coming in. Another wise strategy for the Olimar player is to utilize the [[Pikmin Adventure#Whip Seed|Whip Seed]] or [[Pikmin Adventure#Knuckle Seed|Knuckle Seed]]. By staying far away from it, the GamePad user can easily pelt it from a safe distance. This works even better in multiplayer, where the Pikmin can distract the Beeb while the GamePad user pelts it from afar.
FreezeInsideHit - Ice Pikmin consumption needed to freeze enemy?


In ''Cage of Terror'', you must fight 3 smaller Elemental Bladed Beebs with lower health. The same strategies apply here, but the Beebs now have a shorter attack range and less health, making it an easier fight.
FreezeDamageRatio - How much Ice Pikmin damage adds up to freeze wheel?


==Names in other languages==
CrushHit - Damage taken from crush attacks?
{{foreignname
|Jap  = キザミワラジ
|JapR =
|JapM =
|Dut  = Vlijmscherpe Baub
|DutM =
|Fra  = Grand Brok Faucheur
|FraM =
|FraN =
|Ger  = Klingenkugelkäfer
|GerM =
|GerN  =
|Ita  = Ultrapidolino fochista
|ItaM =
|ItaN =
|PorP  = Baub Encrustado
|PorPM =
|PorPN =
|Rus  = Большой лезволап
|RusR =
|RusM =
|RusN =
|Spa  = Boloide cortante
|SpaM =
|SpaN =


|notes = y
FrozenCrushDamageRate - Damage taten from crush while frozen?
}}


==Gallery==
SnowBallDamage - Damage taken from snowballs?
<gallery>
BladedBeebStuck.png|The Greater Bladed Beeb stuck in the ground.
BladedBeebFight.png|Fighting the Greater Bladed Beeb during its second phase.
BladedBeebDefeat.png|The Greater Bladed Beeb is defeated.
File:Bladed Beeb 1.jpg|The statue of the Greater Bladed Beeb.
File:Bladed Beeb 2.jpg|When the statue of the Greater Bladed Beeb is interacted with a second time, it tries to attack.
File:Bladed Beeb 3.jpg|When the statue of the Greater Bladed Beeb is interacted with a third time, it pretends to be defeated.
</gallery>


==Trivia==
StoneDamage - Damage taken from [[Pebble Pitcher]]?
*The bottom half of its spherical head seems to resemble a microphone or speaker. This may explain how it makes its deafening roar, despite having no mouth.
*The Greater Bladed Beeb has a lot of characteristics that other bosses don't possess. Its the only boss seen multiple times in some levels, be seen in both the main and advanced stages, and be treated as a normal enemy.
* The Greater Bladed Beeb is referred to as the "Bladed Beeb" during its introductory cutscene.
{{clear}}


==Grand Bulblord==
ThunderStopTime - How long actor is paralyzed by [[Lightning Shock]]?
[[File:Grand Bulblord NL.png|thumb|300px|The Grand Bulblord during its introduction cutscene.]]
The '''Grand Bulblord''' ({{j|ショーグンチャッピー|Shōgun Chappī|General Chappy}}) is the first boss in the extra challenges of ''[[Pikmin Adventure]]''. It is a variant of the [[Bulblord]] found in the standard challenges. It has a similar color scheme to the [[Emperor Bulblax]] from the [[Pikmin series|main series games]] and the [[Pikmin Adventure enemies#Green Bulborb|Green Bulborb]] also seen in ''Pikmin Adventure''.


==Behavior==
CrushStopTime - ???
The Grand Bulblord's attacks are very similar to those of the Bulblord, only faster.


==Strategy==
CrushKnockBackSpeed - ???
{{guide}}
The Grand Bulblord has the same strategy as the original Bulblord, but the Grand Bulblord has more health, does not react when the weak points on its back are destroyed, and is faster during its second phase.


What you must do is remove all of its weak points from its back. If you are low leveled, it is recommend to go for the smaller ones first, as they break easily and give you lots of [[Nectar#Pikmin Adventure|nectar]] for you to level up with. In the last challenge of the attraction, '''Goodbye Pikmin''', which is a boss rush, a few Creepy Beebs and a [[Bulborb#Pikmin Adventure|Bulborb]] will spawn in. Getting rid of these first will provide a decent amount of nectar.
FlashbangRate - ???


Once the Grand Bulblord's back weakpoints have been destroyed, its sclera will turn black, and the rings around it's pupils red with rage. The joints on its legs open up into weakpoints, providing the next objective. Begin targeting only one of the legs so that when it breaks, the Grand Bulblord will fall over onto its back, revealing its major weak spot on its underbelly. Once it starts falling over, call your Pikmin and teammates and begin throwing them on top so that everyone can help out. Like the Bulblord, it is possible to get a stamp by attacking and breaking its eyes, which act similar to its weakpoints.
FreezeDropType - Type of drops if actor is killed while frozen


When the final weak point breaks, the Grand Bulblord's head begins to spin ferociously, slowing down gradually until the entire body explodes.
DropStationPieceNum - How many [[Glow pellet]]s actor drop?


Destroying both of the Grand Bulblord's eyes will reward the player with a stamp, the ''Eyes of the Bulblord''.
URODistanceThesholds - ???


==Naming==
{{see also|Grub-dog family#Naming}}


===Names in other languages===


{{foreignname
PlayerDamage - Damage it deals to the player?
|Jap  = ショーグンチャッピー
|JapR = Shōgun Chappī
|JapM = General Chappy
|Dut  = Bezeten Bulblord
|DutM =
|Fra  = Général Bulblord
|FraM =
|FraN =
|Ger  = Königspunktkäfer
|GerM =
|GerN  =
|Ita  = Gran Bosscoleto
|ItaM  = Big Boss-Bulborb
|ItaN =
|PorP  = Baub Encrustado
|PorPM =
|PorPN =
|Rus  = Главный клубнекороль
|RusR =
|RusM =
|RusN =
|Spa  = Gran bulbo feroz
|SpaM =
|SpaN =


|notes = y
OtherDamage - Damage it deals to other actors?
}}


==Gallery==
FlashBangTargetWeight - ???
<gallery>
File:Grand Bulblord angry NL.png|The Grand Bulblord enrages during its transition cutscene.
</gallery>
{{clear}}
{{clear}}


==Translucent Wollywog==
= Bomb Rock =
[[File:Translucent_Wollywog_NL.png|thumb|300px|The Translucent Wollywog during its introduction cutscene.]]
{{infobox upgrade
|p1              = y
|p2              = y
|p3              = y
|p4              = y
|name            = Bomb Rock
|icon            = Bomb Rock P4 icon.png
|image          = Bomb Rock P4 icon.png
|size            = x150px
|caption        = The Bomb Rock's icon in ''Pikmin 4''.
|function        = Explodes after being thrown or interacted with.
|requirements1  = Found in field
|requirements2  = Found in caves
|requirements3  = Reward from roulette wheel, found in field, dug up from [[dirt mound]]s
|requirements4  = Have reached {{sparklium|p4|3000}}, buy for {{icon|Raw material}} &times; 8, reward from roulette wheel
}}


The '''Translucent Wollywog''' ({{j|オオグチカスミガエル|Oo Guchi Kasumi Gaeru|Big-mouthed Haze Frog}}; known as '''Translucent Wollyhop''' in the European version) is the second boss to be fought in the extra challenges of ''[[Pikmin Adventure]]''. It is almost the same exact boss as the [[Large-Mouth Wollywog]] from the 16 standard challenges. The only differences between the two are that the Translucent Wollywog is see-through compared to the Large-Mouth Wollywog which is yellow, and that it shoots its tongue out three times in a row instead of just one time.
The '''Bomb Rock''' ({{j|バクダン岩|Bakudan iwa|Bomb rock}}; formatted as '''bomb-rock''' prior to ''Pikmin 3'') is an explosive rock found in the [[Pikmin series|''Pikmin'' games]]. Upon being activated, a Bomb Rock's fuse starts going down (represented by a [[Health#Health wheel|colored wheel]] in the first two games), and when it reaches zero, the bomb causes a violent explosion, capable of damaging [[enemy|enemies]], [[leader]]s, some [[obstacle]]s and knocking back and subsequently killing any [[Pikmin family|Pikmin]].


==Strategy==
How it works has changed, in some fashion, in every entry. In the [[Pikmin (game)|first]] and [[Pikmin 3|third]] games, it can be carried by Pikmin, but only by [[Yellow Pikmin]] in the former. In ''[[Pikmin 2]]'', is slightly larger and serve as an obstacle instead of a tool, with the exception of the [[2-Player Battle]] stage [[Hostile Territory]], where it can be picked up and thrown by leaders. It also appears as an item in 2-Player Battle and [[Bingo Battle]]. In ''[[Pikmin 4]]'' it's instead an item used by leaders and can be either found in the field or bought from [[Russ]] for 8 [[raw material]]s per Bomb Rock after accumulating a total of 3000 [[Sparklium]]. In the side story [[Olimar's Shipwreck Tale]], Bomb Rocks are similarly found scattered around the four areas, and Olimar gains additional Bomb Rocks as milestone bonuses for recovering 2 and then 13 [[ship part]]s.
The strategy used for the Large-Mouth Wollywog also applies here. When it shoots out its tongue, attack it while it is still out, and it will hit itself in the head and be dazed for a bit. It will become dazed on its own, but it will take a while. Use this interval of time to attack the weak point on its tongue, which should break in no time. Once it breaks, the Translucent Wollywog will move back into the center of the pond. Its cheeks are now open as weak points, proceed to throw Pikmin at them, dodging any tongue attacks. After the player breaks both cheeks, its back becomes the final weak point. At this time, it is best to locate a rock, and throw it at the Translucent Wollywog. Chances are that it will be stunned for a decent amount of time, so get behind the Wollywog and throw Pikmin at its back until it breaks, finishing the fight.
 
===Names in other languages===
 
{{foreignname
|Jap  = オオグチカスミガエル
|JapR =
|JapM =
|Dut  = Doorzichtige Wollyhop
|DutM =
|Fra  = Wog Translucide
|FraM =
|FraN =
|Ger  = Durchsichtiger Orcalog
|GerM =
|GerN  =
|Ita  = Ranuca idropica traslucida
|ItaM  =
|ItaN =
|PorP  = Batrassalto Translúcido
|PorPM =
|PorPN =
|Rus  = Прозрачный вопапрыг
|RusR =
|RusM =
|RusN =
|Spa  = Sapo gigante translúcido
|SpaM =
|SpaN =
 
|notes = y
}}
 
==Trivia==
*Interestingly, the Translucent Wollywog is classified under the [[wollywog family]], not the [[amphituber family]], in both the American and Japanese versions of the game. This is not the case in the European version.
{{clear}}
{{clear}}


==Monochromatic Pinchipede==
== '''Pikmin 4 Cave Types''' ==
[[File:Monochromatic Pinchipede NL.png|thumb|300px|The Monochromatic Pinchipede during its introduction cutscene.]]
The 10 different [[cave]] types in {{p4}}, taken from the folder names in Carrot4/Terrain/Cave/Type, with a few caves that use said themes.
{{clean}}


The '''Monochromatic Pinchipede''' ({{j|シロクロハサミムカデ|Shirokuro Hasami Mukade|Monochrome Scissors Centipede}}) is the third boss fought during {{pa}}{{'s}} extra challenges. Like other members of the [[Pinchipede family]], it is a long centipede-like insect with huge serrated pincers. It looks very similar to the [[Emperor Pinchipede]], only here, it is colored white and has higher speed and health. It looks blue in the first battle it is fought, due to the ambient lighting; during the Boss Rush, it has an orange tint, for the same reasons.
Aquarium - Set in an aquarium tank. Used in [[Planning Pools]]
{{clear}}


==Strategy==
Blocks - Set in a room similar to ''Pikmin 2'''s [[Pikmin 2 cave generation#Floor designs|Toybox]] theme. Used in [[Trial Run]], [[Battle in a Box]], and [[Final Battle]]
{{guide}}
The Monochromatic Pinchipede is fought more-or-less the same way as one would fight the Emperor Pinchipede. The only difference is that the fight requires more care to be taken overall: The Monochromatic Pinchipede has more health compared to it's predecessor, and is generally faster overall.


Begin by targeting the smaller segments of its body. Ironically, these smaller segments have significantly more health than the larger ones, presumably because the larger weak points double as spinning spike tops that circle the arena.
Brick - Walls and elevated areas are made out of bricks. Used in [[Crackling Cauldron]]


Once the smaller portions are removed, quickly remove the larger, more threatening, weak points, which should be easier due to their smaller health pool. After all of the portions are destroyed, the larger spinning sections will stop, and retract back to their original place on the Monochromatic Pinchipede.
Common - Unknown


[[File:Monochromatic Pinchipede angry NL.png|thumb|The Monochromatic Pinchipede's black, more dangerous side.]]
Concrete - Made out of tiles not to dissimilar to ''Pikmin 2'''s [[Pikmin 2 cave generation#Floor designs|Tiles]] theme. Used in [[Subzero Sauna]]
The Monochromatic Pinchipede will now pull itself backward and charge up an attack, which reveals its last weak point located on its head. Use this opportunity to dish out as much damage as possible. It will flip over to its black side and rampage across the arena, trying to corner you and crush you with its gaping mandibles. After a few seconds, it will start to slow down, indicating it will start to charge up its attack again.


Once this weak point reaches a quarter of its health, all segments will fling away from the Monochrome Pinchipede and spin around the stage. Care must be taken during this phase.  Avoid the spinning platforms, and wait for the Pinchipede to charge into you. Dodge its attack and begin throwing Pikmin onto its back. These Pikmin will stay on there forever, as the Pinchipede now has no way to shake them off. At this point, you can wait out the battle by avoiding it's attacks while the Pikmin whittle it down, or try to add more Pikmin to the attack to kill it faster. Be careful, though, because the Monochromatic Pinchipede will now constantly chomp it's mandibles during this phase.
Garden - Walls made out of bamboo and rocks. Used in [[Aquiferous Summit]]


Eventually, the last weak spot will reach 0 HP, and the Monochromatic Pinchipede will die.
Last - Used in sublevel 20 of [[Cavern for a King]]


===Names in other languages===
Metal - Very similar style and assets to ''Pikmin 2'''s [[Pikmin 2 cave generation#Floor designs|Metal]] theme. Used in [[Below-Grade Discotheque]]
{{todo|Find the Russian name due to it not being easily extractable.}}
{{foreignname
|Jap  = シロクロハサミムカデ
|JapR =
|JapM =
|Dut  = Zwart-witte Pinchipede
|DutM =
|Fra  = Mille-Klak Bicolore
|FraM =
|FraN =
|Ger  = Schwarzweißkaufüßler
|GerM =
|GerN  =
|Ita  = Centiciompo monocromatico
|ItaM  =
|ItaN =
|PorP  = Centopinça Monocromática
|PorPM =
|PorPN =
|Rus  =
|RusR =
|RusM =
|RusN =
|Spa  = Ciempiédulo bicolor
|SpaM =
|SpaN =


|notes = y
Sand - Similar in style to Blocks, except with sand. Used in [[Dandori Castle]], [[Leafy Showdown]], and [[Hot Sandy Duel ]]
}}


==Gallery==
Soil - Walls made out of soil. Used in [[Hectic Hollows]], [[Engulfed Castle]]
<gallery>
 
</gallery>
{{clear}}
{{clear}}


==Greater Studded Beeb==
== ''Pikmin'' media navigation ==
[[File:Greater_Studded_Beeb_NL.png|thumb|300px|The Greater Studded Beeb during its introduction cutscene.]]
The following is a list of media related to the {{ps}}, including games relating to ''Pikmin'', or games with ''Pikmin'' content.
The '''Greater Studded Beeb''' ({{j|アバレワラジ|Abare Waraji|Raging Woodlouse}}; known as '''Greater Studded Baub''' in the European version) is the boss of the nineteenth level (''The Tyrant Arrives'' in the European version) and the final boss of the ''Nintendo Land'' attraction ''[[Pikmin Adventure]]''. It shares the same basic shape with the [[Bladed Beeb]], only it has [[Spike Ball]]s for hands instead of blades, and starts off with yellow lights instead of green.


==Strategy==
=== Main series ===
The strategy for killing this beast is basically exactly the same as the Bladed Beeb. Just be wary that the Greater Studded Beeb has significantly more vitality, and is better at blocking attacks from the [[Pikmin Adventure#Power-ups|Knuckle Seed]] with its Spike Balls.
<gallery class="center" widths="160" heights="80">
Pikmin logo.png|link=Pikmin (game)|'''{{p1}}'''<br>(2001)
Pikmin 2 logo.png|link=Pikmin 2|'''{{p2}}'''<br>(2004)
Pikmin 3 logo.png|link=Pikmin 3|'''{{p3}}'''<br>(2013)
Pikmin 4 Logo.png|link=Pikmin 4|'''{{p4}}'''<br>(2023)
</gallery>


[[File:Greater Studded Beeb roar NL.png|thumb|The Greater Studded Beeb enraged after one of its weakspots are destroyed for the first time.]] The first thing that must be completed to defeat this foe is breaking one of its weak points. Once one of them breaks, it will roar in rage and the yellow lights will turn red, speeding up its attacks and adding consecutive strikes to its attacks.
=== Spin-offs ===
<gallery class="center" widths="160" heights="80">
Pikmin Puzzle Card Logo.png|link=E-Reader#Pikmin_Puzzle_Card_mini-games|'''''[[E-Reader#Pikmin_Puzzle_Card_mini-games|Pikmin Puzzle Card ]]'''''<br>({{p2}}, 2004)
Navigation Hey! Pikmin logo.png|link=Hey! Pikmin|'''{{hp}}'''<br>(2017)
Pikmin Bloom logo 2022.png|link=Pikmin Bloom|'''{{pb}}'''<br>(2021)
</gallery>


Keeping your distance using Knuckle Seed or [[Pikmin Adventure#Power-ups|Whip Seed]] is one good strategy, and dashing to either direction when he prepares his double arm smash attack is wise if you want to keep you power-up.
=== Re-releases ===
<gallery class="center" widths="160" heights="80">
NPC! Pikmin logo.jpg|link=New Play Control! Pikmin|'''{{npcp1}}'''<br>(2008)
NPC! Pikmin 2 logo.jpg|link=New Play Control! Pikmin 2|'''{{npcp2}}'''<br>(2009)
Pikmin 3 Deluxe new logo.png|link=Pikmin 3 Deluxe|'''{{p3d}}'''<br>(2020)
Pikmin 1 Switch Logo.png|link=Pikmin 1 (Nintendo Switch)|'''{{p1s}}'''<br>(2023)
Pikmin 2 Switch Logo.png|link=Pikmin 2 (Nintendo Switch)|'''{{p2s}}'''<br>(2023)
</gallery>


Another quick but sometimes dangerous technique is getting up close and personal with the mantis-monster. If you stay right up against the Greater Studded Beeb and pummel it with your Knuckle Seed power-up, it wont be able to strike you with its attacks most of the time, excluding its spin attack, in which case you want to jump away.
=== Web browser games ===
<gallery class="center" widths="160" heights="80">
Spaceforce title.jpg|link=Pikmin.com SpaceForce|'''''[[Pikmin.com SpaceForce]]'''''<br>(2001)
Treasure Hunt Homepage Recreation.jpg|[[Pikmin Treasure Hunt]|'''''[[Pikmin Treasure Hunt]]'''''<br>(2004)
Pikmin Finder Logo.png|link=Pikmin Finder|'''''[[Pikmin Finder]]'''''<br>(2023)
Pikmin 100 logo.png|link=Pikmin Garden#やってみよう (Let's Try It)|'''''[[Pikmin Garden#やってみよう (Let's Try It)|Pikmin 100]]'''''<br>([[Pikmin Garden]], 2024)
</gallery>


Once defeated, its eyes will widen, and it will collapse on the floor. Your Miis will pose, and the Greater Studded Beeb's body will proceed to explode into tons of ''Nintendo Land'' Coins.
=== Other Pikmin media ===
<gallery class="center" widths="160" heights="80">
PhotosWithPikminLogo.png|link=Nintendo_3DS#Japanese_eShop_cards_and_Photos_with_Pikmin|'''''[[Nintendo_3DS#Japanese_eShop_cards_and_Photos_with_Pikmin|Photos with Pikmin]]'''''<br>(2013)
Pikmin Safari logo.jpg|link=Pikmin Safari|'''''[[Pikmin Safari]]'''''<br>(2013)
PikminShortsLogo.png|link=Pikmin Short Movies|'''{{psm}}'''<br>(2014)
Pikmin Garden Logo.png|link=Pikmin Garden|'''''[[Pikmin Garden]]'''''<br>(2023)
</gallery>


===Names in other languages===
=== Media with ''Pikmin'' content ===
 
<gallery class="center" widths="160" heights="80">
{{foreignname
Super Smash Bros. Brawl logo.png|link=Super Smash Bros. Brawl|'''{{ssbb}}'''<br>(2008)
|Jap  = アバレワラジ 
Pikmin Adventure logo.png|link=Pikmin Adventure|'''{{pa}}'''<br>(''[[Nintendo Land]]'', 2012)
|JapR =  
Smash 4 logo.png|link=Super Smash Bros. for Nintendo 3DS and Wii U|'''{{ssb4}}'''<br>(2014)
|JapM =  
Super Smash Bros. Ultimate logo.png|link=Super Smash Bros. Ultimate|'''{{ssbu}}'''<br>(2018)
|Dut  = Pletterbaub Grand
</gallery>
|DutM =
|Fra  = Brok Piquant
|FraM =
|FraN =  
|Ger  = Killerkugelkäfer
|GerM =  
|GerN  =
|Ita  = Ultrapidolino borchiato
|ItaM  =
|ItaN =
|PorP  = Baub Encrustado
|PorPM =
|PorPN =
|Rus  = Большой шиполап
|RusR =
|RusM =
|RusN =
|Spa  = Boloide tachonado
|SpaM =
|SpaN =
 
|notes = y
}}
{{clear}}

Latest revision as of 08:24, September 23, 2024

Sandbox to hold my W.I.P. edits for certain articles.

Pikmin

Stuff relating to Pikmin

P1S Ship Part Icons

Using the ship part icons from Pikmin 1 (Nintendo Switch) in place of the current unofficial icons.

Location map

The texture for The Impact Site's radar map in Pikmin 1 (Nintendo Switch).
Main Engine P1S
The location of the Main Engine in The Impact Site.

Table

Icon Name Location Weight Max. carriers Required Visual
Main Engine P1S Main Engine The Impact Site 20 40 Yes Yes
Positron Generator P1S Positron Generator The Impact Site 20 40 Yes No
Eternal Fuel Dynamo P1S Eternal Fuel Dynamo The Forest of Hope 40 60 Yes Yes
Extraordinary Bolt P1S Extraordinary Bolt The Forest of Hope 30 50 Yes No
Whimsical Radar P1S Whimsical Radar The Forest of Hope 20 40 Yes Yes
Geiger Counter P1S Geiger Counter The Forest of Hope 15 25 Yes Yes
Radiation Canopy P1S Radiation Canopy The Forest of Hope 30 50 Yes Yes
Sagittarius P1S Sagittarius The Forest of Hope 20 30 Yes Yes
Shock Absorber P1S Shock Absorber The Forest of Hope 30 50 Yes No
Automatic Gear P1S Automatic Gear The Forest Navel 15 25 Yes No
Ionium Jet P1S #1 Ionium Jet The Forest Navel 15 25 Yes Yes
Anti-Dioxin Filter P1S Anti-Dioxin Filter The Forest Navel 40 60 Yes Yes
Omega Stabilizer P1S Omega Stabilizer The Forest Navel 30 50 Yes Yes
Gravity Jumper P1S Gravity Jumper The Forest Navel 25 45 Yes No
Analog Computer P1S Analog Computer The Forest Navel 20 40 Yes No
Guard Satellite P1S Guard Satellite The Forest Navel 20 40 Yes Yes
Sagittarius P1S Libra The Forest Navel 15 25 Yes Yes
Repair-Type Bolt P1S Repair-type Bolt The Distant Spring 20 40 Yes No
Gluon Drive P1S Gluon Drive The Distant Spring 50 70 Yes Yes
Zirconium Rotor P1S Zirconium Rotor The Distant Spring 30 50 Yes No
Interstellar Radio P1S Interstellar Radio The Distant Spring 20 40 Yes Yes
Pilot's Seat P1S Pilot's Seat The Distant Spring 25 45 Yes No
Ionium Jet P1S #2 Ionium Jet The Distant Spring 15 25 Yes Yes
Bowsprit P1S Bowsprit The Distant Spring 30 50 Yes Yes
Chronos Reactor P1S Chronos Reactor The Distant Spring 20 40 Yes Yes
Nova Blaster P1S Nova Blaster The Forest of Hope 30 50 No No
Space Float P1S Space Float The Forest Navel 25 45 No No
Massage Machine P1S Massage Machine The Distant Spring 30 50 No No
UV Lamp P1S UV Lamp The Distant Spring 10 25 No No
Secret Safe P1S Secret Safe The Final Trial 40[1] 95 No No

Pikmin 2

Stuff relating to Pikmin 2

Treasure Series Gallery

Tests for new ways of showing treasure series in Pikmin 2.

List

Nintendo Switch

North America GameCube/Wii

Nintendo Switch

North America GameCube/Wii

Europe GameCube/Wii

Japan GameCube/Wii

Pikmin Adventure

Stuff relating to Pikmin Adventure

Pikmin Adventure area infobox

An area infobox for the challenges in Pikmin Adventure.

Bulborb Forest
File:Pikipedia Base Image.jpg
Challenge type Standard
Master Rank time 2:10
Area style Spring
Next area Boss of the Beebs
Music Spring area

Pikmin Adventure controls

Controls for Nintendo Land and Pikmin Adventure based on User:PopitTart/Controls.

Pikmin Adventure

Nintendo Land allows two controller types in the Pikmin Adventure attraction; The Wii U GamePad for the first and the sideways Wii Remote for the other players.

Nintendo Land plaza

Action GamePad controls Notes
Move the L Stick on the Wii U GamePad Supports analog movement.
Rotate camera the R Stick on the Wii U GamePad / GamePad shake The right stick can only be used to turn the camera left and right. The GamePad can be used to look up and down alongside correcting the camera if the GamePad is rotated.
Swap to menu/plaza the Y Button on the Wii U GamePad Toggles between the menu and the plaza.
Jump the ZR Button on the Wii U GamePad Three consecutive jumps cause the Mii to jump higher each time. Jumps can cause interactions with statues.
First person perspective the ZL Button on the Wii U GamePad
held

Pikmin Adventure GamePad controls

In Pikmin Adventure, the GamePed player does the majority of the important actions by pressing on the touchscreen.

Action GamePad Notes
Move the L Stick on the Wii U GamePad / the R Stick on the Wii U GamePad / Wii U Stylus
held
Doesn't support analog movement.
Whistle the ZL Button on the Wii U GamePad / the ZR Button on the Wii U GamePad
tapped or held
Punch/throw Pikmin Wii U Stylus
tap
Change next Pikmin type the L Button on the Wii U GamePad / the R Button on the Wii U GamePad / Wii U Stylus
tap icon
Only available in advanced challenges.
Dodge Wii U Stylus
swipe
Cannot be done if a Mii Pikmin player is being carried
Pause/resume the + Button on the Wii U GamePad
Skip cutscene the - Button on the Wii U GamePad

Pikmin Adventure Wii Remote controls

In Pikmin Adventure, the Wii Remote player needs to hold the controller sideways to play properly.

Action Wii Remote Notes
Move the + Control Pad on the Wii Remote Doesn't support analog movement.
Jump the 2 Button on the Wii Remote
Attack the 1 Button on the Wii Remote Attack changes depending on the currently worn power-up.
Double attack the 1 Button on the Wii Remote twice Can only be done after reaching level 5 or higher. Attack changes depending on the currently worn power-up.
Triple attack the 1 Button on the Wii Remote thrice Can only be done after reaching level 10 or higher. Attack changes depending on the currently worn power-up.
Charged attack Hold the 1 Button on the Wii Remote Attack changes depending on the currently worn power-up.
Air attack the 1 Button on the Wii Remote in midair Attack changes depending on the currently worn power-up.
Latched attack the 1 Button on the Wii Remote while latched onto an enemy.

Pikmin Adventure enemy list

The following lists the appearance of enemies in each level in Pikmin Adventure.

Enemies found in Bulborb Forest

Bulborb (red) × 9

Creepy Beeb × 18

Bulborb (yellow) × 1

Enemies found in Boss of the Beebs

Bulborb (red) × 18

Creepy Beeb × 15

Bulborb (yellow) × 1

King Beeb × 3

Enemies found in Five Seconds to Takeoff

Creepy Beeb × 28

Bulborb (red) × 1

Enemies found in Overthrow the Bulblord

Bulblord × 1

Enemies found in Cannon Smash

Creepy Beeb × 12

Bulborb (yellow) × 6

Bulborb (red) × 6

Telescoping Pumphog × 3

Enemies found in King Beeb is Back

Bulborb (red) × 15

Bulborb (yellow) × 14

Telescoping Pumphog × 12

Creepy Beeb × 30

King Beeb × 1

Enemies found in Through the Darkness

King Beeb × 7

Telescoping Pumphog × 1

Bulborb (red) × 7

Bulborb (yellow) × 5

Enemies found in Swamp Master

Large-mouth Wollywog × 1

Enemies found in Lord of a Barren Land

Blowhog × 5

Telescoping Pumphog (invincible) × 9

Bombardier Beeb × 5

King Beeb × 4

Bulborb (red) × 10

Bulborb (yellow) × 5

Bilious Bulborb × 1

Enemies found in Burst the Giant Balloon

Bombardier Beeb × 9

Bulborb (red) × 8

Bulborb (yellow) × 5

Telescoping Pumphog × 3

King Beeb × 4

Blowhog × 7

Notes in other languages

Bulborb (Pikmin Adventure)
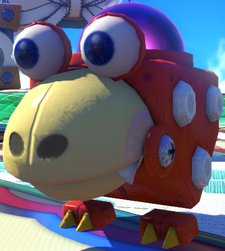
A Red Bulborb statue in the Nintendo Land plaza.
The Bulborb statue in the Nintendo Land Plaza.

Monita's notes

These grub-dog predators tend to sleep during the day and attack aggressively if woken from a nap. Bulborbs come in a wide variety of colors--now on sale at our gift shop!
These Grub-dog predators tend to sleep during the day and attack aggressively if woken. ◆ Bulborbs come in a variety of colours and are now on sale at our souvenir shop.


Text:
◆和名は「デメマダラ」という イヌムシ科の生物 昼間は眠っていることが多いが 近づくと突進してくる◆ 黄色や緑のカラーバリエーションもあって ピクミン アドベンチャーでは人気No.1 だそうデス
Translation:
◆ The Japanese name is "Spotted Bug-eye". A creature of the Dog bug family It is often asleep during the day, but when you get close, it rushes. ◆ There are also yellow and green color variations, and it is the most popular No. 1 in Pikmin Adventure.


Text:
De Grub-dog-familie van roofdieren slaapt gewoonlijk overdag en is erg agressief. ◆ Bulborbs zijn er ook in gele en groene varianten, en verkrijgbaar in onze souvenirwinkel.
Translation:
The Grub-dog family of predators usually sleeps during the day and are very aggressive. ◆ Bulborbs also come in yellow and green varieties, and are available in our souvenir shop.


Text:
Famille : canidés fouisseurs. Le bulborbe passe ses journées à dormir, mais se réveille pour attaquer tous ceux qui s'approchent trop près de lui. ◆ Également disponible en jaune et en vert (offre soumise à conditions).
Translation:
Family: excavating canids. The Bulborb spends its days sleeping, but wakes up to attack anyone who gets too close to it. ◆ Also available in yellow and green (offer subject to conditions).
Text:

Dieser Krabbler schläft am Tag und wird bei Störungen schnell rabiat. ◆ In der Pikmin-Welt wimmelt es

nur so von Punktkäfern, und sie geben auch tolle Plüsch-Souvenirs ab!
Translation:
This creepy-crawly sleeps during the day and quickly becomes ferocious when disturbed. ◆ The Pikmin world is teeming with Dot Beetles, and they also make great plush souvenirs!


Text:
I predatori appartenenti alla famiglia dei Coletidi tendono a dormire di giorno e attaccano se disturbati. ◆ Troverai Coleti di vari colori in vendita nel nostro negozio di souvenir.
Translation:
Predators belonging to the Coletidae family tend to sleep during the day and attack if disturbed. ◆ You will find Coletis of various colors for sale in our gift shop.


Text:
Хищники из семейства личинкопсовых в светлое время суток обычно спят. Будучи разбужены, атакуют. ◆ Клубнеголовы могут иметь различный окрас. У нас сейчас как раз распродажа их фигурок!
Translation:
Predators from the larvae family usually sleep during daylight hours. When awakened, they attack. ◆ Tuberheads can have different colors. We have their figurines on sale right now!


Text:
Estos depredadores de la familia de los Gusarapérridos suelen dormir de día y atacan con mucha fuerza si se los despierta. ◆ En nuestra tienda de souvenirs encontrarás a la venta bulbos de muchos otros colores.
Translation:
These predators from the Grudogidae family usually sleep during the day and attack with great force if they are awakened. ◆ In our souvenir store, you will find bulbs for sale in many other colors.


Text:
Estes predadores da família Canilarva passam os dias a dormir e atacam ferozmente se alguém os acordar. ◆ Existem Orbolbos de várias cores e temo-los em saldo na nossa loja de recordações.
Translation:
These predators of the Canilarva family spend their days sleeping and attack fiercely if anyone wakes them up. ◆ There are Orbolbos of various colors and we have them on sale in our souvenir store.

Hey! Pikmin

Stuff relating to Hey! Pikmin

Spark dandelion

Location of the Silence Breaker in the Space of Silence.
A group of inactive spark dandelions in Space of Silence.

The spark dandelion is a small tool that lights up when Yellow Pikmin are thrown at it. When activated, it will hold the Yellow Pikmin in place as it lights up an area around it, allowing for Bloominous Stemples to bloom. The spark dandelion will immediately be turned off once the Yellow Pikmin are whistled at.

The name comes from the Japanese Hey! Pikmin guidebook, where it was given the name スパークタンポポ? (lit.: "Spark dandelion").

Locations

  • Ravaged Rustworks
    • Space of Silence: The only spark dandelions in the game appear here. They are found in the room containing the Silence Breaker, where they act as electrical tools that the player has to use in order to activate nearby Bloominous Stemples and reach the treasure.

Hey! Pikmin area table

A table of Hey! Pikmin areas based on a previous edit of Brilliant Garden.

Main areas

Code Image Name Treasures Available Pikmin
1-A The start of First Expedition. First Expedition

Loop of Beginnings Loop of Beginnings
Hypno Pendulum Hypno Pendulum
Song Sewer Song Sewer

Red Pikmin Red Pikmin

1-B The first wooden stake in Cavern of Confusion. Cavern of Confusion

Consolation Prize Consolation Prize
Ultra-Sealed Aquarium Ultra-Sealed Aquarium
Peace Missile Peace Missile

Yellow Pikmin Yellow Pikmin

1-C The start of Mushroom Valley. Mushroom Valley

Unassuming Lighthouse Unassuming Lighthouse
Quantum Traveler Quantum Traveler
Constitution Gate Constitution Gate

Red Pikmin Red Pikmin

1-D

The first Moving Block in Back-and-Forth Road.

Back-and-Forth Road

Stopped Doomsday Clock Stopped Doomsday Clock
Smile Detector Smile Detector
Independence Monument Independence Monument

Red Pikmin Red Pikmin
Yellow Pikmin Yellow Pikmin

1-E Walking under the Bulborb in The Shadow in the Brush. The Shadow in the Brush

Flashy Monument Flashy Monument

Red Pikmin Red Pikmin

1-X The first Lifting Rock in Cherrystone Pass. Cherrystone Pass

Preservation Door Preservation Door
Despair-o-Sphere Despair-o-Sphere
Revenge Fantasy Revenge Fantasy

Red Pikmin Red Pikmin

Special areas

Image Name amiibo required? Reward(s)
The start of Secret Spot 1. Secret Spot 1 No

Pikmin Park Red pellet

The start of Secret Spot 2. Secret Spot 2 Yes

Pikmin Park Yellow pellet

The start of Secret Spot 3. Secret Spot 3 Yes

Pikmin Park Red pellet

The start of Secret Spot 4. Secret Spot 4 No

Pikmin Park Red pellet

The Sparklium Springs in the Brilliant Garden. Sparklium Springs No

Rocks:
Yellow: 161 (Sparklium × 161)
Red: 84 (Sparklium × 252)
Rainbow: 7 (Sparklium × 35)
Max collectable Sparklium: Sparklium × 448

Main areas

Code Image Name Treasures Available Pikmin
2-A The group of wild Blue Pikmin in the Foaming Lake. Foaming Lake

Giga Whistle Giga Whistle
Rocket Polish Rocket Polish
Berserker Brush Berserker Brush

Blue Pikmin Blue Pikmin

2-B A Mockiwi chase in Serene Stream. Serene Stream

Attitude Adjuster Attitude Adjuster
Unstrung Racket Unstrung Racket
Work-Life Imbalancer Work-Life Imbalancer

Blue Pikmin Blue Pikmin

2-C The main exit in Glowing Bloom Pond and the path that leads to the secret exit. Glowing Bloom Pond

Evidence Pulverizer Evidence Pulverizer
Handy Hand Handy Hand
Hairy Serpent Fossil Hairy Serpent Fossil

Yellow Pikmin Yellow Pikmin

2-D

The first large falling crystal in The Shallow End.

The Shallow End

Greed-o-Sphere Greed-o-Sphere
Twisty Pick Twisty Pick
Conformity Enhancers Conformity Enhancers

Blue Pikmin Blue Pikmin

2-E The Long Water Dumple looking at the group before attacking in The Keeper of the Lake. The Keeper of the Lake

Unexamined Nest Unexamined Nest

Blue Pikmin Blue Pikmin

2-X Some red Sparklium Seeds in the Treacherous Currents. Treacherous Currents

Everyday Cell Everyday Cell
Giant Rodent Skull Giant Rodent Skull

Blue Pikmin Blue Pikmin

Special areas

Image Name amiibo required? Reward(s)
The start of Secret Spot 5. Secret Spot 5 Yes

Pikmin Park Blue pellet

The start of Secret Spot 6. Secret Spot 6 No

Pikmin Park Blue pellet

The start of Secret Spot 7. Secret Spot 7 Yes

Pikmin Park Yellow pellet

The start of Secret Spot 8. Secret Spot 8 No

Pikmin Park Blue pellet

The Sparklium Springs in the Verdant Waterfront. Sparklium Springs No

Rocks:
Yellow: 155 (Sparklium × 155)
Red: 41 (Sparklium × 123)
Rainbow: 62 (Sparklium × 310)
Max collectable Sparklium: Sparklium × 588

Pikmin 4

Stuff relating to Pikmin 4

P4 character page

W.I.P. P4 character page built off of the character preload page.

Dash
ID badge image of Dash. Note that the hair color can be one of five colors depending on the hair color of the leafling this character was cured from.
Name Dash
Gender Male
Age Unknown
Eye color Black
Hair color Varies
Home planet Flukuey
Known related characters None
Height Unknown
First game Pikmin 4
Latest game Pikmin 4

Dash is a leafling castaway introduced in Pikmin 4. He is always the first leafling from a Dandori Battle to be cured.

Appearance

By default Dash wears a dull white space suit with green sleeves and white gloves. He has short hair, a round nose, and two large eyes with visible pupils.

Dash's spacesuit will instead be colored red if the Rescue Corps selected color is also green. His hair color is dependent on the color of the leafling that turned out to be him when cured.

The Rescue Officer can reproduce Dash's appearance with the following options:

Character creator options
Skin tone option 3. The original texture is black and white and colored in real time, so this image has been edited to reflect its ingame appearance. Skin tone 3 Button for the medium body type in Pikmin 4's character creator. Body type 2 P4 Character 2 Face Variation 8.png Face type 8 P4 Character 2 Hair Variation 5.png Hair style 5

ID badge


ID badge image of Dash. Note that the hair color can be one of five colors depending on the hair color of the leafling this character was cured from.

Professional Spelunker

Dash

Home Planet

Flukuey

He's known for saying, "You can always find


me in the pits!" He'll take the leap into any


cave, no matter how dangerous it is.


Quotes

Requirement Quote
Talk to Dash for the first time.

P4 Character 2 Face Variation 8.png

Wow... I've been drawn to caves for most of my life, but I haven't run into danger like this in a long time.

P4 Character 2 Face Variation 8.png

My life's quite precious to me... Thanks for helping. After all, I can only poke around in caves if I'm alive, right?

P4 Character 2 Face Variation 8.png

Oh, I should introduce myself... I'm Dash. I've explored all over the universe, thanks to my family's deep pockets.
Talk to Dash for the second time.

P4 Character 2 Face Variation 8.png

The captain warned me that she'd be very angry if I got stranded again, so I can't go explore any caves.

P4 Character 2 Face Variation 8.png

Oh, hey—I just had the best idea! Starting right now, I'm going to recognize you as my top... well, only... pupil!

P4 Character 2 Face Variation 8.png

I need you to explore the caves around this planet on my behalf. You'll have to make it through them all the way to the exits.
I'd like to start by seeing what kinds of skills you have. Make your way through 5 caves, and report back.
I can't tell you how disappointed I am not to be able to do this myself, but I've got high hopes for your tenacity.
Be very careful around the creatures here. You can't explore more caves for me if you don't make it safely back to the surface!
Wow! I knew I saw promise in you. I'm a great judge of caving potential. Next, try making your way through 10 caves.
You, my star pupil, are making great progress to support my life's work!
There may be a lot of danger, but isn't that just part of the thrill of getting to explore caves?!
You keep up an impressive pace when you explore! For your next target, how about... 15 caves?
Listening to your reports after you explore each cave gets me itching to dive back underground myself.
If you start to feel unsafe, go back to the surface for a while. Knowing when to quit is essential when you explore caves.
You really seem to understand the true "spirit" of caves now! For your final effort, make your way through every cave!
It sure does seem like this planet has a remarkable variety in its many caves.
The caves here are full of mystery and adventure, with creatures and treasures that point to a fascinating culture!
It seems I do have excellent judgment. You really are a top-notch pupil, both in name and reality!
In recognition of your great achievements, I'd like to offer this phrase I keep in mind as parting words to you. "You can always find me in the pits!" I hope we get a chance to explore some caves together one day.
You seem to be traveling through those caves at a good clip. Drop your latest report on me.
I want to help you discover the "spirit" of caves. You should continue your endeavor to explore even more of them.
What's this?! You've already completed your travels! Whoa! You're miles ahead of what I was expecting.
My title of Cave Researcher feels even more mediocre in the face of your great achievements. You've done amazing work!
I see you've already made your way through several caves. I would expect no less from my star pupil!
Your attitude... the way you take on these caves so enthusiastically... It's like when I first discovered the underground world.
About that "Industrial Maze" matter you reported... That sounded extremely interesting! The caves repeatedly show evidence of intelligent life-forms that evolved in an entirely different way from us. Machinery that keeps working forever, floors that float in the air... It sure does stir the imagination!
When I heard your report about the Secluded Courtyard, I was moved by the beauty of the silence you described. White sand spread out with a pattern in it. Hard botanical cylinders arranged here and there. There even seems to be significance to how the flat rocks are lined up... These are traces of a civilization we don't know.
Among the many caves you've been to, my sense of aesthetic is most drawn to the Seafloor Resort. The marine-blue water, the expansive sandy beach, the beautiful, strange, and sometimes dangerous aquatic creatures... The constant sound of flowing water must've been peaceful as well.
The building-block clearing like out of a fairy tale, the pastel-colored floor that creates a tranquil and bright mood... Thriving giant mushrooms to jump and play on... It does feel dreamy, like the name Dream Home implies. It shows the playfulness possible when a culture matures... This cave really stokes one's inner adventurer and poet!
The Mud Pit you reported on... a lake of poisonous mucus where spores and mycelia are interwoven. I'm so jealous that you got to explore that cave and get all sticky and mucky hiking through it! After all, the more hardship, the bigger the sense of accomplishment when you make it to the end!
The caves here are full of mystery and adventure, with creatures and treasures that point to a fascinating culture!
Talk to Dash while playing as Oatchi. This is embarrassing to admit, but I've been stranded in caves countless times, only to be saved by Rescue Pups like you.
Talk to Dash while playing as Oatchi. I live my life bouncing from adventure to adventure, so sadly I can't have a dog.
Talk to Dash while looking like him. A few years ago, I was diving in a cave made of a mirror-like substance. Wherever I looked, I saw countless copies of myself. You and I look so much alike, it brought back memories from that eerie experience.

Naming

Dash's name may allude to Dachshunds.

Names in other languages

Language Name Meaning
Flag of Japan Japanese ダックス?
Dakkusu
From ダックスフンド? (lit.: "Dachshund")
Flag of the Netherlands Dutch Teck From "teckel" (Dachshund)
Flag of France French Tex From "Teckel" (Dachshund)
Flag of Germany German Dack From "Dackel" (Dachshund)
Flag of Italy Italian Dash -
Flag of South Korea Korean 닥스
Dakseu
From 닥스훈트 (Dachshund)
Flag of Brazil Portuguese Salchi From "cão-salsicha" (sausage dog)
Flag of Spain Spanish Teckel From "Teckel" (Dachshund)

Gallery

This article or section is in need of more images.
You can help Pikipedia by uploading some images.

See also

The following article or section is in need of assistance from someone who plays Pikmin 4.
Particularly: List links to similar subjects.

Character creator table

A potential replacement for the appearance section for Pikmin 4 castaways.

Dash uses the following character creator parts that do not change depending on the player's colors.

Character creator parts
Skin tone option 3. The original texture is black and white and colored in real time, so this image has been edited to reflect its ingame appearance. Button for the medium body type in Pikmin 4's character creator. P4 Character 2 Face Variation 8.png P4 Character 2 Hair Variation 5.png

Pikmin 4 enemy parameters

Parameters for Pikmin 4's enemies, taken from DT_TekiParameter.uasset, along side what they likely do.

ActorName - Internal name for the actor

CarryWeightMin - Minimum carry weight

CarryWeightMax - Maximum carry weight

CarryWeightMinVs - Minimum carry weight in Dandori Battle

CarryWeightMaxVs - Maximum carry weight n Dandori Battle

CarryIncPikmins - Sprouts produced by the Onion

MaxLife - HP value

Kira - Sparklium value?

Poko - Dandori point value in Dandori Challenge?

VsScore - Dandori point value in Dandori Battle?

BombHit - Bomb Rock explosions needed to kill the actor?

BombInsideHit - Bomb Rocks consumed needed to kill the actor?

PoisonHit - White Pikmin consumed needed to kill actor?

PurpleDirectHit - Purple Pikmin latching on needed to kill actor?

PressHit - ???

IceBombHit - Ice Blast explosions needed to freeze actor?

IceBombInsideHit - Ice Blast consumptions needed to freeze actor?

FreezeHit - Ice Pikmin damage needed to freeze enemy?

FreezeInsideHit - Ice Pikmin consumption needed to freeze enemy?

FreezeDamageRatio - How much Ice Pikmin damage adds up to freeze wheel?

CrushHit - Damage taken from crush attacks?

FrozenCrushDamageRate - Damage taten from crush while frozen?

SnowBallDamage - Damage taken from snowballs?

StoneDamage - Damage taken from Pebble Pitcher?

ThunderStopTime - How long actor is paralyzed by Lightning Shock?

CrushStopTime - ???

CrushKnockBackSpeed - ???

FlashbangRate - ???

FreezeDropType - Type of drops if actor is killed while frozen

DropStationPieceNum - How many Glow pellets actor drop?

URODistanceThesholds - ???


PlayerDamage - Damage it deals to the player?

OtherDamage - Damage it deals to other actors?

FlashBangTargetWeight - ???

Bomb Rock

Bomb Rock Icon.
Icon for the Bomb rock from Pikmin 4.
The Bomb Rock's icon in Pikmin 4.
Games Pikmin 2,  Pikmin 3,  Pikmin 4
Function Explodes after being thrown or interacted with.
How to obtain Pikmin 2:  Found in caves
Pikmin 3:  Reward from roulette wheel, found in field, dug up from dirt mounds
Pikmin 4:  Have reached Sparklium × 3000, buy for Raw material × 8, reward from roulette wheel

The Bomb Rock (バクダン岩?, lit.: "Bomb rock"; formatted as bomb-rock prior to Pikmin 3) is an explosive rock found in the Pikmin games. Upon being activated, a Bomb Rock's fuse starts going down (represented by a colored wheel in the first two games), and when it reaches zero, the bomb causes a violent explosion, capable of damaging enemies, leaders, some obstacles and knocking back and subsequently killing any Pikmin.

How it works has changed, in some fashion, in every entry. In the first and third games, it can be carried by Pikmin, but only by Yellow Pikmin in the former. In Pikmin 2, is slightly larger and serve as an obstacle instead of a tool, with the exception of the 2-Player Battle stage Hostile Territory, where it can be picked up and thrown by leaders. It also appears as an item in 2-Player Battle and Bingo Battle. In Pikmin 4 it's instead an item used by leaders and can be either found in the field or bought from Russ for 8 raw materials per Bomb Rock after accumulating a total of 3000 Sparklium. In the side story Olimar's Shipwreck Tale, Bomb Rocks are similarly found scattered around the four areas, and Olimar gains additional Bomb Rocks as milestone bonuses for recovering 2 and then 13 ship parts.

Pikmin 4 Cave Types

The 10 different cave types in Pikmin 4, taken from the folder names in Carrot4/Terrain/Cave/Type, with a few caves that use said themes.

Aquarium - Set in an aquarium tank. Used in Planning Pools

Blocks - Set in a room similar to Pikmin 2's Toybox theme. Used in Trial Run, Battle in a Box, and Final Battle

Brick - Walls and elevated areas are made out of bricks. Used in Crackling Cauldron

Common - Unknown

Concrete - Made out of tiles not to dissimilar to Pikmin 2's Tiles theme. Used in Subzero Sauna

Garden - Walls made out of bamboo and rocks. Used in Aquiferous Summit

Last - Used in sublevel 20 of Cavern for a King

Metal - Very similar style and assets to Pikmin 2's Metal theme. Used in Below-Grade Discotheque

Sand - Similar in style to Blocks, except with sand. Used in Dandori Castle, Leafy Showdown, and Hot Sandy Duel

Soil - Walls made out of soil. Used in Hectic Hollows, Engulfed Castle

Pikmin media navigation

The following is a list of media related to the Pikmin series, including games relating to Pikmin, or games with Pikmin content.

Main series

Spin-offs

Re-releases

Web browser games

Other Pikmin media

Media with Pikmin content

  1. ^ YouTube video demonstrating the requirement of 85 Pikmin for the Safe (at 05:08)