Glowing Bloom Pond: Difference between revisions
mNo edit summary |
(Replaced images and added Pikmin locations and guide) |
||
| (4 intermediate revisions by 3 users not shown) | |||
| Line 3: | Line 3: | ||
|screenshot = | |screenshot = | ||
|map = | |map = | ||
|image = Glowing Bloom Pond | |image = HP Glowing Bloom Pond Second Light Bulb Rose.png | ||
|size = 320px | |size = 320px | ||
|caption = | |caption = | ||
| Line 17: | Line 17: | ||
}} | }} | ||
'''Glowing Bloom Pond''' ({{j|やみに ひかる はな|Yami ni Hikaru Hana}}) is the third main [[area]] in the [[Verdant Waterfront]]. It introduces [[Bloominous Stemple]]s and their ability to bloom with light, meaning the area also focuses [[electrode]]s and [[Widemouthed Anode Beetle]]s. While the standard exit in this area leads to [[The Shallow End]], the [[secret exit]] unlocks [[Treacherous Currents]]. | '''Glowing Bloom Pond''' ({{j|やみに ひかる はな|Yami ni Hikaru Hana|Flowers glowing in the dark}}) is the third main [[area]] in the [[Verdant Waterfront]]. It introduces [[Bloominous Stemple]]s and their ability to bloom with light, meaning the area also focuses [[electrode]]s and [[Widemouthed Anode Beetle]]s. While the standard exit in this area leads to [[The Shallow End]], the [[secret exit]] unlocks [[Treacherous Currents]]. | ||
== Description == | == Description == | ||
At the start, the player can encounter some [[Yellow Pikmin]], using their own bodies to conduct [[electricity]] between two wires. In doing this, they allow some [[Bloominous Stemple]]s to bloom. After this, Olimar has to defeat a [[Widemouthed Anode Beetle]] to progress in the area. After some walking, the player has to use the Yellow Pikmin's ability to conduct electricity in order to make the Bloominous Stemple bloom, thus moving forward in the area. Next to this, the player will encounter two Widemouthed Anode Beetles, which will help Olimar and the Pikmin to access a doorway leading to the first treasure, the [[Evidence | At the start, the player can encounter some [[Yellow Pikmin]], using their own bodies to conduct [[electricity]] between two wires. In doing this, they allow some [[Bloominous Stemple]]s to bloom. After this, Olimar has to defeat a [[Widemouthed Anode Beetle]] to progress in the area. After some walking, the player has to use the Yellow Pikmin's ability to conduct electricity in order to make the Bloominous Stemple bloom, thus moving forward in the area. Next to this, the player will encounter two Widemouthed Anode Beetles, which will help Olimar and the Pikmin to access a doorway leading to the first treasure, the [[Evidence Pulverizer]]. Later in the area, the player will have to use a Widemouthed Anode Beetle once again, in order to retrieve the [[Handy Hand]]. After going through corridors filled with [[Male Sheargrub]]s and Widemouthed Anode Beetle, the player can get access to a [[doorway]], kept behind a [[dirt block]] and a Widemouthed Anode Beetle. In the other side, Olimar has to use those creatures again to reach the last treasure, the [[Hairy Serpent Fossil]]. To reach the end of the area, the player has to build a bridge and use Bloominous Stemples at the same time. However, if the player wants to reach the secret exit, the protagonist has to fall under the last Bloominous Stemples at the very end of the area to gain access of an hidden doorway under the flowers. | ||
== Cutscenes == | == Cutscenes == | ||
| Line 27: | Line 27: | ||
|- | |- | ||
! Widemouthed Anode Beetle | ! Widemouthed Anode Beetle | ||
| [[File:Glowing Bloom Pond Beetle | | [[File:HP Glowing Bloom Pond Widemouthed Anode Beetle Cutscene.png|200px]] | ||
| The player moves a bit beyond the first [[vine]]. | | The player moves a bit beyond the first [[vine]]. | ||
| Two Yellow Pikmin walk up to something bright just off-camera. They happily rub against it, until they realize it's a [[Widemouthed Anode Beetle]]. Once they do, the creature turns to them as they run back to the group. | | Two Yellow Pikmin walk up to something bright just off-camera. They happily rub against it, until they realize it's a [[Widemouthed Anode Beetle]]. Once they do, the creature turns to them as they run back to the group. | ||
|- | |- | ||
! Seeding Dandelion parachutes | ! Seeding Dandelion parachutes | ||
| [[File:Glowing Bloom Pond | | [[File:HP Glowing Bloom Pond Seeding Dandelion Cutscene.png|200px]] | ||
| The player goes beyond the room with the [[Handy Hand]] and [[Widemouthed Anode Beetle]]s. | | The player goes beyond the room with the [[Handy Hand]] and [[Widemouthed Anode Beetle]]s. | ||
| Three Yellow Pikmin fall from the ceiling hole, grabbing on to [[Seeding Dandelion]] seeds. This makes them fall down slowly and calmly. Eventually, a fourth one shows up, but its seed is spinning out of control, making it fall a bit faster than the others. The first three land smoothly, but the fourth lands back-first. However, it gets up, shakes its head, and the group of four make their way to Olimar's side unharmed. | | Three Yellow Pikmin fall from the ceiling hole, grabbing on to [[Seeding Dandelion]] seeds. This makes them fall down slowly and calmly. Eventually, a fourth one shows up, but its seed is spinning out of control, making it fall a bit faster than the others. The first three land smoothly, but the fourth lands back-first. However, it gets up, shakes its head, and the group of four make their way to Olimar's side unharmed. | ||
|- | |- | ||
! Late Pikmin | ! Late Pikmin | ||
| [[File:Glowing Bloom Pond | | [[File:HP Glowing Bloom Pond Doorway Cutscene.png|200px]] | ||
| After going down a vine, the player enters a doorway to the left. | | After going down a vine, the player enters a doorway to the left. | ||
| Olimar comes out of the doorway, alone. He looks around, in search of his Pikmin, and when he looks back into the hole, four of the Pikmin come running out of it, one at a time, and they bump into Olimar, each smack making him spin around. Dizzy, he walks into the doorway, and after a second, walks back out with the rest of the Pikmin squad. | | Olimar comes out of the doorway, alone. He looks around, in search of his Pikmin, and when he looks back into the hole, four of the Pikmin come running out of it, one at a time, and they bump into Olimar, each smack making him spin around. Dizzy, he walks into the doorway, and after a second, walks back out with the rest of the Pikmin squad. | ||
| Line 43: | Line 43: | ||
== Pikmin locations == | == Pikmin locations == | ||
{| class = "wikitable sortable" | {| class = "wikitable sortable" | ||
|- | |- | ||
! Spot || Location || Pikmin || Requirements || Notes | ! Spot || Location || Pikmin || Requirements || Notes | ||
|- | |- | ||
| || | | Activating an [[electrode]] || Near the start of the area || 4 Yellow Pikmin || || First time only | ||
|- | |||
| In a bush || Behind the first [[dirt block]] || 4 Yellow Pikmin || Have less than 4 Yellow Pikmin || | |||
|- | |||
| In a bush || Behind the first [[Widemouthed Anode Beetle]] || 4 Yellow Pikmin || Have less than 4 Yellow Pikmin || First group of four can always be whistled. | |||
|- | |||
| In a bush || Near the [[Bloominous Stemple]]s in the [[Evidence Pulverizer]]'s room || 4 Yellow Pikmin || Have less than 4 Yellow Pikmin || Required to activate the nearby electrode. | |||
|- | |||
| In a bush || Near the large [[Sparklium flower]] || 4 Yellow Pikmin || Have less than 4 Yellow Pikmin || | |||
|- | |||
| In a bush || At the end of the carry path of the [[Handy Hand]] || 4 Yellow Pikmin || Have less than 4 Yellow Pikmin || | |||
|- | |||
| Out in the open || After the Handy Hand area || 4 Yellow Pikmin || || Automatically joins the group after the Seeding Dandelion parachutes cutscene. | |||
|- | |||
| In a bush || Near the area with a group of [[Male Sheargrub]]s || 4 Yellow Pikmin || Have less than 8 Yellow Pikmin || | |||
|- | |||
| In a bush || At the first intersection || 4 Yellow Pikmin || Have less than 8 Yellow Pikmin || | |||
|- | |||
| In a bush || Near the doorway in the [[Hairy Serpent Fossil]]'s room || 4 Yellow Pikmin || Have less than 8 Yellow Pikmin || | |||
|- | |||
| In a bush || Near the [[fragment]] puzzle || 4 Yellow Pikmin || Have less than 8 Yellow Pikmin || | |||
|- | |||
| Bouncing on a [[Bouncy Mushroom]] || Near the [[fragment]] puzzle || 4 Yellow Pikmin || First time only || | |||
|- | |||
|} | |} | ||
| Line 63: | Line 85: | ||
=== Obstacles === | === Obstacles === | ||
{{ | * {{icon|Bloominous Stemple|y}} × 23 | ||
* {{icon| | * {{icon|Bouncy Mushroom|y}} × 4 | ||
* {{icon| | * {{icon|Dirt block|y}} × 2 | ||
* {{icon| | * {{icon|Fragment|y}} × 6 | ||
* {{icon| | |||
=== Plants === | |||
*{{icon|Vine|y}} × 8 | |||
=== Others === | === Others === | ||
{{ | * {{icon|Sparklium Seed}} Yellow [[Sparklium Seed]] × 27 | ||
* {{icon|Sparklium Seed| | * {{icon|Sparklium Seed|v=red}} Red [[Sparklium Seed]] × 8 | ||
* {{icon|Sparklium flower|y}} × 2 | * {{icon|Sparklium flower|y}} (large) × 2 | ||
* {{icon|Heart|y}} × 7 | * {{icon|Heart|y}} (small) × 7 | ||
== Guide == | == Guide == | ||
{{guide}} | {{guide}} | ||
From the start of the area head to the right until encountering the first group of [[Yellow Pikmin]]. Whsitle them down from the active [[electrode]] and throw them at the nearby [[dirt block]] to progress forward. Continue forward until encountering the second group of Yellow Pikmin hiding in a bush. Whistle them and head down the [[vine]] to continue forward until the first [[Widemouthed Anode Beetle]]. Take it out and continue forward until encountering an electrode on an elevated platform. Climb the nearby vine and throw four Yellow Pikmin at it to light up the area and activating a [[Bloominous Stemple]] to continue forward while avoiding the [[Male Sheargrub]] on the ceiling until encountering the second Widemouth Anode Beetle. After attacking it, climb down a nearby vine in order to bounce off a [[Bouncy Mushroom]] to a section requiring the light of a nearby Widemouth Anode Beetle in order to open some Bloominous Stemples and enter an otherwise inaccessable [[doorway]]. | |||
Upon entering the area throw four Yellow Pikmin at an electrode in order to activate the Bloominous Stemples needed to reach the nearby [[Evidence Pulverizer]] by using the [[jetpack]]. After collecting thee treasure head back through the doorway and progress forward until encountering the [[Handy Hand]] on an elevated platform. Throw six Yellow Pikmin at it and let them carry it along a path while following it on the lower path where a Widemouth Anode Beetle lights up a few Bloominous Stemples in order to continue forward. After collecting the treasure continue forward and collect four Yellow Pikmin before encountering an area with a group of Male Sheargrubs. Underneath the floor is a Widemouth Anode Beetle that needs to activate a Bloominous Stemple in order to progress further until encpuntering a vine leading to a intersection. From here head to the left by destroying the dirt block and Widemouth Anode Beetle blocking the way and enter the doorway at the end of the path. | |||
Upon entering the area use the jetpack in order to leave the Pikmin away from the Widemouth Anode Beetles that light up the Bloominous Stemples needed to reach the [[Hairy Serpent Fossil]]. After collecting the treasure head down the nearby vine to safely leave the room and back into the main area. | |||
From here head to the right until encountering an electrode on a elevated platform. Throw four Yellow Pikmin at it in order to light up a nearby group of Bloominous Stemples allowing the other Yellow Pikmin to reach an otherwise inaccessible set of [[fragment]]s needed to build a bridge in order to reach the main exit. In order to reach the secret exit either fall down the gap filled by the fragment bridge or walk behind the set of Bloominous Stemples in order to reach a doorway that leads to the secret exit. | |||
== Gallery == | == Gallery == | ||
<gallery> | <gallery> | ||
Glowing Bloom Pond | HP Glowing Bloom Pond First Yellow Pikmin.png|The first group of Yellow Pikmin. | ||
HP Evidence Pulverizer Location.png|The kocation of the [[Evidence Pulverizer]]. | |||
HP Handy Hand Location.png|Location of the [[Handy Hand]]. | |||
Glowing Bloom Pond | HP Glowing Bloom Pond Intersection.png|The upper path that leads to some red [[Sparklium Seed]]s. | ||
HP Hairy Serpent Fossil Location.png|Location of the [[Hairy Serpent Fossil]]. | |||
Glowing Bloom Pond | HP Glowing Bloom Pond Fragment Puzzle.png|The [[bridge]] room. | ||
Glowing Bloom Pond | HP Glowing Bloom Pond Main Exit.png|The final split, where the player can take the lower route for the [[secret exit]]. | ||
</gallery> | </gallery> | ||
==Names in other languages== | == Names in other languages == | ||
{{foreignname | {{foreignname | ||
|Jap=やみに ひかる はな | |Jap=やみに ひかる はな | ||
|JapR=Yami ni Hikaru Hana | |JapR=Yami ni Hikaru Hana | ||
|JapM= | |JapM=Flowers glowing in the dark | ||
|Dut=Elektroflora | |Dut=Elektroflora | ||
|DutM=Electroflower | |DutM=Electroflower | ||
Latest revision as of 22:57, August 13, 2024
| Glowing Bloom Pond Sector 2 – Area C | |
|---|---|

| |
| Treasures | 3 |
| Pikmin available | Yellow Pikmin |
| Requirements | Complete Serene Stream |
| Next area | The Shallow End (normal exit) Treacherous Currents (secret exit) |
| Music | Underground area Underground area - back side |
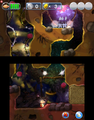
Glowing Bloom Pond (やみに ひかる はな?, lit.: "Flowers glowing in the dark") is the third main area in the Verdant Waterfront. It introduces Bloominous Stemples and their ability to bloom with light, meaning the area also focuses electrodes and Widemouthed Anode Beetles. While the standard exit in this area leads to The Shallow End, the secret exit unlocks Treacherous Currents.
Description[edit]
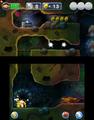
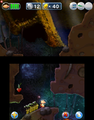
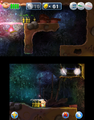
At the start, the player can encounter some Yellow Pikmin, using their own bodies to conduct electricity between two wires. In doing this, they allow some Bloominous Stemples to bloom. After this, Olimar has to defeat a Widemouthed Anode Beetle to progress in the area. After some walking, the player has to use the Yellow Pikmin's ability to conduct electricity in order to make the Bloominous Stemple bloom, thus moving forward in the area. Next to this, the player will encounter two Widemouthed Anode Beetles, which will help Olimar and the Pikmin to access a doorway leading to the first treasure, the Evidence Pulverizer. Later in the area, the player will have to use a Widemouthed Anode Beetle once again, in order to retrieve the Handy Hand. After going through corridors filled with Male Sheargrubs and Widemouthed Anode Beetle, the player can get access to a doorway, kept behind a dirt block and a Widemouthed Anode Beetle. In the other side, Olimar has to use those creatures again to reach the last treasure, the Hairy Serpent Fossil. To reach the end of the area, the player has to build a bridge and use Bloominous Stemples at the same time. However, if the player wants to reach the secret exit, the protagonist has to fall under the last Bloominous Stemples at the very end of the area to gain access of an hidden doorway under the flowers.
Cutscenes[edit]
| Cutscene | Screenshot | Trigger | Description |
|---|---|---|---|
| Widemouthed Anode Beetle | 
|
The player moves a bit beyond the first vine. | Two Yellow Pikmin walk up to something bright just off-camera. They happily rub against it, until they realize it's a Widemouthed Anode Beetle. Once they do, the creature turns to them as they run back to the group. |
| Seeding Dandelion parachutes | 
|
The player goes beyond the room with the Handy Hand and Widemouthed Anode Beetles. | Three Yellow Pikmin fall from the ceiling hole, grabbing on to Seeding Dandelion seeds. This makes them fall down slowly and calmly. Eventually, a fourth one shows up, but its seed is spinning out of control, making it fall a bit faster than the others. The first three land smoothly, but the fourth lands back-first. However, it gets up, shakes its head, and the group of four make their way to Olimar's side unharmed. |
| Late Pikmin | 
|
After going down a vine, the player enters a doorway to the left. | Olimar comes out of the doorway, alone. He looks around, in search of his Pikmin, and when he looks back into the hole, four of the Pikmin come running out of it, one at a time, and they bump into Olimar, each smack making him spin around. Dizzy, he walks into the doorway, and after a second, walks back out with the rest of the Pikmin squad. |
Pikmin locations[edit]
| Spot | Location | Pikmin | Requirements | Notes |
|---|---|---|---|---|
| Activating an electrode | Near the start of the area | 4 Yellow Pikmin | First time only | |
| In a bush | Behind the first dirt block | 4 Yellow Pikmin | Have less than 4 Yellow Pikmin | |
| In a bush | Behind the first Widemouthed Anode Beetle | 4 Yellow Pikmin | Have less than 4 Yellow Pikmin | First group of four can always be whistled. |
| In a bush | Near the Bloominous Stemples in the Evidence Pulverizer's room | 4 Yellow Pikmin | Have less than 4 Yellow Pikmin | Required to activate the nearby electrode. |
| In a bush | Near the large Sparklium flower | 4 Yellow Pikmin | Have less than 4 Yellow Pikmin | |
| In a bush | At the end of the carry path of the Handy Hand | 4 Yellow Pikmin | Have less than 4 Yellow Pikmin | |
| Out in the open | After the Handy Hand area | 4 Yellow Pikmin | Automatically joins the group after the Seeding Dandelion parachutes cutscene. | |
| In a bush | Near the area with a group of Male Sheargrubs | 4 Yellow Pikmin | Have less than 8 Yellow Pikmin | |
| In a bush | At the first intersection | 4 Yellow Pikmin | Have less than 8 Yellow Pikmin | |
| In a bush | Near the doorway in the Hairy Serpent Fossil's room | 4 Yellow Pikmin | Have less than 8 Yellow Pikmin | |
| In a bush | Near the fragment puzzle | 4 Yellow Pikmin | Have less than 8 Yellow Pikmin | |
| Bouncing on a Bouncy Mushroom | Near the fragment puzzle | 4 Yellow Pikmin | First time only |
Objects[edit]
Treasures[edit]
Enemies[edit]
 Male Sheargrub × 6 (4 of them reappear infinitely)
 Widemouthed Anode Beetle × 9 (5 of them come from a hole)
Obstacles[edit]
 Bloominous Stemple × 23
 Bouncy Mushroom × 4
 Dirt block × 2
 Fragment × 6
Plants[edit]
 Vine × 8
Others[edit]
 Yellow Sparklium Seed × 27
 Red Sparklium Seed × 8
 Sparklium flower (large) × 2
 Heart (small) × 7
Guide[edit]
|
The following article or section contains guides. |
From the start of the area head to the right until encountering the first group of Yellow Pikmin. Whsitle them down from the active electrode and throw them at the nearby dirt block to progress forward. Continue forward until encountering the second group of Yellow Pikmin hiding in a bush. Whistle them and head down the vine to continue forward until the first Widemouthed Anode Beetle. Take it out and continue forward until encountering an electrode on an elevated platform. Climb the nearby vine and throw four Yellow Pikmin at it to light up the area and activating a Bloominous Stemple to continue forward while avoiding the Male Sheargrub on the ceiling until encountering the second Widemouth Anode Beetle. After attacking it, climb down a nearby vine in order to bounce off a Bouncy Mushroom to a section requiring the light of a nearby Widemouth Anode Beetle in order to open some Bloominous Stemples and enter an otherwise inaccessable doorway.
Upon entering the area throw four Yellow Pikmin at an electrode in order to activate the Bloominous Stemples needed to reach the nearby Evidence Pulverizer by using the jetpack. After collecting thee treasure head back through the doorway and progress forward until encountering the Handy Hand on an elevated platform. Throw six Yellow Pikmin at it and let them carry it along a path while following it on the lower path where a Widemouth Anode Beetle lights up a few Bloominous Stemples in order to continue forward. After collecting the treasure continue forward and collect four Yellow Pikmin before encountering an area with a group of Male Sheargrubs. Underneath the floor is a Widemouth Anode Beetle that needs to activate a Bloominous Stemple in order to progress further until encpuntering a vine leading to a intersection. From here head to the left by destroying the dirt block and Widemouth Anode Beetle blocking the way and enter the doorway at the end of the path.
Upon entering the area use the jetpack in order to leave the Pikmin away from the Widemouth Anode Beetles that light up the Bloominous Stemples needed to reach the Hairy Serpent Fossil. After collecting the treasure head down the nearby vine to safely leave the room and back into the main area.
From here head to the right until encountering an electrode on a elevated platform. Throw four Yellow Pikmin at it in order to light up a nearby group of Bloominous Stemples allowing the other Yellow Pikmin to reach an otherwise inaccessible set of fragments needed to build a bridge in order to reach the main exit. In order to reach the secret exit either fall down the gap filled by the fragment bridge or walk behind the set of Bloominous Stemples in order to reach a doorway that leads to the secret exit.
Gallery[edit]
The first group of Yellow Pikmin.
The kocation of the Evidence Pulverizer.

Location of the Handy Hand.
The upper path that leads to some red Sparklium Seeds.

Location of the Hairy Serpent Fossil.
The bridge room.

The final split, where the player can take the lower route for the secret exit.


Names in other languages[edit]
| Language | Name | Meaning |
|---|---|---|
| やみに ひかる はな? Yami ni Hikaru Hana |
Flowers glowing in the dark | |
| Elektroflora | Electroflower | |
| Flore survoltée | Overcharged flora | |
| Die Leuchtblumenhöhle | The Lightflower Cave | |
| Stagno brillaflora | Lightflower pond | |
| Gruta eléctrica | Electric grotto | |
| Gruta Eléctrica | Electric Grotto |
| Sector 2: Verdant Waterfront | |
|---|---|
| Normal areas | 2-A: Foaming Lake • 2-B: Serene Stream • 2-C: Glowing Bloom Pond • 2-D: The Shallow End • 2-E: The Keeper of the Lake |
| Extra areas | 2-X: Treacherous Currents • Secret Spot 5 • Secret Spot 6 • Secret Spot 7 • Secret Spot 8 • Sparklium Springs |