HUD: Difference between revisions
m (→Pikmin 2) |
|||
| (34 intermediate revisions by 17 users not shown) | |||
| Line 1: | Line 1: | ||
{{game icons|p=y|p2=y|p3=y|hp=y}} | {{game icons|p=y|p2=y|p3=y|p4=y|hp=y}} | ||
{{game help|p3|We need ''Pikmin 3'' info. There are also the in-game monologs missing. Keep in mind the different control schemes and Off-TV Play on/off.}} | {{game help|p3|We need ''Pikmin 3'' info. There are also the in-game monologs missing. Keep in mind the different control schemes and Off-TV Play on/off.}} | ||
{{image|Add an image of every game's version of every HUD element.}} | {{image|Add an image of every game's version of every HUD element.}} | ||
| Line 12: | Line 12: | ||
====Sun Meter==== | ====Sun Meter==== | ||
{{switchable|float=right | |||
{{switchable | |||
|Pikmin | |Pikmin | ||
|[[File:HUD Sun Meter P1.png|thumb | |[[File:HUD Sun Meter P1.png|thumb|250px|The Sun Meter in ''Pikmin'']] | ||
|Pikmin 2 | |Pikmin 2 | ||
|[[File:HUD Sun Meter P2.png|thumb | |[[File:HUD Sun Meter P2.png|thumb|250px|The Sun Meter in ''Pikmin 2''.]] | ||
|Pikmin 3 | |Pikmin 3 | ||
|[[File:HUD Sun Meter P3.jpg|thumb| | |[[File:HUD Sun Meter P3.jpg|thumb|250px|The Sun Meter in ''Pikmin 3''.]] | ||
|Pikmin 4 | |||
|[[File:P4 Sun Meter.png|thumb|250px|The Sun Meter in ''Pikmin 4''.]] | |||
}} | }} | ||
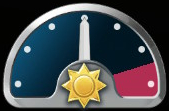
The Sun Meter{{cite quote|(Sun Meter) When the sun icon reaches the far-right side of the bar, the day will end. The only day that doesn't have a time limit is the first.|Indicator blurb|the HUD page of the ''[[Pikmin (game)|Pikmin]]'' instruction manual}} indicates how much remains of the current [[day]] in [[Story Mode]]. In the first three mainline games and {{p3d}}, it is a bar with a pointer that is placed at the start when a [[day]] begins, and moves to the right as time goes by, eventually reaching the end of the bar at night time. The meter is found spanning from the top-left of the screen to almost the right side, as the top-right corner is taken by the [[#Day|day counter]] (in ''Pikmin 3 Deluxe'', the [[#Juice counter|juice counter]] occupies that place instead). In {{p4}}, the Sun Meter is instead a dial whose needle moves from left to right as the day progresses. [[Night expedition]]s feature a meter that serves the same purpose and looks the same, except the sun icon in the bottom is replaced by a moon. Furthermore, [[Olimar's Shipwreck Tale]] displays a number above the sun icon for how many days that remain before [[Captain Olimar]]'s life support system fails. | |||
The | The meter in the first three games consists of 13 bubbles, each one representing one Earth hour. The first, central and final bubbles have a secondary bubble; this pinpoints the start, middle and end of the day. The pointer that moves along the meter is a large circle with a sun inside. The dials for days and night expeditions in ''Pikmin 4'' only contain seven bubbles. A red field in ''Pikmin 4''{{'s}} Sun Meter represents sunsets or sunrises; sunsets begin between the sixth and the seventh bubble, and sunrises begin on the sixth bubble. | ||
Whenever the sun icon reaches one quarter, one half, or three quarters into the meter, it pops out for a second, and the sound of some small bells plays. At the middle of the day, these bells play twice in a row, and in ''Pikmin 2'', two church bells can also be heard. These minor details call the player's attention, and help them keep track of the passage of time. Just before sunset, the half-hour chime of ''{{w|Westminster Quarters}}'' plays, except slightly different, with the notes G♯<sup>4</sup>, C<sup>5</sup>, A♯<sup>4</sup>, D♯<sup>5</sup>, C<sup>5</sup>, G♯<sup>4</sup>, A♯<sup>4</sup>, D♯<sup>4</sup>. In Japanese schools, the half-hour chime of ''Westminster Quarters'' indicates the beginning or end of a period. | Whenever the sun icon reaches one quarter, one half, or three quarters into the meter, it pops out for a second, and the sound of some small bells plays. At the middle of the day, these bells play twice in a row, and in ''Pikmin 2'', two church bells can also be heard. These minor details call the player's attention, and help them keep track of the passage of time. Just before sunset, the half-hour chime of ''{{w|Westminster Quarters}}'' plays, except slightly different, with the notes G♯<sup>4</sup>, C<sup>5</sup>, A♯<sup>4</sup>, D♯<sup>5</sup>, C<sup>5</sup>, G♯<sup>4</sup>, A♯<sup>4</sup>, D♯<sup>4</sup>. In Japanese schools, the half-hour chime of ''Westminster Quarters'' indicates the beginning or end of a period. | ||
''Pikmin 4'' does not show a Sun Meter in situations where time does not pass, such as the [[Rescue Command Post]] and the tutorial with Captain Olimar. | |||
{{clear}} | {{clear}} | ||
====Day==== | ====Day==== | ||
{{switchable|float=right | |||
{{switchable | |||
|Pikmin | |Pikmin | ||
|[[File:HUD Day counter P1.png|thumb | |[[File:HUD Day counter P1.png|thumb|The day counter in ''Pikmin''.]] | ||
|Pikmin 2 | |Pikmin 2 | ||
|[[File:HUD Day counter P2.png|thumb | |[[File:HUD Day counter P2.png|thumb|The day counter in ''Pikmin 2''.]] | ||
|Pikmin 3 | |Pikmin 3 | ||
|[[File:HUD Day counter P3.jpg|thumb | |[[File:HUD Day counter P3.jpg|thumb|The day counter in ''Pikmin 3''.]] | ||
}} | }} | ||
At the top right of the screen, the day counter can be found, in the Story Modes of all mainline Pikmin games except {{p3d}} and {{p4}}. The current day number is inside a bubble, under the word "day" in ''[[Pikmin (game)|Pikmin]]'' (and the remake), and "Day" in the following games. The number on this counter is compressed horizontally to fit inside the bubble; this becomes evident after the player reaches 1000 days on the expedition. | |||
At the top right of the screen, the day counter can be found, in the Story Modes of all mainline Pikmin games except {{p3d}}. The current day number is inside a bubble, under the word "day" in ''[[Pikmin (game)|Pikmin]]'' (and the remake), and "Day" in the following games. The number on this counter is compressed horizontally to fit inside the bubble; this becomes evident after the player reaches 1000 days on the expedition. | |||
{{clear}} | {{clear}} | ||
====Health==== | ====Health==== | ||
{{switchable|float=right|width=300px | |||
{{switchable | |||
|Pikmin | |Pikmin | ||
|[[File:HUD Leader health P1.png|thumb | |[[File:HUD Leader health P1.png|thumb|[[Captain Olimar]]'s health in ''Pikmin''.]] | ||
|Pikmin 2 | |Pikmin 2 | ||
|[[File:HUD Leader health P2.png|thumb | |[[File:HUD Leader health P2.png|thumb|The health of the two initial leaders in ''Pikmin 2''.]] | ||
|Pikmin 3 | |Pikmin 3 | ||
|[[File:HUD Leader health P3.jpg|thumb | |[[File:HUD Leader health P3.jpg|thumb|The health of the three main leaders in ''Pikmin 3''.]] | ||
|Pikmin 3 Deluxe | |Pikmin 3 Deluxe | ||
|[[File:HUD Health Olimar and Louie P3D.jpg|thumb | |[[File:HUD Health Olimar and Louie P3D.jpg|thumb|The health of the [[Side Stories]] leaders in ''Pikmin 3 Deluxe''.]] | ||
|Pikmin 4 | |||
|[[File:Pikmin4Health.jpg|thumb|The health of [[Oatchi]] and [[Pikmin 4 player character]].]] | |||
}} | }} | ||
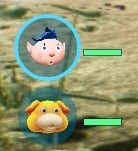
On the bottom-left corner, an icon for each available [[leader]] can be seen, each inside a bubble. To the right of the bubble, there is a [[#health wheels|health wheel]], representing the leader's health. | On the bottom-left corner, an icon for each available [[leader]] can be seen, each inside a bubble. To the right of the bubble, there is a [[#health wheels|health wheel]], representing the leader's health. | ||
| Line 65: | Line 64: | ||
{{clear}} | {{clear}} | ||
====Standby Pikmin==== | ====Standby Pikmin==== | ||
{{switchable|float=right | |||
{{switchable | |||
|Pikmin | |Pikmin | ||
|[[File:HUD Standby Pikmin P1.png|thumb | |[[File:HUD Standby Pikmin P1.png|thumb|A leaf [[Yellow Pikmin]] in standby, in ''Pikmin''.]] | ||
|Pikmin 2 | |Pikmin 2 | ||
|[[File:HUD Standby Pikmin P2.png|thumb | |[[File:HUD Standby Pikmin P2.png|thumb|A flower [[Red Pikmin]] in standby, in ''Pikmin 2''.]] | ||
|Pikmin 3 | |Pikmin 3 | ||
|[[File:HUD Standby Pikmin P3.jpg|thumb | |[[File:HUD Standby Pikmin P3.jpg|thumb|A [[Yellow Pikmin]] in standby, in ''Pikmin 3''.]] | ||
}} | }} | ||
In ''Pikmin'' and ''Pikmin 2'', to the left of the [[#Pikmin counter|Pikmin counter]], there is a bubble with the icon of a Pikmin inside. This icon represents the type of [[Pikmin family|Pikmin]] closest to the current leader. When the [[throw]]ing button is held, a Pikmin from this type will be grabbed, as it is the closest one. There are however some times in which a different Pikmin is held, likely caused due to calculation errors on the game's behalf. This problem is more prominent in the first game. If there are no Pikmin nearby, a hollow figure in the shape of a Pikmin will appear instead. The icon shown in this bubble will also reflect the Pikmin's [[maturity]]. | In ''Pikmin'' and ''Pikmin 2'', to the left of the [[#Pikmin counter|Pikmin counter]], there is a bubble with the icon of a Pikmin inside. This icon represents the type of [[Pikmin family|Pikmin]] closest to the current leader. When the [[throw]]ing button is held, a Pikmin from this type will be grabbed, as it is the closest one. There are however some times in which a different Pikmin is held, likely caused due to calculation errors on the game's behalf. This problem is more prominent in the first game. If there are no Pikmin nearby, a hollow figure in the shape of a Pikmin will appear instead. The icon shown in this bubble will also reflect the Pikmin's [[maturity]]. | ||
| Line 91: | Line 89: | ||
====Pikmin counter==== | ====Pikmin counter==== | ||
{{switchable|float=right | |||
{{switchable | |||
|Pikmin | |Pikmin | ||
|[[File:HUD Pikmin counter P1.png|thumb | |[[File:HUD Pikmin counter P1.png|thumb|250px|Pikmin counter in ''Pikmin''.]] | ||
|Pikmin 2 | |Pikmin 2 | ||
|[[File:HUD Pikmin counter P2.png|thumb | |[[File:HUD Pikmin counter P2.png|thumb|250px|Pikmin counter in ''Pikmin 2''.]] | ||
|Pikmin 3 | |Pikmin 3 | ||
|[[File:HUD Pikmin counter P3.jpg|thumb | |[[File:HUD Pikmin counter P3.jpg|thumb|250px|Pikmin counter in ''Pikmin 3''.]] | ||
|Pikmin 3 Deluxe | |Pikmin 3 Deluxe | ||
|[[File:HUD Pikmin counter P3D.jpg|thumb | |[[File:HUD Pikmin counter P3D.jpg|thumb|250px|Pikmin counter in ''Pikmin 3 Deluxe''.]] | ||
}} | }} | ||
The Pikmin counter displays statistics about the player's Pikmin, and these statistics vary by game. | The Pikmin counter displays statistics about the player's Pikmin, and these statistics vary by game. | ||
| Line 119: | Line 115: | ||
{{clear}} | {{clear}} | ||
====Spray counter==== | ====Spray counter==== | ||
{{switchable|float=right | |||
{{switchable | |||
|Pikmin 2 | |Pikmin 2 | ||
|[[File:HUD Spray counter P2.png|thumb | |[[File:HUD Spray counter P2.png|thumb|Spray counter in ''Pikmin 2''.]] | ||
|Pikmin 3 | |Pikmin 3 | ||
|[[File:HUD Spray counter P3.jpg|thumb | |[[File:HUD Spray counter P3.jpg|thumb|Spray counter in ''Pikmin 3''.]] | ||
}} | }} | ||
In ''[[Pikmin 2]]'' and ''[[Pikmin 3]]'', after the player has created at least one [[spray]], a counter will appear on the left side of the screen. | In ''[[Pikmin 2]]'' and ''[[Pikmin 3]]'', after the player has created at least one [[spray]], a counter will appear on the left side of the screen. | ||
| Line 139: | Line 133: | ||
====Treasure Gauge==== | ====Treasure Gauge==== | ||
[[File:HUD Treasure Gauge.png|thumb | [[File:HUD Treasure Gauge.png|thumb|The Treasure Gauge in ''Pikmin 2'', currently deactivated.]] | ||
In ''Pikmin 2'', the Treasure Gauge appears on the HUD, above the Pikmin counter, after the [[Prototype Detector]] has been collected. It helps the player to track down every treasure in the game. | In ''Pikmin 2'', the Treasure Gauge appears on the HUD, above the Pikmin counter, after the [[Prototype Detector]] has been collected. It helps the player to track down every treasure in the game. | ||
| Line 148: | Line 142: | ||
{{clear}} | {{clear}} | ||
====Sublevel==== | ====Sublevel==== | ||
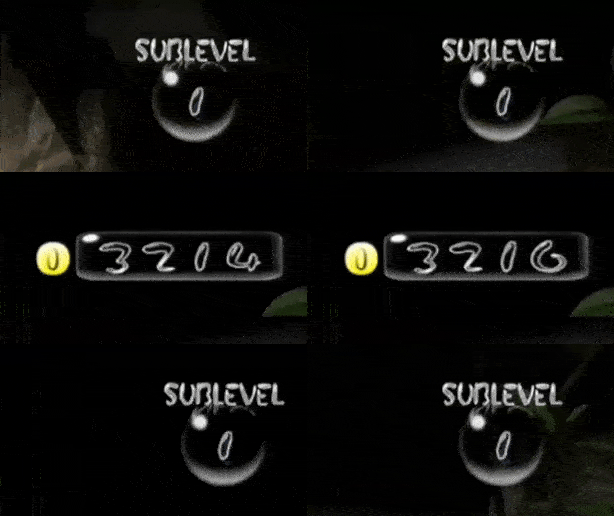
[[File:HUD Sublevel.png|thumb | [[File:HUD Sublevel.png|thumb|Sublevel counter in ''Pikmin 2''.]] | ||
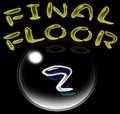
When in a [[cave]] in ''Pikmin 2'', the day counter is replaced with a sublevel counter. Much like with the day counter, the word "SUBLEVEL" appears atop a bubble, that contains the sublevel number inside. When on the final sublevel, the words "FINAL" and "FLOOR" appear instead, in yellow. | When in a [[cave]] in ''Pikmin 2'', the day counter is replaced with a sublevel counter. Much like with the day counter, the word "SUBLEVEL" appears atop a bubble, that contains the sublevel number inside. When on the final sublevel, the words "FINAL" and "FLOOR" appear instead, in yellow. | ||
{{clear}} | {{clear}} | ||
===''Pikmin 3'' main=== | ===''Pikmin 3'' main=== | ||
These HUD elements appear in ''Pikmin 3'' exclusively. | These HUD elements appear in ''Pikmin 3'' exclusively. Note that this does not include ''Pikmin 3 Deluxe''. | ||
====Juice counter==== | ====Juice counter==== | ||
[[File:HUD Juice counter.jpg|thumb | [[File:HUD Juice counter.jpg|thumb|Juice counter in ''Pikmin 3''.]] | ||
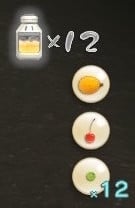
This counter appears on the top-right corner of the screen, below the [[#Day|day counter]], and merely states how many bottles of [[juice]] the player currently has. This does not get updated during the day, seeing as recovered fruits are only juiced when the day ends. If this number reads 0 and the player has not collected any fruit yet, the bottle will blink in an orange color to draw attention to the fact that there won't be food to consume if the day ends. Otherwise, if the number shows a 0, 1, or 2, the bottle will gently blink yellow. | This counter appears on the top-right corner of the screen, below the [[#Day|day counter]], and merely states how many bottles of [[juice]] the player currently has. This does not get updated during the day, seeing as recovered fruits are only juiced when the day ends. If this number reads 0 and the player has not collected any fruit yet, the bottle will blink in an orange color to draw attention to the fact that there won't be food to consume if the day ends. Otherwise, if the number shows a 0, 1, or 2, the bottle will gently blink yellow. | ||
====Recovered fruit list==== | ====Recovered fruit list==== | ||
[[File:HUD Fruit display P3D.jpg|thumb | [[File:HUD Fruit display P3D.jpg|thumb|Recovered fruit list and juice counter in ''Pikmin 3 Deluxe''.]] | ||
This list shows all of the fruits collected in the current day right under the juice counter. A new column of fruits is started after every 7th fruit collected. If a fruit is in more than two pieces, the list will show a piece of the fruit with a counter next to it showing how many pieces have been collected, until the entire fruit has been retrieved. In 2-player mode in {{p3d}}, this is at the center of the screen. | This list shows all of the fruits collected in the current day right under the juice counter. A new column of fruits is started after every 7th fruit collected. If a fruit is in more than two pieces, the list will show a piece of the fruit with a counter next to it showing how many pieces have been collected, until the entire fruit has been retrieved. In 2-player mode in {{p3d}}, this is at the center of the screen. | ||
{{clear}} | {{clear}} | ||
===''Pikmin 3 Deluxe'' main=== | |||
These HUD elements appear in Pikmin 3 Deluxe exclusively. | |||
====KopPad button==== | ====KopPad button==== | ||
[[File:HUD KopPad button P3D.jpg|thumb | [[File:HUD KopPad button P3D.jpg|thumb|The KopPad button in ''Pikmin 3 Deluxe''.]] | ||
In {{p3d}} | In {{p3d}}, a bubble exists at the bottom of the screen to the right of the [[#Health|health display]] to indicate that pressing {{button|switch|-}} opens the [[KopPad]]. | ||
====Hints button==== | ====Hints button==== | ||
[[File:HUD Hints button P3D.jpg|thumb | [[File:HUD Hints button P3D.jpg|thumb|The Hints button in ''Pikmin 3 Deluxe''.]] | ||
In ''Pikmin 3 Deluxe'' | In ''Pikmin 3 Deluxe'', a bubble exists to the right of the KopPad button to indicate that pressing {{button|switch|padu}} opens the current [[Hint]]. This bubble sparkles if a new hint is available, and otherwise looks similar to the KopPad button. It only appears if "Hint Display" is turned on in the [[pause menu|Options menu]]. | ||
{{clear}} | {{clear}} | ||
===''Hey! Pikmin'' main=== | ===''Hey! Pikmin'' main=== | ||
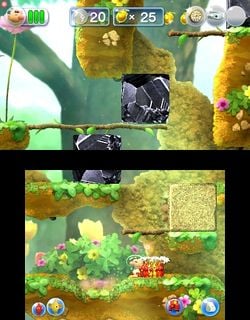
[[File:Back-and-Forth Road 7.jpg|thumb | [[File:Back-and-Forth Road 7.jpg|thumb|250px|A screenshot showing most HUD elements.]] | ||
These HUD elements appear in ''Hey! Pikmin'' exclusively. | These HUD elements appear in ''Hey! Pikmin'' exclusively. | ||
| Line 199: | Line 195: | ||
====Time==== | ====Time==== | ||
[[File:HUD Pikmin 2 time.png|thumb | [[File:HUD Pikmin 2 time.png|thumb|The timer in ''Pikmin 2''.]] | ||
In ''Pikmin 2'''s Challenge Mode, the sublevel counter is replaced by a timer. The word "TIME" is on top of an oval bubble, which contains the time left inside. When the timer reaches 10 seconds, it becomes red. Upon entering a new sublevel, some more time is added, and the timer's numbers pop out for a second to signal this change. | In ''Pikmin 2'''s Challenge Mode, the sublevel counter is replaced by a timer. The word "TIME" is on top of an oval bubble, which contains the time left inside. When the timer reaches 10 seconds, it becomes red. Upon entering a new sublevel, some more time is added, and the timer's numbers pop out for a second to signal this change. | ||
{{clear}} | {{clear}} | ||
====Pokos==== | ====Pokos==== | ||
[[File:HUD Pokos.png|thumb | [[File:HUD Pokos.png|thumb|The Poko counter in ''Pikmin 2''.]] | ||
This item is on the top of the screen, with a [[Poko]] symbol to its left. The number inside the square bubble indicates the amount of Pokos collected thus far in this challenge, and whenever it changes, the digits pop out momentarily. | This item is on the top of the screen, with a [[Poko]] symbol to its left. The number inside the square bubble indicates the amount of Pokos collected thus far in this challenge, and whenever it changes, the digits pop out momentarily. | ||
{{clear}} | {{clear}} | ||
====Deaths==== | ====Deaths==== | ||
[[File:HUD deaths.png|thumb | [[File:HUD deaths.png|thumb|The death counter in ''Pikmin 2''.]] | ||
Much like the Poko counter, a number inside a rectangular bubble indicates the number of Pikmin who died in this challenge so far. This counter is to the right of the Poko counter, and the icon to its left is that of a Pikmin [[soul]]. Likewise, the digits pop out when this number changes. | Much like the Poko counter, a number inside a rectangular bubble indicates the number of Pikmin who died in this challenge so far. This counter is to the right of the Poko counter, and the icon to its left is that of a Pikmin [[soul]]. Likewise, the digits pop out when this number changes. | ||
| Line 222: | Line 218: | ||
====Roulette wheel==== | ====Roulette wheel==== | ||
[[File:HUD roulette.png|thumb | [[File:HUD roulette.png|thumb|The roulette in ''Pikmin 2''.]] | ||
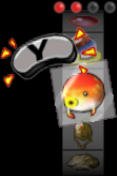
If the player has at least one power in hold, the [[2-Player Battle#Roulette wheel|roulette wheel]] will appear on the right side of their screen. When the roulette is spun, several squares with icons will roll down, until it eventually stops. The square of the standby power will pop out and wiggle about; a flashy {{button|gc|y|wii|-}} icon will also appear above it. | If the player has at least one power in hold, the [[2-Player Battle#Roulette wheel|roulette wheel]] will appear on the right side of their screen. When the roulette is spun, several squares with icons will roll down, until it eventually stops. The square of the standby power will pop out and wiggle about; a flashy {{button|gc|y|wii|-}} icon will also appear above it. | ||
| Line 229: | Line 225: | ||
{{clear}} | {{clear}} | ||
====Marbles==== | ====Marbles==== | ||
[[File:HUD marbles.png|thumb | [[File:HUD marbles.png|thumb|The marble counter in ''Pikmin 2''.]] | ||
On the lower-right corner of each player's screen, four bubbles appear. These indicate how many yellow marbles the player has collected, with each one retrieved filling up an empty bubble with a marble icon. | On the lower-right corner of each player's screen, four bubbles appear. These indicate how many yellow marbles the player has collected, with each one retrieved filling up an empty bubble with a marble icon. | ||
| Line 237: | Line 233: | ||
====Collect Treasure! counter==== | ====Collect Treasure! counter==== | ||
[[File:HUD Collect Treasure! counter.png|thumb | [[File:HUD Collect Treasure! counter.png|thumb|The counter in Collect Treasure! missions.]] | ||
This meter displays how many [[Poko]]s the player has collected. This meter also displays how close the player is to achieving the next medal (bronze, silver, gold, platinum). The meter doesn't show notches below zero or above the platinum score. | This meter displays how many [[Poko]]s the player has collected. This meter also displays how close the player is to achieving the next medal (bronze, silver, gold, platinum). The meter doesn't show notches below zero or above the platinum score. | ||
{{clear}} | {{clear}} | ||
====Battle Enemies! counter==== | ====Battle Enemies! counter==== | ||
[[File:HUD Battle Enemies! counter.jpg|thumb | [[File:HUD Battle Enemies! counter.jpg|thumb|The counter in Battle Enemies! missions.]] | ||
This is the Battle Enemies! counterpart to the above Poko bar, showing the amount of enemies that the player has defeated. Unlike the Poko meter, this meter also displays the amount of enemies left to defeat. | This is the Battle Enemies! counterpart to the above Poko bar, showing the amount of enemies that the player has defeated. Unlike the Poko meter, this meter also displays the amount of enemies left to defeat. | ||
{{clear}} | {{clear}} | ||
====Pikmin Reunion counter==== | ====Pikmin Reunion counter==== | ||
[[File:HUD Pikmin Reunion counter P3D.jpg|thumb | [[File:HUD Pikmin Reunion counter P3D.jpg|thumb|The special Poko counter in Pikmin Reunion.]] | ||
This variant of the Collect Treasure! counter appears in [[Pikmin Reunion]], and contains a box to display how many [[Pikmin Family|Pikmin]] the player has collected. | This variant of the Collect Treasure! counter appears in [[Pikmin Reunion]], and contains a box to display how many [[Pikmin Family|Pikmin]] the player has collected. | ||
{{clear}} | {{clear}} | ||
====Time==== | ====Time==== | ||
[[File:HUD Mission Mode time.jpg|thumb | [[File:HUD Mission Mode time.jpg|thumb|The timer in Mission Mode.]] | ||
The time remaining to clear a Mission Mode or Side Stories stage. It shows the time remaining, and flashes to warn the player when a quarter of the allotted time has elapsed. It is in the top right corner of the screen. | The time remaining to clear a Mission Mode or Side Stories stage. It shows the time remaining, and flashes to warn the player when a quarter of the allotted time has elapsed. It is in the top right corner of the screen. | ||
{{clear}} | {{clear}} | ||
====Time counter==== | ====Time counter==== | ||
[[File:HUD Side Stories Timer P3D.jpg|thumb | [[File:HUD Side Stories Timer P3D.jpg|thumb|The counter in time-based Side Story missions.]] | ||
This counter displays the time remaining in Side Story missions based on completing a single task within a time limit. It replaces the standard timer. The medal displayed changes as the timer counts down. It is in the top left corner of the screen. | This counter displays the time remaining in Side Story missions based on completing a single task within a time limit. It replaces the standard timer. The medal displayed changes as the timer counts down. It is in the top left corner of the screen. | ||
{{clear}} | {{clear}} | ||
| Line 265: | Line 261: | ||
====Roulette wheel==== | ====Roulette wheel==== | ||
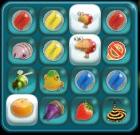
[[File:HUD Bingo roulette.jpg|thumb | [[File:HUD Bingo roulette.jpg|thumb|Player 1's roulette wheel.]] | ||
The roulette wheel shows the player what power-up they currently possess, and how many powers, up to a total of five, the player has in reserve. The powers are earned via [[Cupid’s Grenade]]s. | The roulette wheel shows the player what power-up they currently possess, and how many powers, up to a total of five, the player has in reserve. The powers are earned via [[Cupid’s Grenade]]s. | ||
| Line 279: | Line 275: | ||
====Radar toggle==== | ====Radar toggle==== | ||
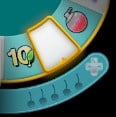
[[File:HUD Radar toggle.jpg|thumb | [[File:HUD Radar toggle.jpg|thumb|The radar toggle button.]] | ||
This label notifies the player that they can press {{button|wiiu|padd}} to open the [[radar]]. The label is only shown while Off-TV Play is enabled. | This label notifies the player that they can press {{button|wiiu|padd}} to open the [[radar]]. The label is only shown while Off-TV Play is enabled. | ||
| Line 286: | Line 282: | ||
====Stylus controls buttons==== | ====Stylus controls buttons==== | ||
[[File:HUD Stylus controls buttons.jpg|thumb | [[File:HUD Stylus controls buttons.jpg|thumb|x130px|The buttons that appear with stylus controls.]] | ||
{{stub}} | {{stub}} | ||
These stylus controls are for the moves that cannot be performed by touching anywhere on the map or using a shoulder button. They are spray (functionally identical to the normal spray command), dismiss (which doubles as the charge command during lock-on) and Apps (which activate the map, Go Here!, and the apps available on the GamePad when using other control schemes. The item command also appears here in Bingo Battle, shown by a [[Cupid's Grenade]] icon. | These stylus controls are for the moves that cannot be performed by touching anywhere on the map or using a shoulder button. They are spray (functionally identical to the normal spray command), dismiss (which doubles as the charge command during lock-on) and Apps (which activate the map, Go Here!, and the apps available on the GamePad when using other control schemes. The item command also appears here in Bingo Battle, shown by a [[Cupid's Grenade]] icon. | ||
| Line 292: | Line 288: | ||
===''Pikmin 3 Deluxe'' action menu=== | ===''Pikmin 3 Deluxe'' action menu=== | ||
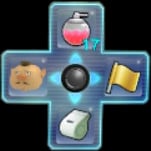
[[File:P3D action menu.jpg|thumb | [[File:P3D action menu.jpg|thumb|The action menu.]] | ||
In {{p3d}}, some actions were moved from specific buttons to a dedicated menu. When {{button|switch|y|switch|facel}} is pressed, the menu shows up on-screen above the current leader's head, and disappears when released. While the button is held, the player can tilt {{button|switch|lstick}} in one of the four cardinal directions to perform the action associated with that direction. Despite the menu looking like a plus sign, the player cannot use {{button|switch|pad}} or {{button|switch|pcpad}} to pick an action. If a direction has no action available, or the action it has available cannot be performed, then its icon will be a gray ×, and tilting in that direction will not do anything. The following actions exist: | In {{p3d}} and [[Pikmin 4]], some actions were moved from specific buttons to a dedicated menu. When {{button|switch|y|switch|facel}} is pressed, the menu shows up on-screen above the current leader's head, and disappears when released. While the button is held, the player can tilt {{button|switch|lstick}} in one of the four cardinal directions to perform the action associated with that direction. Despite the menu looking like a plus sign, the player cannot use {{button|switch|pad}} or {{button|switch|pcpad}} to pick an action. If a direction has no action available, or the action it has available cannot be performed, then its icon will be a gray ×, and tilting in that direction will not do anything. The following actions exist: | ||
{| class="wikitable sortable" | {| class="wikitable sortable" | ||
| Line 306: | Line 302: | ||
! Leader swap | ! Leader swap | ||
| Swaps to the specified leader. Leaders in the area follow a specific order, and when there are two choices to swap to, the leader on the left action is the one that comes earlier in the order, and the leader to the right action comes later. In [[Story Mode]], the order is always Alph, Brittany, Charlie, but in [[Mission Mode]], it depends on the mission. The order can be found in the corresponding mission's article. | | Swaps to the specified leader. Leaders in the area follow a specific order, and when there are two choices to swap to, the leader on the left action is the one that comes earlier in the order, and the leader to the right action comes later. In [[Story Mode]], the order is always Alph, Brittany, Charlie, but in [[Mission Mode]], it depends on the mission. The order can be found in the corresponding mission's article. | ||
| Left or | | Left or Right | ||
| Matches the icon of the leader to swap to. | | Matches the icon of the leader to swap to. | ||
| When there are leaders to swap to. If there is only one leader to pick, only the left action will be available. | | When there are leaders to swap to. If there is only one leader to pick, only the left action will be available. | ||
| Line 354: | Line 350: | ||
There is also a small cone that points downward, to the center of the cursor. This cone, present in all games, has a color that reflects the type of the current [[#Standby Pikmin|standby Pikmin]], and is colored white if there is no Pikmin available for standby. | There is also a small cone that points downward, to the center of the cursor. This cone, present in all games, has a color that reflects the type of the current [[#Standby Pikmin|standby Pikmin]], and is colored white if there is no Pikmin available for standby. | ||
In ''Pikmin 3'', under the classic [[control]] scheme, if the player [[Lock-on|locks-on]] to an object and releases the lock, the cursor will stay on top of the object. If the player rotates the [[camera]] around, the cursor will still be on the object, and if it goes off-camera, the cursor will stay in-camera, but still point towards it. This effect stops if the player moves the cursor manually. | In ''Pikmin 3'', under the classic [[Controls|control]] scheme, if the player [[Lock-on|locks-on]] to an object and releases the lock, the cursor will stay on top of the object. If the player rotates the [[camera]] around, the cursor will still be on the object, and if it goes off-camera, the cursor will stay in-camera, but still point towards it. This effect stops if the player moves the cursor manually. | ||
In ''Hey! Pikmin'', a small white cursor appears underneath the stylus when it is pressed on the screen, and doesn't appear otherwise. | In ''Hey! Pikmin'', a small white cursor appears underneath the stylus when it is pressed on the screen, and doesn't appear otherwise. | ||
| Line 366: | Line 362: | ||
===Fraction numbers=== | ===Fraction numbers=== | ||
{{switchable|float=right | |||
{{switchable | |||
|Pikmin | |Pikmin | ||
|[[File:HUD fraction numbers P1.png|thumb | |[[File:HUD fraction numbers P1.png|thumb|Fraction numbers in ''Pikmin''.]] | ||
|Pikmin 2 | |Pikmin 2 | ||
|[[File:HUD fraction numbers P2.png|thumb | |[[File:HUD fraction numbers P2.png|thumb|Fraction numbers in ''Pikmin 2''.]] | ||
|Pikmin 3 | |Pikmin 3 | ||
|[[File:HUD Carrying numbers (Rock) P3D.jpg|thumb | |[[File:HUD Carrying numbers (Rock) P3D.jpg|thumb|Fraction numbers in ''Pikmin 3 Deluxe''.]] | ||
}} | }} | ||
{{game help|p3}} | {{game help|p3}} | ||
When something is being carried, two numbers will appear on top of it, one on top of a dash, one below. The number on the top indicates the minimum strength needed to carry the object (i.e. the weight), whereas the bottom number shows the total strength of the Pikmin currently grabbing hold of it. | When something is being carried, two numbers will appear on top of it, one on top of a dash, one below. The number on the top indicates the minimum strength needed to carry the object (i.e. the weight), whereas the bottom number shows the total strength of the Pikmin currently grabbing hold of it. | ||
| Line 392: | Line 386: | ||
Fraction numbers also appear in several other situations, albeit less commonly. | Fraction numbers also appear in several other situations, albeit less commonly. | ||
* When Pikmin are standing on top of a [[scale]] (a pair of scales being consisted of two, for the sake of clarity), the bottom number will always be 1, and the top number will indicate the weight of the Pikmin on top of it. These numbers are always colored in pale blue. | * When Pikmin are standing on top of a [[scale]] (a pair of scales being consisted of two, for the sake of clarity), the bottom number will always be 1, and the top number will indicate the weight of the Pikmin on top of it. These numbers are always colored in pale blue. | ||
* When Pikmin are on top of a [[ | * When Pikmin are on top of a [[bag]], the total weight imposed is displayed on the top number, and the weight necessary to squash it is shown on the bottom one. These numbers are always colored in pale blue. | ||
* When dragging a cardboard box, the top number indicates the Pikmin needed to get it moving, and the bottom one indicates the Pikmin that are pushing. These numbers are always colored in rock gray with pale blue outline. | * When dragging a cardboard box, the top number indicates the Pikmin needed to get it moving, and the bottom one indicates the Pikmin that are pushing. These numbers are always colored in rock gray with pale blue outline. | ||
| Line 413: | Line 407: | ||
In ''Hey! Pikmin'', an enemy's health is displayed as a small bar instead of a wheel. The bar starts filled with magenta, and as the enemy's health decreases, the magenta portion decreases and the grey proportion increases, from right to left. | In ''Hey! Pikmin'', an enemy's health is displayed as a small bar instead of a wheel. The bar starts filled with magenta, and as the enemy's health decreases, the magenta portion decreases and the grey proportion increases, from right to left. | ||
Other than representing an entity's health, the wheel is also used to show how much time is left until a [[bomb-rock]] or [[Volatile Dweevil]] explodes in {{p2}}. | In ''Pikmin 4'', due to the inclusion of health upgrade items, only enemies are depicted to have a health wheel. The [[Pikmin 4 player character|player character]], alongside [[Oatchi]] are shown with a health bar instead, which will grow larger if health upgrades are bought or if Oatchi eats a Scrummy Bone at full health. | ||
Other than representing an entity's health, the wheel is also used to show how much time is left until a [[bomb-rock]] or [[Volatile Dweevil]] explodes in {{p2}}, and before a [[fire starter]] extinguishes in {{p4}}. | |||
===Lock-on display=== | ===Lock-on display=== | ||
[[File:HUD Blue arrow P3D.jpg|thumb | [[File:HUD Blue arrow P3D.jpg|thumb|The blue arrow that indicates an object that can be locked-onto.]] | ||
{{game help|p3d|Document what stuff looks like when the player is locked-on to something.}} | {{game help|p3d|Document what stuff looks like when the player is locked-on to something.}} | ||
| Line 462: | Line 458: | ||
Pikmin health and numbers.jpg|Screenshot showing the cursor, a health wheel and fraction numbers. | Pikmin health and numbers.jpg|Screenshot showing the cursor, a health wheel and fraction numbers. | ||
Pikmin challenge.png|[[Challenge Mode (Pikmin)|Challenge Mode]]. | Pikmin challenge.png|[[Challenge Mode (Pikmin)|Challenge Mode]]. | ||
P1 HUD Olimar.png|The icon for [[Olimar]]. | P1 HUD Olimar.png|The icon for [[Olimar]].{{class|blackbg}} | ||
P1 HUD No Pikmin.png|The [[Pikmin family|Pikmin]] icon when there are no Pikmin in Olimar's [[squad]]. | P1 HUD No Pikmin.png|The [[Pikmin family|Pikmin]] icon when there are no Pikmin in Olimar's [[squad]].{{class|blackbg}} | ||
P1 HUD Red Leaf Pikmin.png|The icon for a [[Red Pikmin]] on the [[Maturity|leaf]] stage. | P1 HUD Red Leaf Pikmin.png|The icon for a [[Red Pikmin]] on the [[Maturity|leaf]] stage.{{class|blackbg}} | ||
P1 HUD Red Bud Pikmin.png|The icon for a Red Pikmin on the [[Maturity|bud]] stage. | P1 HUD Red Bud Pikmin.png|The icon for a Red Pikmin on the [[Maturity|bud]] stage.{{class|blackbg}} | ||
P1 HUD Red Flower Pikmin.png|The icon for a Red Pikmin on the [[Maturity|flower]] stage. | P1 HUD Red Flower Pikmin.png|The icon for a Red Pikmin on the [[Maturity|flower]] stage.{{class|blackbg}} | ||
P1 HUD Yellow Leaf Pikmin.png|The icon for a [[Yellow Pikmin]] on the leaf stage. | P1 HUD Yellow Leaf Pikmin.png|The icon for a [[Yellow Pikmin]] on the leaf stage.{{class|blackbg}} | ||
P1 HUD Yellow Bud Pikmin.png|The icon for a Yellow Pikmin on the bud stage. | P1 HUD Yellow Bud Pikmin.png|The icon for a Yellow Pikmin on the bud stage.{{class|blackbg}} | ||
P1 HUD Yellow Flower Pikmin.png|The icon for a Yellow Pikmin on the flower stage. | P1 HUD Yellow Flower Pikmin.png|The icon for a Yellow Pikmin on the flower stage.{{class|blackbg}} | ||
P1 HUD Blue Leaf Pikmin.png|The icon for a [[Blue Pikmin]] on the leaf stage. | P1 HUD Blue Leaf Pikmin.png|The icon for a [[Blue Pikmin]] on the leaf stage.{{class|blackbg}} | ||
P1 HUD Blue Bud Pikmin.png|The icon for a Blue Pikmin on the bud stage. | P1 HUD Blue Bud Pikmin.png|The icon for a Blue Pikmin on the bud stage.{{class|blackbg}} | ||
P1 HUD Blue Flower Pikmin.png|The icon for a Blue Pikmin on the flower stage. | P1 HUD Blue Flower Pikmin.png|The icon for a Blue Pikmin on the flower stage.{{class|blackbg}} | ||
P1 HUD Yellow Leaf Bomb-Rock.png|The icon for a Yellow Pikmin holding a [[Bomb rock|bomb-rock]] on the leaf stage. | P1 HUD Yellow Leaf Bomb-Rock.png|The icon for a Yellow Pikmin holding a [[Bomb rock|bomb-rock]] on the leaf stage.{{class|blackbg}} | ||
P1 HUD Yellow Bud Bomb-Rock.png|The icon for a Yellow Pikmin holding a bomb-rock on the bud stage. | P1 HUD Yellow Bud Bomb-Rock.png|The icon for a Yellow Pikmin holding a bomb-rock on the bud stage.{{class|blackbg}} | ||
P1 HUD Yellow Flower Bomb-Rock.png|The icon for a Yellow Pikmin holding a bomb-rock on the flower stage. | P1 HUD Yellow Flower Bomb-Rock.png|The icon for a Yellow Pikmin holding a bomb-rock on the flower stage.{{class|blackbg}} | ||
P1 Unused Red Leaf Bomb Rock Icon.png|Unused icon for a Red Pikmin holding a bomb-rock on the leaf stage.{{class|blackbg}} | |||
P1 Unused Red Bud Bomb Rock Icon.png|Unused icon for a Red Pikmin holding a bomb-rock on the bud stage.{{class|blackbg}} | |||
P1 Unused Red Flower Bomb Rock Icon.png|Unused icon for a Red Pikmin holding a bomb-rock on the flower stage.{{class|blackbg}} | |||
P1 Unused Blue Leaf Bomb Rock Icon.png|Unused icon for a Blue Pikmin holding a bomb-rock on the leaf stage.{{class|blackbg}} | |||
P1 Unused Blue Bud Bomb Rock Icon.png|Unused icon for a Blue Pikmin holding a bomb-rock on the bud stage.{{class|blackbg}} | |||
P1 Unused Blue Flower Bomb Rock Icon.png|Unused icon for a Blue Pikmin holding a bomb-rock on the flower stage.{{class|blackbg}} | |||
Captain Olimar P1S icon.png|The icon for Captain Olimar in [[Pikmin 1 (Nintendo Switch)|the Nintendo Switch version of ''Pikmin 1'']].{{class|blackbg}} | |||
No Pikmin P1S icon.png|The icon for when no Pikmin are in Olimar's squad in the Nintendo Switch version of ''Pikmin 1''.{{class|blackbg}} | |||
Red Leaf Pikmin P1S icon.png|The icon for a Red Pikmin in the leaf stage in the Nintendo Switch version of ''Pikmin 1''.{{class|blackbg}} | |||
Red Bud Pikmin P1S icon.png|The icon for a Red Pikmin in the bud stage in the Nintendo Switch version of ''Pikmin 1''.{{class|blackbg}} | |||
Red Flower Pikmin P1S icon.png|The icon for a Red Pikmin in the flower stage in the Nintendo Switch version of ''Pikmin 1''.{{class|blackbg}} | |||
Yellow Leaf Pikmin P1S icon.png|The icon for a Yellow Pikmin in the leaf stage in the Nintendo Switch version of ''Pikmin 1''.{{class|blackbg}} | |||
Yellow Bud Pikmin P1S icon.png|The icon for a Yellow Pikmin in the leaf stage in the Nintendo Switch version of ''Pikmin 1''.{{class|blackbg}} | |||
Yellow Flower Pikmin P1S icon.png|The icon for a Yellow Pikmin in the leaf stage in the Nintendo Switch version of ''Pikmin 1''.{{class|blackbg}} | |||
Blue Leaf Pikmin P1S icon.png|The icon for a Blue Pikmin in the leaf stage in the Nintendo Switch version of ''Pikmin 1''.{{class|blackbg}} | |||
Blue Bud Pikmin P1S icon.png|The icon for a Blue Pikmin in the bud stage in the Nintendo Switch version of ''Pikmin 1''.{{class|blackbg}} | |||
Blue Flower Pikmin P1S icon.png|The icon for a Blue Pikmin in the flower stage in the Nintendo Switch version of ''Pikmin 1''.{{class|blackbg}} | |||
Yellow Leaf Pikmin Bomb Rock P1S icon.png|The icon for a Yellow Pikmin in the leaf stage holding a bomb rock in the Nintendo Switch version of ''Pikmin 1''.{{class|blackbg}} | |||
Yellow Bud Pikmin Bomb Rock P1S icon.png|The icon for a Yellow Pikmin in the bud stage holding a bomb rock in the Nintendo Switch version of ''Pikmin 1''.{{class|blackbg}} | |||
Yellow Flower Pikmin Bomb Rock P1S icon.png|The icon for a Yellow Pikmin in the flower stage holding a bomb rock in the Nintendo Switch version of ''Pikmin 1''.{{class|blackbg}} | |||
</gallery> | </gallery> | ||
===''Pikmin 2''=== | ===''Pikmin 2''=== | ||
<gallery> | <gallery> | ||
P2 Onion Replica Location.png|Above ground. | |||
P2 Pale Passion Location.png|Inside a cave. | |||
Pikmin 2 health and numbers.jpg|Screenshot showing the cursor, a health wheel and fraction numbers. | Pikmin 2 health and numbers.jpg|Screenshot showing the cursor, a health wheel and fraction numbers. | ||
P2 Concrete Maze Sublevel 1.png|[[Challenge Mode (Pikmin 2)|Challenge Mode]]. | |||
Colosseum.png|[[2-Player Battle]] mode. | Colosseum.png|[[2-Player Battle]] mode. | ||
P2 HUD Olimar.png|The icon for Olimar. | P2S Sublevel HUD.png|The sublevel counter in [[Pikmin 2 (Nintendo Switch)|the Nintendo Switch version of ''Pikmin 2'']]. | ||
P2 HUD Louie.png|The icon for [[Louie]]. | P2S Final Floor HUD.png|The final floor counter in the Nintendo Switch version of ''Pikmin 2''. | ||
P2 HUD President.png|The icon for [[the President]]. | P2S Final Level HUD.png|The final level counter in the Nintendo Switch version of ''Pikmin 2'' if the console's reigon is set to Europe. | ||
P2 HUD No Pikmin.png|The [[Pikmin family|Pikmin]] icon when there are no Pikmin in the active [[leader]]'s [[squad]]. | P2 HUD Olimar.png|The icon for Olimar.{{class|blackbg}} | ||
P1 HUD Red Leaf Pikmin.png|The icon for a Red Pikmin on the [[Maturity|leaf]] stage. | P2 HUD Louie.png|The icon for [[Louie]].{{class|blackbg}} | ||
P1 HUD Red Bud Pikmin.png|The icon for a Red Pikmin on the [[Maturity|bud]] stage. | P2 HUD President.png|The icon for [[the President]].{{class|blackbg}} | ||
P1 HUD Red Flower Pikmin.png|The icon for a Red Pikmin on the [[Maturity|flower]] stage. | P2 HUD No Pikmin.png|The [[Pikmin family|Pikmin]] icon when there are no Pikmin in the active [[leader]]'s [[squad]].{{class|blackbg}} | ||
P1 HUD Yellow Leaf Pikmin.png|The icon for a Yellow Pikmin on the leaf stage. | P1 HUD Red Leaf Pikmin.png|The icon for a Red Pikmin on the [[Maturity|leaf]] stage.{{class|blackbg}} | ||
P1 HUD Yellow Bud Pikmin.png|The icon for a Yellow Pikmin on the bud stage. | P1 HUD Red Bud Pikmin.png|The icon for a Red Pikmin on the [[Maturity|bud]] stage.{{class|blackbg}} | ||
P1 HUD Yellow Flower Pikmin.png|The icon for a Yellow Pikmin on the flower stage. | P1 HUD Red Flower Pikmin.png|The icon for a Red Pikmin on the [[Maturity|flower]] stage.{{class|blackbg}} | ||
P1 HUD Blue Leaf Pikmin.png|The icon for a Blue Pikmin on the leaf stage. | P1 HUD Yellow Leaf Pikmin.png|The icon for a Yellow Pikmin on the leaf stage.{{class|blackbg}} | ||
P1 HUD Blue Bud Pikmin.png|The icon for a Blue Pikmin on the bud stage. | P1 HUD Yellow Bud Pikmin.png|The icon for a Yellow Pikmin on the bud stage.{{class|blackbg}} | ||
P1 HUD Blue Flower Pikmin.png|The icon for a Blue Pikmin on the flower stage. | P1 HUD Yellow Flower Pikmin.png|The icon for a Yellow Pikmin on the flower stage.{{class|blackbg}} | ||
P2 HUD Purple Leaf Pikmin.png|The icon for a [[Purple Pikmin]] on the leaf stage. | P1 HUD Blue Leaf Pikmin.png|The icon for a Blue Pikmin on the leaf stage.{{class|blackbg}} | ||
P2 HUD Purple Bud Pikmin.png|The icon for a Purple Pikmin on the bud stage. | P1 HUD Blue Bud Pikmin.png|The icon for a Blue Pikmin on the bud stage.{{class|blackbg}} | ||
P2 HUD Purple Flower Pikmin.png|The icon for a Purple Pikmin on the flower stage. | P1 HUD Blue Flower Pikmin.png|The icon for a Blue Pikmin on the flower stage.{{class|blackbg}} | ||
P2 HUD White Leaf Pikmin.png|The icon for a [[White Pikmin]] on the leaf stage. | P2 HUD Purple Leaf Pikmin.png|The icon for a [[Purple Pikmin]] on the leaf stage.{{class|blackbg}} | ||
P2 HUD White Bud Pikmin.png|The icon for a White Pikmin on the bud stage. | P2 HUD Purple Bud Pikmin.png|The icon for a Purple Pikmin on the bud stage.{{class|blackbg}} | ||
P2 HUD White Flower Pikmin.png|The icon for a White Pikmin on the flower stage. | P2 HUD Purple Flower Pikmin.png|The icon for a Purple Pikmin on the flower stage.{{class|blackbg}} | ||
P2 HUD Leaf Bulbmin.png|The icon for a [[Bulbmin]] on the leaf stage. | P2 HUD White Leaf Pikmin.png|The icon for a [[White Pikmin]] on the leaf stage.{{class|blackbg}} | ||
P2 HUD Bud Bulbmin.png|The icon for a Bulbmin on the bud stage. | P2 HUD White Bud Pikmin.png|The icon for a White Pikmin on the bud stage.{{class|blackbg}} | ||
P2 HUD Flower Bulbmin.png|The icon for a Bulbmin on the flower stage. | P2 HUD White Flower Pikmin.png|The icon for a White Pikmin on the flower stage.{{class|blackbg}} | ||
Treasure Gauge.png|The Treasure gauge, when activated. | P2 HUD Leaf Bulbmin.png|The icon for a [[Bulbmin]] on the leaf stage.{{class|blackbg}} | ||
P2 HUD Bud Bulbmin.png|The icon for a Bulbmin on the bud stage.{{class|blackbg}} | |||
P2 HUD Flower Bulbmin.png|The icon for a Bulbmin on the flower stage.{{class|blackbg}} | |||
Treasure Gauge.png|The Treasure gauge, when activated.{{class|blackbg}} | |||
Captain Olimar P2S icon.png|The icon for Captain Olimar in the Nintendo Switch version of ''Pikmin 2''.{{class|blackbg}} | |||
Louie P2S icon.png|The icon for louie in the Nintendo Switch version of ''Pikmin 2''.{{class|blackbg}} | |||
The President P2S icon.png|The icon for The President in the Nintendo Switch version of ''Pikmin 2''.{{class|blackbg}} | |||
No Pikmin P2S icon.png|The icon for when no Pikmin are in a leader's squad in the Nintendo Switch version of ''Pikmin 2''.{{class|blackbg}} | |||
Red Leaf Pikmin P1S icon.png|The icon for a Red Pikmin in the leaf stage in the Nintendo Switch version of ''Pikmin 2''.{{class|blackbg}} | |||
Red Bud Pikmin P1S icon.png|The icon for a Red Pikmin in the bud stage in the Nintendo Switch version of ''Pikmin 2''.{{class|blackbg}} | |||
Red Flower Pikmin P1S icon.png|The icon for a Red Pikmin in the flower stage in the Nintendo Switch version of ''Pikmin 2''.{{class|blackbg}} | |||
Yellow Leaf Pikmin P1S icon.png|The icon for a Yellow Pikmin in the leaf stage in the Nintendo Switch version of ''Pikmin 2''.{{class|blackbg}} | |||
Yellow Bud Pikmin P1S icon.png|The icon for a Yellow Pikmin in the leaf stage in the Nintendo Switch version of ''Pikmin 2''.{{class|blackbg}} | |||
Yellow Flower Pikmin P1S icon.png|The icon for a Yellow Pikmin in the leaf stage in the Nintendo Switch version of ''Pikmin 2''.{{class|blackbg}} | |||
Blue Leaf Pikmin P1S icon.png|The icon for a Blue Pikmin in the leaf stage in the Nintendo Switch version of ''Pikmin 2''.{{class|blackbg}} | |||
Blue Bud Pikmin P1S icon.png|The icon for a Blue Pikmin in the bud stage in the Nintendo Switch version of ''Pikmin 2''.{{class|blackbg}} | |||
Blue Flower Pikmin P1S icon.png|The icon for a Blue Pikmin in the flower stage in the Nintendo Switch version of ''Pikmin 2''.{{class|blackbg}} | |||
Purple Leaf Pikmin P2S icon.png|The icon for a Purple Pikmin in the leaf stage in the Nintendo Switch version of ''Pikmin 2''.{{class|blackbg}} | |||
Purple Bud Pikmin P2S icon.png|The icon for a Purple Pikmin in the bud stage in the Nintendo Switch version of ''Pikmin 2''.{{class|blackbg}} | |||
Purple Flower Pikmin P2S icon.png|The icon for a Purple Pikmin in the flower stage in the Nintendo Switch version of ''Pikmin 2''.{{class|blackbg}} | |||
White Leaf Pikmin P2S icon.png|The icon for a White Pikmin in the leaf stage in the Nintendo Switch version of ''Pikmin 2''.{{class|blackbg}} | |||
White Bud Pikmin P2S icon.png|The icon for a White Pikmin in the bud stage in the Nintendo Switch version of ''Pikmin 2''.{{class|blackbg}} | |||
White Flower Pikmin P2S icon.png|The icon for a White Pikmin in the flower stage in the Nintendo Switch version of ''Pikmin 2''.{{class|blackbg}} | |||
Leaf Bulbmin P2S icon.png|The icon for a Bulbmin in the leaf stage in the Nintendo Switch version of ''Pikmin 2''.{{class|blackbg}} | |||
Bud Bulbmin P2S icon.png|The icon for a Bulbmin in the leaf stage in the Nintendo Switch version of ''Pikmin 2''.{{class|blackbg}} | |||
Flower Bulbmin P2S icon.png|The icon for a Bulbmin in the leaf stage in the Nintendo Switch version of ''Pikmin 2''.{{class|blackbg}} | |||
</gallery> | </gallery> | ||
| Line 525: | Line 566: | ||
BingoBattle.jpg|[[Bingo Battle]]. | BingoBattle.jpg|[[Bingo Battle]]. | ||
Hocotatians.png|The icons used for [[Captain Olimar]] and [[Louie]] in {{p3}}. | Hocotatians.png|The icons used for [[Captain Olimar]] and [[Louie]] in {{p3}}. | ||
</gallery> | |||
===''Pikmin 4''=== | |||
<gallery> | |||
P4 Sun Meter Paused.jpg|The Sun Meter when paused using the [[Survey Drone]]. | |||
P4 Moon Meter.jpg|The Sun Meter during [[night expeditions]] uses a moon icon to represent the night. | |||
P4 OST Sun Meter.jpg|The Sun Meter in [[Olimar's Shipwreck Tale]] features a day counter that counts down. | |||
P4 OST Sun Meter Paused.jpg|The ''Olimar's Shipwreck Tale'' Sun Meter when paused using the ''Survey Drone'' | |||
</gallery> | </gallery> | ||
| Line 539: | Line 588: | ||
<gallery> | <gallery> | ||
Health.png|Indicator of health remaining. | Health.png|Indicator of health remaining. | ||
PA HUD Timer.png|The timer when mastery is achievable. | |||
All HUD.png|The player's squad has the three main types of [[Pikmin family|Pikmin]]. | All HUD.png|The player's squad has the three main types of [[Pikmin family|Pikmin]]. | ||
Blues HUD.png|The color of Pikmin is set to blue. | Blues HUD.png|The color of Pikmin is set to blue. | ||
| Line 547: | Line 597: | ||
==Trivia== | ==Trivia== | ||
[[File:Health icon backdrop shenanigan.jpg|thumb | [[File:Health icon backdrop shenanigan.jpg|thumb|The gap where Olimar's right ear would be can be easily seen on the President's health icon.]] | ||
*In ''[[Pikmin 2]]'', the standby icons for leaf and bud [[Purple Pikmin]] lack the creature's hairs. | *In ''[[Pikmin 2]]'', the standby icons for leaf and bud [[Purple Pikmin]] lack the creature's hairs. | ||
*Also in ''Pikmin 2'', the Purple and White Pikmin's standby icons use the Yellow Pikmin's icons as a base. | *Also in ''Pikmin 2'', the Purple and White Pikmin's standby icons use the Yellow Pikmin's icons as a base. | ||
*Once again in ''Pikmin 2'', Olimar's health icon uses a backdrop cut with the shape of his head, fitting perfectly into his icon. But the President's and Louie's health icons use the same texture, where the backdrop doesn't fit. | *Once again in ''Pikmin 2'', Olimar's health icon uses a backdrop cut with the shape of his head, fitting perfectly into his icon. But the President's and Louie's health icons use the same texture, where the backdrop doesn't fit. This is fixed in ''[[Pikmin 2 (Nintendo Switch)]]'' due to HUD touchups. | ||
==Names in other languages== | ==Names in other languages== | ||
'''Sun Meter''' | '''Sun Meter''' | ||
{{foreignname | {{foreignname | ||
|Jap=太陽メーター | |||
|JapR=Taiyō mētā | |||
|JapM=Sun meter | |||
|FraA=Icône du soleil | |FraA=Icône du soleil | ||
|FraAM=Sun icon | |FraAM=Sun icon | ||
Revision as of 15:19, July 20, 2024
|
The following article or section is in need of assistance from someone who plays Pikmin 3. |
|
This article or section is in need of more images. Particularly: |
The heads-up display (HUD for short) is the name given to the informational features presented on-screen at all times during the main game. These are usually static, and provide vital information to the player, normally numerical, such as the number of Pikmin in the party, the current day, and the number of sprays available.
Screen elements
This section lists the HUD elements that are drawn on the screen, in a static position, in order to be accessible to the player during gameplay. In all games, these elements drop in and out smoothly from the edges of the screen whenever a menu opens or closes, or when the day begins.
Main
While playing, it is important for the player to keep track of several things, such as the number of Pikmin available, without having to access a menu to do so each time. The most important elements appear in-game on the edges of the screen, as to not obstruct the view of the game world. The following items are the most common ones, throughout games and game modes:
Sun Meter
The Sun Meter[1] indicates how much remains of the current day in Story Mode. In the first three mainline games and Pikmin 3 Deluxe, it is a bar with a pointer that is placed at the start when a day begins, and moves to the right as time goes by, eventually reaching the end of the bar at night time. The meter is found spanning from the top-left of the screen to almost the right side, as the top-right corner is taken by the day counter (in Pikmin 3 Deluxe, the juice counter occupies that place instead). In Pikmin 4, the Sun Meter is instead a dial whose needle moves from left to right as the day progresses. Night expeditions feature a meter that serves the same purpose and looks the same, except the sun icon in the bottom is replaced by a moon. Furthermore, Olimar's Shipwreck Tale displays a number above the sun icon for how many days that remain before Captain Olimar's life support system fails.
The meter in the first three games consists of 13 bubbles, each one representing one Earth hour. The first, central and final bubbles have a secondary bubble; this pinpoints the start, middle and end of the day. The pointer that moves along the meter is a large circle with a sun inside. The dials for days and night expeditions in Pikmin 4 only contain seven bubbles. A red field in Pikmin 4's Sun Meter represents sunsets or sunrises; sunsets begin between the sixth and the seventh bubble, and sunrises begin on the sixth bubble.
Whenever the sun icon reaches one quarter, one half, or three quarters into the meter, it pops out for a second, and the sound of some small bells plays. At the middle of the day, these bells play twice in a row, and in Pikmin 2, two church bells can also be heard. These minor details call the player's attention, and help them keep track of the passage of time. Just before sunset, the half-hour chime of Westminster Quarters plays, except slightly different, with the notes G♯4, C5, A♯4, D♯5, C5, G♯4, A♯4, D♯4. In Japanese schools, the half-hour chime of Westminster Quarters indicates the beginning or end of a period.
Pikmin 4 does not show a Sun Meter in situations where time does not pass, such as the Rescue Command Post and the tutorial with Captain Olimar.
Day
At the top right of the screen, the day counter can be found, in the Story Modes of all mainline Pikmin games except Pikmin 3 Deluxe and Pikmin 4. The current day number is inside a bubble, under the word "day" in Pikmin (and the remake), and "Day" in the following games. The number on this counter is compressed horizontally to fit inside the bubble; this becomes evident after the player reaches 1000 days on the expedition.
Health

On the bottom-left corner, an icon for each available leader can be seen, each inside a bubble. To the right of the bubble, there is a health wheel, representing the leader's health.
In Pikmin 3 Deluxe, if a leader is in another leader's group, their icon will be darkened.
In Hey! Pikmin, the health display is completely different from the one in the mainline games. Olimar's health appears in the top left of the top screen, and is displayed as a group of bars next to an icon of Olimar. Getting hit by an enemy will reduce the number of colored bars by 1, and collecting a heart will increase the number of colored bars. The bars are green by default, but if they are running out, they will turn yellow and then red.
Standby Pikmin

In Pikmin and Pikmin 2, to the left of the Pikmin counter, there is a bubble with the icon of a Pikmin inside. This icon represents the type of Pikmin closest to the current leader. When the throwing button is held, a Pikmin from this type will be grabbed, as it is the closest one. There are however some times in which a different Pikmin is held, likely caused due to calculation errors on the game's behalf. This problem is more prominent in the first game. If there are no Pikmin nearby, a hollow figure in the shape of a Pikmin will appear instead. The icon shown in this bubble will also reflect the Pikmin's maturity.
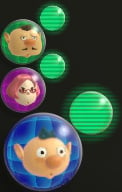
In Pikmin 3, three bubbles appear, with the leftmost one being the biggest and most important: it shows what type of Pikmin will be thrown next, regardless of distance. By pressing ![]() /
/ ![]() /
/ ![]() , the player can toggle to a different Pikmin type. The next two types in the list will be represented in the smaller bubbles. If there are only one or two types, then only one or two bubbles will appear. There is also a number alongside the larger bubble, indicating how many Pikmin of that type there are in the party. In this game, the icons do not reflect the maturity of the next Pikmin to be thrown.
, the player can toggle to a different Pikmin type. The next two types in the list will be represented in the smaller bubbles. If there are only one or two types, then only one or two bubbles will appear. There is also a number alongside the larger bubble, indicating how many Pikmin of that type there are in the party. In this game, the icons do not reflect the maturity of the next Pikmin to be thrown.
In Hey! Pikmin, a bubble for each Pikmin type encountered so far in the area is present in the lower left corner of the touch screen. The largest bubble represents the type that Olimar can currently throw. The player can switch to a different type by tapping another type's bubble, which will make it the largest bubble. If a type is not in Olimar's squad but has been used in the area already, it is represented by a red X mark.
Pikmin counter
The Pikmin counter displays statistics about the player's Pikmin, and these statistics vary by game.
In the mainline games, the Pikmin counters are displayed in the bottom-right corner of the screen. Some numbers in rectangular bubbles appear, separated by slashes. The digits become compressed horizontally, in case the number is too large to fit inside the bubble normally.
The first number indicates the total of Pikmin within the current leader's party. The player can use this number to know how many Pikmin are following them, especially when they're lagging behind and are prone to abandon the party altogether due to the distance. The following number specifies how many Pikmin there are in the field. This can be used to keep track of Pikmin that are dying off-screen.
In Pikmin and Pikmin 2, a third number also exists. This indicates the total number of Pikmin, which is the sum of the Pikmin on the field and the Pikmin inside all Onions.
Due to the importance of having a large amount of Pikmin in the first game's Challenge Mode, the total Pikmin counter is larger than the rest. In contrast, this number is entirely absent in Pikmin 2's Challenge Mode, 2-Player Battle mode, and while inside a cave in story mode, as that information is not important during those times.
In Pikmin and Pikmin 2, the in-party number is slightly larger than the rest. A multiplication sign also appears between the standby Pikmin icon and the number of in-party Pikmin. In addition, in the first game, the in-party counter's bubble is always green, and the field counter's bubble becomes red when there are 100 Pikmin on the field.
In Hey! Pikmin, the Pikmin counter is at the top of the top screen to the right of Olimar's health. It contains a Pikmin icon and the number of Pikmin currently in the area. If not all of those Pikmin are in Olimar's squad, the number will turn from white to gray, and if some Pikmin have been separated for some time, the number will flash red.
Spray counter
- Pikmin 2
- Pikmin 3
In Pikmin 2 and Pikmin 3, after the player has created at least one spray, a counter will appear on the left side of the screen.
In Pikmin 2, the counter has a D-pad shaped symbol (![]() ) on the GameCube, and a "1" and a "2" inside circles (
) on the GameCube, and a "1" and a "2" inside circles (![]() and
and ![]() ) on the Wii. If a specific spray type has been discovered, a dot of its color appears on the equivalent D-pad direction. Above or below the D-pad or Wii Remote buttons, an icon representing the spray can be seen, followed by a multiplication sign and the number of sprays available of that type.
) on the Wii. If a specific spray type has been discovered, a dot of its color appears on the equivalent D-pad direction. Above or below the D-pad or Wii Remote buttons, an icon representing the spray can be seen, followed by a multiplication sign and the number of sprays available of that type.
In Pikmin 3, the counter is instead a simple icon showing the spray, followed by a multiplication symbol and the number of sprays on hand. Underneath is a bar that shows how close the player is to a new spray.
Pikmin 2 main
These items appear in Pikmin 2 exclusively.
Treasure Gauge
In Pikmin 2, the Treasure Gauge appears on the HUD, above the Pikmin counter, after the Prototype Detector has been collected. It helps the player to track down every treasure in the game.
There is a needle that wiggles continuously when a treasure is in the current field or cave, no matter if an enemy has it or it is buried. As the active leader approaches a treasure, the needle moves to the right and starts to flash and beep. When all the treasures in an area have been collected, or there were never any present to begin with, the device automatically turns off with an echoing beep, a flash, and a faint snore. Finally, the box then turns gray to signal the inactivity.
If there is an Antenna Beetle in the area, the box glows purple and the needle moves around erratically, along with incessant beeps and strange noises. Olimar's notes indicate that this is because the Beetle's wings produce supersonic waves; the creature must be defeated for the gauge to function normally again.
Sublevel
When in a cave in Pikmin 2, the day counter is replaced with a sublevel counter. Much like with the day counter, the word "SUBLEVEL" appears atop a bubble, that contains the sublevel number inside. When on the final sublevel, the words "FINAL" and "FLOOR" appear instead, in yellow.
Pikmin 3 main
These HUD elements appear in Pikmin 3 exclusively. Note that this does not include Pikmin 3 Deluxe.
Juice counter
This counter appears on the top-right corner of the screen, below the day counter, and merely states how many bottles of juice the player currently has. This does not get updated during the day, seeing as recovered fruits are only juiced when the day ends. If this number reads 0 and the player has not collected any fruit yet, the bottle will blink in an orange color to draw attention to the fact that there won't be food to consume if the day ends. Otherwise, if the number shows a 0, 1, or 2, the bottle will gently blink yellow.
Recovered fruit list
This list shows all of the fruits collected in the current day right under the juice counter. A new column of fruits is started after every 7th fruit collected. If a fruit is in more than two pieces, the list will show a piece of the fruit with a counter next to it showing how many pieces have been collected, until the entire fruit has been retrieved. In 2-player mode in Pikmin 3 Deluxe, this is at the center of the screen.
Pikmin 3 Deluxe main
These HUD elements appear in Pikmin 3 Deluxe exclusively.
KopPad button
In Pikmin 3 Deluxe, a bubble exists at the bottom of the screen to the right of the health display to indicate that pressing ![]() opens the KopPad.
opens the KopPad.
Hints button
In Pikmin 3 Deluxe, a bubble exists to the right of the KopPad button to indicate that pressing ![]() opens the current Hint. This bubble sparkles if a new hint is available, and otherwise looks similar to the KopPad button. It only appears if "Hint Display" is turned on in the Options menu.
opens the current Hint. This bubble sparkles if a new hint is available, and otherwise looks similar to the KopPad button. It only appears if "Hint Display" is turned on in the Options menu.
Hey! Pikmin main
These HUD elements appear in Hey! Pikmin exclusively.
Whistle button
In the lower right corner of the touch screen, there is an icon of a whistle. Tapping it uses the whistle.
Jetpack button
To the left of the whistle button is a button with the icon of a jetpack. Tapping it activates the jetpack.
Sparklium counter
To the right of the Pikmin counter on the top screen, there is a counter for the value of all the Sparklium Seeds collected in the current area.
Treasure icons
On the top right of the top screen, there are gray circles representing the treasures in the area. When a treasure is collected, its corresponding circle will be filled in with the icon for the treasure.
|
The following article or section is in need of assistance from someone who plays Hey! Pikmin. |
Boss health bar
In boss areas, the Sparklium counter and treasure icons are replaced by a bar for the health of the boss. This bar contains an icon for the boss and a long horizontal line. This line starts completely magenta, and as the health of the boss decreases, more and more of the bar turns gray, from right to left.
Pikmin 2 Challenge Mode
Challenge Mode in Pikmin 2 features some different items. The Treasure Gauge, the sun meter, the day counter, and the total Pikmin counter number are missing in this game mode.
Time
In Pikmin 2's Challenge Mode, the sublevel counter is replaced by a timer. The word "TIME" is on top of an oval bubble, which contains the time left inside. When the timer reaches 10 seconds, it becomes red. Upon entering a new sublevel, some more time is added, and the timer's numbers pop out for a second to signal this change.
Pokos
This item is on the top of the screen, with a Poko symbol to its left. The number inside the square bubble indicates the amount of Pokos collected thus far in this challenge, and whenever it changes, the digits pop out momentarily.
Deaths
Much like the Poko counter, a number inside a rectangular bubble indicates the number of Pikmin who died in this challenge so far. This counter is to the right of the Poko counter, and the icon to its left is that of a Pikmin soul. Likewise, the digits pop out when this number changes.
2-Player layout
The layout of the HUD items is different in 2-Player mode. The icon and health for each leader appears individually on the respective player's screen, on the top-left corner. The left side of each screen lists the available sprays, which are shared between players. The bottom-left corner of each screen indicates the standby Pikmin and the Pikmin counter.
The top-right corner of the top screen indicates the time left, which is the same as its position in single-player Challenge Mode. On the bottom-right of the top screen there is the Poko counter, and the top-right corner of the bottom screen contains the Pikmin death counter.
Pikmin 2 2-Player Battle
The 2-Player Battle mode in Pikmin 2 features some unique HUD elements. The main items match the same position as those in Challenge Mode with 2 players.
Roulette wheel
If the player has at least one power in hold, the roulette wheel will appear on the right side of their screen. When the roulette is spun, several squares with icons will roll down, until it eventually stops. The square of the standby power will pop out and wiggle about; a flashy ![]() /
/ ![]() icon will also appear above it.
icon will also appear above it.
There are four bubbles on top of the roulette wheel, which become red as more roulette wheel spins are in queue. When there is no power in standby, the entire roulette and the bubbles disappear.
Marbles
On the lower-right corner of each player's screen, four bubbles appear. These indicate how many yellow marbles the player has collected, with each one retrieved filling up an empty bubble with a marble icon.
Mission Mode and Side Stories
Mission Mode and the Side Stories in Pikmin 3 and Pikmin 3 Deluxe has some unique elements that show information about the player's progress in the current mission.
Collect Treasure! counter
This meter displays how many Pokos the player has collected. This meter also displays how close the player is to achieving the next medal (bronze, silver, gold, platinum). The meter doesn't show notches below zero or above the platinum score.
Battle Enemies! counter
This is the Battle Enemies! counterpart to the above Poko bar, showing the amount of enemies that the player has defeated. Unlike the Poko meter, this meter also displays the amount of enemies left to defeat.
Pikmin Reunion counter
This variant of the Collect Treasure! counter appears in Pikmin Reunion, and contains a box to display how many Pikmin the player has collected.
Time
The time remaining to clear a Mission Mode or Side Stories stage. It shows the time remaining, and flashes to warn the player when a quarter of the allotted time has elapsed. It is in the top right corner of the screen.
Time counter
This counter displays the time remaining in Side Story missions based on completing a single task within a time limit. It replaces the standard timer. The medal displayed changes as the timer counts down. It is in the top left corner of the screen.
Bingo Battle
The following HUD items are exclusive to Bingo Battle.
Roulette wheel
The roulette wheel shows the player what power-up they currently possess, and how many powers, up to a total of five, the player has in reserve. The powers are earned via Cupid’s Grenades.
Bingo Card
The Bingo card of each team. Collected fruits or enemies are filled in with a white background, and a no symbol appears over anything the player cannot collect (due to the other team collecting all of the enemies/fruits of that type). A question mark represents any item that cannot be obtained yet, like for instance, an object inside an enemy.
Pikmin 3 alternative control schemes
Some buttons and labels appear if the player is using a control scheme that is not the classic one, with Off-TV Play disabled.
Radar toggle
This label notifies the player that they can press ![]() to open the radar. The label is only shown while Off-TV Play is enabled.
to open the radar. The label is only shown while Off-TV Play is enabled.
Stylus controls buttons
|
This article is a stub. You can help Pikipedia by expanding it. |
These stylus controls are for the moves that cannot be performed by touching anywhere on the map or using a shoulder button. They are spray (functionally identical to the normal spray command), dismiss (which doubles as the charge command during lock-on) and Apps (which activate the map, Go Here!, and the apps available on the GamePad when using other control schemes. The item command also appears here in Bingo Battle, shown by a Cupid's Grenade icon.
In Pikmin 3 Deluxe and Pikmin 4, some actions were moved from specific buttons to a dedicated menu. When ![]() /
/ ![]() is pressed, the menu shows up on-screen above the current leader's head, and disappears when released. While the button is held, the player can tilt
is pressed, the menu shows up on-screen above the current leader's head, and disappears when released. While the button is held, the player can tilt ![]() in one of the four cardinal directions to perform the action associated with that direction. Despite the menu looking like a plus sign, the player cannot use
in one of the four cardinal directions to perform the action associated with that direction. Despite the menu looking like a plus sign, the player cannot use ![]() or
or ![]() to pick an action. If a direction has no action available, or the action it has available cannot be performed, then its icon will be a gray ×, and tilting in that direction will not do anything. The following actions exist:
to pick an action. If a direction has no action available, or the action it has available cannot be performed, then its icon will be a gray ×, and tilting in that direction will not do anything. The following actions exist:
| Action | Description | Directions | Icon | Availability |
|---|---|---|---|---|
| Ultra-spicy spray | Uses an ultra-spicy spray. | Up | An ultra-spicy spray bottle. The amount of doses available to use will also be shown. | When there are ultra-spicy sprays available to use. |
| Leader swap | Swaps to the specified leader. Leaders in the area follow a specific order, and when there are two choices to swap to, the leader on the left action is the one that comes earlier in the order, and the leader to the right action comes later. In Story Mode, the order is always Alph, Brittany, Charlie, but in Mission Mode, it depends on the mission. The order can be found in the corresponding mission's article. | Left or Right | Matches the icon of the leader to swap to. | When there are leaders to swap to. If there is only one leader to pick, only the left action will be available. |
| Co-op regroup | Forces the other player's leader into the group. In this state, the other player's leader can move a bit freely, but is forced to stick close to the group. That leader can also be grabbed and thrown by the main one. Throwing or dismissing will return gameplay to normal. | Right | A golden flag. | When playing Story Mode in co-op, the other player can control their leader freely, both player leaders are close together, and both players are controlling entirely different characters. |
| Bingo Battle item | Uses the standby Bingo Battle item. | Right | Matches the icon of the item. | When playing Bingo Battle and there is an item in standby. |
| Dismiss | Dismisses. | Down | A white pea whistle. | Always, even if there is nobody in the leader's group. |
If the player holds the action menu button and then holds a direction of an action that is not available, the action will be performed as soon as it becomes available, if the player is still holding the direction. Holding the direction first and then holding the action menu button will not trigger any action.
Misc.
The following are minor HUD elements that appear in specific situations.
- In Pikmin's Challenge Mode, the day counter is replaced with a "Challenge" marker, indicating that the player is in Challenge Mode, where the notion of the current day number is non-existent. The word is colored as "Challenge", inside three merged bubbles. A Blue, Yellow and Red leaf Pikmin are resting atop the bubbles. In New Play Control! Pikmin, the three bubbles have been changed to a single, elliptical bubble.
- In 2-Player Battle, if a player has gotten the "ghost" powerup, a dancing ghost Pikmin icon will appear to the right of the leader's icon on the respective player's screen. It will slow down and begin flashing when the power is running out.
- In Pikmin 2, if an enemy's corpse is delivered to the Research Pod, the sublevel number will move out of the screen, and a small counter will appear in its place, showing the current total of Pokos increasing. This counter then moves off-screen and the sublevel bubble regains its original place. This Poko number indicator is visually the same as the one used in Challenge Mode.
In-world elements
Besides the elements that are stuck in position, projected on the screen, there are also some helpful items that are visible in the game world.
Cursor
|
The following article or section is in need of assistance from someone who plays Pikmin 3. |
The cursor marks the location Pikmin land on when they are thrown, as well as the focal point of the whistle. In the New Play Control! games, it also marks where the Pikmin group is moved to when ![]() is pressed. When using an ultra-bitter spray, the leader aims towards the cursor, regardless of the angle they are facing.
is pressed. When using an ultra-bitter spray, the leader aims towards the cursor, regardless of the angle they are facing.
In the GameCube games, the leader's movement is tied to the cursor's; both happen when tilting ![]() , although it is possible to move the cursor without moving the leader, by tilting the stick slightly. The cursor cannot move beyond a certain distance from the leader. In the New Play Control games however, the cursor can be moved independently, and can be pointed to any location of the screen. The cursor has an "outer shell", that follows the Wii Remote's sensor, and an inner symbol, that cannot go beyond a certain distance from the leader. Pikmin can only be thrown to where the "symbol" is, but can be whistled from where the "shell" is pointing, even if that spot is on the other side of the area.
, although it is possible to move the cursor without moving the leader, by tilting the stick slightly. The cursor cannot move beyond a certain distance from the leader. In the New Play Control games however, the cursor can be moved independently, and can be pointed to any location of the screen. The cursor has an "outer shell", that follows the Wii Remote's sensor, and an inner symbol, that cannot go beyond a certain distance from the leader. Pikmin can only be thrown to where the "symbol" is, but can be whistled from where the "shell" is pointing, even if that spot is on the other side of the area.
The cursor is always on the ground, and should it be pointed at an incline, it will be moved vertically along the surface and will be titled accordingly.
Visually, the cursor is pink for Captain Olimar, and blue for Louie and the President. In the GameCube games, it has a circle with a pointed end, indicating the direction it is facing, as well as a partial sub-circle, united to the main one by two lines. In the New Play Control! games, the "outer shell" is a thin ring with a pointed end, and the "symbol" is a thicker ring, but segmented into four equal parts; this section of the cursor is always rotating counter-clockwise. When the Wii Remote is moved around, a faint trail is left behind the outer cursor. If the Pikmin are being swarmed, the cursors oscillate in size and in a yellow tint, in the New Play Control! titles.
There is also a small cone that points downward, to the center of the cursor. This cone, present in all games, has a color that reflects the type of the current standby Pikmin, and is colored white if there is no Pikmin available for standby.
In Pikmin 3, under the classic control scheme, if the player locks-on to an object and releases the lock, the cursor will stay on top of the object. If the player rotates the camera around, the cursor will still be on the object, and if it goes off-camera, the cursor will stay in-camera, but still point towards it. This effect stops if the player moves the cursor manually.
In Hey! Pikmin, a small white cursor appears underneath the stylus when it is pressed on the screen, and doesn't appear otherwise.
Fraction numbers
|
The following article or section is in need of assistance from someone who plays Pikmin 3. |
When something is being carried, two numbers will appear on top of it, one on top of a dash, one below. The number on the top indicates the minimum strength needed to carry the object (i.e. the weight), whereas the bottom number shows the total strength of the Pikmin currently grabbing hold of it.
In Pikmin, the top number is always blue and the bottom one is always red. If the number of Pikmin is sufficient to move the object, the bottom number will be bigger in size, otherwise the top number will.
In Pikmin 2, the numbers are as follows:
- Pale blue when the carriers are stopped, or the strength number is being changed.
- White when carrying something that doesn't go into an Onion.
- The same color as the destination Onion when being carried to one.
In the New Play Control! versions of both Pikmin and Pikmin 2, the numbers are shown the same as they are in the GameCube version of Pikmin 2.
When a Breadbug is carrying something in Pikmin 2, the numbers will appear on top of the object. The top number indicates how much strength is needed to push against the Breadbug, and the lower number indicates the current strength applied; this number shows 0 when there are no Pikmin on the object.
Fraction numbers also appear in several other situations, albeit less commonly.
- When Pikmin are standing on top of a scale (a pair of scales being consisted of two, for the sake of clarity), the bottom number will always be 1, and the top number will indicate the weight of the Pikmin on top of it. These numbers are always colored in pale blue.
- When Pikmin are on top of a bag, the total weight imposed is displayed on the top number, and the weight necessary to squash it is shown on the bottom one. These numbers are always colored in pale blue.
- When dragging a cardboard box, the top number indicates the Pikmin needed to get it moving, and the bottom one indicates the Pikmin that are pushing. These numbers are always colored in rock gray with pale blue outline.
In Pikmin 3, the numbers are switched: the number on the top now indicates the total strength of the Pikmin currently carrying it, whereas the bottom number shows indicates the minimum strength needed to carry the object (i.e. the weight or strength); this follows the correct ordering of the fractional number system. The numbers are as follows:
- Dark blue when there's an insufficient amount of carriers, when the strength number is being changed, or when the carriers are stopped.
- Pale blue when carrying something that doesn't go into an Onion.
- The same color as whichever type of Pikmin has the most carriers (e.g. gray for 1 Rock Pikmin and 2 Red Pikmin) when being carried to an Onion.
- When dragging a cardboard box, the top number indicates the Pikmin needed to get it moving, and the bottom one indicates the Pikmin that are pushing.
Additionally, colors are added for Purples and Whites in Mission Mode and Bingo Battle, though this doesn't change their functionality since they still lack Onions.
In Hey! Pikmin, the same information is conveyed through dots. A grid of black dots represents the total weight of an object, and as Pikmin are thrown onto it, those dots will be replaced with white dots (each white dot representing a Pikmin) until the total weight is reached.
Health wheel
In the Pikmin games, an object's health is not represented with numbers, as is the norm in strategy games, but rather, by a pie chart in a circle. When an entity has all of its health, the wheel will not be visible; it only appears when damage is taken. The pie chart inside the wheel makes a full circle when the health is full, and opens up clockwise, from the top, as damage is sustained, finally opening all the way and disappearing when all health is lost.
In Pikmin, the color of the pie chart gradually moves from green to yellow to red, as the health draws closer to 0. The chart also opens and closes gradually with time, when the health is changed. When the health is at 50% or higher, the color is green, when it's between 20% and 50%, yellow, and on the last fifth of health remaining, the chart is red. In Pikmin 2 and Pikmin 3, the color changes instantly to the next as soon as the required percentage is met, not gradually. It also changes to the final health's color, even when the wheel is still moving.
In Hey! Pikmin, an enemy's health is displayed as a small bar instead of a wheel. The bar starts filled with magenta, and as the enemy's health decreases, the magenta portion decreases and the grey proportion increases, from right to left.
In Pikmin 4, due to the inclusion of health upgrade items, only enemies are depicted to have a health wheel. The player character, alongside Oatchi are shown with a health bar instead, which will grow larger if health upgrades are bought or if Oatchi eats a Scrummy Bone at full health.
Other than representing an entity's health, the wheel is also used to show how much time is left until a bomb-rock or Volatile Dweevil explodes in Pikmin 2, and before a fire starter extinguishes in Pikmin 4.
Lock-on display
|
The following article or section is in need of assistance from someone who plays Pikmin 3 Deluxe. |
In Pikmin 3, objects which the cursor has locked-on to are highlighted in blue, with camera control being taken away from the player to focus in on the thing in question. A new blue overlay appears when locking on around all but the middle of the screen, with the object's name being displayed on the middle-left side of the screen, and with lots of Koppaite text on the edges of the screen.
In Pikmin 3 Deluxe, objects which the cursor can lock-on to are indicated with a blue arrow floating above them. It will only appear when the player is close enough to lock onto the object, and will only appear on the next object to be locked-on to. When locked onto something, the cursor gets slightly bigger and a blue tint/outline shrouds the object that is being locked onto.
Messages
During the game, some messages may pop up on the screen, warning the player about something.
Common messages
The following messages are common in all games and almost all game modes.
Countdown
Some minutes before the day ends, a message will appear on-screen, saying "It is almost sundown. Hurry up!!". After some seconds pass, the message "Hurry, gather your Pikmin!" in Pikmin, and "Hurry! Gather your Pikmin!" in Pikmin 2 will appear, with a countdown below, ranging from 10 to 0. Once the countdown reaches 0, the day is over.
In Pikmin 3, the first message will appear slightly different, and the second message has been omitted, replaced by only the countdown.
Pikmin extinction
When all Pikmin are killed, or when there are no more available Pikmin inside a cave, a Pikmin extinction is declared, and the message "Pikmin extinction" in Pikmin and "Pikmin extinction!" in Pikmin 2 appears on screen. If a Pikmin extinction happens for a specific player in 2-Player Battle mode, the message will only appear on that player's screen.
In Pikmin 3, this message does not show up, instead shifting to a cutscene of the Onion spitting out a single seed of the briefly extinct type of Pikmin.
Leader is down
If a leader's health reaches 0, a cutscene with a message announcing their downfall will appear. The message reads "[Leader's name] is down!" in all games, with the President's name simply being "President". If a player's leader loses all their health in 2-Player Battle mode, the message will only appear on that player's screen.
Specific messages
The following is a list of messages that appear only in specific games or specific game modes.
- Before a challenge starts in Pikmin 2's Challenge Mode, and before a 2-Player Battle match starts, the messages "READY?" and "GO!" will appear on each player's screen.
- In 2-Player Battle, the message "LOSE!" appears on the losing player's screen, in blue, and the word "WIN!" appears on the winner's, in red.
- When starting the final floor of a cave or Challenge Mode challenge, the words "FINAL FLOOR!" or "FINAL LEVEL!" appear on the screen, the latter only appearing on the European region of the New Play Control! version.
- Every 10% of the debt that is repaid, a fanfare plays, and a message appears on-screen, saying "X% OF DEBT RECOVERED!", with "X" being the corresponding percentage. At 100%, the message is more detailed, and the theme is more triumphant. If the number is reached while underground, the message will appear on the next surface, and if more than one milestone is reached, only the most recent one will be announced. The debt can only be fully repaid after the 100% message appears, meaning it can only be repaid after exiting a cave, or while aboveground.
- In Pikmin 3, the Koppaites, the Hocotatians, and the S.S. Drake will occasionally say something, which will cause a textbox to appear in the upper middle of the screen. It does not require player input to proceed, nor obstructs the gameplay, but contain valuable information about the activities and situation of the character, so that the player may understand the situation.
Gallery
The following gallery demonstrates the HUD elements over the different games and circumstances.
Pikmin
The icon for Olimar.
The icon for a Red Pikmin on the leaf stage.
The icon for a Red Pikmin on the bud stage.
The icon for a Red Pikmin on the flower stage.
The icon for a Yellow Pikmin on the leaf stage.
The icon for a Blue Pikmin on the leaf stage.
The icon for a Yellow Pikmin holding a bomb-rock on the leaf stage.
The icon for Captain Olimar in the Nintendo Switch version of Pikmin 1.
Pikmin 2
2-Player Battle mode.
The sublevel counter in the Nintendo Switch version of Pikmin 2.
The icon for Louie.
The icon for the President.
The icon for a Red Pikmin on the leaf stage.
The icon for a Red Pikmin on the bud stage.
The icon for a Red Pikmin on the flower stage.
The icon for a Purple Pikmin on the leaf stage.
The icon for a White Pikmin on the leaf stage.
The icon for a Bulbmin on the leaf stage.
Pikmin 3
Alph locked on to a Whiptongue Bulborb.
The list of fruits completely filled with the 18 pieces of fruit in the Tropical Wilds.
Collect Treasure! in Mission Mode.
Battle Enemies! in Mission Mode.
Defeat Bosses! Mission Mode.
The icons used for Captain Olimar and Louie in Pikmin 3.
Pikmin 4
The Sun Meter when paused using the Survey Drone.
The Sun Meter during night expeditions uses a moon icon to represent the night.
The Sun Meter in Olimar's Shipwreck Tale features a day counter that counts down.
Hey! Pikmin
Pikmin Adventure
Trivia
- In Pikmin 2, the standby icons for leaf and bud Purple Pikmin lack the creature's hairs.
- Also in Pikmin 2, the Purple and White Pikmin's standby icons use the Yellow Pikmin's icons as a base.
- Once again in Pikmin 2, Olimar's health icon uses a backdrop cut with the shape of his head, fitting perfectly into his icon. But the President's and Louie's health icons use the same texture, where the backdrop doesn't fit. This is fixed in Pikmin 2 (Nintendo Switch) due to HUD touchups.
Names in other languages
Sun Meter
| Language | Name | Meaning |
|---|---|---|
| 太陽メーター? Taiyō mētā |
Sun meter | |
| Icône du soleil | Sun icon | |
| Icône soleil | Sun icon | |
| Sonnenmeter | Sun meter | |
| Spia solare | Sun indicator | |
| Medidor solar | Solar meter |
Day counter
| Language | Name | Meaning |
|---|---|---|
| Indicador de días | Days indicator |
Standby Pikmin
| Language | Name | Meaning | Notes |
|---|---|---|---|
| Pikmin en attente | Pending Pikmin | Name taken from the New Play Control! Pikmin 2 instruction manual. | |
| Pikmin más próximo | Nearest Pikmin | Name taken from the New Play Control! Pikmin 2 instruction manual. |
Pikmin counter
| Language | Name | Meaning |
|---|---|---|
| Contador de Pikmin | Pikmin Counter |
Spray counter
| Language | Name | Meaning | Notes |
|---|---|---|---|
| Dosis de atomizador | Atomizer dose | Name taken from the New Play Control! Pikmin 2 instruction manual. |
Roulette wheel
| Language | Name | Meaning |
|---|---|---|
| Ruleta | Roulette |
Cursor
| Language | Name | Meaning |
|---|---|---|
| Cursor | Cursor |
See also
- Prerelease information – parts of the HUD were different in earlier versions of the games.
- Radar
- KopPad
- Menu
